
Why You’ll Fall in Love with Cheesecake Tartlet Delights
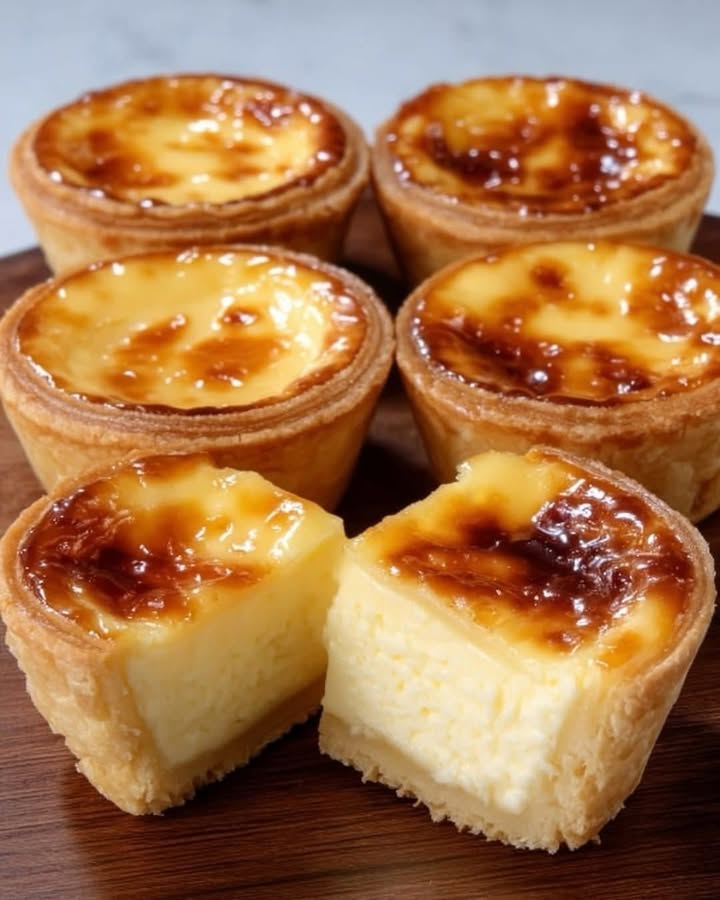
Picture this: a cozy afternoon, a cup of coffee, and a tray of mini cheesecakes nestled in golden tartlet shells. These bite-sized wonders are creamy, crunchy, and utterly irresistible. I remember the first time I made them for a family gathering. They disappeared so fast, I barely had time to take a picture! Cheesecake Tartlet Delights are perfect for anyone who loves rich flavors but doesn’t want to commit to a full slice. Let’s dive into what makes these little treats so special.
A Bite-Sized History of Cheesecake
Cheesecake has been around for centuries, with roots tracing back to ancient Greece. Yes, even the gods probably enjoyed something similar! The modern version we know today owes much to New York-style cheesecake, which is rich, dense, and oh-so-creamy. Turning cheesecake into tartlets is a brilliant twist because it combines the elegance of French patisserie with the comfort of American desserts. When I first tried making these tartlets, I was amazed at how easy they were to prepare—no water bath or fancy techniques required!
Why You’ll Love This Recipe
If you’re looking for a dessert that’s simple yet impressive, look no further. Cheesecake Tartlet Delights are foolproof. The combination of a buttery crust and velvety filling is pure magic. Plus, the individual portions mean no fighting over slices. Whether you’re a seasoned baker or a beginner, this recipe will make you feel like a pro. Trust me, your friends will think you spent hours slaving away in the kitchen.
Perfect Occasions to Serve These Delights
These tartlets are perfect for tea parties, baby showers, or even as a sweet ending to a dinner party. I once made them for a holiday cookie exchange, and they stole the show. Their petite size makes them ideal for finger food, and their elegant appearance ensures they fit right in at any event. Want to impress someone? Whip up a batch of these Cheesecake Tartlet Delights—they never fail to charm.
Ingredients
- 1 sheet of puff pastry or shortcrust dough
- 200 g of cream cheese
- 1 egg
- 1/3 cup of sugar
- 1/4 cup of heavy cream
- 1 teaspoon of vanilla extract
- 1 teaspoon of cornstarch
Substitution Options
No puff pastry? No problem! You can use store-bought pie crust or even graham cracker crumbs mixed with melted butter for a quick base. If you’re out of heavy cream, substitute it with full-fat yogurt or sour cream. For a dairy-free version, try using vegan cream cheese and coconut cream. And if you’re not a fan of vanilla, swap it out for almond extract or lemon zest.
Preparation
Step 1: Prepare the Tartlet Shells
Start by rolling out your puff pastry and cutting it into circles slightly larger than your tartlet molds. Gently press the dough into the molds and prick the bottoms with a fork. This step prevents the shells from puffing up too much during baking. Preheat your oven to 180°C (350°F) and bake the shells for about 10 minutes until lightly golden. Pro tip: Dust the molds with flour before adding the dough to prevent sticking.
Step 2: Make the Cheesecake Filling
In a mixing bowl, combine cream cheese, sugar, egg, vanilla extract, heavy cream, and cornstarch. Beat the mixture until smooth and creamy. You’ll notice how the ingredients transform into a luscious, pale filling. Take a moment to inhale the sweet aroma—it’s almost hypnotic! Chef’s tip: Use room-temperature cream cheese for a smoother blend.
Step 3: Assemble and Bake
Once the tartlet shells are pre-baked, spoon the cheesecake filling into each one. Don’t overfill; leave a little space at the top for the filling to rise. Pop them back into the oven for 20–25 minutes until the tops turn a gorgeous golden brown. Keep an eye on them; timing may vary depending on your oven. The smell wafting through your kitchen will be heavenly!
Step 4: Cool and Enjoy
After baking, let the tartlets cool completely on a wire rack. Cooling is crucial—it helps the filling set properly. Once cooled, dig in and savor every creamy bite. These Cheesecake Tartlet Delights are best enjoyed fresh but can also be stored for later indulgence.
Timing
Prep Time: 15 minutes
Cooking Time: 35 minutes
Total Time: 50 minutes
This recipe is quick enough for a weeknight treat but special enough for weekend entertaining.
Chef’s Secret
For an extra touch of luxury, drizzle melted chocolate or caramel sauce over the cooled tartlets. It adds a hint of decadence that takes these Cheesecake Tartlet Delights to another level.
Extra Info
Did you know that cheesecake isn’t technically a cake? It’s more of a custard pie! This fun fact always sparks conversation when I serve these tartlets. People love learning something new while enjoying dessert.
Necessary Equipment
You’ll need a few basic tools: tartlet molds, a rolling pin, a mixing bowl, an electric mixer, and a wire cooling rack. Nothing fancy—just good old-fashioned kitchen gear.
Storage
To keep your Cheesecake Tartlet Delights fresh, store them in an airtight container in the refrigerator. They’ll stay good for up to three days. If you need to freeze them, wrap each tartlet individually in plastic wrap and place them in a freezer-safe bag. They can last up to two months frozen.
When ready to serve, thaw frozen tartlets overnight in the fridge. For a quick refresh, pop them in the oven at 150°C (300°F) for 5–10 minutes. This restores their crispiness beautifully.
Avoid leaving them at room temperature for too long, as the cream cheese filling can spoil. Always handle leftovers with clean hands or utensils to maintain freshness.
Tips and Advice
For a smoother texture, sift the cornstarch before adding it to the filling. Ensure your eggs are at room temperature to avoid curdling. Lastly, don’t skip pre-baking the shells—it’s key to achieving that perfect crunch.
Presentation Tips
- Garnish with fresh berries or mint leaves for a pop of color.
- Dust with powdered sugar for an elegant finish.
- Serve on a tiered dessert stand for a wow factor.
Healthier Alternative Recipes
Here are six variations to suit different dietary needs:
- Gluten-Free: Use gluten-free puff pastry and ensure all other ingredients are certified gluten-free.
- Vegan: Substitute cream cheese with cashew-based alternatives and use flaxseed “eggs.”
- Low-Sugar: Replace sugar with stevia or monk fruit sweetener.
- Protein-Packed: Add a scoop of protein powder to the filling.
- Fruit-Infused: Swirl in pureed strawberries or blueberries for natural sweetness.
- Nutty Twist: Sprinkle crushed almonds or pistachios on top for added crunch.
Common Mistakes to Avoid
Mistake 1: Overfilling the Tartlets
Overfilling leads to messy spills and uneven baking. Fill only three-quarters of the way to allow room for expansion.
Mistake 2: Skipping the Pre-Bake
Without pre-baking, the shells may become soggy. Always bake them briefly before adding the filling.
Mistake 3: Rushing the Cooling Process
Cooling is essential for setting the filling. Patience pays off here—trust me!
FAQ
Can I use store-bought tart shells?
Absolutely! Store-bought shells save time and still deliver great results. Just adjust the baking time accordingly.
What type of cream cheese works best?
Full-fat cream cheese gives the richest flavor and creamiest texture. Avoid low-fat versions if possible.
Can I make these ahead of time?
Yes, you can prepare them a day in advance. Store them in the fridge and bring them to room temperature before serving.
Do I need an electric mixer?
No, a whisk and some elbow grease work fine. However, an electric mixer speeds things up significantly.
How do I prevent cracks in the filling?
Avoid overmixing the batter and ensure gradual cooling to minimize cracking.
Can I add toppings?
Of course! Fresh fruit, whipped cream, or chocolate shavings pair wonderfully with these tartlets.
Is it okay to double the recipe?
Definitely! Doubling is easy—just make sure you have enough molds and oven space.
Can kids help with this recipe?
Absolutely! Kids love pressing the dough into molds and spooning in the filling.
Why did my filling sink?
Sinking usually happens if the filling is underbaked. Extend the baking time slightly next time.
Can I use Greek yogurt instead of cream?
Yes, Greek yogurt works well as a substitute for heavy cream.
Final Thoughts
Cheesecake Tartlet Delights are proof that big flavors can come in small packages. They’re creamy, crunchy, and completely delightful. Whether you’re baking for yourself or sharing with loved ones, these tartlets are guaranteed to bring joy. So grab your apron, gather your ingredients, and let’s get baking—you won’t regret it!
Equipment
- Mixing bowl
- Electric mixer
- Tartlet molds
- Rolling pin
- Wire cooling rack
Ingredients
- 1 sheet puff pastry or shortcrust dough
- 200 g cream cheese
- 1 egg
- 1/3 cup sugar
- 1/4 cup heavy cream
- 1 teaspoon vanilla extract
- 1 teaspoon cornstarch
Instructions
- Roll out puff pastry and cut into circles larger than tartlet molds. Press dough into molds and prick bottoms with a fork.
- Preheat oven to 180°C (350°F) and bake the shells for about 10 minutes until lightly golden.
- In a mixing bowl, combine cream cheese, sugar, egg, vanilla extract, heavy cream, and cornstarch. Beat until smooth.
- Spoon cheesecake filling into pre-baked tartlet shells, leaving space at the top.
- Bake for 20–25 minutes until tops are golden brown.
- Let tartlets cool completely on a wire rack before serving.