
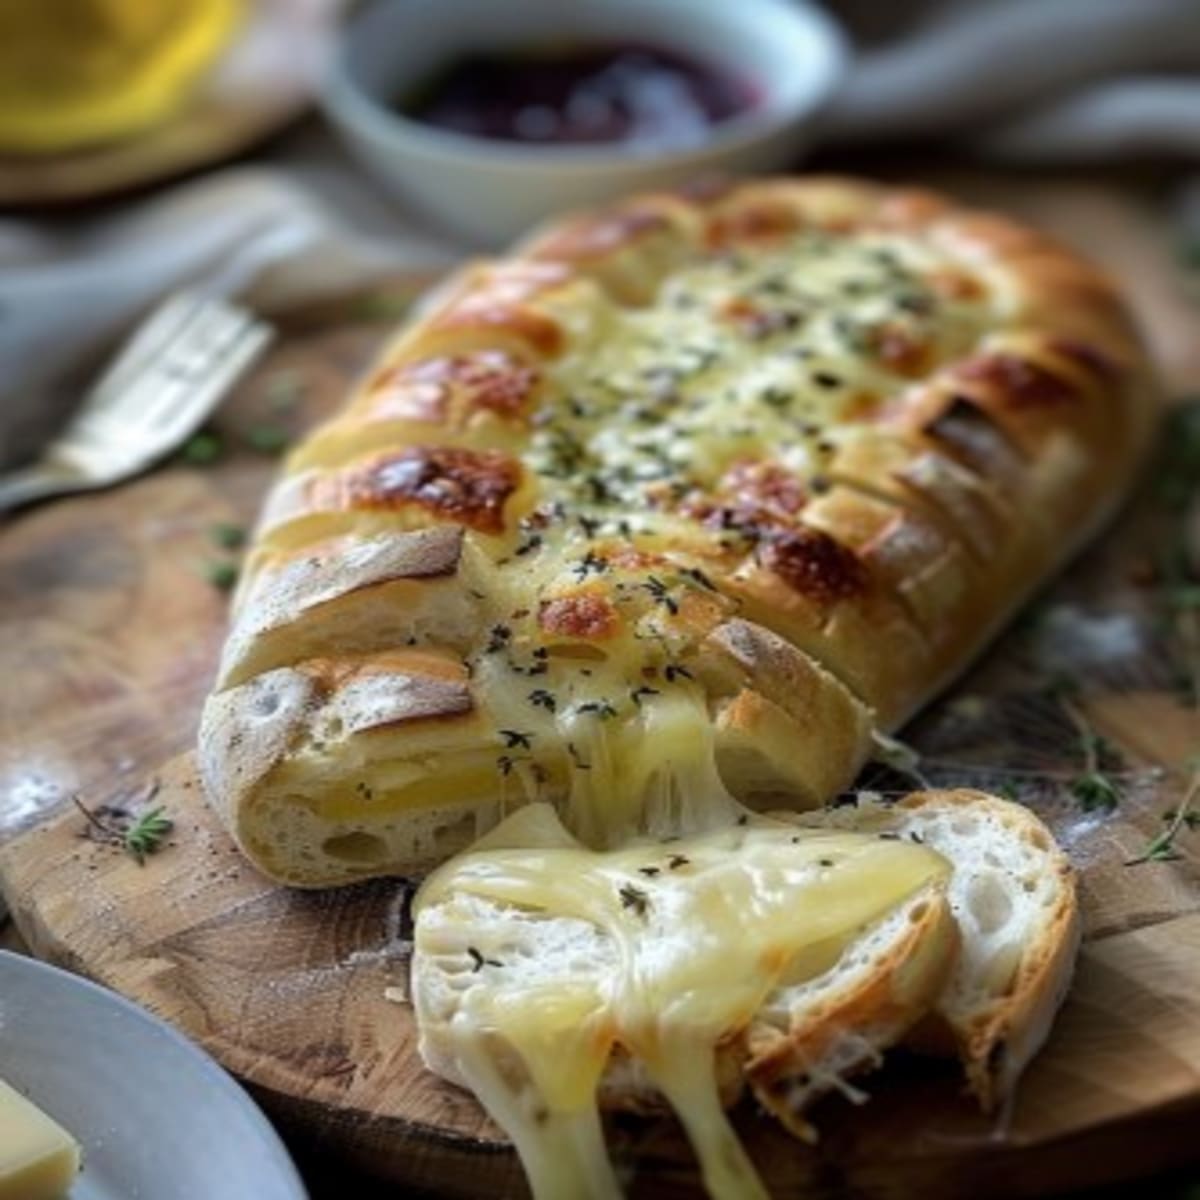
Discover the Irresistible Cheesy Garlic Bread: A Tasty Delight!
Imagine a warm, gooey, and garlicky bread that fills your kitchen with an irresistible aroma. That’s exactly what this Cheesy Garlic Bread does! It’s the perfect side dish for any meal or a delightful snack. Let me share how I stumbled upon this recipe and why it has become a family favorite.
A Little History Behind the Cheesy Garlic Bread
Last summer, during a family gathering, my aunt brought over a loaf of homemade garlic bread. But it wasn’t just any garlic bread—it was loaded with melted cheese. The whole family was hooked! Since then, I’ve been experimenting to perfect this recipe. It turns out, garlic bread originated in Italy, but adding cheese is a twist that makes it even more delicious.
Why You’ll Love This Cheesy Garlic Bread Recipe
This recipe is a real crowd-pleaser. The combination of butter, garlic, and melted cheese creates a heavenly flavor that is both comforting and satisfying. Plus, it’s incredibly easy to make, so you won’t be spending hours in the kitchen. It’s the perfect blend of simplicity and deliciousness.
Perfect Occasions to Prepare This Cheesy Garlic Bread
Whether you’re hosting a dinner party, having a movie night, or just need a quick and tasty snack, this Cheesy Garlic Bread fits the bill. It pairs wonderfully with soups, salads, or even as a standalone appetizer. Trust me, your guests will love it!
Ingredients for Cheesy Garlic Bread
- 1 baguette or ciabatta bread
- 100 g softened butter
- 4 cloves garlic, crushed
- 150 g parmesan, mozzarella, or cheddar cheese
- 1 tablespoon fresh parsley, finely chopped
- Salt and pepper to taste
Substitution Options
If you don’t have all the ingredients, here are some easy swaps:
- Use a French baguette if you can’t find ciabatta.
- Substitute fresh parsley with dried parsley if needed.
- Try different cheeses like Gruyère or Fontina for a unique flavor.
Preparation: Step-by-Step Guide
Step 1: Prepare the Butter Mixture
In a bowl, mix the softened butter, crushed garlic, grated cheese, fresh parsley, salt, and pepper until well combined. The mixture should be smooth and spreadable. The aromas of garlic and cheese will already start to tickle your senses.
Step 2: Prep the Bread
Cut the bread into slices, being careful not to cut all the way through—leave the bottom intact. This will help the bread stay together while cooking. Spread the butter mixture generously between each slice. The bread should be evenly coated, making every bite a treat.
Step 3: Bake the Bread
Wrap the bread in aluminum foil and place it on a baking sheet. Preheat your oven to 180°C (350°F) and bake for about 15-20 minutes. Remove the foil and bake for an additional 5 minutes to get a golden, crispy top. The smell in your kitchen will be divine!
Timing: Prep, Cook, and Rest
Here’s a quick breakdown of the time needed:
- Prep Time: 10 minutes
- Cook Time: 20-25 minutes
- Total Time: 35-40 minutes
Chef’s Secret: A Unique Trick to Enhance the Recipe
For an extra layer of flavor, try adding a pinch of red pepper flakes to the butter mixture. It adds a subtle kick that complements the garlic and cheese beautifully.
Extra Info: An Interesting Anecdote
Did you know that garlic bread became popular in the United States in the 1950s? It was a simple and delicious way to use up leftover bread and garlic. Today, it’s a staple in many households, and adding cheese is a fantastic modern twist.
Necessary Equipment
To make this Cheesy Garlic Bread, you’ll need:
- A mixing bowl
- A knife for slicing the bread
- Aluminum foil
- A baking sheet
- An oven
Storage: Best Ways to Store This Dish
Store leftover Cheesy Garlic Bread in an airtight container in the refrigerator for up to 3 days. To reheat, wrap it in aluminum foil and bake at 180°C (350°F) for about 10 minutes. For longer storage, you can freeze the bread for up to 2 months. Thaw overnight in the fridge before reheating.
Tips and Advice
For a crisper crust, brush the outside of the bread with a bit of olive oil before baking. Also, try different types of cheese to find your favorite combination. Experimenting with flavors is part of the fun!
Presentation Tips
To make your Cheesy Garlic Bread look even more appealing, garnish it with a sprinkle of fresh parsley and a drizzle of olive oil. You can also serve it on a pretty platter with a side of marinara sauce for dipping.
Healthier Alternative Recipes
- Lighter Version: Use whole wheat bread and reduce the amount of butter. Add in some low-fat cheese and a bit of Greek yogurt for a creamy texture.
- Herbed Version: Add a mix of fresh herbs like rosemary, thyme, and oregano to the butter mixture for a burst of flavor.
- Vegetarian Version: Include some sautéed mushrooms and spinach for added nutrition and a hearty texture.
- Vegan Version: Use vegan butter and plant-based cheese alternatives. Add nutritional yeast for a cheesy flavor.
- Gluten-Free Version: Use a gluten-free bread and follow the same steps. Ensure all other ingredients are gluten-free as well.
- Sweet Version: Instead of garlic, use cinnamon and honey. Top with a mix of cream cheese and vanilla for a sweet and savory twist.
For a healthier dessert option, check out these Light Banana Chocolate Muffins. They’re a delicious and nutritious treat that everyone will love.
Common Mistakes to Avoid
Mistake 1: Overcooking the Bread
Overcooking can make the bread too dry and hard. To avoid this, keep an eye on the bread after removing the foil. If it starts to brown too quickly, cover it loosely with foil again.
Mistake 2: Not Enough Filling
Make sure to spread the butter mixture generously between the slices. Skimping on the filling can result in a disappointing, bland bread. Don’t be afraid to load it up!
Mistake 3: Using Cold Butter
Using cold butter can make it difficult to mix and spread. Always use softened butter for a smoother, more even spread. If your butter is still cold, let it sit at room temperature for a few minutes.
Mistake 4: Slicing Too Thinly
Slicing the bread too thinly can cause it to fall apart. Aim for about 1-inch thick slices. This will help the bread stay together and hold the filling better.
Mistake 5: Not Preheating the Oven
Preheating the oven is crucial for even baking. Make sure your oven is fully preheated to 180°C (350°F) before placing the bread inside. This ensures the bread cooks evenly and comes out perfectly.
For more tips on healthy cooking skills and ensuring the quality of your ingredients, check out the USDA guidelines. They provide excellent advice on choosing and preparing nutritious meals.
If you’re looking for more delightful recipes, head over to our main category page for a variety of options that will make your taste buds dance with joy.
FAQ
Can I use different types of bread for this recipe?
Yes, you can use different types of bread. While a baguette or ciabatta works best, you can also try a sourdough or even a whole wheat loaf for a healthier option.
What if I don’t have fresh parsley?
You can substitute fresh parsley with dried parsley. Just use about 2 teaspoons of dried parsley instead of 1 tablespoon of fresh parsley.
Can I use margarine instead of butter?
While you can use margarine, it may not give the same rich flavor as butter. If you do use margarine, opt for a high-quality, unsalted variety for the best results.
How do I store leftover cheesy garlic bread?
Store leftover cheesy garlic bread in an airtight container in the refrigerator for up to 3 days. To reheat, wrap it in aluminum foil and bake at 180°C (350°F) for about 10 minutes.
Can I freeze the cheesy garlic bread?
Yes, you can freeze the cheesy garlic bread for up to 2 months. Thaw it overnight in the fridge before reheating in the oven.
What can I serve with cheesy garlic bread?
Cheesy garlic bread pairs well with a variety of dishes. Try it with soups, salads, or as a standalone appetizer. You can also dip it in marinara sauce or pesto for added flavor.
Can I add other ingredients to the butter mixture?
Absolutely! Feel free to get creative. You can add chopped sun-dried tomatoes, olives, or even a pinch of red pepper flakes for a bit of a kick.
Is this recipe suitable for vegetarians?
Yes, this recipe is suitable for vegetarians. Just make sure to use vegetarian-friendly cheese and check that all other ingredients are vegetarian as well.
How do I make the bread extra crispy?
To make the bread extra crispy, brush the outside with a bit of olive oil before baking. You can also remove the foil a few minutes earlier to allow the bread to crisp up more.
Can I prepare the bread in advance?
Yes, you can prepare the bread in advance. Assemble the bread, wrap it in foil, and keep it in the fridge. When ready to bake, preheat your oven and cook as directed.
Conclusion
There you have it—a simple, delicious, and versatile Cheesy Garlic Bread that’s sure to be a hit. Whether you’re enjoying it as a side, a snack, or a centerpiece at a gathering, this recipe is a winner. So, roll up your sleeves, gather your ingredients, and get ready to savor the mouthwatering goodness of this homemade delight. Happy cooking! 🧀✨
Equipment
- Mixing bowl
- Knife for slicing the bread
- Aluminum foil
- Baking sheet
- Oven
Ingredients
- 100 g softened butter
- 4 cloves garlic, crushed
- 150 g parmesan, mozzarella, or cheddar cheese
- 1 tablespoon fresh parsley, finely chopped
- to taste Salt and pepper
Instructions
- In a bowl, mix the softened butter, crushed garlic, grated cheese, fresh parsley, salt, and pepper until well combined.
- Cut the bread into slices, being careful not to cut all the way through—leave the bottom intact.
- Spread the butter mixture generously between each slice.
- Wrap the bread in aluminum foil and place it on a baking sheet.
- Preheat your oven to 180°C (350°F) and bake for about 15-20 minutes.
- Remove the foil and bake for an additional 5 minutes to get a golden, crispy top.
Notes
Nutrition

Hi, I’m Olivia Parker, the founder of BakingSecret.com and a lifelong lover of all things sweet and homemade. I grew up in a small town in Oregon, where the smell of fresh cookies in my family’s kitchen sparked my passion for baking. Over the years, I turned that passion into a mission: to help home bakers feel confident, inspired, and creative.
After studying food science and working in several artisan bakeries across the U.S., I decided to create a space where everyone from beginners to seasoned bakers can find reliable recipes, expert tips, and a warm, welcoming community. BakingSecret.com is my way of sharing the magic of baking with the world. When I’m not testing new recipes, you’ll find me exploring farmers’ markets, collecting vintage cookbooks, or perfecting my sourdough technique.