
The Perfect Blend of Chocolate and Cherry Awaits You!
Have you ever had one of those dessert cravings that just won’t quit? You know, the kind where you can almost taste the dark chocolate and feel the pop of a sweet cherry? That was me last Sunday. Staring into the pantry, I was determined to create something spectacular for a family dinner. What emerged from my kitchen was a Cherry Chocolate Roll so dreamy, it got a standing ovation from my toughest critics—my kids! It’s a fun twist on a classic that feels fancy but is surprisingly simple to make. Let’s roll up our sleeves and make some magic!
A Slice of Sweet History: From Forest to Fridge
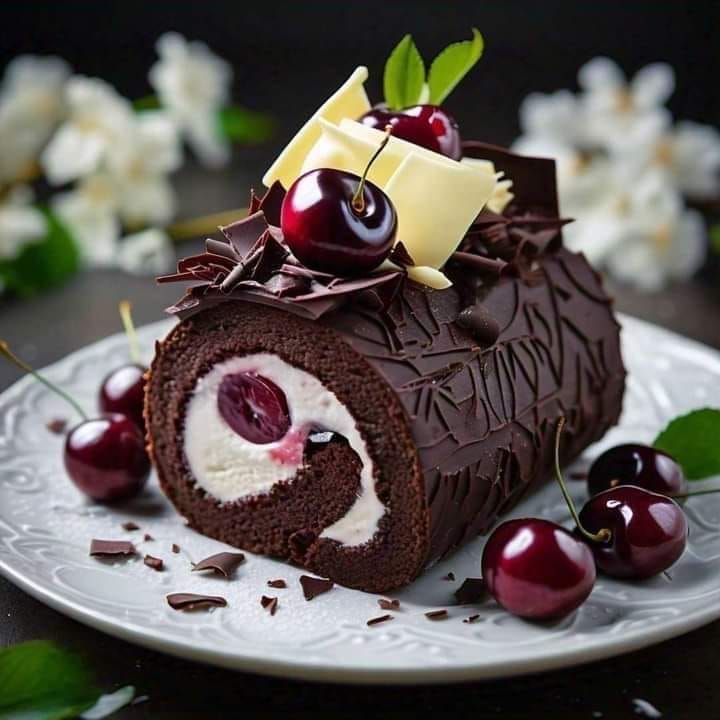
The original Black Forest gâteau is a legend from Germany. It layers chocolate cake, whipped cream, and cherries soaked in Kirschwasser. My version, this Black Forest roll cake, is its playful, modern cousin. It keeps that magical pairing of deep cocoa and bright cherry but in a swirled, easy-to-serve roll. I’ve added a luxurious white chocolate cherry delight filling that makes every bite an absolute celebration. It’s a tribute to tradition with a personal, creamy twist that always feels special.
Why This Recipe Will Become Your Go-To
You’ll love this recipe because it looks impressive but won’t keep you in the kitchen all day. The rich chocolate sponge rolls up beautifully without cracking. The filling is a creamy, dreamy mix of sweet white chocolate and tangy cherries. It’s perfect for when you want a show-stopping dessert that’s secretly easy. The flavors are bold and familiar, yet the presentation feels fresh and exciting. Plus, making a roll cake is just plain fun!
When to Whip Up This Cherry Chocolate Roll
This cake is your secret weapon for so many occasions! It’s elegant enough for a holiday table, like Christmas or Thanksgiving. It’s a guaranteed hit at birthday parties and potlucks. I love making it for a relaxed weekend gathering with friends. A slice with coffee turns an ordinary afternoon into a special treat. Any day that calls for a little extra sweetness is the perfect day for this roll.
Gathering Your Ingredients
Let’s make sure you have everything you need. Using great local ingredients whenever you can really boosts the flavor and supports your community farmers.
For the Chocolate Roll:
- 1 1/2 cups all-purpose flour
- 1 cup granulated sugar
- 3/4 cup unsweetened cocoa powder (high-quality is key!)
- 1 teaspoon baking powder
- 1/2 teaspoon salt
- 1/2 cup unsalted butter, softened
- 2 large eggs
- 2 teaspoons vanilla extract
- 1 cup cherry jam or preserves
For the White Chocolate Cherry Delight Filling:
- 1 cup white chocolate chips
- 1/2 cup heavy cream
- 1 tablespoon unsalted butter
- 1 cup maraschino cherries, drained and chopped
No Stress Substitutions
Don’t have every ingredient? No problem! Here are some easy swaps:
- Cherry Jam: Raspberry or blackberry jam works wonderfully.
- Cocoa Powder: Use dark cocoa powder for an even richer chocolate flavor.
- White Chocolate: Good quality milk chocolate chips can be used in a pinch.
- Maraschino Cherries: Try pitted fresh cherries or even well-drained frozen cherries.
Your Step-by-Step Guide to Success
Step 1: Prep and Preheat
Start by heating your oven to 375°F (190°C). This gives it time to get perfectly hot. Grab a 10×15-inch jelly roll pan and line it with parchment paper. A little baking spray under the paper helps it stay put. This lining is your best friend for a clean release later. Get your ingredients measured and ready to go. This “mise en place” makes the mixing process smooth and stress-free.
Step 2: Combine the Dry Ingredients
In a large mixing bowl, whisk together the flour, sugar, cocoa powder, baking powder, and salt. Watch as the white sugar disappears into the dark, fragrant cocoa cloud. This step ensures every powdery ingredient is evenly distributed. No one wants a bite with a pocket of baking powder! A good whisk here is the foundation of a light, uniform cake. Pro tip: Sifting the cocoa powder prevents lumps for a super smooth batter.
Step 3: Bring in the Wet Ingredients
Add the softened butter, eggs, and vanilla extract to the dry mix. Use an electric mixer on medium speed to blend it all together. The batter will be thick, shiny, and deeply chocolatey. It should drop from the beaters in heavy ribbons. Don’t overmix! Just combine until you no longer see dry streaks of flour. Overmixing can make the cake tough, and we want it tender and flexible for rolling.
Step 4: Bake to Perfection
Spread the thick batter evenly into your prepared pan. An offset spatula is perfect for getting it into every corner. Pop the pan into your preheated oven. Bake for 12-15 minutes. You’ll know it’s done when the top springs back lightly to the touch and a toothpick poked in the center comes out clean. Your kitchen will smell like a chocolate paradise! Chef’s Tip: Avoid opening the oven door too early, as it can cause the cake to fall.
Step 5: Cool and Add the Jam Layer
Let the cake cool in the pan for about 10 minutes. Then, carefully spread the cherry jam over the entire warm surface. The gentle heat helps the jam loosen and spread into a thin, sticky-sweet layer. This jam adds moisture and that classic cherry flavor right into the sponge. Let it cool completely before adding the filling. A warm cake will melt your lovely white chocolate delight.
Step 6: Create the Dreamy Filling
For the filling, melt the white chocolate chips gently in a double boiler or in short bursts in the microwave. Stir until it’s completely smooth and glossy. In a saucepan, warm the heavy cream and butter just until the butter melts. Slowly whisk the warm cream into the melted white chocolate. You’ll see it thicken into a luscious, pourable ganache. Finally, gently fold in the chopped cherries, being careful not to break them up too much.
Step 7: Roll, Fill, and Chill
Once the cake and filling are cool, it’s assembly time! Spread the white chocolate and cherry delight evenly over the jam-covered cake. Leave a small border at one of the shorter edges. Using the parchment paper to help you, start at the opposite short end and roll the cake tightly over the filling. Don’t worry if it cracks a little—it adds character! Wrap the whole roll in plastic wrap and refrigerate for at least 30 minutes. This sets the shape and makes slicing clean and easy.
Timing is Everything
Prep Time: 25 minutes
Cook Time: 15 minutes
Cooling/Chilling Time: 50 minutes
Total Time: About 1 hour 30 minutes
Chef’s Secret for the Perfect Roll
My best tip is to roll the warm cake lightly in a clean kitchen towel dusted with powdered sugar right after baking. Let it cool completely in that rolled shape. Then, unroll it, add your fillings, and re-roll. This “muscle memory” trick makes the final rolling with filling inside so much easier and prevents major cracks!
A Sweet Little Fact
Did you know the name “Black Forest” isn’t just about the chocolate? The traditional cake is named after the Black Forest region in Germany, known for its sour Morello cherries and Kirschwasser (cherry brandy). While our roll cake is a simpler, family-friendly version, it carries the spirit of that delicious history in every bite!
Helpful Tools You’ll Need
- 10×15-inch Jelly Roll Pan
- Parchment Paper
- Electric Mixer
- Large Mixing Bowls
- Double Boiler or Microwave-Safe Bowl
- Rubber Spatula
- Offset Spatula (very helpful!)
How to Store Your Masterpiece
Once assembled, your Black Forest roll cake should be stored in the refrigerator. Cover it tightly with plastic wrap or place it in an airtight container. The cold keeps the creamy white chocolate filling firm and delicious. It also helps the flavors meld together beautifully, making it even tastier the next day.
You can store the cake this way for up to 5 days. If you want to keep it longer, freezing is a great option. Wrap the whole roll or individual slices tightly in plastic wrap and then in foil. It will keep in the freezer for up to 2 months.
To serve after freezing, just thaw it overnight in the refrigerator. This makes the Cherry Chocolate Roll a fantastic make-ahead dessert for busy weeks or unexpected guests. No one will ever guess it came from the freezer!
Tips for a Flawless Cake
- Use room temperature eggs and butter. They blend into the batter much more smoothly.
- When spreading batter, get it as even as possible for uniform baking.
- Don’t skip the chilling step before slicing. A sharp knife dipped in hot water makes perfect, clean slices.
- For more decadent dessert ideas, explore our whole collection of incredible cake recipes that are sure to inspire your next baking project.
Make it Picture-Perfect
- Dust the top with a snowfall of powdered sugar right before serving.
- Add a row of fresh cherries and dark chocolate shavings on top.
- Serve each slice with a dollop of lightly sweetened whipped cream.
- Place the whole roll on a rustic wooden board for a charming, homey feel.
Healthier & Creative Twists to Try
Love the idea but want to mix it up? Here are six delicious variations on the classic Cherry Chocolate Roll.
1. Berry Blast Roll: Swap the cherry jam for seedless raspberry jam. The filling is amazing with fresh raspberries folded in instead of cherries. It’s a tart, vibrant twist that’s perfect for summer.
2. Deep Dark Chocolate Roll: For intense chocolate lovers, replace the regular cocoa powder with Dutch-processed dark cocoa. Use a dark chocolate ganache filling for an ultra-rich, grown-up dessert.
3. Boozy Black Forest Roll: For a more traditional adult touch, brush the baked cake with 1-2 tablespoons of Kirschwasser (cherry brandy) before adding the jam. It adds incredible depth of flavor.
4. Nutty Delight Roll: Add a layer of finely chopped toasted hazelnuts or almonds over the jam before adding the white chocolate filling. The crunch is divine!
5. Dairy-Free Dream Roll: Use dairy-free butter and a high-quality dairy-free white chocolate. Coconut cream can often stand in for heavy cream in the filling with delicious results.
6. Citrus Sunshine Roll: Replace the cherry jam with orange marmalade. Fold finely chopped dried apricots into the white chocolate filling. It’s a bright, sunny variation.
Internal Links for More Baking Inspiration
If you adore the combination of fruit and creamy fillings, you will absolutely lose your mind over our Blackberry Raspberry Cheesecake. For another chocolate lover’s dream, the layers of caramel and chocolate in this Crunchy Caramel Chocolate Cake are unbelievable. For a tropical escape, try the bright flavors of this Mango and Passion Fruit Paradise Cake. And if cherries are your thing, the creamy, nutty layers in these Cherry Pistachio Cheesecake Bars are simply irresistible.
Common Mistakes to Avoid
Mistake 1: Overbaking the Cake Sponge
This is the biggest culprit for a cracked roll. An overbaked cake becomes dry and brittle. It loses the flexibility needed to roll without breaking. Always set a timer and check a minute or two before the minimum bake time. The cake is done when the top looks set and springs back when lightly pressed. Pro tip: Pull it out the moment a toothpick comes out with a few moist crumbs, not completely clean.
Mistake 2: Adding Filling to a Warm Cake
Patience is key! If you spread the white chocolate cherry delight onto a warm or even slightly hot cake, the filling will melt into a mess. It will make the cake soggy and impossible to roll neatly. Let the cake cool completely with the jam layer on it. You can even speed this up by popping it in the fridge for 15 minutes after it reaches room temperature.
Mistake 3: Rolling Too Tightly (or Too Loosely)
Finding the rolling “sweet spot” takes practice. Rolling too tightly can force the filling out the ends and put stress on the cake. Rolling too loosely gives you a saggy, unstable spiral. Use the parchment paper as a guide, applying gentle, even pressure. Aim for a snug roll where the filling just kisses the edges without spilling over. Your first roll might not be perfect, and that’s okay—it will still taste amazing!
Mistake 4: Skipping the Chill Before Slicing
Resisting the urge to slice right away is hard, but so important. A freshly rolled cake is soft, and the filling is not fully set. Slicing it immediately will cause messy, squashed pieces. Wrapping it and chilling for at least 30 minutes firms up the filling and sets the cake’s shape. This gives you those beautiful, clean, Instagram-worthy slices we all love.
Your Cherry Chocolate Roll Questions, Answered
Can I make this cake gluten-free?
Absolutely! You can substitute the all-purpose flour with a good quality 1-to-1 gluten-free flour blend. Make sure the blend contains xanthan gum, which helps with structure and binding. The baking time might be slightly different, so keep a close eye on it. The result will be a delicious gluten-free roll that everyone can enjoy.
My cake cracked while rolling. What did I do wrong?
Don’t worry, this happens to everyone! Small cracks are normal and add charm. Large cracks usually come from overbaking (dry cake) or rolling it while it’s too cold and stiff. Remember the chef’s secret of pre-rolling the warm cake in a towel. Also, if it does crack, just position the roll so the crack is on the bottom when you plate it. A dusting of powdered sugar covers a multitude of sins!
Can I use fresh cherries instead of maraschino cherries?
Yes, you can! Pit and chop about 1 1/4 cups of fresh sweet cherries. You might want to toss them with a teaspoon of sugar and let them sit for 10 minutes to draw out some juices. Pat them dry before folding into the filling so they don’t make it too runny. The flavor will be less sweet and more natural, which is lovely.
How far in advance can I assemble the whole cake?
For the best texture and taste, I recommend assembling the cake the day you plan to serve it. However, you can bake the chocolate sponge and make the white chocolate filling up to 2 days in advance. Store them separately in the fridge. Let the filling come to room temperature to soften slightly before spreading, and assemble the roll on the day of your event.
What’s the best way to slice the roll without squishing it?
Use a long, thin, sharp knife. Wipe the blade clean and dip it in hot water between each cut. This gentle heat helps the knife glide smoothly through the chocolate cake and creamy filling without dragging or pressing down. It’s the secret trick for perfect, professional-looking slices every single time.
Can I freeze the assembled roll?
You sure can! Wrap the completely cooled and chilled roll very tightly in plastic wrap. Then, wrap it again in aluminum foil or place it in a freezer-safe bag. It will keep well for up to 2 months. Thaw it overnight in the refrigerator before unwrapping and slicing. This is a fantastic way to always have a fabulous dessert on hand.
My white chocolate seized up when I added the cream. Help!
Seizing happens if a tiny bit of water or steam gets into the melting chocolate, or if the cream is too hot. To fix it, try adding a teaspoon more of warm cream and stirring vigorously. If that doesn’t work, gently re-warm the whole mixture over the double boiler while whisking. To prevent it, make sure your bowls and utensils are completely dry, and add warm (not boiling) cream slowly to the melted chocolate.
Is there a non-alcoholic substitute for Kirschwasser in the variations?
Yes! For a similar flavor without the alcohol, you can use a good-quality cherry syrup or even a little cherry juice concentrate. Another fun option is a teaspoon or two of almond extract brushed on the cake—it mimics the nuanced flavor of the traditional liqueur beautifully and is family-friendly.
Can I decorate this cake like a Yule log for Christmas?
That’s a wonderful idea! Once the roll is chilled, you can spread a thin layer of chocolate frosting over it. Use a fork to create bark-like lines. Add meringue mushrooms, a dusting of powdered sugar “snow,” and some fresh holly leaves (non-toxic!) for decoration. It becomes a stunning Buche de Noel centerpiece.
What can I do with leftover white chocolate cherry filling?
Lucky you! This filling is delicious on so many things. Use it as a dip for fresh fruit like strawberries or pineapple. Swirl it into plain yogurt or oatmeal. You can even spread it between layers of a different cake or use it to fill cupcakes. Store any leftovers in an airtight container in the fridge for up to 5 days.
Ready, Set, Roll!
There you have it—your guide to creating a stunning, delicious Black Forest Roll Cake with White Chocolate and Cherry Delight. This Cherry Chocolate Roll is more than just a dessert. It’s a fun kitchen project, a beautiful centerpiece, and a guaranteed way to make people smile. Remember, baking is about joy, not perfection. So put on some music, gather your ingredients, and have fun with it. I can’t wait for you to experience the chocolatey, cherry-filled delight that comes from your own oven. Happy baking
Equipment
- Grand bol
- Fouet
- Spatule
- Plaque à pâtisserie
- Papier sulfurisé
Ingredients
- 2 tasses farine tout usage
- 1 tasse sucre
- 3/4 tasse cacao en poudre non sucré
- 1 cuil. à café poudre à lever
- 1/2 cuil. à café sel
- 1/2 tasse beurre non salé, ramolli
- 2 cuil. à café extrait de vanille
- 1 tasse confiture ou confiture de cerise
- 1 tasse pépites de chocolat blanc
- 1/2 tasse crème épaisse
- 1 cuil. à soupe beurre
- 1 tasse cerises au maraschino, égouttées et hachées
Instructions
- Préchauffez votre four à 190°C et tapissez une plaque à pâtisserie de 10x15 pouces avec du papier sulfurisé.
- Dans un grand bol, fouettez ensemble la farine, le sucre, le cacao en poudre, la poudre à lever et le sel.
- Ajoutez le beurre ramolli, les œufs et l'extrait de vanille au mélange sec et mélangez avec un mixeur électrique jusqu'à ce que le tout soit bien incorporé.
- Étalez la pâte uniformément sur votre plaque préparée et enfournez pendant 12 à 15 minutes.
- Laissez le gâteau refroidir dans la plaque pendant environ 10 minutes, puis étalez la confiture de cerise sur la surface et laissez refroidir complètement.
- Faites fondre les pépites de chocolat blanc dans un bain-marie ou au micro-ondes jusqu'à obtenir une consistance lisse.
- Chauffez la crème et le beurre dans une casserole, puis incorporez le mélange au chocolat fondu jusqu'à épaississement. Incorporez les cerises hachées.
- Étalez la garniture sur le gâteau refroidi, roulez-le serré depuis une extrémité, enveloppez-le dans du film plastique et réfrigérez pendant au moins 30 minutes.