
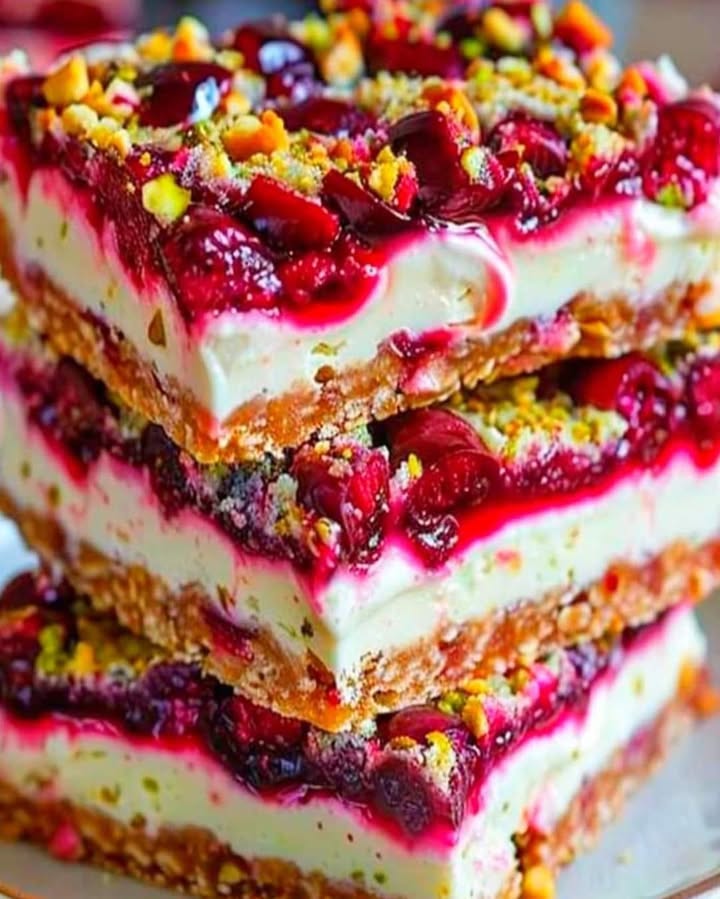
Introducing Luscious Cherry Pistachio Cheesecake Bars
You know that feeling when you bite into something so good, you just have to close your eyes for a second? That’s what these Luscious Cherry Pistachio Cheesecake Bars do for me. I was tinkering in my kitchen one afternoon, dreaming of a dessert that felt fancy but was secretly easy. I wanted the nutty crunch of pistachios, the creamy silk of cheesecake, and a topping that burst with fruit. The result was these magical bars. They’ve now become my go-to for every potluck and family gathering. Everyone asks for the recipe, and today, it’s yours!
The Story Behind Cherry Pistachio Cheesecake Bars
Cheesecake is a classic, but I love giving it a twist. This recipe kind of came to me by accident. I had a bag of pistachios from a holiday party and a beautiful bowl of cherries from the market. Traditional cheesecake felt a bit heavy for a summer evening. So, I thought, why not make bars? They’re easier to serve and share. The pistachio crust adds a lovely green hue and a texture that’s just so different from the usual graham cracker. It’s a modern take on two beloved classics: the creamy cheesecake and the fruity dessert bar.
Why You Will Adore This Cherry Pistachio Cheesecake Recipe
Let me tell you why this recipe is a keeper. First, the flavor combination is a dream team. Sweet, tangy cherries meet rich, creamy cheesecake and a subtly salty pistachio crust. It’s a symphony in every bite! Second, it’s so much easier than a full-sized cheesecake. No worrying about a cracked top or a fussy springform pan. You bake it in a simple 9×13 pan, chill it, and slice. Perfect for beginners. Finally, it’s just beautiful. The red cherry topping against the green crust makes it a show-stopper on any table.
Perfect Occasions for These Dreamy Bars
These bars are wonderfully versatile. They’re perfect for a summer picnic or barbecue because they’re fruity and light. I love bringing them to holiday parties—the red and green colors are festive for Christmas! They’re also ideal for a birthday treat when someone wants something different from a cake. I’ve even served them at bridal showers and baby showers. Honestly, any time you want a dessert that looks like you spent hours, but really didn’t, this is your answer.
Ingredients for Luscious Cherry Pistachio Cheesecake Bars
Gathering your ingredients is the first step to kitchen happiness. Here’s what you’ll need:
For the Crust:
- 1 1/2 cups pistachio crumbs (finely ground)
- 1/4 cup granulated sugar
- 1/2 cup unsalted butter, melted
For the Cheesecake Layer:
- 3 (8 oz) packages cream cheese, softened
- 3/4 cup granulated sugar
- 3 large eggs
- 1 tsp vanilla extract
- 1/2 cup sour cream
For the Cherry Topping:
- 2 cups fresh cherries, pitted and halved
- 1/4 cup granulated sugar
- 2 tbsp cornstarch
- 1/4 cup water
Handy Substitution Options
Don’t stress if you’re missing something! Here are easy swaps:
- Pistachio Crust: You can use almond crumbs or even graham cracker crumbs if you prefer.
- Fresh Cherries: Frozen cherries work great! Just thaw and drain them first. You could also use a good-quality cherry jam or compote.
- Sour Cream: Full-fat Greek yogurt is a fantastic substitute and adds a similar tangy creaminess.
- Cream Cheese: Always use full-fat for best results. Low-fat can make the filling too soft.
Creating Your Cherry Pistachio Cheesecake Bars: A Step-by-Step Guide
Step 1: Prepare Your Pan and Oven
Start by preheating your oven to 350°F (175°C). This ensures a consistent baking temperature from the very start. Take your 9×13-inch baking pan and grease it lightly. Then, line it with parchment paper. This liner is your best friend! It will let you lift the whole cheesecake out later for clean, easy slicing. Pro tip: Let the parchment paper overhang the sides a bit. It acts like little handles.
Step 2: Make the Pistachio Crust
In a medium bowl, combine the gorgeous green pistachio crumbs, sugar, and melted butter. The butter will bind everything together. Mix it until it looks like wet sand. Now, press this mixture firmly and evenly into the bottom of your prepared pan. Use the bottom of a glass or a measuring cup to get it really flat. Bake this crust for 10 minutes. This short bake gives it a head start, making it sturdy and deliciously nutty. Let it cool before adding the filling.
Step 3: Create the Creamy Cheesecake Filling
In a large mixing bowl, beat the softened cream cheese and sugar together until smooth. This takes about 2-3 minutes. You want no lumps! Add the eggs one at a time, beating well after each addition. This prevents the mixture from curdling. Now, mix in the vanilla extract and sour cream. The sour cream is the secret weapon—it makes the cheesecake incredibly silky and adds a slight tang. The batter will be thick, creamy, and pale. Pour it over your cooled crust and spread it evenly with a spatula.
Step 4: Cook the Vibrant Cherry Topping
While your cheesecake batter waits, make the topping. In a small saucepan, combine your halved cherries, sugar, cornstarch, and water. Cook this over medium heat. You’ll see the cherries soften and the juice bubble. The cornstarch will work its magic, turning the juices into a glossy, thick sauce. Stir frequently to prevent sticking. It takes about 5-7 minutes. Let it cool slightly so it’s not scalding hot when you add it to the cheesecake. Spoon it gently over the cheesecake batter in the pan.
Step 5: Bake, Cool, and Chill to Perfection
Place the pan in your preheated oven. Bake for 40-45 minutes. The edges will turn a light golden brown, and the center should be set but might still have a slight jiggle. That’s okay! Over-baking leads to a dry cheesecake. Let the pan cool completely on a rack. This is crucial. Then, refrigerate it for at least 4 hours, or overnight. This chilling time lets the flavors meld and the texture firm up beautifully. Patience rewards you with the perfect slice.
Step 6: Slice and Serve Your Masterpiece
The final step is the most rewarding. Use the parchment paper “handles” to lift the entire cheesecake out of the pan onto a cutting board. With a sharp knife, slice into 16 beautiful bars. Clean the knife between cuts for neat edges. Serve them up and watch the smiles appear. Chef’s Tip: For an extra touch, sprinkle a few finely chopped pistachios over the top of each bar just before serving.
Timing Your Baking Success
Good planning makes baking fun. Here’s your timeline:
- Prep Time: 25 minutes (crust, filling, topping)
- Baking Time: 45 minutes
- Cooling Time: 1 hour (in pan)
- Chilling Time: At least 4 hours (preferably overnight)
- Total Time: About 5 hours 10 minutes (mostly hands-off chilling)
A Little Extra Info: The Pistachio Passion
Pistachios aren’t just tasty; they’re pretty nutritious too! They add a lovely color and a unique flavor that pairs so well with sweet cherries. Using seasonal cherries when they’re fresh and juicy makes this dessert even more special. For information on the benefits of choosing fresh, seasonal foods, you can check out trusted resources. It’s a great way to support local growers and get the best flavor.
Necessary Equipment
You likely have most of this in your kitchen already:
- 9×13-inch baking pan
- Parchment paper
- Medium and large mixing bowls
- Hand mixer or stand mixer
- Small saucepan
- Spatula
- Sharp knife for slicing
Storing Your Luscious Cherry Pistachio Cheesecake Bars
These bars store wonderfully, so you can make them ahead. Once completely chilled and sliced, place them in an airtight container. They will keep happily in the refrigerator for up to 4-5 days. The cherry topping and creamy filling hold up perfectly.
If you want to freeze them for longer storage, it’s easy. Place the sliced bars on a tray and flash-freeze them for about an hour. This prevents them from sticking together. Then, transfer them to a freezer-safe bag or container. They can be frozen for up to 2 months.
To enjoy frozen bars, simply thaw them in the refrigerator overnight. They will taste just as fresh and delicious as the day you made them. I often freeze half the batch for a future treat when I need a quick, impressive dessert.
Tips and Advice for the Best Bars
- Soft Cream Cheese: Let your cream cheese soften at room temperature for at least an hour. This prevents a lumpy batter.
- Cool the Crust: Don’t rush! Let the crust cool before adding the filling. A hot crust can start cooking the bottom of the filling.
- Don’t Over-mix: Mix the filling just until everything is combined. Over-mixing can incorporate too much air and cause cracking.
- Pit Cherries Easily: Use a straw or a cherry pitter. If you don’t have one, carefully slice around the cherry and pop the pit out with your fingers.
Presentation Ideas to Wow Your Guests
A beautiful plate makes everything taste better!
- Place each bar on a small, colorful plate.
- Drizzle a tiny bit of extra cherry syrup around the plate.
- Top with a single whole pistachio or a mint leaf for a fresh touch.
- Serve on a tiered stand for a party – it looks so elegant!
6 Fantastic Recipe Variations to Try
Love this format? Here are some other delicious twists you can make:
- No-Bake Lemon Blueberry: Use a lemon cheesecake filling and a blueberry compote topping for a bright, refreshing summer bar.
- Chocolate Hazelnut: Swap pistachios for hazelnuts in the crust. Add a tablespoon of cocoa powder to the cheesecake filling and top with a chocolate ganache.
- Apple Cinnamon: Use a spiced apple compote instead of cherries. Add a teaspoon of cinnamon to the crust for a cozy fall treat.
- Strawberry Basil: Top with a fresh strawberry sauce and sprinkle with finely chopped basil for an herbaceous, fragrant bar.
- Salt & Caramel Pecan: Use a peanut or pecan crust, keep the classic cheesecake, and top with a salted caramel sauce and chopped toasted pecans.
- Tropical Twist: Use a macadamia nut crust and top with a mango-passion fruit sauce, inspired by the flavors of a Tropical Fruit Cake.
Common Mistakes to Avoid
Mistake 1: Using Cold Cream Cheese
This is probably the biggest culprit for a lumpy, difficult-to-mix filling. Cold cream cheese doesn’t blend smoothly with the sugar and eggs. You’ll end up with chunks and an uneven texture. To avoid this, let your cream cheese blocks sit on the counter for at least an hour before you start baking. They should feel soft and pliable when you poke them.
Mistake 2: Over-baking the Cheesecake
We want creamy bliss, not a dry brick. Over-baking happens when you wait for the center to be completely firm like a cake. A cheesecake should still have a slight, gentle jiggle in the middle when you take it out of the oven. The edges will be set and lightly browned. It firms up perfectly during the long chilling time. Set a timer and trust it!
Mistake 3: Skipping the Chilling Time
I know it’s tempting to slice into it right away! But if you don’t chill the cheesecake bars for the full 4 hours (or overnight), they will be too soft and messy to slice. The chilling process allows the cheesecake structure to set properly. It also makes the flavors come together beautifully. Plan ahead and make this a day-before dessert for any event.
Mistake 4: Not Letting the Cherry Topping Cool
If you spoon a hot, bubbling cherry mixture directly onto the raw cheesecake batter, you can start to cook the top layer of the batter prematurely. This can create a weird texture and make spreading harder. Let the cooked cherry topping cool for about 10-15 minutes. It should be warm, not hot. Then, spoon it over gently.
Frequently Asked Questions
Can I use frozen cherries for the Cherry Pistachio Cheesecake Bars?
Absolutely! Frozen cherries are a great option, especially when fresh ones are not in season. Just make sure to thaw them completely first. You should also drain any extra liquid that comes from thawing. Otherwise, your topping might be too watery. The cooking process with cornstarch will still thicken the juices beautifully. I’ve used frozen cherries many times, and the results are just as delicious.
How do I make pistachio crumbs for the crust?
It’s simple! You can buy shelled, raw, or roasted pistachios. If they are salted, that’s fine—it adds a nice contrast. Place them in a food processor and pulse until they become fine crumbs. Don’t process them too long, or they might start to turn into a paste. If you don’t have a food processor, you can place them in a sturdy zip-top bag and crush them with a rolling pin. You need 1 1/2 cups of crumbs after processing.
Why is sour cream used in the cheesecake filling?
Sour cream is a secret ingredient in many great cheesecake recipes. It adds a slight tanginess that balances the sweetness of the cheese and sugar. More importantly, it contributes to a super smooth, creamy, and rich texture. The acidity and fat in sour cream help make the filling luxuriously silky. If you don’t have it, full-fat Greek yogurt is the best substitute.
Can I make these bars gluten-free?
Yes, this recipe can easily be made gluten-free. The only potential source of gluten is in the crust if you use a graham cracker substitute. But since we are using pistachio crumbs, the crust is naturally gluten-free! Just ensure that all your other ingredients (like cornstarch) are from gluten-free sources. You’ll have a wonderful gluten-free dessert ready to enjoy.
How do I prevent the cheesecake from cracking on top?
Cracking usually happens from over-mixing (adding too much air) or from a sudden temperature change. To avoid it: mix your filling just until everything is combined—don’t whip it vigorously. Also, avoid opening the oven door frequently during baking. After baking, let the cheesecake cool gradually in the pan on the counter, then move it to the fridge. Bars are less prone to cracking than large cheesecakes, so you’re already on safe ground!
What’s the best way to slice cheesecake bars cleanly?
A sharp, thin knife is your best tool. Run it under hot water and wipe it dry before each cut. The warm knife glides through the creamy filling and sticky topping more easily, giving you neat, clean edges. You can also use a bench scraper or a large chef’s knife. Clean the knife between slices for the prettiest presentation.
Can I make a different fruit topping?
Of course! This recipe is very flexible. You can use the same method with other fruits like blueberries, raspberries, or chopped peaches. Just maintain the ratio of about 2 cups of fruit, 1/4 cup sugar, 2 tbsp cornstarch, and 1/4 cup water. Cook until thickened. For a tropical vibe, try a mango topping like the one used in a Refreshing No-Bake Pineapple Cheesecake.
How long do these bars last in the fridge?
When stored properly in an airtight container, these Luscious Cherry Pistachio Cheesecake Bars will stay fresh and tasty for up to 4-5 days in the refrigerator. The flavors actually meld and deepen a bit over the first day or two. Make sure they are covered so they don’t dry out. I often make them on Thursday for a weekend party.
Is it necessary to use parchment paper?
I highly recommend it. Parchment paper guarantees that you can remove every bar perfectly from the pan. It prevents sticking and makes cleanup a breeze. If you don’t have parchment paper, you can grease the pan very well, but lifting out the whole cheesecake to slice will be more challenging. You’d likely have to slice it in the pan.
Can I double this recipe?
Doubling this recipe for a larger crowd isn’t straightforward because of the pan size. Instead, I recommend making two separate batches. Bake them one after the other, or use two 9×13 pans if you have them and oven space. Doubling the ingredients in one pan would make the layers too thick and require a much longer, unpredictable baking time.
If you adore cheesecake desserts as much as I do, you can explore many more delightful ideas in our dedicated cheesecake recipe collection. From fruity to chocolatey, there’s a world of creamy goodness to try, like this stunning Blackberry Raspberry Cheesecake.
Your New Favorite Dessert is Ready
There you have it! My beloved recipe for Luscious Cherry Pistachio Cheesecake Bars. They combine simplicity with stunning results. The nutty crust, the creamy filling, and the bright cherry topping create a dessert that feels special and tastes incredible. I hope this recipe brings as many happy moments to your table as it has to mine. So grab your apron, preheat that oven, and get ready for some serious compliments. Happy baking!
Equipment
- Grand bol
- Fouet
- Spatule
- Plaque à pâtisserie
- Papier sulfurisé
Ingredients
- 1.5 tasses miettes de pistache
- 0.25 tasses sucre granulé
- 0.5 tasses beurre non salé, fondu
- 24 oz fromage à la crème, ramolli
- 0.75 tasses sucre granulé
- 3 œufs
- 1 cuil. à café extrait de vanille
- 0.5 tasses crème aigre
- 2 tasses cerises fraîches, dénoyautées et coupées en deux
- 0.25 tasses sucre granulé
- 2 cuil. à soupe maïzena
- 0.25 tasses eau
Instructions
- Préchauffez votre four à 175°C et graissez un moule à pâtisserie de 9x13 pouces, tapissé de papier sulfurisé.
- Dans un bol moyen, combinez les miettes de pistache, le sucre et le beurre fondu. Pressez ce mélange fermement au fond du moule préparé et faites cuire pendant 10 minutes.
- Dans un grand bol, battez le fromage à la crème et 3/4 tasse de sucre jusqu'à obtenir une consistance lisse. Ajoutez les œufs un à un, en mélangeant bien après chaque ajout. Incorporez l'extrait de vanille et la crème aigre jusqu'à obtenir un mélange crémeux.
- Dans une petite casserole, combinez les cerises coupées en deux, 1/4 tasse de sucre, la maïzena et l'eau. Faites cuire à feu moyen jusqu'à ce que le mélange épaississe, environ 5-7 minutes. Laissez refroidir légèrement.
- Versez la garniture de cheesecake sur la croûte refroidie et ajoutez le mélange de cerises par-dessus.
- Faites cuire pendant 40-45 minutes, jusqu'à ce que les bords soient légèrement dorés et que le centre ait un léger mouvement. Laissez refroidir complètement avant de mettre au réfrigérateur pendant au moins 4 heures ou toute la nuit.
- Sortez le cheesecake à l'aide du papier sulfurisé et coupez-le en 16 barres. Servez et appréciez.