
Why Chocolate Cream Pie is a Showstopper
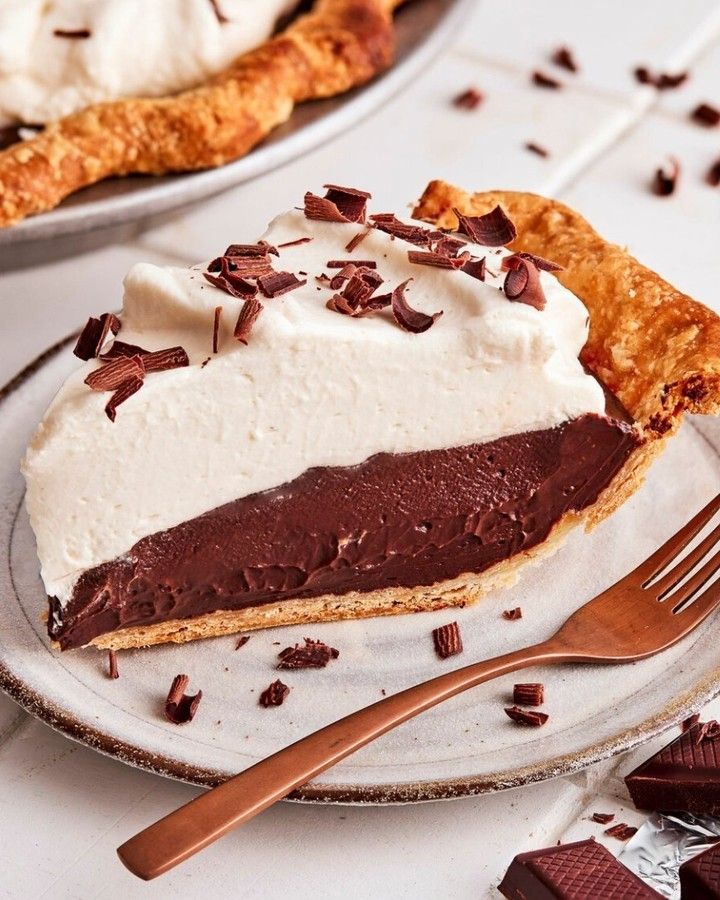
There’s something magical about a slice of chocolate cream pie. The first time I made it for my family, the room went silent—except for the sound of forks clinking against plates. It’s rich, creamy, and oh-so-chocolatey, with a buttery crust that crumbles just right. Whether you’re celebrating a birthday or simply craving something indulgent, this dessert hits all the right notes. Plus, it’s surprisingly easy to make. Trust me, once you try this recipe, it’ll become your go-to for impressing guests—or treating yourself.
A Little History Behind Chocolate Cream Pie
Chocolate cream pie has roots in classic American baking, where pies were a staple at family gatherings. Back in the day, bakers relied on simple ingredients like cocoa and sugar to create decadent fillings. Over time, recipes evolved, adding espresso powder for depth and vanilla extract for warmth. I discovered this version while experimenting with my grandmother’s old recipe book. She always said, “A good pie should make people smile.” And let me tell you, this Chocolate Cream Pie does just that.
Why You’ll Love This Recipe
What makes this Chocolate Cream Pie special? First, it’s incredibly flavorful. The dark chocolate and espresso combo creates a rich, sophisticated taste. Second, it’s beginner-friendly. Even if you’ve never baked a pie before, this recipe guides you step by step. Lastly, it’s versatile. You can serve it plain, top it with whipped cream, or even drizzle melted chocolate for extra flair. Plus, the aroma of chocolate filling your kitchen is unbeatable.
Perfect Occasions to Make This Pie
This Chocolate Cream Pie is perfect for holidays like Thanksgiving or Christmas when desserts need to shine. It’s also ideal for casual get-togethers, potlucks, or even date night. Once, I brought it to a summer barbecue, and everyone raved about how refreshing yet indulgent it felt. Honestly, any occasion—or no occasion at all—is a great excuse to bake this beauty.
Ingredients You’ll Need
Here’s what you’ll need to whip up this masterpiece:
For the Dough:
- 175 g wheat flour (Type 405)
- 1 tablespoon of sugar
- 1 teaspoon salt
- 125 g cold butter
- 60–90 ml ice-cold water
For the Filling:
- 100 g dark chocolate (70% cocoa content)
- 125 g brown sugar
- 60 g baked cocoa
- 2 tablespoons cornstarch
- 1 teaspoon instant espresso powder
- 1/2 teaspoon salt
- 6 egg yolks (medium size, approx. 100 g)
- 100 g cream
- 500 ml milk
- 30 g cold butter
- 1 tablespoon vanilla extract
For the Topping:
- 2 leaves gelatin
- 300 g cream
- 100 g sour cream
- 35 g sugar
- 2 teaspoons vanilla extract
- 1/2 teaspoon salt
- 1 small piece of dark chocolate (approx. 10 g)
Substitution Options
Not every pantry is stocked perfectly, so here are some swaps:
- Dark chocolate: Use semi-sweet chocolate if you prefer a milder flavor.
- Brown sugar: Substitute with white sugar and a teaspoon of molasses.
- Cream: Heavy whipping cream works as a substitute.
- Gelatin leaves: Replace with powdered gelatin (follow package instructions).
Step-by-Step Preparation
Step 1: Make the Dough
Start by mixing the flour, sugar, and salt in a large bowl. Cut the cold butter into 1 cm cubes and toss them into the dry mix. Quickly press each cube between your fingers to flatten it slightly—this helps create those flaky layers later. Work fast; warm butter equals soggy dough! If the mixture feels too dry, sprinkle in ice-cold water, one spoonful at a time, until it holds together when squeezed. Don’t overmix—it should look rough and lumpy.
Step 2: Chill the Dough
Wrap the dough in plastic wrap and pop it in the fridge for at least 30 minutes. Chilling firms up the butter, making the crust easier to roll out. While it rests, prep your filling ingredients. Pro tip: Measure everything ahead of time—it makes the process smoother.
Step 3: Create the Filling
In a saucepan, whisk together brown sugar, cocoa, cornstarch, espresso powder, and salt. Add egg yolks, cream, and milk, stirring constantly over medium heat. Keep whisking until the mixture thickens—it should coat the back of a spoon. Remove from heat and stir in the chopped chocolate, butter, and vanilla extract. The glossy, velvety texture will make your heart sing. Pour the filling into the cooled crust and smooth the top.
Step 4: Prepare the Topping
Soak the gelatin leaves in cold water, then gently heat them with a splash of cream to dissolve. Whip the remaining cream, sour cream, sugar, vanilla, and salt until soft peaks form. Fold in the gelatin mixture and spread this heavenly topping over the chilled pie. Finish with a grating of dark chocolate for elegance.
Timing Breakdown
- Prep Time: 30 minutes
- Cooking Time: 20 minutes
- Resting Time: 4 hours (chilling)
- Total Time: Approximately 5 hours
Chef’s Secret
For an extra-rich crust, brush the bottom with a thin layer of melted chocolate before adding the filling. This trick prevents sogginess and adds another layer of flavor.
Extra Info
Did you know that dark chocolate contains antioxidants? That means you can enjoy this Chocolate Cream Pie guilt-free—well, almost! Pair it with a cup of coffee for the ultimate treat.
Necessary Equipment
You’ll need a few tools to bring this pie to life:
- Rolling pin
- Pie dish (9-inch)
- Saucepan
- Whisk
- Mixing bowls
- Measuring cups and spoons
Storage Tips
Store leftovers in the fridge, covered with plastic wrap or aluminum foil. The pie stays fresh for up to three days. For longer storage, freeze individual slices wrapped tightly in parchment paper and plastic wrap. Thaw overnight in the fridge before serving.
To keep the crust crisp, avoid stacking heavy items on top of the pie. Also, don’t refrigerate uncovered—the filling can absorb unwanted odors.
If you’re freezing the pie, omit the whipped cream topping until after thawing. Add it fresh for the best texture and taste.
Tips and Advice
– Always use cold butter for the crust. Warm butter leads to a dense, tough result.
– Whisk the filling constantly to prevent lumps.
– Taste the chocolate before using it. High-quality chocolate makes all the difference.
– Chill the pie thoroughly before slicing—it cuts cleaner.
Presentation Ideas
Dress up your Chocolate Cream Pie with creative touches:
- Dust cocoa powder through a stencil for a fancy design.
- Add chocolate shavings or curls on top.
- Serve with a dollop of whipped cream and fresh berries.
Healthier Alternatives
Craving something lighter? Try these variations:
- Gluten-Free Crust: Swap wheat flour for almond or oat flour.
- Vegan Version: Use coconut cream and dairy-free chocolate.
- Low-Sugar Option: Replace sugar with stevia or monk fruit sweetener.
- Fruit Twist: Add raspberries or strawberries to the filling.
- Spiced Pie: Include cinnamon or chili powder for a kick.
- Mini Pies: Bake individual portions for portion control.
Common Mistakes to Avoid
Mistake 1: Overworking the Dough
Overmixing the dough makes it tough instead of flaky. Stop mixing as soon as it comes together. Remember, a little roughness is okay—it’s pie, not perfection!
Mistake 2: Skipping the Chilling Step
Skipping the chilling step ruins the crust’s texture. Pop it in the fridge for at least 30 minutes. Patience pays off here.
Mistake 3: Burning the Filling
Cooking the filling too long or at high heat can cause burning. Stir constantly and keep the heat medium-low. If it starts sticking, lower the flame immediately.
Mistake 4: Rushing the Resting Time
Don’t skip chilling the pie before slicing. Give it ample time to set—four hours minimum. Otherwise, you’ll end up with a gooey mess.
FAQs About Chocolate Cream Pie
Can I Use Store-Bought Crust?
Absolutely! If you’re short on time, a store-bought crust works fine. Just blind-bake it for 10 minutes before adding the filling.
How Do I Fix Lumpy Filling?
Strain the filling through a fine mesh sieve to remove lumps. This ensures a silky-smooth texture every time.
Can I Freeze This Pie?
Yes, but leave off the whipped cream topping until after thawing. Wrap the pie tightly and freeze for up to two months.
What Type of Chocolate Should I Use?
Opt for high-quality dark chocolate with at least 70% cocoa content. It provides the best flavor and richness.
Can I Make This Ahead?
Definitely. Assemble the pie a day in advance, chill it overnight, and add the topping just before serving.
Is Espresso Powder Essential?
No, but it enhances the chocolate flavor without tasting like coffee. If you skip it, the pie will still be delicious.
Why Is My Crust Soggy?
Soggy crust happens if the filling isn’t cooled before adding it. Chill both components separately before assembling.
How Do I Get Clean Slices?
Chill the pie thoroughly, then dip your knife in hot water and wipe it clean between cuts. This trick works wonders.
Can I Use Milk Instead of Cream?
You can, but the texture won’t be as rich. Stick to cream for the best results.
What Can I Serve With This Pie?
Pair it with coffee, tea, or a glass of red wine. Fresh fruit like strawberries or raspberries also complement the flavors beautifully.
Final Thoughts
This Chocolate Cream Pie is more than just a dessert—it’s a labor of love. From the flaky crust to the velvety filling, every bite tells a story. Whether you’re baking for loved ones or treating yourself, this pie promises happiness in every slice. So grab your apron, preheat that oven, and let’s make some memories together—one forkful at a time.
Equipment
- Mixing bowls
- Rolling pin
- 9-inch pie dish
- Whisk
- Saucepan
Ingredients
- 175 g wheat flour (Type 405)
- 1 tablespoon sugar
- 1 teaspoon salt
- 125 g cold butter
- 60–90 ml ice-cold water
- 100 g dark chocolate (70% cocoa content)
- 125 g brown sugar
- 60 g baked cocoa
- 2 tablespoons cornstarch
- 1 teaspoon instant espresso powder
- 1/2 teaspoon salt
- 6 egg yolks (medium size, approx. 100 g)
- 100 g cream
- 500 ml milk
- 30 g cold butter
- 1 tablespoon vanilla extract
- 2 leaves gelatin
- 300 g cream
- 100 g sour cream
- 35 g sugar
- 2 teaspoons vanilla extract
- 1/2 teaspoon salt
- 1 small piece dark chocolate (approx. 10 g)
Instructions
- Mix the flour, sugar, and salt in a large bowl, then cut cold butter into 1 cm cubes and toss them into the dry mix.
- Press each butter cube between fingers to flatten slightly; if too dry, add ice-cold water gradually until it holds together.
- Wrap the dough in plastic wrap and refrigerate for at least 30 minutes.
- In a saucepan, whisk together brown sugar, cocoa, cornstarch, espresso powder, and salt, then stir in egg yolks, cream, and milk over medium heat constantly until thick.
- Remove from heat, stir in chopped chocolate, butter, and vanilla extract until smooth, then pour the filling into the cooled crust.
- Soak gelatin leaves in cold water, then heat with a splash of cream until dissolved.
- Whip the remaining cream, sour cream, sugar, vanilla, and salt until soft peaks form, then fold in gelatin mixture and spread over the filled pie.
- Chill the pie for at least 4 hours before serving.