
Why You’ll Love This Chocolate Ding Dong Cake
Picture this: a rich, velvety chocolate cake that tastes like your favorite childhood treat but with an adult twist. That’s exactly what this Chocolate Ding Dong Cake delivers! When I first made this for my family, it was love at first bite. My kids couldn’t stop raving about the creamy layers, and my husband claimed it was “better than store-bought.” Trust me, once you try this homemade version, you’ll never settle for anything less.
The Sweet Story Behind Chocolate Ding Dong Cake
Chocolate Ding Dongs are those iconic little cakes wrapped in shiny foil that many of us grew up sneaking into our lunchboxes. The original Ding Dong is a soft, round cake filled with marshmallow fluff and coated in chocolate. My version takes all that nostalgic goodness and turns it into a show-stopping dessert. A full-sized cake means there’s plenty to share (or not!) and lets you customize it to your liking. Plus, baking it yourself gives you bragging rights at any gathering!
Why This Recipe Stands Out
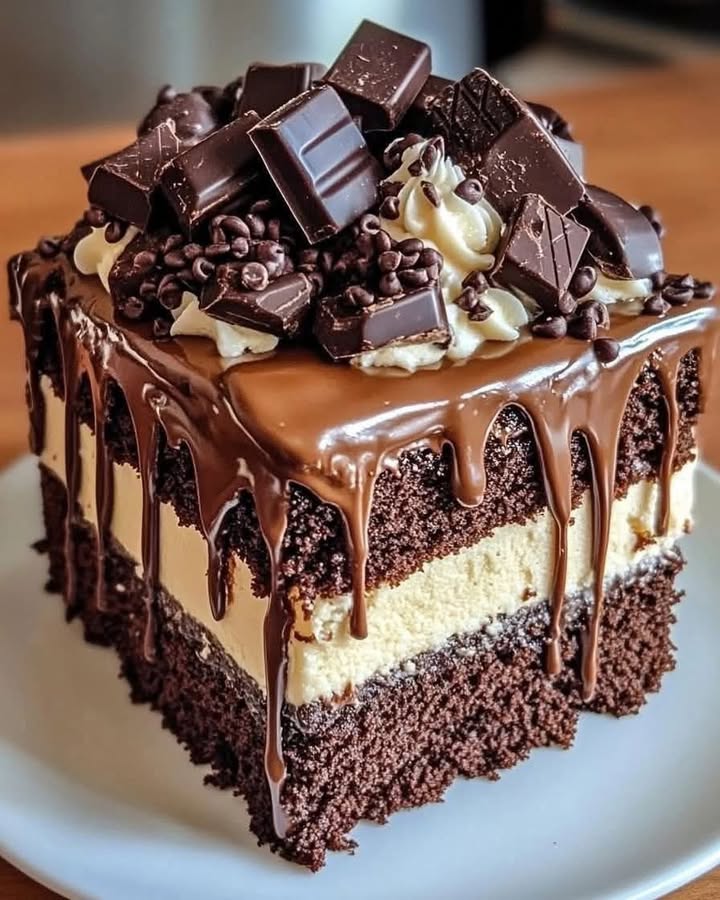
This Chocolate Ding Dong Cake isn’t just another dessert—it’s a flavor bomb! With its moist chocolate layers, gooey marshmallow filling, and silky chocolate ganache topping, every bite feels indulgent yet comforting. Best of all? It’s surprisingly easy to make. Whether you’re a seasoned baker or new to the kitchen, this recipe is foolproof and fun. And did I mention how impressive it looks on the table? Your guests will think you spent hours perfecting it!
When to Serve This Decadent Dessert
A Chocolate Ding Dong Cake is perfect for birthdays, holidays, or even casual get-togethers. It’s also a hit at potlucks because everyone loves something chocolatey. I’ve served it at summer barbecues, Thanksgiving dinners, and Christmas parties—and it’s always gone before the coffee is poured. Honestly, though, you don’t need a special occasion to whip this up. Sometimes, a random Tuesday night calls for a slice of happiness!
What You’ll Need
- 1 box of chocolate cake mix (plus ingredients from the box: eggs, oil, water)
- 1 cup heavy cream
- ½ cup powdered sugar
- 1 tsp vanilla extract
- 1 cup semisweet chocolate chips
- 2 tbsp butter
- 1 cup marshmallow fluff
- 1 tbsp cornstarch
- ¼ cup water
Substitutions You Can Try
If you want to tweak the recipe, here are some ideas:
- Cake Mix: Swap out the boxed mix for a homemade chocolate cake recipe if you’re feeling ambitious.
- Heavy Cream: Coconut cream works as a dairy-free alternative.
- Marshmallow Fluff: Make your own by whipping egg whites, sugar, and corn syrup.
- Chocolate Chips: Use dark or milk chocolate depending on your preference.
Step 1: Preheat and Prepare the Cake
Start by preheating your oven according to the instructions on the cake mix box. Grease a round cake pan generously—I recommend using parchment paper at the bottom for easy release. Mix the cake batter following the package directions, adding eggs, oil, and water until smooth. Pour the batter into the prepared pan and pop it in the oven. As it bakes, your kitchen will fill with the irresistible aroma of warm chocolate. Pro tip: Don’t open the oven door too soon; let the magic happen undisturbed!
Step 2: Cool and Slice the Cake
Once the cake is baked, remove it from the oven and let it cool completely. Patience is key here—rushing can lead to crumbling disasters. Once cooled, carefully slice the cake horizontally into two even layers. If you’re worried about precision, use a serrated knife and gently saw back and forth. This step sets the stage for layering, so take your time.
Step 3: Make the Marshmallow Filling
In a small saucepan, combine marshmallow fluff, cornstarch, and water. Heat over low heat, stirring constantly, until the mixture becomes smooth and slightly thickened. The result should be glossy and spreadable. Let it cool slightly before applying to the cake. Chef’s tip: To avoid lumps, sift the cornstarch before mixing.
Step 4: Whip Up the Cream
In a large bowl, beat the heavy cream, powdered sugar, and vanilla extract until stiff peaks form. This part is pure magic—you’ll see the liquid transform into fluffy clouds right before your eyes. Be careful not to overbeat, though, or you might end up with butter! Spread a generous layer of whipped cream on top of the marshmallow filling for added decadence.
Step 5: Create the Ganache
Melt the chocolate chips and butter together in a microwave-safe bowl or on the stovetop. Stir until silky smooth—this ganache is going to crown your masterpiece. Carefully pour it over the top layer of the cake, letting it cascade down the sides like a chocolate waterfall. Smooth it out with a spatula for that professional finish.
Timing Breakdown
Prep Time: 20 minutes
Cooking Time: 30 minutes
Resting/Cooling Time: 1 hour
Total Time: About 2 hours
Chef’s Secret
To make the ganache extra shiny, add a splash of heavy cream while melting the chocolate and butter. This creates a luxurious sheen that makes the cake look bakery-worthy.
An Interesting Tidbit
Did you know that Ding Dongs were invented in 1967? They were created as a competitor to Hostess Ho Hos but quickly became a fan favorite thanks to their unique round shape and creamy filling. My cake pays homage to these classic treats while giving them a modern upgrade.
Necessary Equipment
- Round cake pan
- Serrated knife
- Mixing bowls
- Electric mixer or whisk
- Saucepan
- Spatula
How to Store Leftovers
If you have leftovers (good luck with that!), store the cake in an airtight container in the refrigerator. The cold temperature helps keep the ganache firm and prevents the whipped cream from deflating. For best results, consume within three days. Bring the cake back to room temperature before serving to enhance the flavors.
Freezing is another option. Wrap individual slices tightly in plastic wrap and then aluminum foil. Thaw overnight in the fridge when ready to enjoy. Just note that the texture of the whipped cream may change slightly after freezing.
Never leave the cake at room temperature for more than two hours, especially during warmer months, to avoid spoilage. Keep it chilled and covered to maintain freshness.
Tips and Advice
- Use high-quality chocolate chips for the ganache—they really do make a difference.
- For a cleaner cut, dip your knife in hot water between slices.
- Add sprinkles or edible flowers for a festive touch.
Presentation Ideas
- Garnish with fresh berries for a pop of color.
- Dust powdered sugar on top for an elegant look.
- Serve slices on pretty dessert plates with a dollop of extra whipped cream.
Healthier Alternatives
Want to lighten things up? Here are six variations:
- Gluten-Free Version: Use gluten-free cake mix and ensure all other ingredients are certified gluten-free.
- Low-Sugar Option: Substitute sugar-free cake mix and stevia-sweetened chocolate chips.
- Vegan Twist: Replace eggs and dairy with plant-based alternatives like flax eggs and almond milk.
- Fruit-Filled Layer: Add a layer of fresh strawberries or raspberries for natural sweetness.
- Coconut Lovers’ Dream: Use coconut cream instead of heavy cream and sprinkle toasted coconut flakes on top.
- Spiced Chocolate: Add a pinch of cinnamon or chili powder to the ganache for a spicy kick.
Mistake 1: Overmixing the Batter
Overmixing the cake batter can lead to a dense, tough cake instead of a light and airy one. This happens because overworking the flour develops gluten, which affects texture. To avoid this, mix just until the ingredients are combined. Pro tip: Stop mixing as soon as you no longer see streaks of dry ingredients.
Mistake 2: Skipping Cooling Time
Rushing through the cooling process is a common mistake. A warm cake can cause the whipped cream and ganache to melt, ruining the layers. Always allow the cake to cool completely before assembling. Set a timer if you tend to forget!
Mistake 3: Uneven Layers
Cutting uneven layers can make the cake look messy and affect the balance of flavors. Use a ruler or toothpicks to mark the halfway point around the cake before slicing. Practice makes perfect, so don’t worry if it’s not flawless the first time.
Mistake 4: Burning the Ganache
Burning the ganache happens when you heat it too long or at too high a temperature. Melt the chocolate and butter slowly, stirring frequently. If it scorches, start over—it’s worth it for that silky finish.
Frequently Asked Questions
Can I use a different type of cake?
Absolutely! While chocolate is traditional, you could experiment with vanilla or red velvet cake for a fun twist. Just keep in mind that the flavor profile will change slightly.
Is this recipe kid-friendly?
Yes! Kids love helping with tasks like mixing the batter and spreading the ganache. Plus, they’ll enjoy eating the finished product even more.
Can I freeze the cake?
You sure can! Wrap individual slices tightly and freeze for up to three months. Thaw in the fridge before serving.
What if I don’t have cornstarch?
In a pinch, you can substitute arrowroot powder or omit it entirely, though the filling may be slightly thinner.
How far in advance can I make this?
You can assemble the cake a day ahead and refrigerate it. Just add the ganache closer to serving time to keep it looking fresh.
Why did my whipped cream deflate?
This often happens if the cream is overbeaten or exposed to heat. Chill your bowl and beaters beforehand and watch closely as you whip.
Can I double the recipe?
Definitely! Doubling the recipe works well if you’re feeding a larger crowd. Just adjust your pan sizes accordingly.
What’s the best way to transport the cake?
Place the cake in a sturdy carrier or box and secure it with non-slip mats. Avoid tilting or jostling during transit to prevent damage.
Do I need a stand mixer?
Nope! A hand mixer or even a whisk will work fine, though a stand mixer saves effort.
Can I decorate the cake?
Of course! Get creative with sprinkles, chocolate shavings, or piped designs. Have fun making it your own!
Final Thoughts
This Chocolate Ding Dong Cake is everything you want in a dessert: rich, creamy, and utterly irresistible. Whether you’re baking it for a special occasion or simply treating yourself, it’s bound to become a family favorite. So grab your apron, gather your ingredients, and get ready to create a dessert that’s as delightful to make as it is to eat. Happy baking!
Equipment
- Round cake pan
- Serrated knife
- Mixing bowls
- Electric mixer or whisk
- Saucepan
- Spatula
Ingredients
- 1 box chocolate cake mix
- 1 cup heavy cream
- ½ cup powdered sugar
- 1 tsp vanilla extract
- 1 cup semisweet chocolate chips
- 2 tbsp butter
- 1 cup marshmallow fluff
- 1 tbsp cornstarch
- ¼ cup water
Instructions
- Preheat your oven according to the instructions on the cake mix box and grease a round cake pan.
- Mix the cake batter following the package directions, then pour it into the prepared pan and bake.
- Once baked, let the cake cool completely before slicing it horizontally into two even layers.
- In a saucepan, combine marshmallow fluff, cornstarch, and water, heating until smooth and slightly thickened; then let it cool.
- Whip the heavy cream with powdered sugar and vanilla extract until stiff peaks form.
- Melt the chocolate chips and butter together until smooth to create ganache.
- Assembly: spread the marshmallow filling on the bottom layer, top with whipped cream, place the second layer on top, and pour ganache over.