
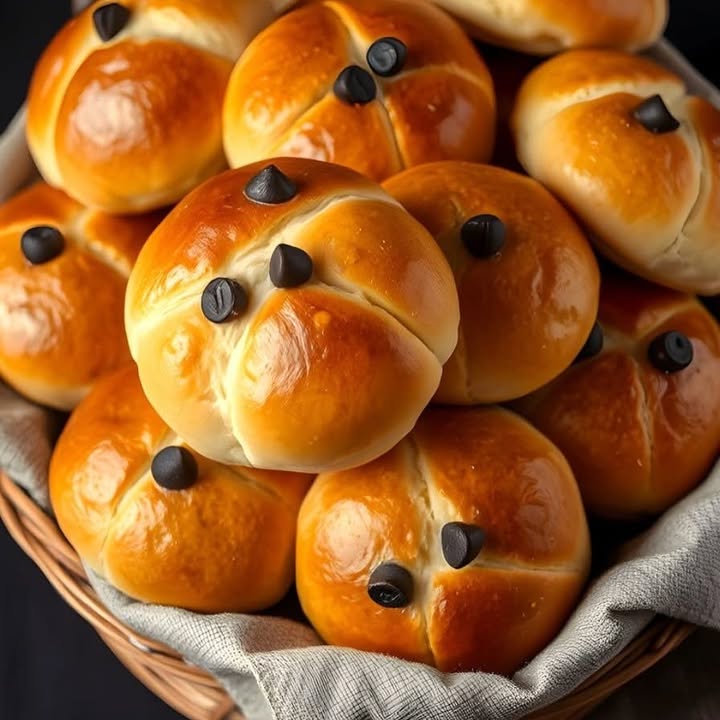
Chocolate Milk Rolls: A Treat That Brings Smiles
There’s something magical about the smell of freshly baked bread. Add chocolate to the mix, and you’ve got a recipe for pure happiness. I first tried making these Chocolate Milk Rolls on a rainy Sunday afternoon when my kids were craving something sweet but homemade. The result? A batch of soft, gooey rolls that disappeared faster than I could snap a picture. These rolls are not just a treat; they’re a hug in edible form.
A Little History Behind Chocolate Milk Rolls
While I can’t pinpoint the exact origin of these rolls, they remind me of the sweet breads popular in many cultures. Think of Mexican conchas, Swiss brioche, or even American cinnamon rolls. What sets Chocolate Milk Rolls apart is their simplicity and the surprise of melty chocolate inside. It’s like a warm mug of hot chocolate wrapped in pillowy dough. Over time, I’ve tweaked this recipe to make it foolproof for home cooks—no fancy tools or skills required!
Why You’ll Love This Recipe
These rolls are perfect for anyone who loves baking (or eating). They’re soft, slightly sweet, and packed with gooey chocolate. Plus, the recipe is easy enough for beginners yet impressive enough to wow guests. Whether you’re baking with kids or looking for a cozy snack, these rolls check all the boxes.
Perfect Occasions to Bake Chocolate Milk Rolls
From lazy weekend mornings to holiday gatherings, these rolls fit any occasion. Serve them at brunch alongside coffee or tea, pack them for picnics, or gift them to friends during the holidays. They’re also a hit at birthday parties or as an after-school treat. Honestly, you don’t need a special reason—any day is a good day for Chocolate Milk Rolls.
Ingredients
Here’s what you’ll need to make these delightful rolls:
For the Dough:
- 500 g of wheat flour
- 7 g dry yeast or 20 g fresh yeast
- 250 ml of warm milk
- 50 g granulated sugar
- 1 egg
- 60 g of melted butter
- 1/2 teaspoon salt
For the Filling and Decoration:
- 1/2 cup chocolate chips
- 1 beaten egg to varnish
Substitution Options
No need to stress if you’re missing an ingredient. Here are some swaps:
- Flour: Use bread flour for extra chewiness, or try whole wheat flour for a nuttier flavor.
- Milk: Any plant-based milk works if you’re dairy-free.
- Butter: Substitute with coconut oil or margarine.
- Chocolate chips: Swap with chopped dark or milk chocolate bars.
Step 1: Activate the Yeast
Let’s start by waking up our yeast. In a small bowl, mix the yeast with 2 tablespoons of warm milk and a teaspoon of sugar. Let it sit for about 10 minutes until it gets foamy. This step is crucial because it ensures your dough will rise properly. Pro tip: Make sure the milk isn’t too hot, or it might kill the yeast. Think baby-bottle warm, not scalding.
Step 2: Prepare the Dough
In a large mixing bowl, combine the flour, sugar, and salt. Add the activated yeast mixture, egg, melted butter, and remaining milk. Knead the dough for about 10 minutes by hand or 5 minutes using a stand mixer. You’ll know it’s ready when the dough feels smooth and elastic, almost like a soft pillow. If it’s too sticky, sprinkle in a bit more flour—but don’t overdo it!
Step 3: First Rest
Shape the dough into a ball and place it in a lightly greased bowl. Cover it with a clean kitchen towel and let it rest in a warm spot for 1-2 hours. During this time, the dough will double in size, puffing up like a happy cloud. Patience is key here—rushing this step will result in flat rolls.
Step 4: Form the Buns
Once the dough has risen, divide it into portions of about 50 g each. Flatten each piece slightly, add a few chocolate chips in the center, then seal the edges tightly. Roll them into neat balls and place them on a baking tray lined with parchment paper. Imagine tucking little treasures of chocolate into each roll—it’s like hiding Easter eggs!
Step 5: Second Rest
Cover the shaped buns with a cloth and let them rest again for 30-40 minutes. They’ll puff up a bit more, getting ready for their big debut in the oven. While waiting, preheat your oven to 180°C (350°F). This resting period helps the rolls bake evenly and stay light and airy.
Step 6: Varnish and Bake
Brush the tops of the buns with beaten egg for that gorgeous golden sheen. Pop them into the oven and bake for 15-20 minutes. Keep an eye on them—they’re done when they’re golden brown and smell amazing. Your kitchen will be filled with the aroma of warm bread and chocolate, which is basically heaven in itself.
Step 7: Decorate and Serve
Let the rolls cool slightly before serving. If you’re feeling fancy, sprinkle a few extra chocolate chips on top while they’re still warm. Pair them with a glass of cold milk or a steaming cup of coffee. Trust me, these Chocolate Milk Rolls are best enjoyed fresh out of the oven.
Chef’s Tip
To take your rolls to the next level, toast them lightly before serving. The warmth brings out the chocolate’s richness, making every bite irresistible.
Timing
This recipe takes about 3 hours total, including prep, resting, and baking. Here’s the breakdown:
- Prep time: 30 minutes
- Resting time: 2 hours
- Baking time: 15-20 minutes
Extra Info
Did you know that yeast has been used in baking for thousands of years? Ancient Egyptians discovered its magic accidentally when they left dough out too long. Lucky for us, we now have precise measurements to create delicious treats like these Chocolate Milk Rolls!
Necessary Equipment
You don’t need much to whip up these rolls:
- A large mixing bowl
- A stand mixer or strong hands for kneading
- A baking tray and parchment paper
- A pastry brush for the egg wash
Storage
If you somehow manage to have leftovers, store them in an airtight container at room temperature for up to 2 days. For longer storage, freeze the rolls individually wrapped in plastic wrap. To reheat, pop them in the microwave for 10-15 seconds or warm them in the oven for a few minutes.
Frozen rolls are perfect for busy mornings. Just grab one, defrost, and enjoy with your favorite drink. No one will guess they weren’t freshly baked!
Pro tip: Never refrigerate bread—it dries it out faster. Stick to room temp or freezing for optimal freshness.
Tips and Advice
Want to make the best Chocolate Milk Rolls ever? Here are some tips:
- Knead thoroughly to develop gluten for a soft texture.
- Use high-quality chocolate for maximum flavor.
- Don’t skip the resting periods—they’re essential for fluffy rolls.
Presentation Tips
Make your rolls look Instagram-worthy by arranging them on a rustic wooden board. Dust with powdered sugar or drizzle with melted chocolate for extra flair. Tie a ribbon around the plate if you’re gifting them—it adds a personal touch.
Healthier Alternative Recipes
Looking to tweak the recipe? Try these variations:
- Whole Wheat Version: Replace half the flour with whole wheat for added fiber.
- Vegan Rolls: Use plant-based milk, vegan butter, and flaxseed “eggs.”
- Low-Sugar Option: Reduce the sugar and use dark chocolate chips with higher cocoa content.
- Gluten-Free Rolls: Experiment with gluten-free flour blends.
- Fruit-Filled Rolls: Swap chocolate for dried fruits like raisins or cranberries.
- Spiced Rolls: Add cinnamon or nutmeg for a festive twist.
Mistake 1: Using Cold Milk
Cold milk won’t activate the yeast properly, leading to flat rolls. Always use warm milk, around 110°F (43°C), to wake up the yeast. Pro tip: Test the temperature with your finger—it should feel comfortably warm.
Mistake 2: Overloading the Filling
Too many chocolate chips can burst out during baking, creating a mess. Stick to a teaspoon per roll for perfectly balanced bites. Less is more here!
Mistake 3: Skipping the Resting Time
Rushing the resting periods results in dense, tough rolls. Be patient—the dough needs time to rise and relax. Set a timer and enjoy the process.
FAQ
Can I use instant yeast instead of active dry yeast?
Yes, you can! Instant yeast doesn’t require activation, so you can mix it directly with the dry ingredients. Just ensure it’s fresh for the best results.
How do I know when the dough has risen enough?
The dough should double in size and feel light and airy. Gently press it with your finger—if the indentation stays, it’s ready to go.
Can I prepare the dough ahead of time?
Absolutely! You can refrigerate the dough overnight after the first rise. Just let it come to room temperature before shaping and baking.
What if my rolls turn out too brown?
Overbaking happens easily. Next time, reduce the oven temperature slightly or cover the rolls loosely with foil halfway through baking.
Can I freeze unbaked rolls?
Yes! Freeze the shaped rolls on a tray, then transfer them to a bag. When ready to bake, let them thaw and rise before popping them in the oven.
How can I make the rolls sweeter?
Increase the sugar in the dough or brush the baked rolls with a simple syrup made from equal parts water and sugar.
Do I have to use chocolate chips?
Nope! Feel free to experiment with chopped nuts, jam, or even caramel sauce for variety.
Why does my dough feel sticky?
Sticky dough often means too much liquid. Add flour a tablespoon at a time until the dough feels manageable but still soft.
Can I use self-rising flour?
Self-rising flour contains baking powder, not yeast, so it won’t work here. Stick to regular or bread flour for best results.
How do I prevent the rolls from sticking to the tray?
Always line your baking tray with parchment paper or grease it well. Nonstick spray works wonders too.
Final Thoughts
These Chocolate Milk Rolls are more than just a recipe—they’re a way to bring joy to your table. Whether you’re baking for family, friends, or yourself, these rolls promise smiles and satisfied tummies. So grab your apron, gather your ingredients, and let the magic begin. Happy baking!
Equipment
- Large mixing bowl
- Stand mixer or strong hands for kneading
- Baking tray
- Parchment paper
- Pastry brush
Ingredients
- 500 g wheat flour
- 7 g dry yeast or 20 g fresh yeast
- 250 ml warm milk
- 50 g granulated sugar
- 1 egg
- 60 g melted butter
- 1/2 teaspoon salt
- 1/2 cup chocolate chips
- 1 beaten egg for varnish
Instructions
- In a small bowl, mix the yeast with 2 tablespoons of warm milk and a teaspoon of sugar, and let it sit for about 10 minutes until foamy.
- In a large mixing bowl, combine the flour, sugar, and salt. Add the activated yeast mixture, egg, melted butter, and remaining milk. Knead for about 10 minutes by hand or 5 minutes with a stand mixer.
- Shape the dough into a ball and place it in a lightly greased bowl. Cover with a kitchen towel and let it rest in a warm spot for 1-2 hours.
- Divide the risen dough into portions of about 50 g each, flatten them slightly, add chocolate chips in the center, then seal tightly and shape into balls.
- Cover the shaped buns with a cloth and let them rest for 30-40 minutes while preheating your oven to 180°C (350°F).
- Brush the tops with beaten egg for a shiny finish, then bake in the oven for 15-20 minutes until golden brown.
- Let the rolls cool slightly before serving, optionally sprinkling extra chocolate chips on top.