
Chocolate Pie Crust: A Must-Try for Dessert Lovers
There’s something special about a rich, chocolatey pie crust. It takes any dessert to the next level. This recipe is my favorite when I want to impress. I’ve made it tons of times, and it always works.
The Story Behind the Chocolate Pie Crust
I first made this crust years ago for a holiday party. Everyone loved how well it paired with creamy fillings. The cocoa flavor adds elegance without being overpowering. Over time, I’ve used it for both sweet and savory dishes.
Why You’ll Love This Chocolate Pie Crust Recipe
This crust is simple but decadent. Cocoa powder gives it bold chocolate flavor, and it’s easy to make. Plus, it works with almost any filling—sweet or savory.
Perfect Occasions for Chocolate Pie Crust
Serve this crust at dinner parties, birthdays, or cozy nights in. It’s great for holidays like Valentine’s Day or Christmas too. Use it anytime you want to add a touch of luxury.
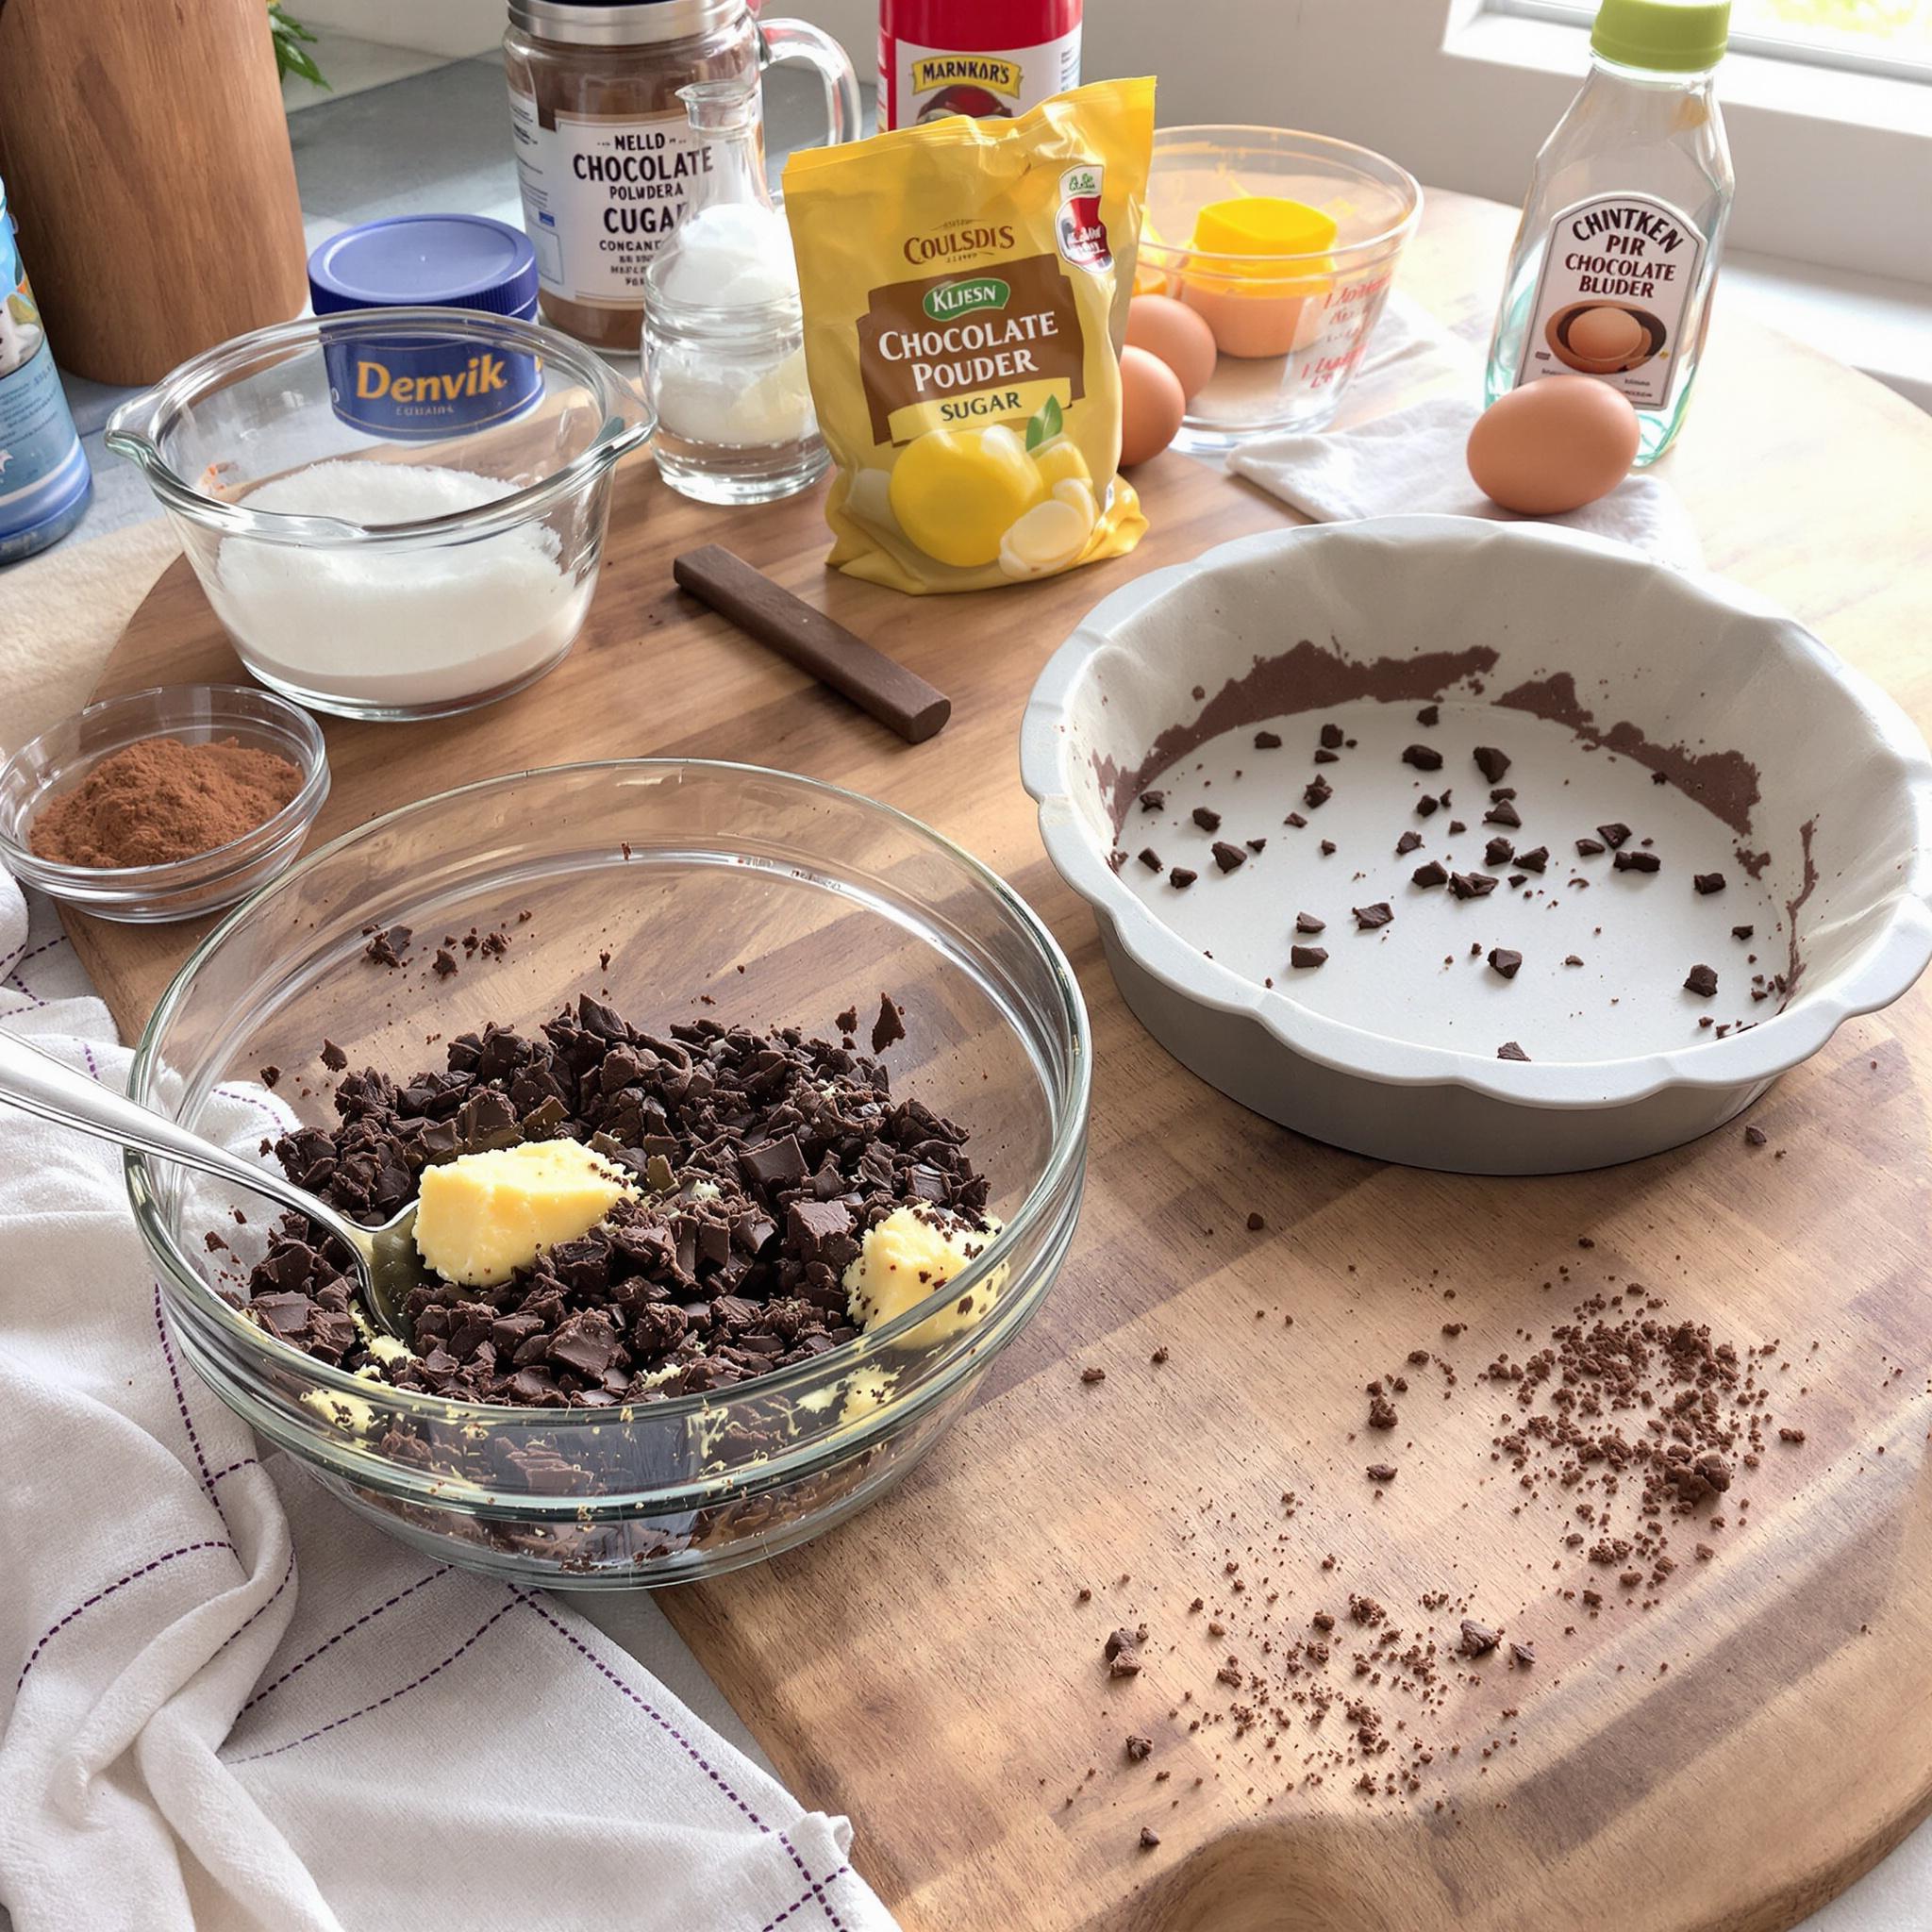
Ingredients for Chocolate Pie Crust
- 1 cup unsweetened cocoa powder
- 1 ½ cups all-purpose flour
- ¼ cup granulated sugar
- ½ tsp salt
- ½ cup unsalted butter, cold and cubed
- 4-5 tbsp ice water
Substitution Options
- Use gluten-free flour instead of regular flour.
- Swap coconut sugar for granulated sugar.
- Replace butter with vegan margarine for a dairy-free option.
Step 1: Mixing the Dry Ingredients
In a big bowl, whisk together cocoa powder, flour, sugar, and salt. The dark cocoa looks great against the lighter flour. Mix well so every bite tastes balanced.
Step 2: Cutting in the Butter
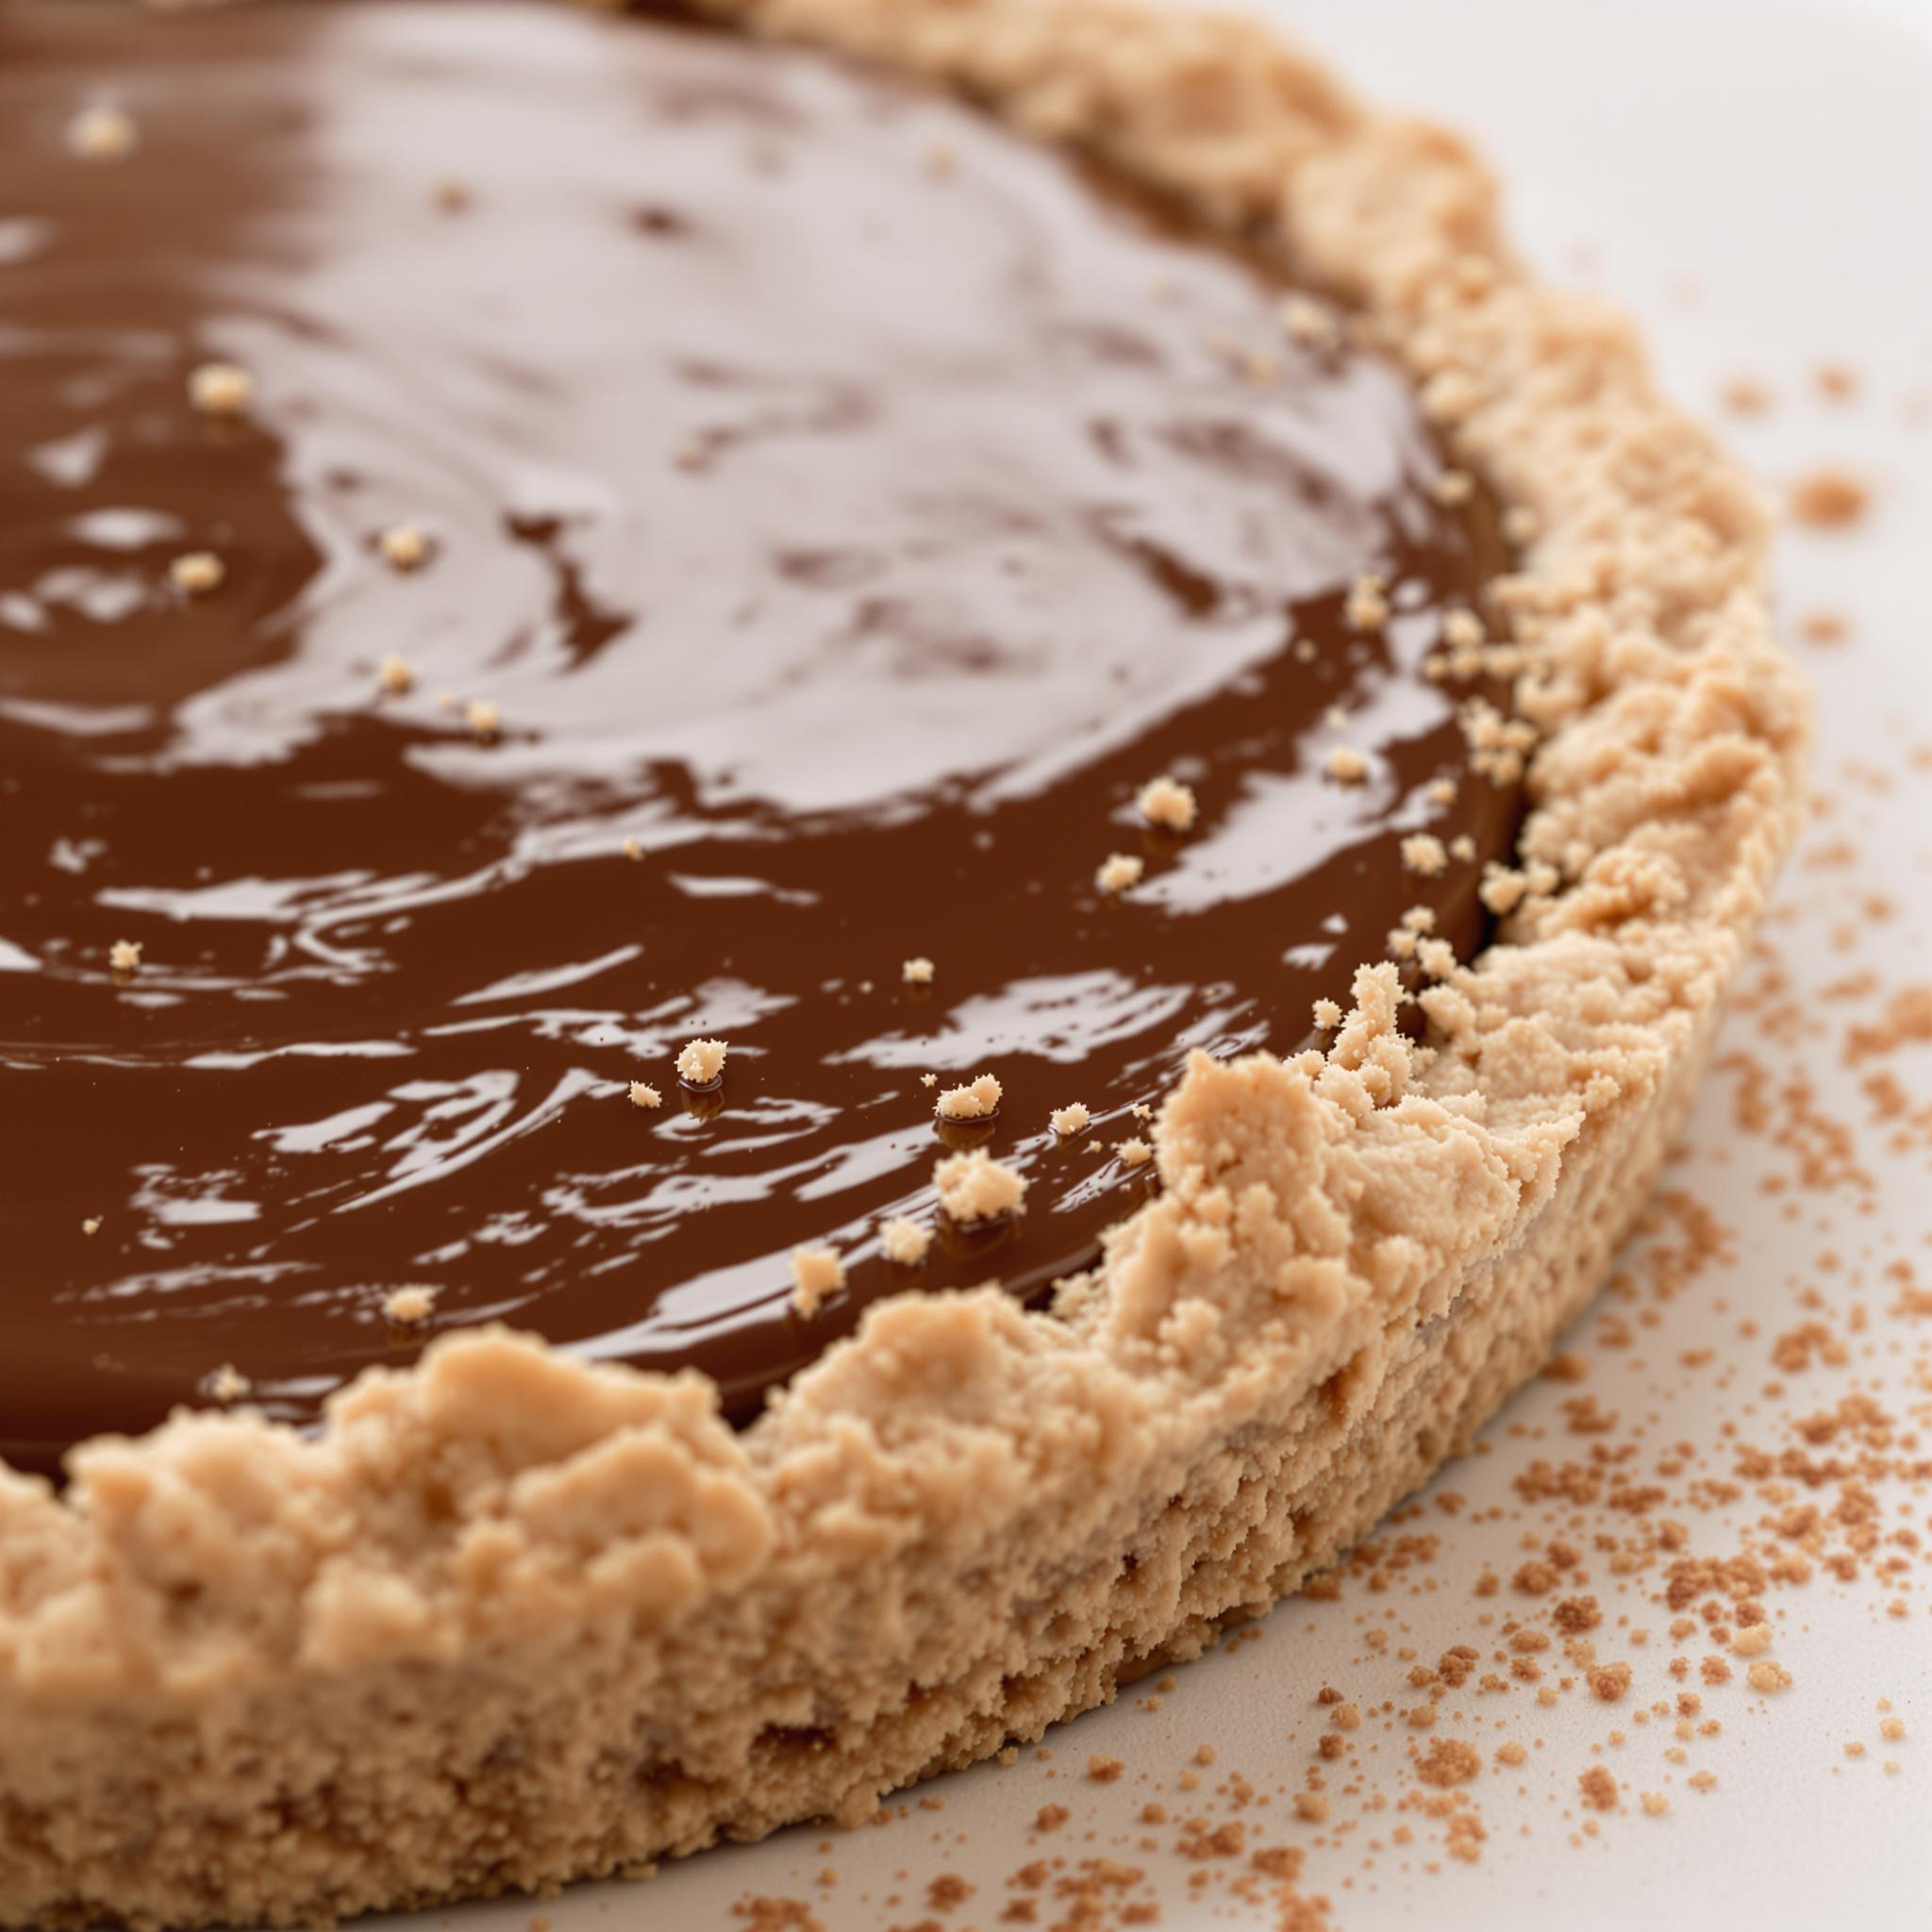
Cut cold butter into cubes and mix it into the dry ingredients. Use a pastry cutter or your fingers. Aim for a crumbly texture—it should look like coarse sand. This makes the crust flaky. Keep the butter cold for best results!
Step 3: Adding Ice Water
Add ice water one tablespoon at a time. Mix gently until the dough comes together. Don’t overwork it; just enough to hold its shape. Too much water makes the crust tough.
Step 4: Chilling the Dough
Shape the dough into a disc, wrap it in plastic wrap, and chill for 30 minutes. Resting firms up the butter and relaxes the gluten. This keeps the crust tender. Patience pays off here!
Step 5: Rolling and Baking
Roll out the chilled dough on a lightly floured surface. Transfer it to your pie pan and press gently. Trim the edges and bake as directed. The smell of chocolate baking is amazing.
Chef’s Tip
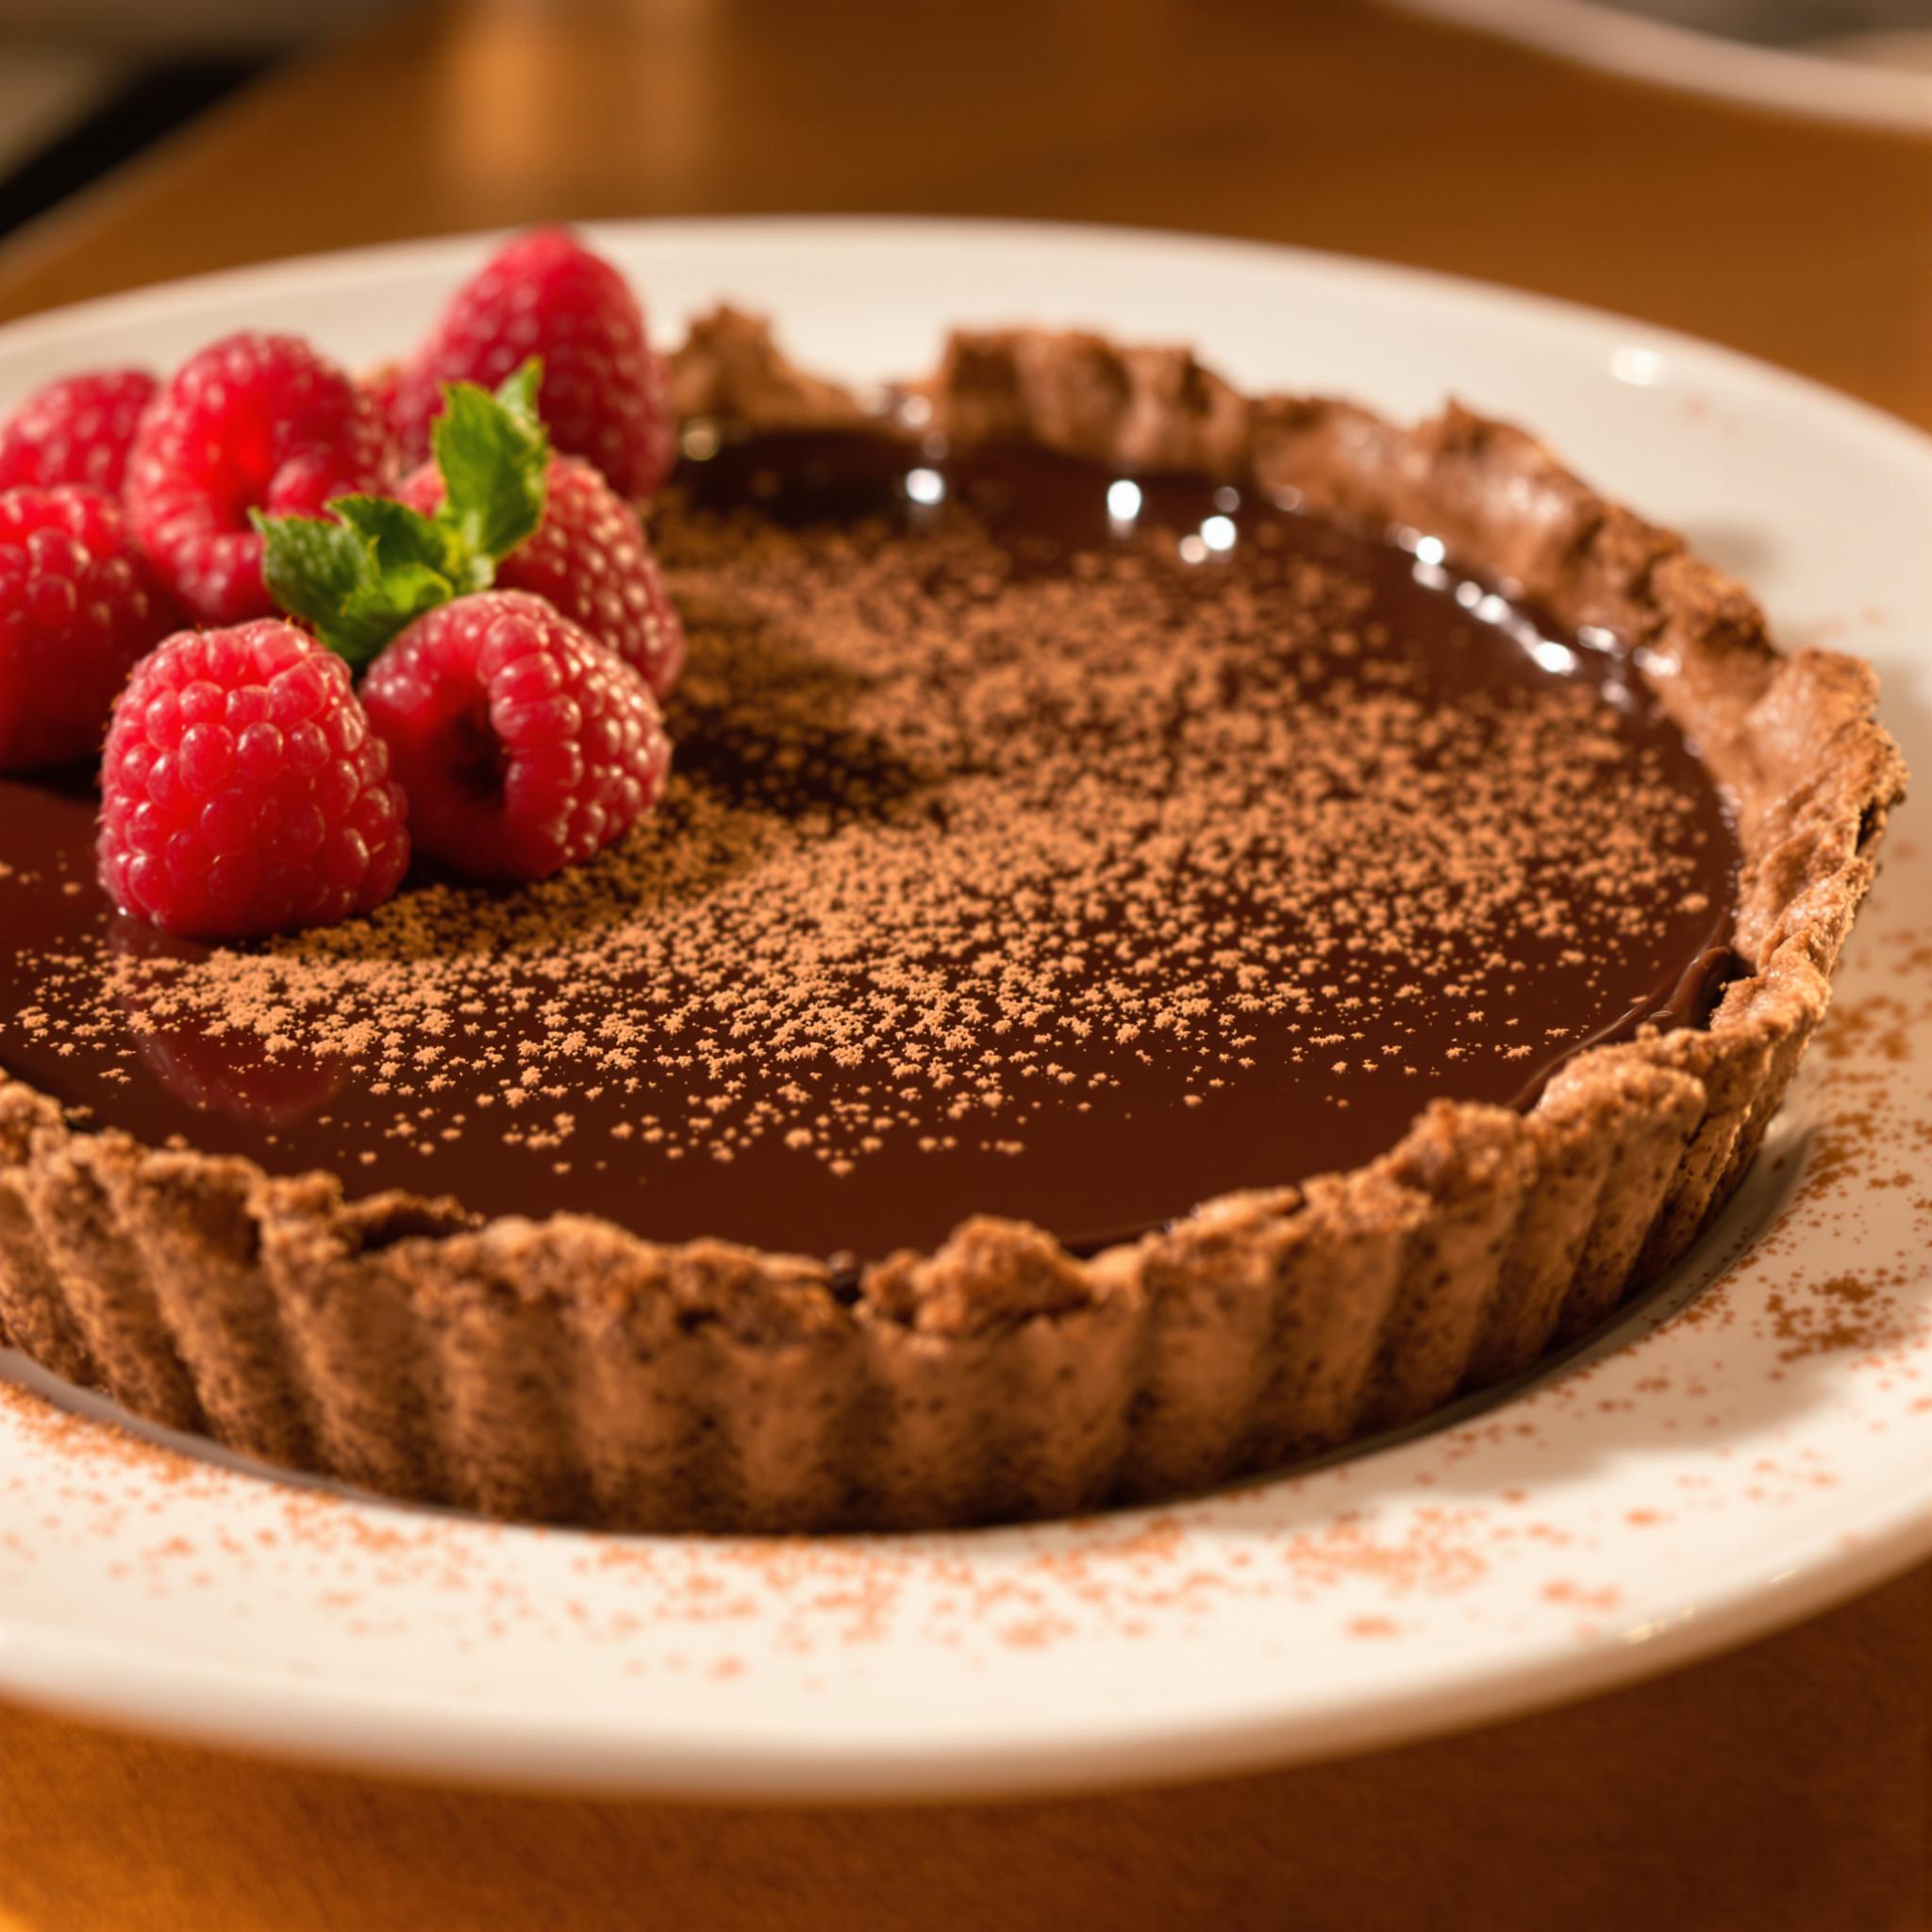
For an extra-rich crust, brush the baked shell with melted chocolate before adding the filling. It locks in moisture and boosts flavor.
Time Breakdown
- Prep Time: 15 minutes
- Chilling Time: 30 minutes
- Baking Time: Varies by pie recipe
- Total Time: ~45 minutes (plus baking)
Nutritional Information
Per serving (without filling): Calories: 180 | Protein: 3g | Fat: 9g | Carbs: 22g
Extra Information
Did you know cocoa powder has antioxidants? Using unsweetened cocoa keeps the crust rich without added sugar.
Necessary Tools
- Large mixing bowl
- Pastry cutter or fork
- Rolling pin
- Pie pan
- Plastic wrap
Storage Instructions
Store leftover crust in an airtight container at room temperature for up to two days. For longer storage, freeze unbaked dough wrapped tightly in plastic wrap. Thaw overnight in the fridge before rolling.
If filled, refrigerate within two hours. Most pies stay fresh for 3-4 days. Always cover them to prevent drying out.
Frozen pies can last up to three months. Reheat slices briefly in the oven for a warm treat.
Tips and Tricks
- Use a light hand when mixing to avoid tough dough.
- Chill the bowl and utensils beforehand for extra-cold dough.
- Dust your rolling pin with cocoa powder instead of flour for a richer taste.
Serving Suggestions
- Pair with creamy chocolate mousse for double indulgence.
- Fill with fresh berries and whipped cream for a refreshing twist.
Healthier Alternatives for Chocolate Pie Crust
Here are six ways to lighten up this classic:
- Whole Wheat Flour: Swap half the flour with whole wheat for more fiber.
- Coconut Oil: Replace butter with solid coconut oil for a plant-based option.
- Low-Sugar Version: Cut the sugar in half or omit entirely if the filling is sweet.
- Almond Flour: Use almond flour for a gluten-free, nutty crust.
- Oat Flour: Blend oats into flour for a hearty, wholesome base.
- No Sugar Added: Skip sugar altogether for savory applications like quiche.
Common Mistakes to Avoid
Mistake 1: Overworking the Dough
Overmixing makes the crust tough. Handle the dough as little as possible. Stop once it holds together. Pro tip: Chill the dough again if it gets sticky.
Mistake 2: Skipping the Chill Time
Skipping chilling leads to shrinkage during baking. Always let the dough rest. Thirty minutes is the minimum; longer is better.
Mistake 3: Adding Too Much Water
Too much water creates a soggy crust. Add ice water sparingly—one tablespoon at a time—and stop when the dough clumps.
Frequently Asked Questions
Can I use Dutch-process cocoa?
Yes! Dutch-process cocoa gives a deeper flavor but may slightly alter the texture. Adjust flour by 1-2 tablespoons if needed.
What fillings pair well with this crust?
This crust works great with creamy fillings like chocolate mousse, custard, or cheesecake. Try fruity options like cherry or raspberry too.
How do I prevent cracks in the dough?
Knead the dough gently before chilling. If cracks form, patch them with extra dough scraps and smooth with your fingers.
Can I make this ahead of time?
Absolutely! Wrap the dough tightly and freeze for up to three months. Thaw in the fridge overnight before rolling.
Why does my crust taste bitter?
Check your cocoa powder. Unsweetened varieties can be strong. Balance bitterness by pairing with sweeter fillings.
Do I need to pre-bake the crust?
Yes, for most recipes. Pre-baking ensures the crust stays crisp under wet fillings like pudding or custard.
What size pie pan works best?
A standard 9-inch pie pan fits perfectly. Adjust thickness if using a larger or smaller pan.
Can I skip the sugar?
Yes, especially for savory pies. Omitting sugar enhances the cocoa’s natural bitterness.
How do I know when the crust is done?
The crust should look set and slightly darker around the edges. It won’t brown much due to the cocoa.
Is this crust gluten-free?
Not originally, but substituting gluten-free flour makes it suitable for gluten-free diets.
Conclusion
The Chocolate Pie Crust is a versatile, delicious base for countless desserts. Whether you’re baking for others or treating yourself, this recipe works every time. Experiment with flavors and fillings—it’s truly a winner!
Equipment
- Large mixing bowl
- Pastry cutter
- Rolling pin
- Pie pan
- Plastic wrap
Ingredients
- 1 cup unsweetened cocoa powder
- 1.5 cups all-purpose flour
- 0.25 cup granulated sugar
- 0.5 tsp salt
- 0.5 cup unsalted butter cold and cubed
- 4-5 tbsp ice water
Instructions
- In a large bowl, whisk together cocoa powder, flour, sugar, and salt.
- Cut the cold butter into small cubes and work it into the dry mix using a pastry cutter or your fingers.
- Gradually pour in the ice water, one tablespoon at a time, mixing gently until the dough starts coming together.
- Shape the dough into a disc, wrap it tightly in plastic wrap, and chill for at least 30 minutes.
- Roll out the chilled dough on a lightly floured surface. Transfer it to your pie pan and trim excess edges.
- Bake according to your specific pie recipe.