
A Festive Cheesecake That Tastes Like a Holiday Hug

There’s something magical about the smell of orange zest mingling with sweet, tart cranberries. It fills my kitchen with the spirit of the season. This Cranberry Orange Cheesecake is my favorite way to capture that magic in a dessert. It’s a creamy, dreamy slice of joy that always gets applause from my family. Last year, my niece declared it “the best thing she ever ate,” and I think I agree!
The Story Behind This Cranberry Orange Delight
I first dreamed up this cheesecake when I found myself with extra cranberries after Thanksgiving. I love classic cheesecake, but I wanted something brighter. Orange and cranberry are a classic pair, like in cranberry sauce or mulled drinks. I thought, “Why not put them in a cheesecake?” The first try was a winner! The creamy filling gets a sunny lift from fresh orange zest. The topping bursts with tart cranberry flavor. It’s a modern twist on a beloved traditional dessert. Every bite feels both familiar and excitingly new.
Why You’ll Fall in Love With This Recipe
You’ll adore this Cranberry Orange Cheesecake for so many reasons!
- The Flavor: It’s the perfect balance. Sweet, creamy cheesecake meets zesty orange and tangy cranberry.
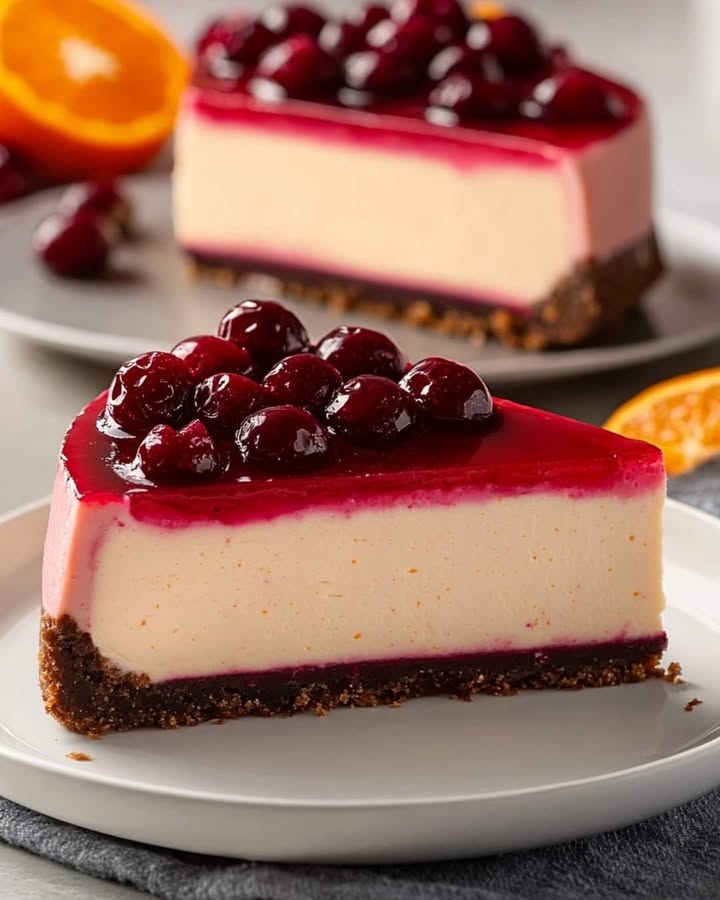
- It’s Impressive: This dessert looks stunning on a table. The vibrant red topping is a showstopper.
- Not Too Hard: If you follow the steps closely, especially the water bath, you’ll get a perfect, crack-free cheesecake.
- It Makes You Happy: Honestly, making (and eating) this feels like a celebration. It’s pure comfort food with a festive spark.
Perfect Occasions for Your Cranberry Orange Delight
This isn’t just a holiday dessert! It’s perfect for:
- Christmas and Thanksgiving Gatherings: It embodies the flavors of the season.
- Potluck Parties: It travels well and everyone asks for the recipe.
- Birthday Celebrations: For someone who loves citrus and tart flavors.
- Just a Special Sunday: Sometimes, you need a fancy dessert to make a regular day feel extraordinary.
What You’ll Need: Ingredients List
Gather these simple ingredients for your Cranberry Orange Cheesecake masterpiece.
For the Crust:
- 1 1/2 cups graham cracker crumbs
- 1/4 cup unsalted butter, melted
- 1/4 cup granulated sugar
For the Cheesecake Filling:
- 24 oz (680g) cream cheese, softened
- 3/4 cup granulated sugar
- 3 large eggs, at room temperature
- 1 teaspoon vanilla extract
- Zest of 1 orange
For the Cranberry Topping:
- 2 cups fresh or frozen cranberries
- 1/2 cup orange juice (freshly squeezed is best!)
- 1/2 cup granulated sugar
- Zest of 1 orange
Smart Swaps: Substitution Options
Don’t worry if you’re missing something! Here are easy swaps:
- Graham Cracker Crust: Use digestive biscuits or shortbread cookie crumbs instead.
- Fresh Cranberries: Frozen work perfectly. No need to thaw them first.
- Orange Juice: If you don’t have fresh, a good quality bottled juice is fine.
- Springform Pan: If you don’t have one, a deep 9-inch cake pan will work. You’ll just serve slices from the pan.
Let’s Make This Cranberry Orange Delight!
Follow these steps for a flawless cheesecake. Read them carefully before you start.
Step 1: Prep Your Oven and Pan
Start by turning your oven to 325°F (160°C). This lower temperature is key for a gentle, even bake. Take your 9-inch springform pan and wrap the outside bottom and sides tightly with aluminum foil. This makes a waterproof shield for the water bath. Trust me, a leaky pan in a water bath is a sad mess to clean up!
Step 2: Create the Buttery Crust
In a bowl, mix the graham cracker crumbs, melted butter, and sugar. Stir until every crumb is shiny and coated. It should feel like wet sand. Press this mixture firmly into the bottom of your foil-wrapped pan. Use the bottom of a cup to get it really flat and even. Bake this crust for 10 minutes. This short bake helps it set so it doesn’t get soggy later. Let it cool on a rack.
Step 3: Mix the Sunny Cheesecake Filling
In a large bowl, beat the softened cream cheese with an electric mixer. Beat it until it’s completely smooth and has no lumps. Add the sugar and beat again until it’s fully combined. Now, add the eggs one at a time. Mix well after each egg before adding the next. Finally, mix in the vanilla and that beautiful, fragrant orange zest. Pro tip: Stop mixing as soon as it’s smooth. Overmixing can add too much air and cause cracks. Pour this creamy, orange-scented filling over your cooled crust.
Step 4: Bake It With a Water Bath
Place your springform pan into a larger roasting pan. Pour hot water into the roasting pan until it comes about halfway up the sides of the cheesecake pan. This water bath is your secret weapon! It creates a steamy environment that cooks the cheesecake gently. This prevents cracking and gives you that ultra-smooth texture. Bake for 50-60 minutes. The edges will look set, but the center will still have a slight jiggle. Turn off the oven. Leave the cheesecake inside with the door cracked open for one hour. This slow cooling is another crack-prevention step.
Step 5: Cook the Gorgeous Cranberry Topping
While the cheesecake cools in the oven, make the topping. In a saucepan, combine cranberries, orange juice, sugar, and orange zest. Cook over medium heat. You’ll hear the cranberries start to pop and sizzle! Stir occasionally. The mixture will thicken into a lovely, glossy sauce in about 10-15 minutes. Let it cool for a bit so it’s not super hot when you put it on the cheesecake.
Step 6: Assemble and Let It Set
Carefully spoon the cranberry topping over the cooled cheesecake. Spread it evenly with a spatula. Now, patience is key! Refrigerate the cheesecake for at least 4 hours. For the best texture, I always let it chill overnight. This long rest lets everything firm up perfectly.
Step 7: Serve Your Beautiful Creation
To serve, run a thin knife around the edge of the pan to loosen it. Unlock and remove the springform ring. Slice with a clean, sharp knife wiped between cuts for neat pieces. Each slice will have that creamy layer, the crunchy crust, and the bright red topping. It’s a masterpiece!
Chef’s Tip: For super clean slices, dip your knife in hot water and wipe it dry before each cut.
Timeline for Your Cranberry Orange Cheesecake
Plan your time wisely for this dessert.
- Prep Time: 30 minutes (crust, filling, topping prep)
- Cook Time: 55 minutes (10 mins for crust, 45-55 mins for cheesecake)
- Cooling Time: 1 hour (in the oven after baking)
- Chilling Time: At least 4 hours, best overnight
- Total Time: About 6 hours 25 minutes (including minimum chill)
My Secret for the Ultimate Cranberry Orange Delight
My best trick is for the orange zest. Don’t just zest it into the bowl! Use a microplane zester and zest the orange directly over the cream cheese mixture. This captures all the bright, volatile oils from the zest. Those oils carry the most intense flavor. It makes the orange taste fresher and more vibrant in the final cheesecake.
A Little Extra Cranberry Knowledge
Cranberries are amazing! They’re one of the few fruits native to North America. They bounce when they’re fresh because they have air pockets inside. That’s how growers test them for freshness. Their natural tartness is what makes them pair so beautifully with sweet things like cheesecake and sugar. They bring a lively punch that balances richness perfectly.
Tools You’ll Need
You don’t need fancy gear. Just these basics:
- 9-inch springform pan
- Aluminum foil
- Large roasting pan (for water bath)
- Electric mixer (hand or stand)
- Medium saucepan
- Mixing bowls, spatula, measuring cups
- Microplane or fine zester (for the orange)
How to Store Your Leftover Cheesecake
Cover the cheesecake tightly with plastic wrap or store it in an airtight container. Keep it in the refrigerator. It will stay fresh and delicious for up to 5 days. The flavors actually meld and get even better after a day or two.
For longer storage, you can freeze it. Wrap the whole cheesecake or individual slices tightly in plastic wrap, then in foil. Freeze for up to 2 months. Thaw overnight in the refrigerator before serving.
If you’ve made the cranberry topping separately, it can also be stored in a jar in the fridge for a week. Use it on yogurt, oatmeal, or even our festive Cranberry Honey Butter for a double cranberry treat!
More Tips for Cheesecake Success
- Room Temperature is Key: Let your cream cheese and eggs warm up on the counter before mixing. This prevents lumps and helps the batter blend smoothly.
- Don’t Open the Oven: Resist peeking during the bake! Sudden temperature changes can cause cracks.
- Test for Doneness: The center should be slightly jiggly, like set jelly, not liquid. The edges will be firm.
Make It Look Even More Amazing
Presentation is fun! Try these ideas:
- Add a few whole cranberries and a twist of orange zest on top for garnish.
- Serve with a dollop of freshly whipped cream on the side.
- Place each slice on a plate with a dusting of powdered sugar around it.
- For a holiday table, surround the whole cheesecake with fresh rosemary sprigs and orange slices.
Try These Other Delicious Variations
If you love this Cranberry Orange Cheesecake, you might enjoy these other twists on classic desserts:
- Chocolate Banana Bliss Cake: A rich chocolate cake layered with creamy banana filling and chocolate ganache. It’s a decadent dream.
- Citrus Berry Swirl Cheesecake: Use lemon zest in the filling and a mixed berry topping for a summer version.
- Pumpkin Spice Cheesecake: Add pumpkin puree and spices to the filling for a fall favorite.
- White Chocolate Raspberry Cheesecake: Add melted white chocolate to the filling and top with a raspberry coulis.
- Mini Cheesecake Bites: Make the recipe in a muffin tin for individual portions. Perfect for parties!
- No-Bake Cranberry Orange Cheesecake: Use gelatin to set a no-bake filling for a quicker, cooler option.
Common Mistakes to Avoid
Mistake 1: Using Cold Cream Cheese and Eggs
This is the biggest cause of lumpy cheesecake batter. Cold cream cheese doesn’t blend smoothly with sugar. Cold eggs can shock the mixture and cause it to separate. Always let your cream cheese and eggs sit on the counter for at least 30 minutes before you start. They should feel room temperature to the touch. Your batter will be silky and smooth, leading to a perfect bake.
Mistake 2: Skipping the Water Bath
It seems like an extra step, but it’s essential. Baking a cheesecake without a water bath exposes it to direct, dry oven heat. This often leads to overcooking, cracking, and a dry texture. The water bath creates gentle, moist heat. It cooks the cheesecake evenly and keeps it creamy. Always use the foil wrap to protect your pan. Don’t skip this step!
Mistake 3: Overmixing the Filling After Adding Eggs
Once you add the eggs, you need to be gentle. Overmixing incorporates too many air bubbles. These bubbles expand in the oven and then collapse. This collapse can cause the cheesecake surface to crack. Mix just until each egg is incorporated and the batter is uniform. Stop the mixer as soon as you see a smooth, creamy texture.
Mistake 4: Not Letting It Chill Long Enough
Patience is hard, but it’s necessary. A cheesecake needs time to set its structure in the fridge. If you slice it after only 2 hours, it will be too soft and may fall apart. The flavors also haven’t fully melded. For the best texture and taste, chill it for at least 4 hours. I promise, an overnight chill makes it absolutely perfect.
Mistake 5: Cutting With a Dirty Knife
Using the same knife for each slice without cleaning it makes messy, crumb-covered pieces. The sticky cheesecake and topping cling to the blade. Simply wipe the knife clean with a warm, damp cloth between each cut. You’ll get beautiful, clean slices that look professional.
Your Cranberry Orange Cheesecake Questions Answered
Can I use bottled orange juice instead of fresh?
Yes, you can use bottled orange juice if you don’t have fresh oranges. Try to find a good quality juice with no added sugar. The flavor from fresh juice is brighter and more vibrant. But bottled juice will work fine. For the zest, however, fresh is really important. The zest holds the essential oils that give the fantastic orange aroma. If you only have bottled juice, you could add a tiny drop of orange extract to the filling to boost the flavor.
My cranberry topping is very thin. How can I thicken it?
If your cranberry topping is too runny, it likely needed to cook a bit longer. Cranberries release pectin as they cook, which naturally thickens the sauce. Let it simmer for a few more minutes until it coats the back of a spoon. If it’s still thin after cooling, you can mix in a teaspoon of cornstarch slurry (cornstarch mixed with a little cold water). Return it to the pan and simmer for another minute or two until thickened.
Can I make this cheesecake ahead of time?
Absolutely! This cheesecake is ideal for making ahead. In fact, it gets better. You can bake it and add the topping 2-3 days before you need it. Just keep it covered in the refrigerator. The long chill time helps the flavors deepen and the texture become perfectly set. It’s one less thing to worry about on the day of your event.
Why did my cheesecake crack in the middle?
Cracks usually happen from temperature stress. Overmixing (adding too much air), baking at too high a temperature, or cooling too quickly can all cause cracks. The water bath and slow oven cooling are your best defenses. If a small crack does appear, don’t worry! Your beautiful cranberry topping will cover it up completely. No one will ever know.
Is it okay to use frozen cranberries?
Frozen cranberries are perfectly fine to use. You don’t even need to thaw them. Just add them directly to the saucepan with the other topping ingredients. They will cook and break down just like fresh ones. Frozen cranberries are often more affordable and available year-round. This lets you make this Cranberry Orange Delight anytime you want!
Can I freeze this cheesecake?
You can freeze this cheesecake very successfully. Freeze it whole or in slices. Wrap it tightly in plastic wrap first, then in aluminum foil to prevent freezer burn. It will keep for up to 2 months. Thaw it overnight in the refrigerator. The texture will remain creamy and delicious. It’s a great way to have a slice of celebration ready anytime.
What’s the best way to zest an orange?
Use a microplane grater or a fine zester. These tools give you fluffy, fine zest without the bitter white pith underneath. Zest directly over your mixing bowl to capture all the aromatic oils. Only zest the bright orange outer skin. Stop when you see the white layer. That white part (pith) can add a bitter taste.
Do I have to use a springform pan?
A springform pan is best because the removable ring makes it easy to get the cheesecake out without damaging it. If you don’t have one, you can use a deep 9-inch regular cake pan. You’ll just need to serve the cheesecake directly from the pan. Be sure to line the bottom with parchment paper for easier removal of slices.
How do I know when the cheesecake is done baking?
The cheesecake is done when the edges look set and puffed slightly. The center (about a 3-inch circle) should still jiggle like set jelly when you gently tap the pan. It should not be liquidy. The internal temperature should be around 150°F (65°C) if you use a thermometer. Remember, it will continue to set as it cools in the oven and chills.
Can I use low-fat cream cheese for this recipe?
I recommend using full-fat, regular cream cheese. Low-fat or neufchâtel cheese has more water and less fat. This can change the texture. Your cheesecake might be softer, less creamy, or even weep water. For the rich, thick texture we love, full-fat cream cheese works best. Satisfying, rich desserts like this can help us tune into our body’s natural satiety signals, allowing us to enjoy a reasonable portion feel fully content.
If you’re a cheesecake fanatic like me, you’ll find more wonderful ideas in our full collection of cheesecake recipes, from classic to wildly creative.
Final Thoughts on Your Festive Dessert
This Cranberry Orange Cheesecake is more than just a recipe. It’s a way to bring bright, joyful flavor to your table. The process is fun, and the result is stunning. Whether for a holiday or just a treat, it always feels special. I love how the creamy filling and tart topping play together. It’s a dessert that feels both cozy and elegant. So gather your ingredients, take your time, and enjoy creating this delicious Cranberry Orange Delight. Your friends and family will thank you—with every single bite!
Equipment
- Grand bol
- Fouet
- Spatule
- Plaque à pâtisserie
- Papier sulfurisé
Ingredients
- 1.5 tasses miettes de biscuit Graham
- 0.25 tasses beurre non salé, fondu
- 0.25 tasses sucre granulé
- 24 oz fromage à la crème, ramolli
- 0.75 tasses sucre granulé
- 3 œufs, à température ambiante
- 1 cuil. extrait de vanille
- 1 cuil. Zeste d'orange
- 2 tasses canneberges fraîches ou congelées
- 0.5 tasses jus d'orange de préférence frais
- 0.5 tasses sucre granulé
- 1 cuil. Zeste d'orange
Instructions
- Préchauffez le four à 160°C (325°F) et enveloppez le moule à charnière de papier aluminium.
- Mélangez les miettes de biscuit Graham, le beurre fondu et le sucre dans un bol pour créer la croûte; appuyez dans le fond du moule et faites cuire pendant 10 minutes. Refroidir sur une grille.
- Dans un grand bol, battez le fromage à la crème jusqu'à ce qu'il soit lisse; ajoutez le sucre, puis les œufs un à la fois, en terminant par l'extrait de vanille et le zeste d'orange.
- Versez la garniture dans la croûte refroidie, placez dans un plus grand plat de cuisson et ajoutez de l'eau chaude au plat de cuisson à mi-hauteur des côtés.
- Faites cuire pendant 50-60 minutes jusqu'à ce que les bords soient pris et que le centre tremble légèrement; laissez refroidir dans le four pendant 1 heure.
- Pour la garniture, faites cuire les canneberges, le jus d'orange, le sucre et le zeste dans une casserole à feu moyen jusqu'à épaississement, environ 10-15 minutes.
- Répartissez la garniture de canneberges sur le cheesecake refroidi et réfrigérez pendant au moins 4 heures ou toute la nuit.
- Pour servir, passez un couteau autour du bord, retirez l'anneau du moule à charnière et tranchez avec un couteau propre.