
Layers of Bliss: The Creamy Banana Cheesecake Dessert You’ll Love
Picture this: a sunny Saturday afternoon, my kitchen filled with the sweet aroma of vanilla wafers and fresh strawberries. I was on a mission to create something magical—a dessert that would make my family forget all about store-bought treats. Enter the Creamy Banana Cheesecake, a show-stopping dish that’s as easy to make as it is delightful to eat. Layers of fluffy cheesecake, rich banana pudding, and juicy strawberries come together in perfect harmony. Trust me, one bite, and you’ll be hooked!
A Little Sweet History
Banana pudding has been a Southern classic for generations, often served at family gatherings and holiday feasts. But why stop at tradition? By adding a cheesecake layer and fresh strawberries, we’re giving this beloved dessert a modern twist. I first tried this recipe when hosting a summer barbecue. My guests couldn’t believe how simple it was to prepare, yet how impressive it looked. It’s become my go-to dessert for potlucks, birthdays, and even lazy Sundays.
Why You’ll Fall Head Over Heels for This Recipe
This Creamy Banana Cheesecake is a dream come true for anyone who loves creamy textures and fruity flavors. The best part? You don’t need to be a pastry chef to pull it off. With just a few ingredients and some layering magic, you’ll have a dessert that looks like it came straight from a fancy bakery. Plus, it’s versatile! Whether you’re feeding a crowd or treating yourself, this recipe has got you covered.
Perfect Occasions for This Delightful Treat
From casual family dinners to elegant dinner parties, this dessert fits any occasion. Imagine serving it at a bridal shower, where its vibrant layers steal the show. Or picture it as the grand finale of your Fourth of July celebration, topped with a sprinkle of red and blue crushed wafers. It’s also perfect for holidays like Easter or Thanksgiving, where creamy desserts are always a hit. Honestly, any day is a good day for this masterpiece!
Ingredients You’ll Need
- For the cheesecake layer:
- 1 package cream cheese (8 oz), softened
- 1 cup whipping cream
- ½ cup powdered sugar
- 1 tsp vanilla extract
- For the pudding layer:
- 1 box (5.1 oz) instant vanilla pudding
- 2 cups cold milk
- For assembly:
- Vanilla wafers or your favorite cookies
- 2 sliced bananas
- 1 cup fresh strawberries, chopped
- Crushed strawberry wafers (optional, for decoration)
Substitution Options
Not a fan of bananas? Swap them for mango slices or peaches. If you’re out of whipping cream, heavy cream works just as well. For a gluten-free version, use gluten-free cookies instead of vanilla wafers. And if you want to skip the pudding layer, try a layer of whipped cream mixed with a bit of honey for sweetness. Feel free to get creative—it’s your dessert!
Step 1: Whip Up the Cheesecake Layer
Start by beating the softened cream cheese, powdered sugar, and vanilla extract in a mixing bowl until smooth and creamy. Next, fold in the whipped cream until the mixture becomes light and fluffy. This step is where the magic begins! The cream cheese adds a tangy richness, while the whipped cream brings a cloud-like texture. Pro tip: Make sure your cream cheese is at room temperature for easier blending.
Step 2: Prepare the Pudding Layer
In another bowl, whisk together the instant vanilla pudding mix and cold milk. Keep stirring until the mixture thickens—it should take about 2 minutes. The pudding will have a silky consistency and a sweet vanilla scent that’s simply irresistible. Pro tip: Chill the pudding in the fridge for 10 minutes before assembling for an extra firm layer.
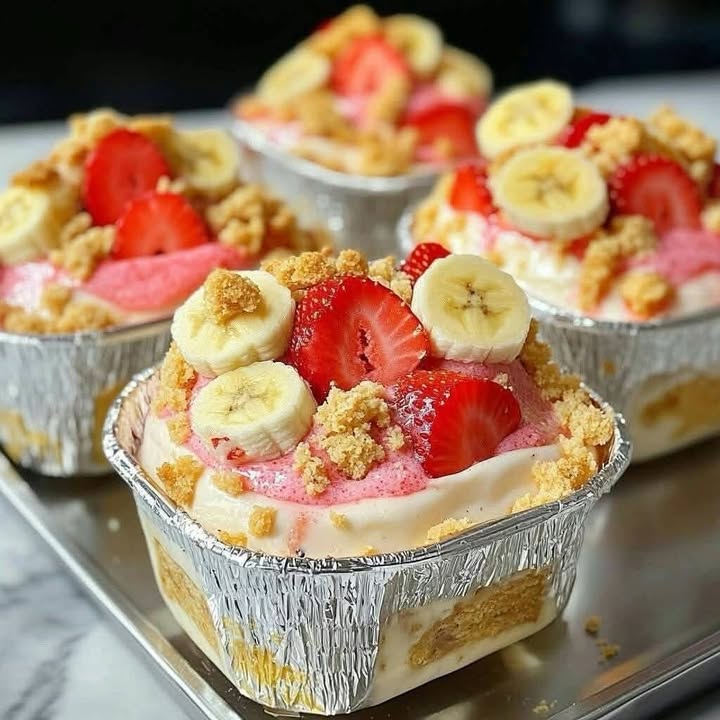
Step 3: Assemble the Layers
Now comes the fun part—layering! Start with a base of vanilla wafers in your serving dish. Add slices of banana and chopped strawberries for a burst of color and flavor. Spoon a generous layer of the cheesecake mixture on top, followed by the pudding. Repeat the layers until your dish is full, finishing with a final layer of pudding. Garnish with fresh strawberries and crushed wafers for a touch of elegance. Chef’s tip: Use clear glassware to showcase those beautiful layers!
Timing Breakdown
Prep time: 20 minutes
Resting time: 3 hours (or overnight)
Total time: 3 hours and 20 minutes
Chef’s Secret
Here’s a little secret to take this dessert to the next level: brush the vanilla wafers with a tiny bit of lemon juice before layering. This prevents them from getting soggy and adds a subtle zing that pairs beautifully with the sweetness of the bananas and strawberries.
Extra Info
Did you know that bananas are technically berries? Yep, they belong to the same family as blueberries and strawberries! This fun fact makes our Creamy Banana Cheesecake even more special. Plus, bananas are packed with potassium, which helps keep your heart happy while you indulge.
Necessary Equipment
- Mixing bowls
- Electric mixer or whisk
- Spatula
- Serving dish or individual glasses
- Measuring cups and spoons
Storage Tips
To keep your dessert fresh, cover it tightly with plastic wrap or transfer it to an airtight container. Store it in the refrigerator for up to 3 days. Avoid freezing, as the texture of the pudding and cheesecake layers may change. If you’re making this ahead of time, assemble everything except the garnish. Add the fresh fruit and crushed wafers just before serving to maintain their vibrant look and crisp texture.
Leftovers? No problem! Portion them into small containers for easy grab-and-go treats. Just be sure to consume them within a couple of days for the best flavor. And if you’re bringing this dessert to a party, transport it in a cooler to keep it chilled and fresh.
One last tip: If you notice any discoloration on the bananas after storage, don’t worry—it’s just oxidation. A quick stir or rearrangement can make it look as good as new!
Tips and Advice
For an extra creamy cheesecake layer, chill the mixing bowl and beaters before whipping the cream. This helps stabilize the whipped cream and gives it a fluffier texture. When slicing bananas, dip them briefly in lemon water to prevent browning. And if you’re short on time, use pre-made whipped cream instead of whipping your own. These little tweaks can make a big difference!
Presentation Ideas
- Serve in individual mason jars for a rustic touch.
- Add a sprig of mint for a pop of green.
- Drizzle chocolate syrup over the top for a decadent finish.
- Use edible flowers for an elegant presentation.
- Dust with powdered sugar for a snowy effect.
Healthier Alternative Recipes
Want to enjoy this treat guilt-free? Here are six variations to try:
- Low-Sugar Version: Use sugar-free pudding and replace the powdered sugar with a sugar substitute.
- Dairy-Free Delight: Swap cream cheese for vegan cream cheese and use coconut whipped cream.
- Protein-Packed Option: Add a scoop of vanilla protein powder to the cheesecake layer.
- Gluten-Free Goodness: Use gluten-free cookies for layering.
- Fruit-Forward Twist: Double the amount of fresh fruit and reduce the pudding layer.
- No-Bake Cheesecake Base: Blend dates, nuts, and cocoa powder for a crunchy crust alternative.
Mistake 1: Using Overripe Bananas
While ripe bananas are sweet and flavorful, overripe ones can turn mushy and brown too quickly. To avoid this, choose bananas that are just ripe—yellow with a few small brown spots. Pro tip: Slice them right before assembling to keep them looking fresh.
Mistake 2: Skipping the Resting Time
Rushing the chilling process is a common mistake. The flavors need time to meld, and the layers need to set properly. Always refrigerate for at least 3 hours or overnight for the best results. Trust me, patience pays off here!
Mistake 3: Overmixing the Cheesecake Layer
Overmixing can make the cheesecake layer dense instead of light and airy. Mix until just combined, and stop as soon as you achieve a smooth consistency. Pro tip: Fold the whipped cream gently to preserve its fluffiness.
FAQ
Can I make this recipe ahead of time?
Absolutely! This dessert actually tastes better when made a day in advance. The flavors have more time to blend, resulting in an even creamier experience. Just add the garnishes right before serving.
Brush the cookies lightly with lemon juice or let them sit uncovered for a bit to dry out slightly. This creates a barrier that helps them stay crisp longer.
Can I use frozen strawberries?
Fresh is best for texture and flavor, but thawed frozen strawberries work in a pinch. Pat them dry with a paper towel to remove excess moisture before using.
What if I don’t have vanilla wafers?
Graham crackers, shortbread cookies, or even digestive biscuits make great substitutes. They provide a similar crunch and complement the flavors beautifully.
Is this recipe kid-friendly?
Yes! Kids love the creamy layers and fruity goodness. Let them help with assembling—it’s a fun way to bond in the kitchen.
Can I double the recipe?
Definitely. Simply multiply each ingredient by two and use a larger serving dish or multiple containers. It’s perfect for bigger gatherings.
How do I fix lumpy pudding?
If your pudding turns out lumpy, strain it through a fine mesh sieve. This removes any clumps and ensures a silky-smooth texture.
Can I use Greek yogurt instead of cream cheese?
Yes, but the flavor will be tangier. Opt for full-fat Greek yogurt for a creamier result.
What’s the best way to slice bananas evenly?
Use a sharp knife and cut them on a cutting board. For uniform slices, consider using an egg slicer—it works wonders!
Can I add other fruits?
Of course! Blueberries, raspberries, or even diced pineapple would pair beautifully with the existing flavors.
Final Thoughts
This Creamy Banana Cheesecake is more than just a dessert—it’s a celebration of flavors, textures, and creativity. Whether you’re making it for a special occasion or just because, it’s sure to bring smiles to everyone who tries it. So grab your ingredients, roll up your sleeves, and let’s make some magic in the kitchen. Happy baking!
Equipment
- Mixing bowls
- Electric mixer or whisk
- Spatula
- Serving dish or individual glasses
- Measuring cups and spoons
Ingredients
- 8 oz cream cheese softened
- 1 cup whipping cream
- ½ cup powdered sugar
- 1 tsp vanilla extract
- 5.1 oz instant vanilla pudding
- 2 cups cold milk
- vanilla wafers or your favorite cookies
- 2 sliced bananas
- 1 cup fresh strawberries chopped
- crushed strawberry wafers optional, for decoration
Instructions
- Whip the softened cream cheese, powdered sugar, and vanilla extract until smooth and creamy; then fold in the whipped cream until light and fluffy.
- In another bowl, whisk together the instant vanilla pudding mix and cold milk until the mixture thickens (about 2 minutes).
- Layer vanilla wafers in your serving dish, add banana slices and chopped strawberries, spoon the cheesecake mixture, and then the pudding layer; repeat layers finishing with pudding.
- Garnish with fresh strawberries and crushed wafers.