
Why This Creamy Homemade Cheese Is a Must-Try
There’s something magical about desserts that take you back to childhood. For me, it’s this Creamy Homemade Cheese. The first time I made it, my kitchen smelled like a dream—vanilla mingling with caramelized sugar. It was love at first bite! This dessert is creamy, comforting, and oh-so-easy to make. Whether you’re hosting a dinner party or craving something sweet, this recipe will win hearts.
A Little History Behind the Dish
This dish reminds me of my grandmother’s stories about traditional homemade desserts in Latin America. She called it “queso de mano,” which translates to “handmade cheese.” Back then, families would gather around the stove, stirring pots of milk and sugar until the mixture turned into a velvety treat. Over time, recipes evolved, but the soul of this dessert stayed the same—a rich, custard-like texture topped with golden caramel.
Why You’ll Love This Recipe
Let’s be honest: who doesn’t love a dessert that’s both simple and spectacular? This Creamy Homemade Cheese checks all the boxes. It’s not too sweet, has a silky texture, and pairs perfectly with coffee or tea. Plus, it’s versatile—you can dress it up for special occasions or enjoy it as a cozy weeknight treat. Did I mention it’s foolproof? Even if you’re new to baking, this recipe will make you feel like a pro.
Perfect Occasions to Prepare This Recipe
From birthdays to Sunday brunches, this dessert fits every occasion. I once served it at a family reunion, and everyone raved about how it brought back memories of their own grandmothers’ kitchens. It’s also perfect for holidays like Thanksgiving or Christmas when you want something lighter than pie but just as delightful. And let’s not forget—it’s a showstopper at potlucks!
Ingredients
- For the cheese:
- 8 eggs
- 200 g of sugar
- 1 liter of milk
- 1 teaspoon vanilla essence
- For the candy (caramel):
- 100 g of sugar
- 50 ml of water
Substitution Options
If you’re out of an ingredient, don’t worry! Here are some swaps:
- Use almond or oat milk instead of regular milk for a dairy-free version.
- Replace vanilla essence with a scraped vanilla bean for a more intense flavor.
- For the caramel, try using honey or maple syrup if you’re short on time.
Step 1: Prepare the Candy
Start by making the caramel base—it’s what gives this dessert its signature golden top. In a small pot, heat sugar and water over medium heat. Let it cook undisturbed until it turns a beautiful amber color. Be patient; stirring too early can ruin the process. Once done, pour the hot caramel into your metal mold and swirl it around to coat the bottom evenly. Pro tip: Work quickly, as caramel hardens fast!
Step 2: Prepare the Cheese Mixture
Now comes the fun part—making the creamy filling. Crack the eggs into a bowl, add sugar, milk, and vanilla essence, and whisk everything together until smooth. Imagine the soft clinking of the whisk against the bowl and the sweet aroma of vanilla filling the air. Pour this luscious mixture over the caramel in the mold. Chef’s tip: Strain the mixture through a sieve to ensure no lumps remain.
Step 3: Cooking
Baking this beauty requires a water bath, which keeps the texture delicate and prevents cracking. Place the mold inside a larger tray filled with hot water. Bake at 180°C for 30-40 minutes. To check if it’s ready, insert a toothpick—if it comes out clean, you’re good to go. Let it cool completely before refrigerating for at least 3 hours. Trust me, patience pays off here.
Step 4: Unmold and Serve
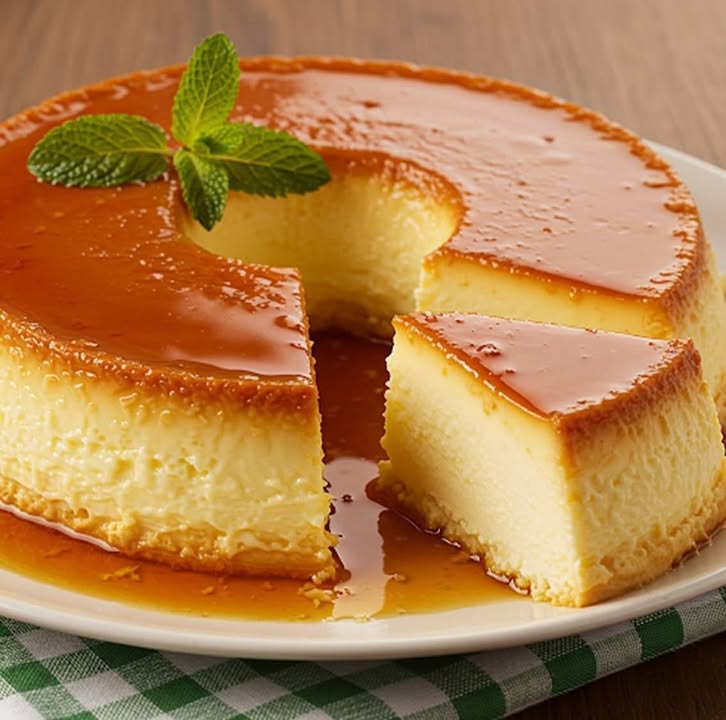
The moment of truth! Run a knife along the edges of the mold to loosen the dessert. Flip it onto a plate, and watch the caramel cascade down the sides. Decorate with dulce de leche, crushed cookies, or fresh fruit if you’re feeling fancy. Every slice is a masterpiece waiting to happen.
Timing
- Prep Time: 20 minutes
- Cooking Time: 40 minutes
- Resting Time: 3 hours (refrigeration)
- Total Time: Approximately 4 hours
Chef’s Secret
Here’s a little trick: Add a pinch of salt to the caramel. It enhances the sweetness and balances the flavors beautifully. Your guests won’t know what hit them!
Extra Info
Did you know that similar dishes exist worldwide? In Spain, they call it “flan,” while in France, it’s known as “crème caramel.” Despite the names, these desserts share the same comforting essence. Isn’t it amazing how food connects us across cultures?
Necessary Equipment
- Metal mold or baking dish
- Whisk or electric mixer
- Sieve (optional but recommended)
- Oven-safe tray for the water bath
- Small pot for caramel
Storage
Store leftovers in an airtight container in the fridge. This dessert stays fresh for up to 4 days. Keep it away from strong-smelling foods to preserve its delicate flavor. If you need to transport it, wrap the mold securely to prevent spills.
When reheating, avoid microwaving, as it can alter the texture. Instead, let it sit at room temperature for 10-15 minutes before serving. For best results, serve chilled straight from the fridge.
If you have extra caramel, store it separately in a jar. It makes a fantastic topping for ice cream or pancakes!
Tips and Advice
- Always use room-temperature eggs for a smoother mixture.
- Don’t skip the water bath—it’s key to achieving that silky texture.
- Experiment with spices like cinnamon or nutmeg for a unique twist.
Presentation Tips
- Garnish with mint leaves or edible flowers for a pop of color.
- Serve slices on elegant plates with a drizzle of extra caramel.
- Add a dusting of powdered sugar for a touch of elegance.
Healthier Alternative Recipes
Looking to lighten things up? Try these variations:
- Low-Sugar Version: Reduce sugar by half and use stevia or monk fruit as a substitute.
- Dairy-Free Option: Swap milk for coconut or almond milk.
- Eggless Recipe: Use cornstarch and plant-based yogurt for binding.
- Protein-Packed Dessert: Add a scoop of protein powder to the mixture.
- Fruit-Infused Twist: Blend pureed mango or berries into the cheese layer.
- Gluten-Free Caramel: Make caramel with brown rice syrup instead of sugar.
Common Mistakes to Avoid
Mistake 1: Overcooking the Caramel
Burning the caramel is a common blunder. Keep an eye on it, as it can go from golden to burnt in seconds. Stirring too soon can also cause crystallization. Pro tip: Remove the pot from heat just before it reaches your desired shade—it continues cooking off the stove.
Mistake 2: Skipping the Water Bath
Without a water bath, your dessert might crack or become rubbery. The steam from the water ensures even cooking and a velvety finish. Always preheat the water before placing the mold in the oven.
Mistake 3: Rushing the Cooling Process
Patience is key! Don’t rush the cooling or refrigeration steps. Allowing the dessert to set properly ensures it unmolds cleanly and maintains its shape. Chill it overnight for the best results.
FAQ
Can I use a glass mold instead of metal?
Absolutely! Just ensure it’s oven-safe. Glass molds work well and give you a clear view of the layers forming during baking.
How do I fix lumpy batter?
No worries! Simply strain the mixture through a fine mesh sieve to remove any lumps. This step guarantees a smooth final product.
What if my caramel hardens before pouring?
Reheat it gently on low heat until it softens again. Avoid overheating, as it may burn.
Can I freeze this dessert?
Yes, but freezing can affect the texture slightly. Thaw overnight in the fridge before serving.
Is this recipe kid-friendly?
Definitely! Kids adore the creamy texture and sweet caramel topping. They’ll beg you to make it again.
Can I add chocolate to the mix?
Of course! Melted dark chocolate folded into the batter adds a decadent twist.
Why does my dessert taste eggy?
Overmixing the eggs can lead to an eggy flavor. Whisk gently and incorporate ingredients slowly for balanced taste.
How do I know when it’s fully cooked?
Insert a toothpick into the center. If it emerges clean, your dessert is ready. If not, bake for another 5-10 minutes.
Can I double the recipe?
Yes, just use two molds or a larger one. Adjust baking time accordingly.
What’s the best way to serve leftovers?
Portion leftovers into individual containers for easy grab-and-go treats. Reheat briefly or enjoy cold.
Final Thoughts
This Creamy Homemade Cheese is more than just a dessert—it’s a celebration of tradition, flavor, and family. Whether you’re a seasoned baker or a beginner, this recipe will bring joy to your table. So grab your apron, gather your loved ones, and create memories one delicious bite at a time. Happy baking!
Equipment
- Metal mold or baking dish
- Whisk or electric mixer
- Sieve (optional)
- Oven-safe tray for water bath
- Small pot for caramel