
Introduction
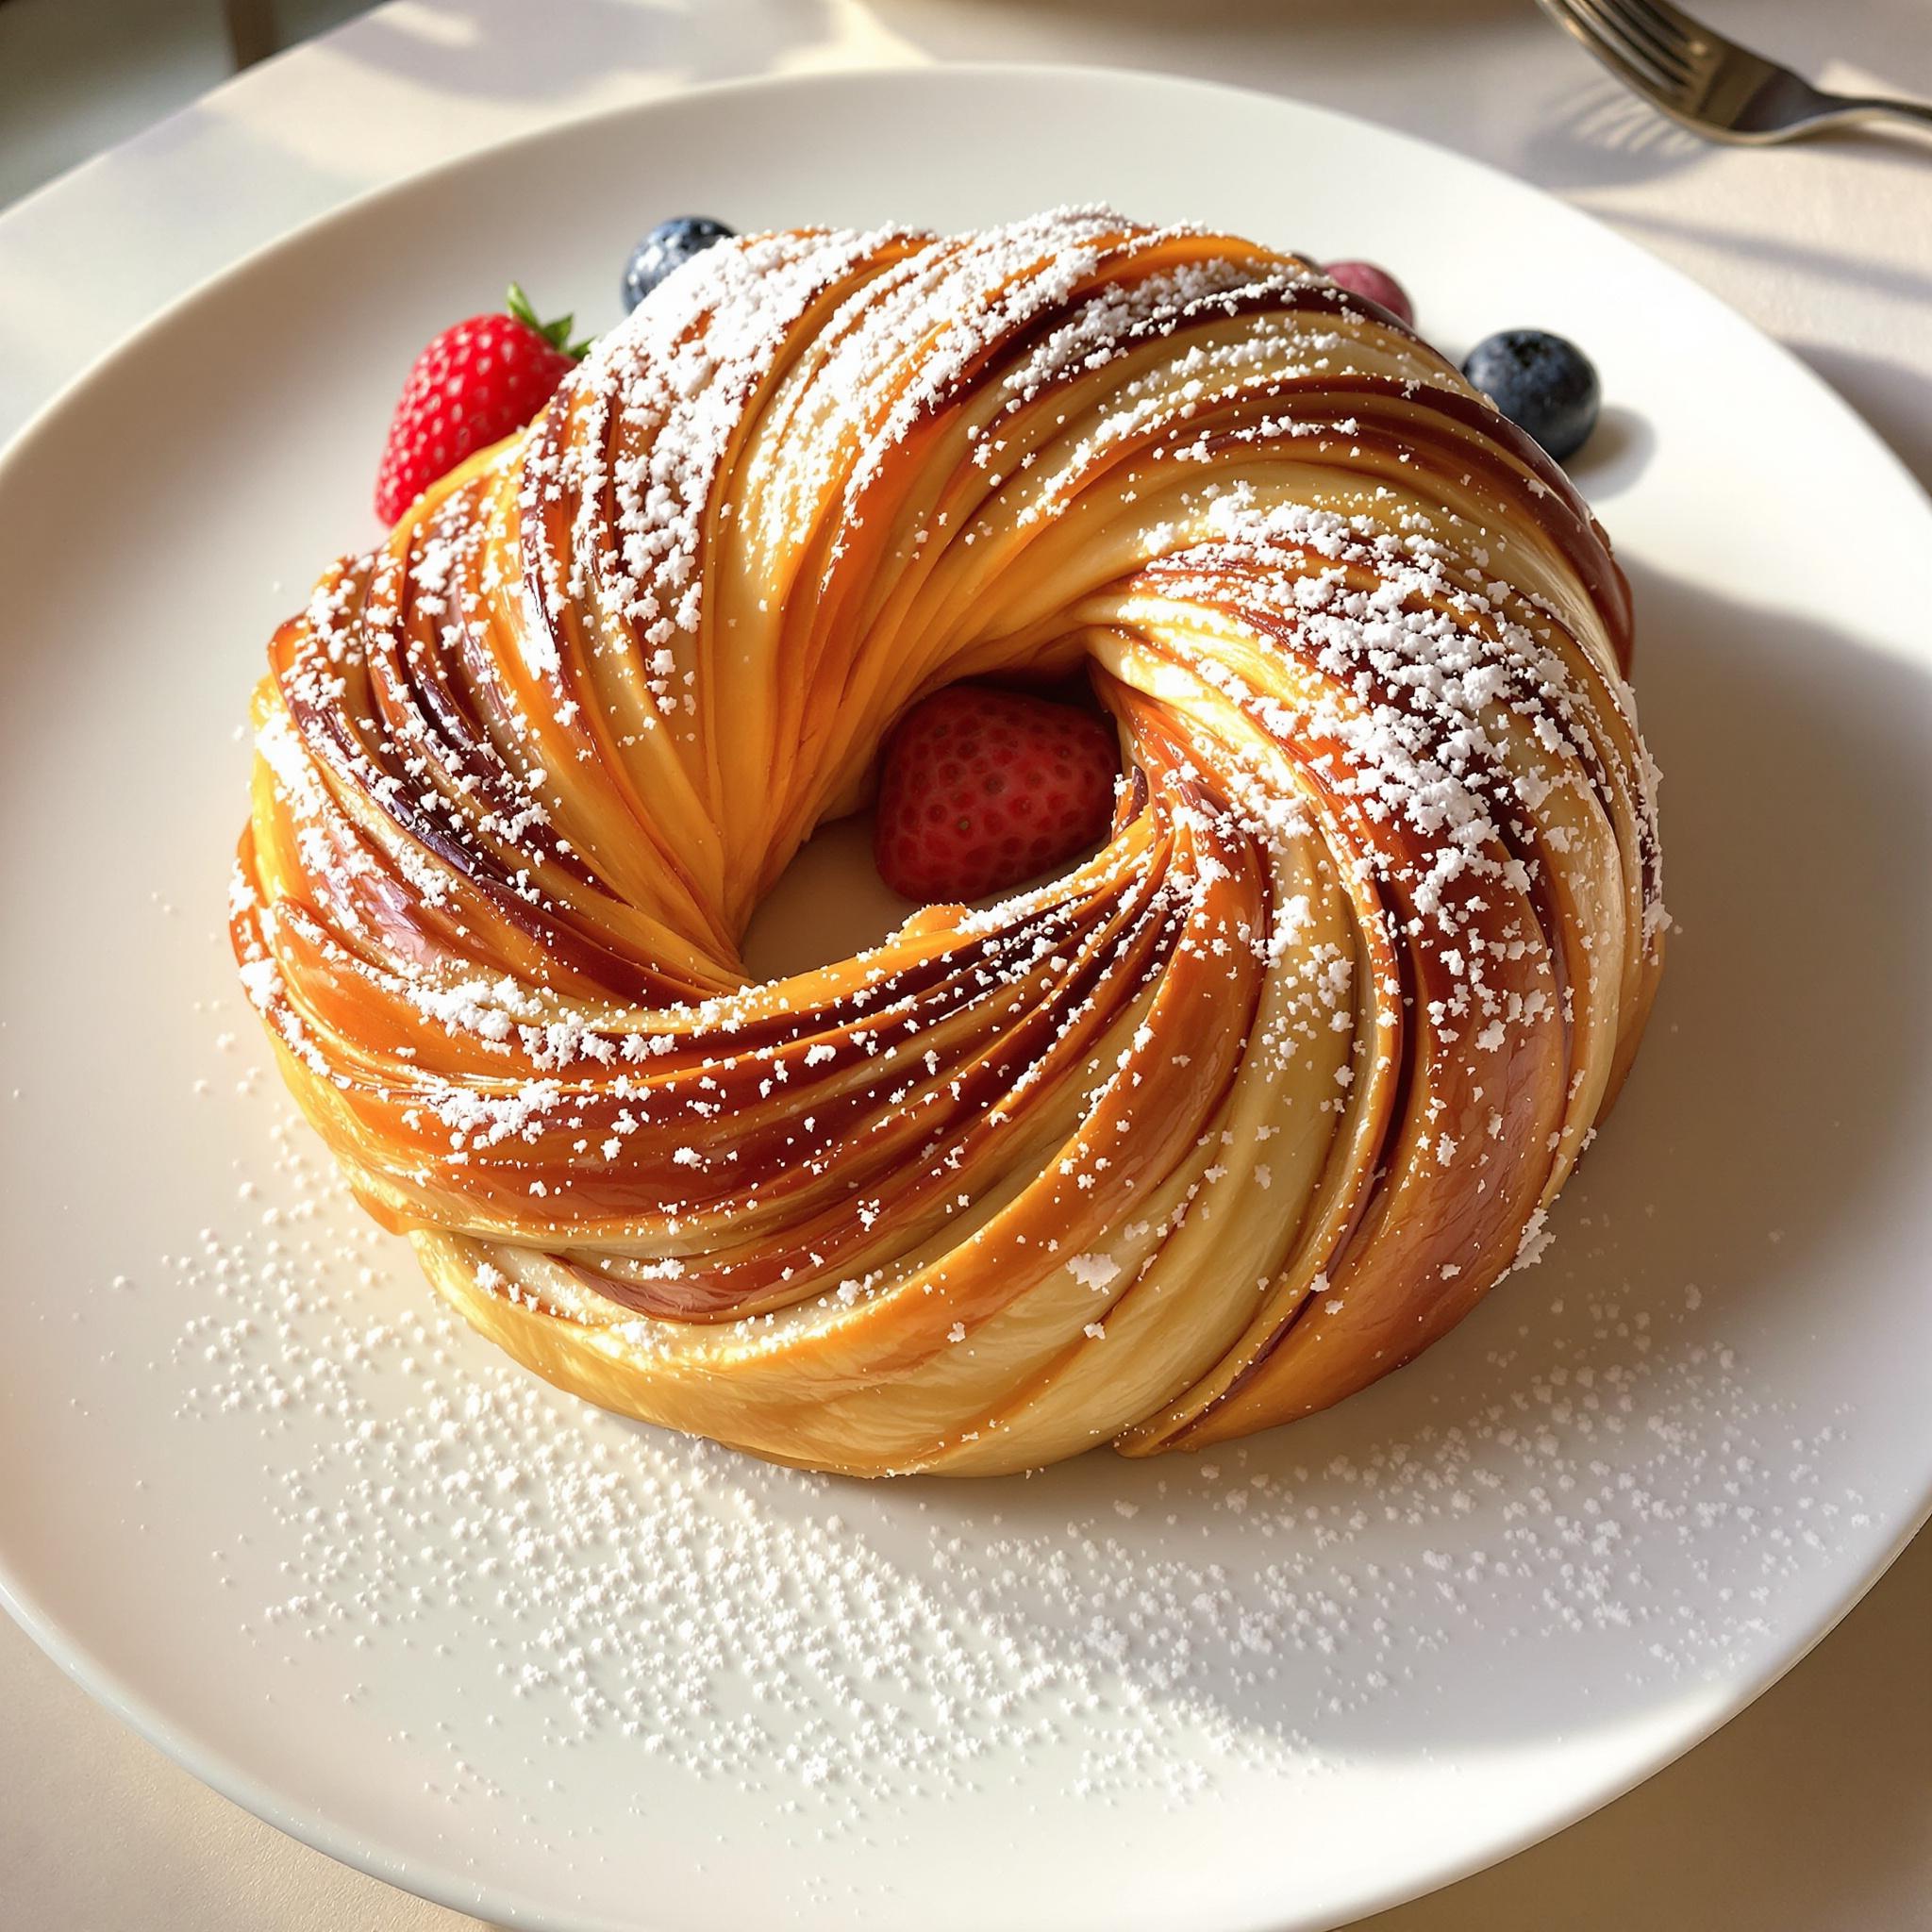
Danish Pastry Dough is a must-try for anyone who loves flaky, buttery baked goods. This recipe shows you how to make those perfect layers. I made it first for a family brunch, and everyone couldn’t stop talking about it. The smell alone will make your kitchen feel like a cozy bakery.
The History of Danish Pastry Dough
Danish pastry, or “wienerbrød” in Denmark, has an interesting story. It’s said to have been inspired by Austrian techniques brought to Denmark in the 1800s. Over time, Danish bakers added their own twist, making it richer and flakier. Today, you can find many versions worldwide, from sweet to savory. My go-to? A classic Danish pastry with a touch of cinnamon.
Why You’ll Love This Recipe
This Danish Pastry Dough recipe is simple but impressive. The dough is easy to handle, and the results are bakery-quality. The flaky layers and buttery taste make every bite unforgettable. Plus, it works for both sweet and savory treats.
Perfect Occasions to Prepare It
Serve this pastry dough at brunches, holiday gatherings, or weekend baking sessions. It’s great for impressing guests or treating yourself. Pair it with coffee for a cozy morning snack or bring it to potlucks for a standout dessert.
Ingredients
- 3 cups all-purpose flour
- 1/4 cup sugar
- 1 teaspoon salt
- 1 cup unsalted butter, cold
- 1 packet (2 1/4 teaspoons) active dry yeast
- 3/4 cup warm milk
- 1 large egg
- 1/4 cup water
Substitution Options
- Use bread flour instead of all-purpose for a chewier texture.
- Swap milk with almond or oat milk if you’re going dairy-free.
- Replace butter with vegan margarine if needed.
Preparation
Step 1: Mix Dry Ingredients
In a big bowl, mix flour, sugar, and salt. Stir well to combine. Cold butter later helps keep the layers crisp.
Step 2: Activate the Yeast
In another bowl, dissolve yeast in warm milk. Let it sit for 5-10 minutes until it foams. Active yeast is key for the dough to rise. Make sure the milk isn’t too hot.
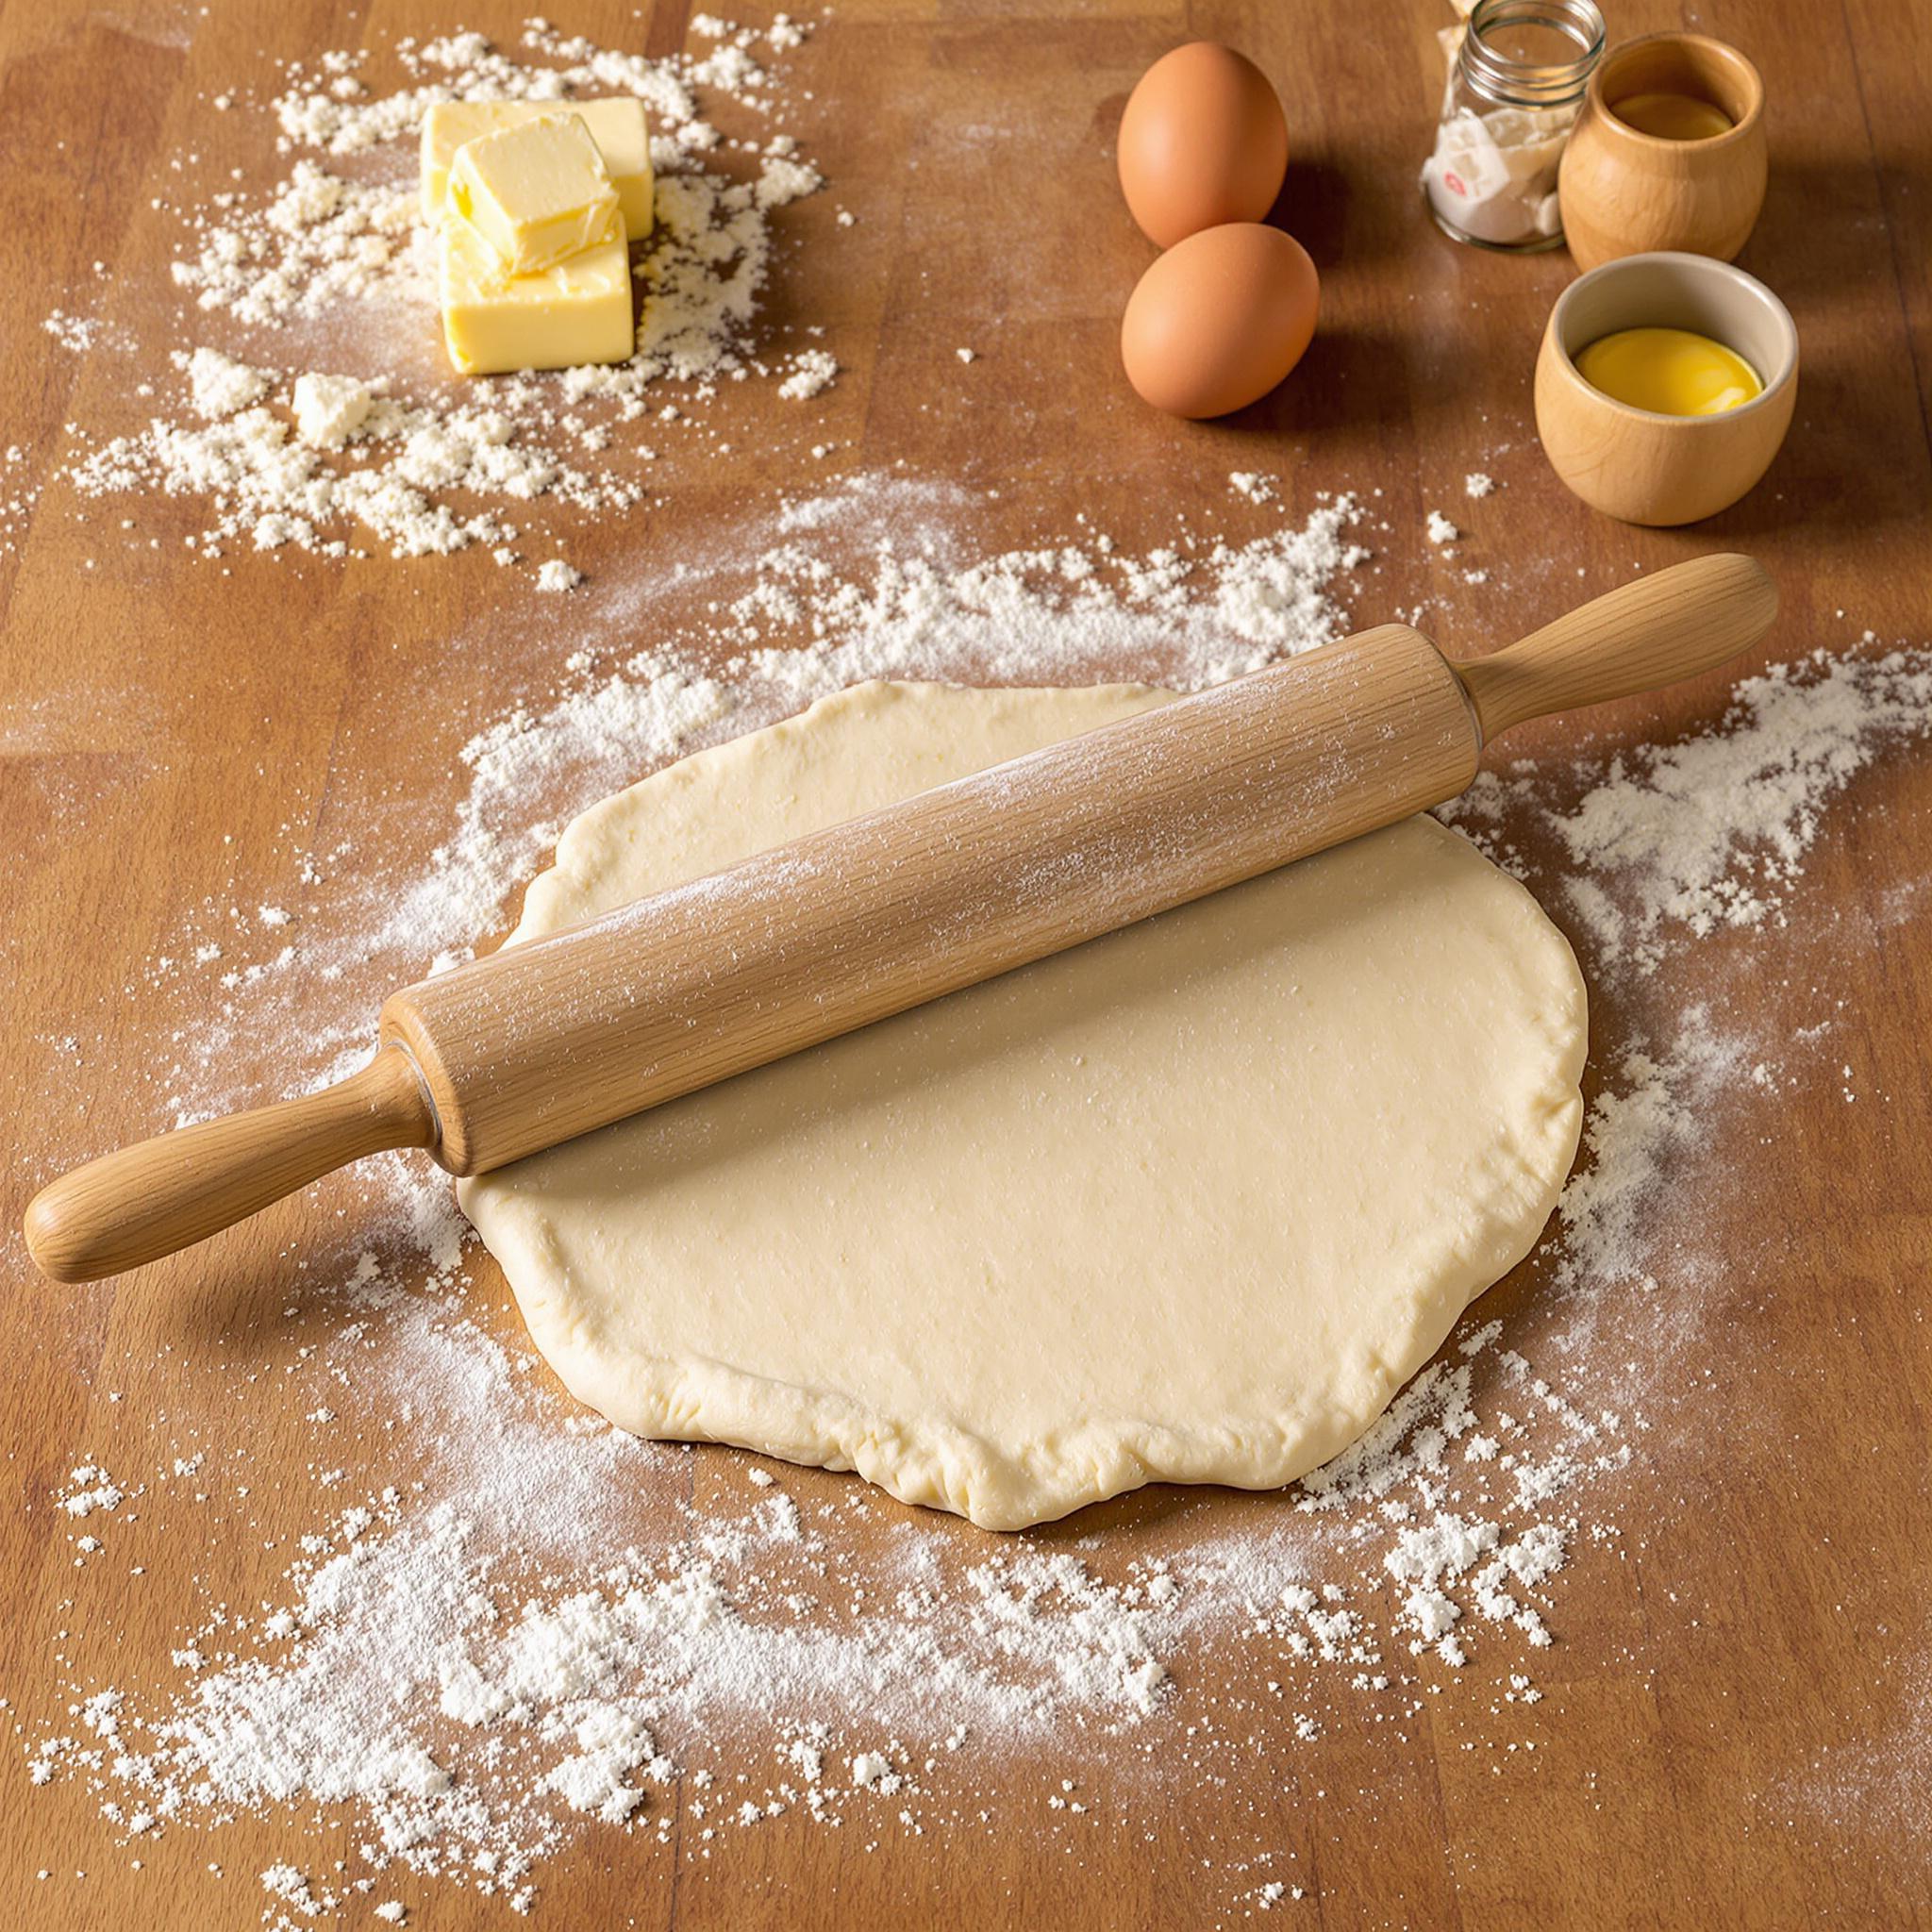
Step 3: Form the Dough
Add the yeast mixture to the flour mix. Throw in the beaten egg and water. Mix until a soft dough forms. It should feel slightly sticky but manageable. Kneading will smooth it out.
Step 4: Knead and Rise
Knead the dough on a floured surface for about 10 minutes. It should become smooth and elastic. Put it in a greased bowl, cover it, and let it rise until doubled. This takes 1-2 hours. Patience here pays off with airy layers.
Step 5: Create Layers
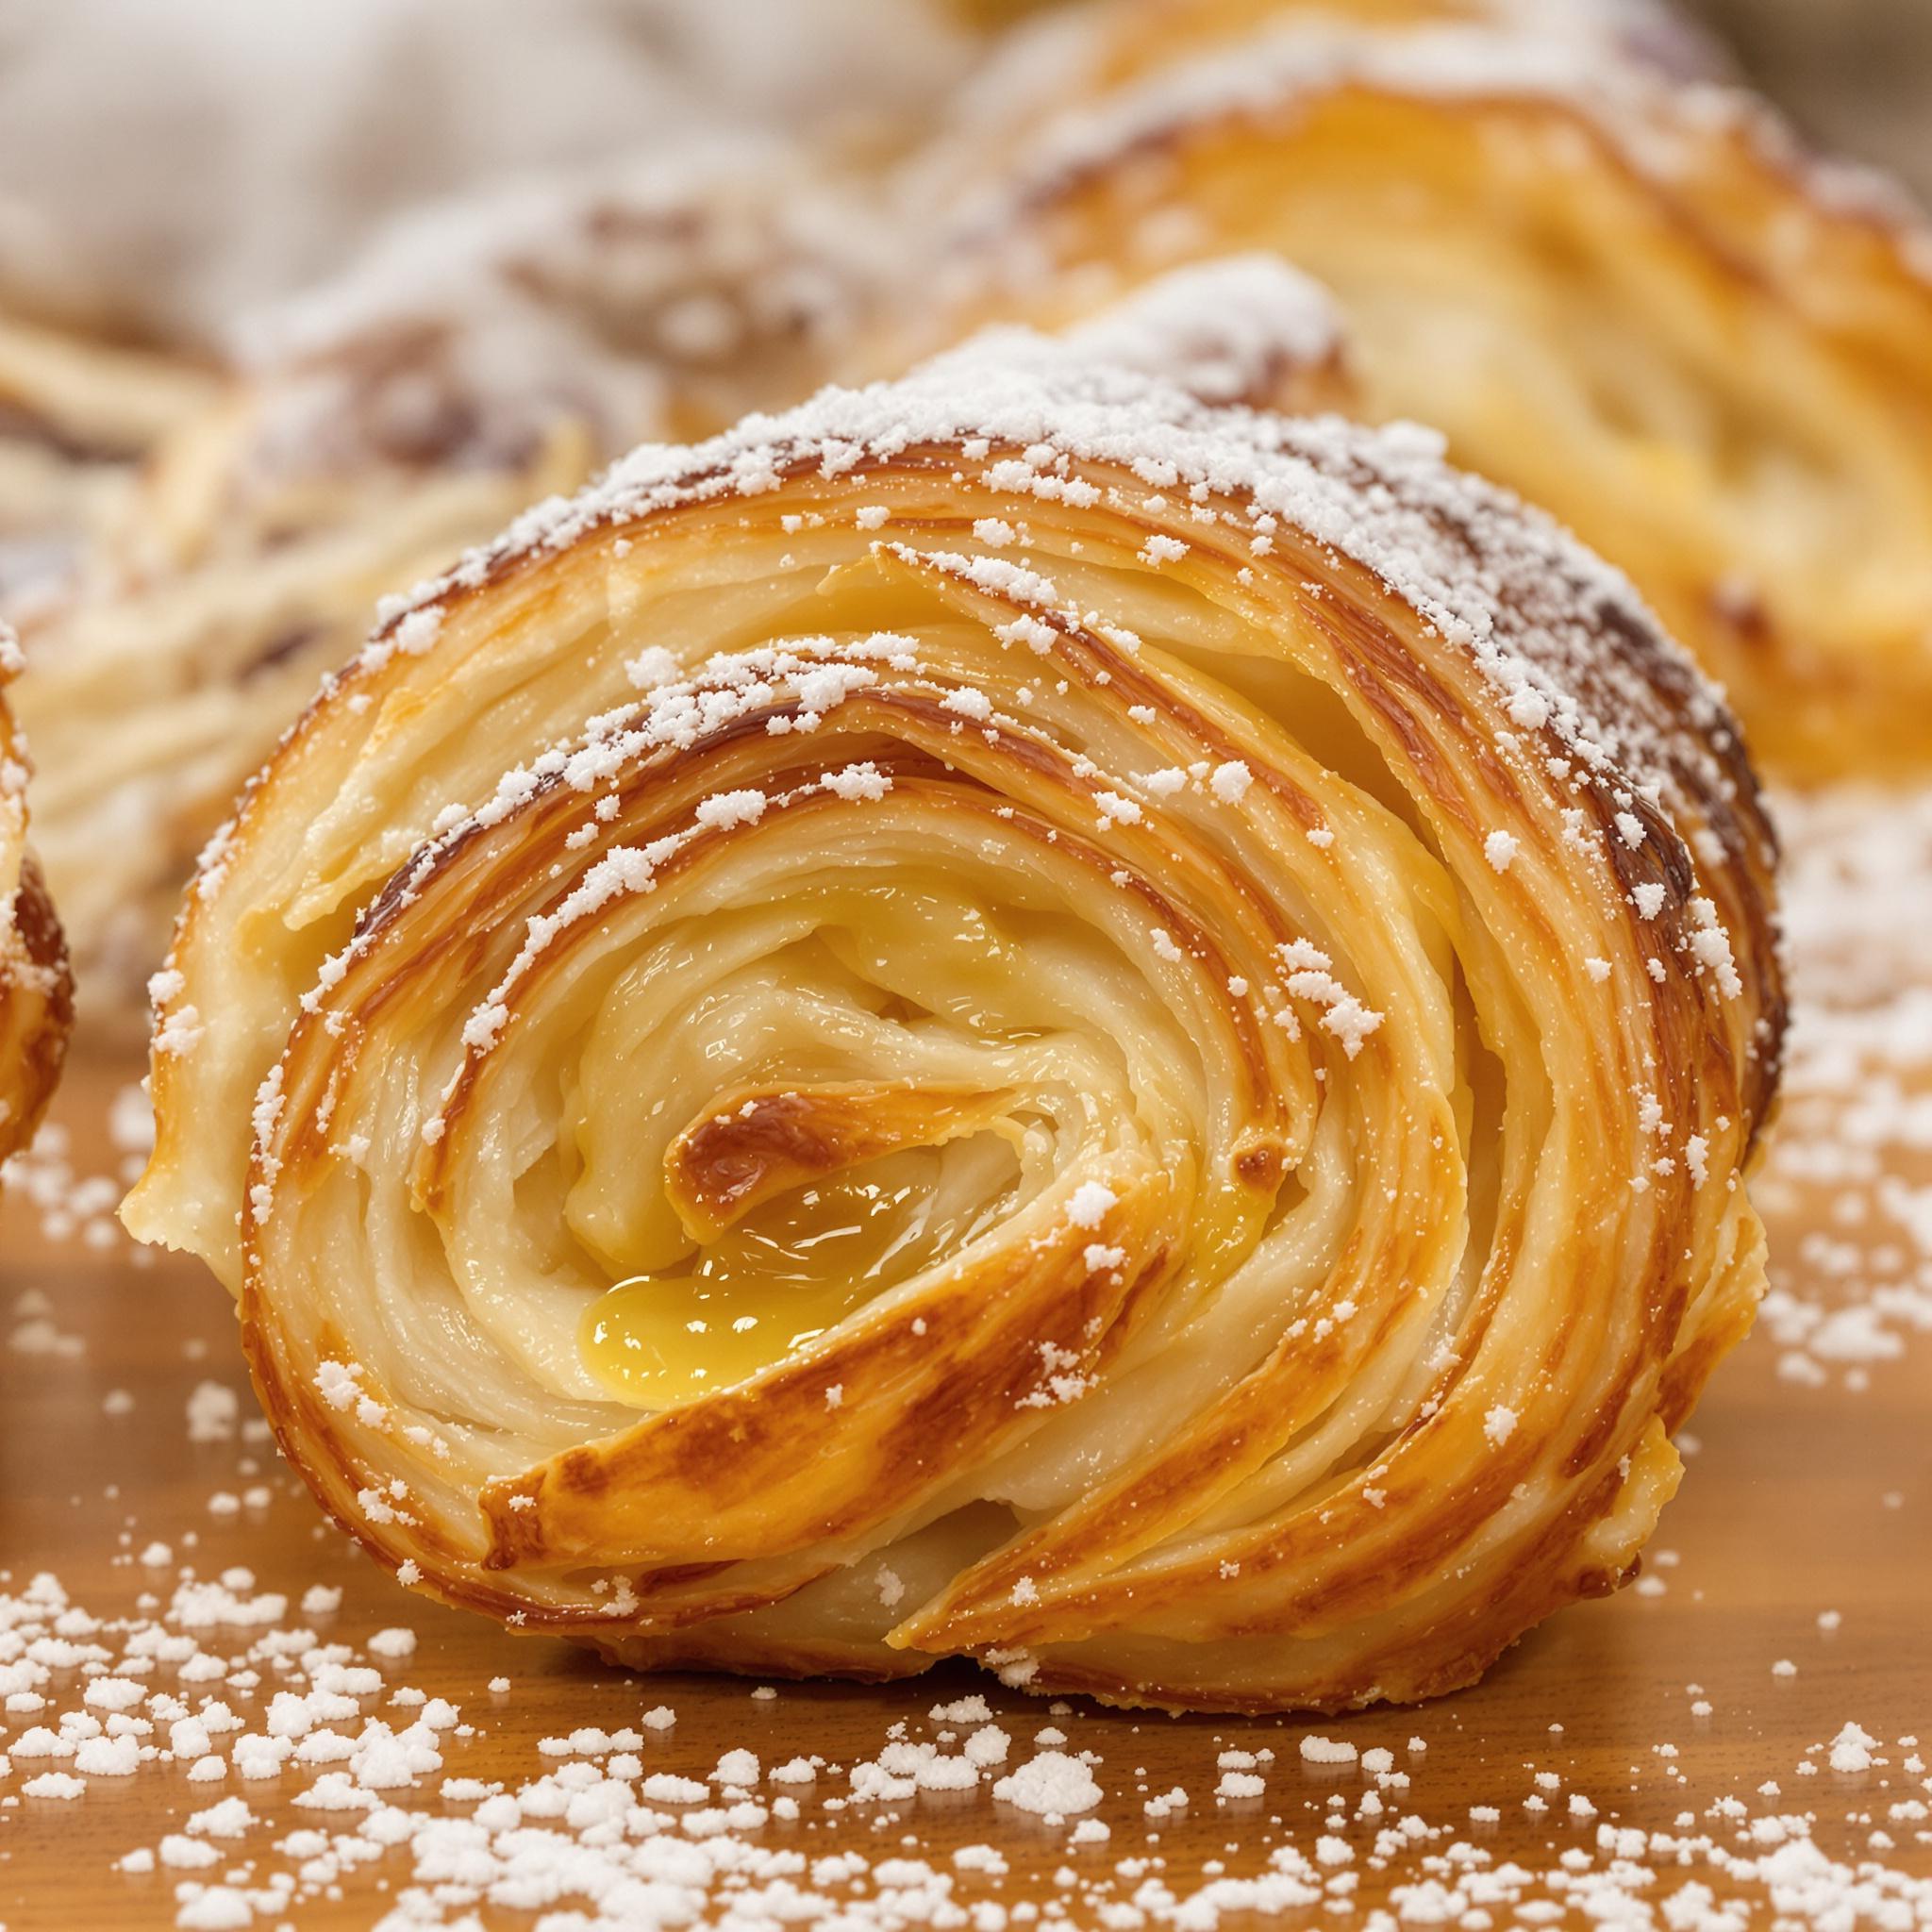
Roll out the dough into a rectangle. Add cold butter in chunks, then fold it like a letter. Repeat rolling and folding several times. These folds create the signature flaky layers. Chill the dough between folds to keep the butter firm.
Chef’s Tip
For extra flakiness, chill the dough thoroughly between folds. Cold butter traps steam during baking, creating those dreamy layers.
Time
- Prep Time: 30 minutes
- Rising Time: 2 hours
- Cooking Time: 20 minutes
- Total Time: 2 hours 50 minutes
Nutritional Information
Each serving has about:
- Calories: 250
- Protein: 5g
- Fat: 12g
- Carbohydrates: 30g
Extra Information
Did you know Danish pastries were once a luxury item? Bakers used pricey ingredients like butter and sugar, making them a treat for special occasions.
Necessary Tools
- Rolling pin
- Large mixing bowls
- Plastic wrap for chilling
- Baking sheet
- Parchment paper
Storage Instructions
Store leftover pastries in an airtight container at room temperature for up to 2 days. For longer storage, freeze them wrapped in plastic wrap. Thaw at room temperature before reheating.
To reheat, place pastries on a baking sheet and warm them in the oven at 350°F for 5-10 minutes. This restores their crispness.
Avoid refrigerating these pastries. The moisture in the fridge can make them soggy.
Tips and Tricks
- Chill the dough after each fold to keep the butter firm.
- Use a sharp knife to cut shapes without squishing the layers.
- Brush pastries with egg wash before baking for a golden finish.
Serving Suggestions
- Fill with jam or custard for a sweet treat.
- Add cheese and herbs for a savory twist.
Healthier Alternatives for the Recipe
Try these variations for a healthier take on Danish Pastry Dough:
- Whole Wheat Version: Substitute half the flour with whole wheat flour.
- Low-Sugar Option: Reduce sugar to 2 tablespoons.
- Vegan Adaptation: Use plant-based milk and margarine.
- Gluten-Free Twist: Use a gluten-free flour blend.
- Lightened-Up Layers: Use half butter and half Greek yogurt.
- No-Yeast Method: Use baking powder as a leavening agent.
Common Mistakes to Avoid
Mistake 1: Using Warm Butter
Warm butter melts into the dough instead of creating layers. Keep it cold throughout preparation. Pro tip: Cut butter into small cubes and chill before use.
Mistake 2: Skipping Resting Time
Rushing the rising process leads to dense pastries. Allow enough time for the dough to double in size. Patience ensures light, airy layers.
Mistake 3: Overworking the Dough
Over-kneading makes the dough tough. Stop kneading once it feels smooth and elastic. Trust your instincts and don’t overdo it.
Frequently Asked Questions
Can I freeze the dough?
Yes, you can freeze the dough after the first rise. Wrap it tightly in plastic wrap and store it for up to 3 months. Thaw overnight in the fridge before using.
What fillings work best?
Jam, chocolate, cream cheese, and fruit compotes are popular choices. For savory options, try spinach and feta or ham and cheese.
How do I know when the dough has risen enough?
The dough should double in size and feel soft to the touch. Press lightly; if it springs back slowly, it’s ready.
Can I use instant yeast?
Yes, instant yeast works fine. Skip dissolving it in milk and add it directly to the dry ingredients.
Why are my layers not flaky?
This often happens if the butter melts or the dough isn’t folded enough. Keep everything cold and follow the folding steps carefully.
Do I need a stand mixer?
No, you can knead the dough by hand. It takes a bit more effort but yields the same results.
How do I prevent sticking while rolling?
Lightly flour your surface and rolling pin. Avoid adding too much flour, which can toughen the dough.
Can I bake ahead of time?
Absolutely. Bake the pastries, cool them, and store them. Reheat in the oven for fresh-baked flavor.
What temperature should I bake at?
Bake at 375°F for 15-20 minutes or until golden brown. Adjust time based on your oven.
Is it okay to skip the egg wash?
Yes, but the egg wash gives a shiny, golden crust. Skip it if you prefer a matte finish.
Conclusion
Danish Pastry Dough is a rewarding recipe that brings joy to any table. With its flaky layers and endless filling options, it’s great for both beginners and experienced bakers. Try it once, and you’ll want to make it again and again. Happy baking!
Equipment
- Rolling pin
- Large mixing bowls
- Plastic wrap for chilling
- Baking sheet
- Parchment paper
Ingredients
- 3 cups all-purpose flour
- 1/4 cup sugar
- 1 teaspoon salt
- 1 cup unsalted butter, cold
- 1 packet (2 1/4 teaspoons) active dry yeast
- 3/4 cup warm milk
- 1 large egg
- 1/4 cup water
Instructions
- In a large bowl, combine flour, sugar, and salt. Stir well to evenly distribute the ingredients.
- In a separate bowl, dissolve yeast in warm milk. Let it sit for 5-10 minutes until it foams.
- Pour the yeast mixture into the flour mixture. Add the beaten egg and water. Mix until a soft dough forms.
- Knead the dough on a floured surface for about 10 minutes. Place it in a greased bowl, cover it, and let it rise until doubled in size.
- Roll out the dough into a rectangle. Add cold butter in chunks, then fold it like a letter. Repeat rolling and folding several times.