
The Ultimate Decadent Chocolate Delight Awaits
Have you ever had a dessert so good it made you pause mid-bite? I made this Triple Chocolate Mousse Torte for my husband’s birthday, and let me tell you, the room went quiet. The only sounds were forks clinking and happy sighs. That’s the magic of three dreamy chocolate layers coming together in one perfect slice. It’s more than a dessert; it’s a moment of pure, unapologetic joy.
A Sweet Slice of History
The classic French mousse has been lightening up desserts for centuries. This torte is my playful, over-the-top take on that tradition. While a single chocolate mousse is elegant, combining dark, milk, and white chocolate creates a symphony of flavors and textures. It’s like getting the best of every chocolate world in one magnificent bite. I’ve served this at everything from fancy dinner parties to casual potlucks, and it always steals the show.
Why You’ll Fall in Love With This Recipe
This recipe is special for so many reasons! First, it looks incredibly fancy but is built on simple, repeating steps. Each layer uses the same easy method, just with different chocolate. The contrast between the deep, rich dark chocolate, the creamy milk chocolate, and the sweet white chocolate is simply breathtaking. It’s a foolproof way to create a dessert that looks like it came from a professional bakery.
Perfect Occasions for Your Chocolate Masterpiece
This torte is your secret weapon for making memories. It’s perfect for celebrating birthdays, anniversaries, or holidays. Bring it to a dinner party and watch it become the main topic of conversation. Honestly, it’s also perfect for a “just because” Tuesday when you need a major pick-me-up. Any day is a good day for this decadent chocolate delight.
Gathering Your Ingredients
Quality ingredients make a big difference here, especially the chocolate. Since it’s the star, choose a brand you enjoy eating on its own.
For the Crust:
- 1 ½ cups chocolate cookie crumbs (like Oreos, filling removed)
- ⅓ cup melted butter
For the Dark Chocolate Mousse:
- 2 tbsp butter
- 2 tbsp water
- 6 oz dark chocolate (60-70%), chopped
- 1 cup heavy cream
- 2 large egg yolks
- 2 tbsp granulated sugar
For the Milk Chocolate Mousse:
- 2 tbsp butter
- 2 tbsp water
- 6 oz milk chocolate, chopped
- 1 cup heavy cream
- 2 large egg yolks
- 2 tbsp granulated sugar
For the White Chocolate Mousse:
- 2 tbsp butter
- 2 tbsp water
- 6 oz white chocolate, chopped
- 1 cup heavy cream
- 2 large egg yolks
- 2 tbsp granulated sugar
Easy Ingredient Substitutions
Don’t worry if you’re missing something! Here are some easy swaps:
- Cookie Crumbs: Graham cracker crumbs work wonderfully for a different flavor.
- Dairy: For a non-dairy version, use coconut cream instead of heavy cream and a plant-based butter.
- Chocolate: Feel free to use chocolate chips if that’s what you have. Just make sure they are good quality.
- Egg-Free: You can omit the egg yolks for a simpler mousse. The texture will be a bit lighter but still delicious.
Crafting Your Decadent Chocolate Delight
Let’s build this beautiful dessert layer by layer. The process is like a relaxing, chocolaty meditation. Take your time and enjoy it!
Step 1: Create the Chocolate Foundation
Start by preheating your oven to 350°F (175°C). In a medium bowl, mix the fine, dark chocolate cookie crumbs with the warm, melted butter. The mixture should hold together when pinched. Press it firmly and evenly into the bottom of a 9-inch springform pan. I use the bottom of a measuring cup to get it nice and flat. Bake this for just 10 minutes until it sets and smells toasty. Let this base cool completely on a wire rack. A cool crust is key for those clean layers.
Step 2: Whip Up the Dark Chocolate Layer
Now for the first mousse! Place the chopped dark chocolate, butter, and water in a heatproof bowl over a pan of gently simmering water. Stir until it melts into a glossy, dark pool. Let it cool slightly. In a separate bowl, whip the heavy cream to soft peaks—it should look billowy and hold its shape. In another bowl, beat the egg yolks and sugar until they turn pale yellow and thick. Gently fold the slightly warm chocolate into the egg mixture, then carefully fold in the whipped cream. Watch as the dark, rich mousse forms. Spread this evenly over your cool crust. The scent is amazing. Chill for 30 minutes to let it set.
Pro tip: Make sure your melted chocolate is just warm, not hot, when you add it to the eggs. You don’t want to cook them!
Step 3: Build the Milk Chocolate Dream
Repeat the exact same process with the milk chocolate. Melt it with butter and water until smooth and creamy. Whip another cup of cold cream. Beat the yolks and sugar. Fold everything together into a luscious, tan-colored mousse. By now, you’re a pro at this! Gently spread this layer over the set dark chocolate. Use a spatula and try not to disturb the layer below. The color contrast is already stunning. Pop it back in the fridge for another 30 minutes.
Step 4: Crown It With White Chocolate
For the final act, use your white chocolate. White chocolate can be fussy, so melt it on very low heat to avoid seizing. Once melted and smooth, let it cool a bit more than the other chocolates. Whip the last of the cream, beat the last of the yolks and sugar, and fold it all into a cloud-like, ivory mousse. This sweet, creamy layer is the perfect finish. Spread it gently over the milk chocolate. Your gorgeous triple-layer decadent chocolate delight is assembled! Chill it for a final 30 minutes to firm up.
Step 5: The Grand Reveal and Serve
This is the best part. Run a thin knife around the inside edge of the springform pan to loosen the torte. Unlatch the pan and carefully lift the ring away. You’ll reveal the beautiful, striped cross-section of your creation. For super clean slices, dip your knife in hot water and wipe it dry between each cut. Serve each slice chilled and get ready for the applause.
Chef’s Secret: For an extra professional touch, use a blow dryer on low heat to gently warm the *sides* of the springform pan before removing it. This slightly melts the outer edge for a flawlessly smooth side.
Your Recipe Timetable
Good things take a little time, but most of it is hands-off chilling.
- Prep Time: 30 minutes (active mixing and assembling)
- Bake Time: 10 minutes (for the crust only)
- Chilling Time: About 1 hour 30 minutes (30 minutes per layer)
- Total Time: Approximately 2 hours 10 minutes
A Little Extra Chocolate Info
Did you know white chocolate isn’t technically chocolate? It contains cocoa butter but no cocoa solids. That’s why it has that different, sweet, buttery flavor. Using it in this trio gives you a full spectrum of the cocoa bean’s possibilities, from deep and complex to sweet and creamy.
Equipment You’ll Need
You likely have everything in your kitchen already:
- 9-inch springform pan (non-negotiable for easy removal)
- Mixing bowls (several!)
- Hand mixer or stand mixer
- Heatproof bowl for double boiler
- Spatulas
- Measuring cups and spoons
How to Store Your Masterpiece
This torte must be stored in the refrigerator. Cover it tightly with plastic wrap or place it in a large cake carrier. The mousse layers are delicate and need to stay cold.
It will keep beautifully for up to 4 days. The flavors actually meld and become even more wonderful on the second day.
You can also freeze it for up to a month. Wrap the whole torte or individual slices tightly in plastic wrap and then foil. Thaw overnight in the refrigerator before serving.
Tips for Absolute Perfection
- Ensure all ingredients, especially the cream and eggs, are at room temperature for the smoothest mousse.
- Chill your mixing bowl and beaters before whipping the cream. It whips faster and higher.
- When folding, use a gentle, sweeping motion to keep the mousse light and airy.
- Patience is key! Don’t rush the chilling steps. Each layer needs to be set before adding the next.
Presentation Ideas to Impress
- Dust the top with unsweetened cocoa powder or decorate with chocolate curls.
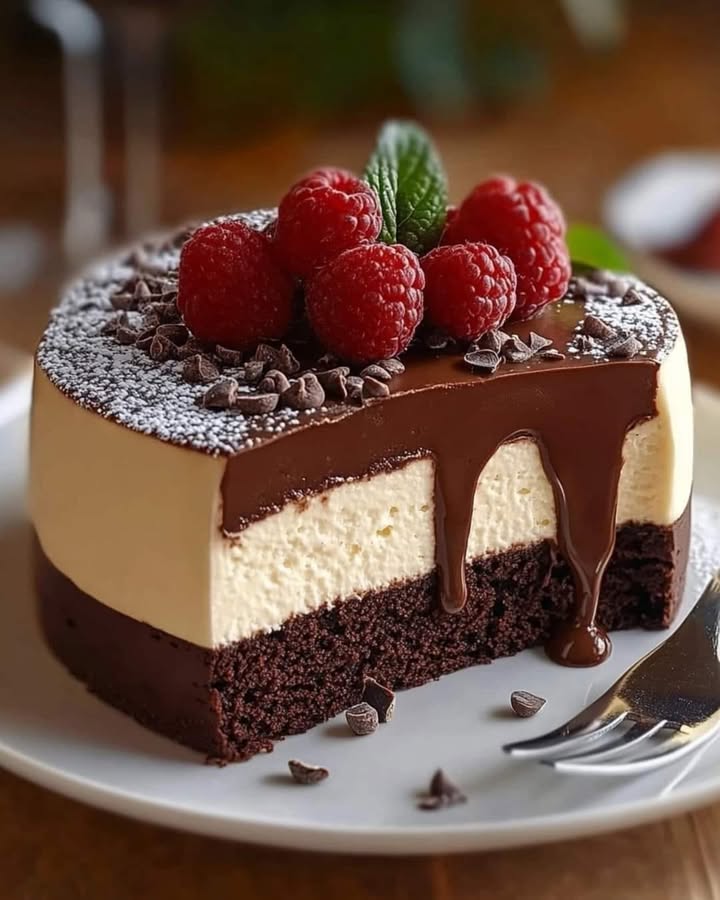
- Add a few fresh raspberries or a mint sprig on the side for a pop of color.
- Serve with a dollop of lightly sweetened whipped cream.
- Drizzle each plate with a little caramel or raspberry sauce before placing the slice.
Explore More Decadent Treats
If you loved building this show-stopping torte, you might enjoy other layered desserts. For a fruity twist, my White Chocolate Strawberry Cheesecake is always a hit. Nut lovers go crazy for the rich, creamy Peanut Butter Cheesecake. When summer hits, nothing beats homemade Strawberry Vanilla Bean Ice Cream. And for an easy, shareable treat, these Blueberry Cheesecake Bars are simply irresistible.
Common Mistakes to Avoid
Mistake 1: Rushing the Chilling Steps
It’s so tempting to pour the next layer on right away. If the layer below isn’t set, the warm mousse will melt into it and you’ll lose those beautiful, distinct stripes. The mousse needs that 30 minutes in the fridge to firm up enough to support the next layer. Set a timer and use the wait time to clean up or prep for the next step. Your patience will be rewarded with a picture-perfect slice.
Mistake 2: Overheating the Chocolate
Chocolate, especially white chocolate, can “seize” or become grainy and clumpy if overheated or if steam gets in. Always use a double boiler (or a bowl over simmering water) and make sure the bottom of the bowl doesn’t touch the water. Stir gently until just melted and smooth. If you’re curious about ingredient quality in your cooking, reading about clean eating principles can offer great insights into selecting wholesome ingredients.
Mistake 3: Deflating the Mousse
The magic of mousse is its airy texture. If you stir or mix too hard when combining the chocolate with the eggs and cream, you’ll knock out all the air bubbles. Always “fold” using a spatula in a gentle, scooping motion from the bottom up. Mix just until you see no more streaks. A few small streaks are better than an over-mixed, dense mousse.
Mistake 4: Using Cold Ingredients
Cold egg yolks and cold melted chocolate can cause the mixture to stiffen too quickly. This makes it very hard to fold in the whipped cream smoothly, leading to lumps. Take your eggs out of the fridge ahead of time. Let your melted chocolate cool, but don’t let it get cold. Room temperature ingredients are friends here.
This torte is a fantastic example of what you can create with a few great techniques. If you’re looking for more bar and sliceable dessert inspiration, check out our full collection of dessert bars and brownie recipes for your next baking project.
Frequently Asked Questions
Can I make this torte ahead of time?
Absolutely! This is actually a fantastic make-ahead dessert. You can prepare the entire torte, cover it well, and store it in the refrigerator for up to two days before you plan to serve it. The flavors have time to develop and meld together, often making it taste even better. Just be sure to add any final garnishes, like fresh berries or whipped cream, right before serving so they look their best.
What’s the best chocolate to use for each layer?
For the best flavor, choose a chocolate you enjoy eating on its own. For the dark layer, a good quality dark chocolate bar with 60-70% cocoa content gives a deep, rich flavor without being too bitter. For the milk chocolate, any standard milk chocolate bar or chips will work well. For the white chocolate, look for a bar that lists cocoa butter as the first ingredient, not just sugar and oil. Avoid using candy melts for the white layer, as they won’t provide the same creamy texture.
Can I make this recipe without eggs?
Yes, you can make a delicious egg-free version. Simply omit the egg yolks and sugar from each mousse step. The texture will be slightly lighter and less custard-like, but still wonderfully creamy and airy. The chocolate, butter, and whipped cream are the main stars. You may want to add a tiny pinch of salt to each chocolate mixture to help balance the sweetness, especially in the white chocolate layer.
My white chocolate got lumpy when I melted it. What can I do?
White chocolate is very sensitive to heat and moisture. If it seizes and gets grainy, you can often save it by immediately stirring in an extra tablespoon of warm heavy cream from your measured amount. Keep stirring vigorously until it becomes smooth again. To prevent this, always melt white chocolate over the lowest possible heat and make sure your bowl is completely dry before you start.
How do I get perfectly clean slices?
Clean slices are all about the right tool and technique. Use a long, thin-bladed knife. Dip the blade in a tall glass of very hot water for about 10 seconds, then wipe it completely dry with a clean towel. Make one smooth, confident cut without sawing. Repeat the hot water and drying step for every single slice. This melts through the mousse cleanly and prevents the layers from smearing.
Can I use a different type of pan?
A springform pan is highly recommended because the removable sides make it easy to get the tall, elegant torte out without damaging it. If you don’t have one, you can use a regular 9-inch cake pan lined with parchment paper that overhangs the sides. This creates “slings” to help you lift the whole torte out. It requires more care, but it is possible.
Is it safe to eat the mousse with raw egg yolks?
The egg yolks in this recipe are technically not fully cooked, as they are only warmed by the melted chocolate. If you are serving young children, the elderly, pregnant women, or anyone with a compromised immune system, you should use pasteurized eggs for safety. You can find them in most large grocery stores. Alternatively, you can follow the egg-free variation mentioned above.
My mousse layers seem too soft. What happened?
Soft layers usually mean the whipped cream was not whipped enough, or the torte didn’t chill long enough before serving. The cream should be whipped to firm peaks where it holds its shape firmly. Also, after the final layer is added, letting the whole torte chill for at least 4 hours (or ideally overnight) ensures all the layers are fully set and sliceable.
Can I freeze individual slices?
Freezing individual slices is a fantastic idea! It lets you have a personal dessert ready anytime. Wrap each slice tightly in plastic wrap, then place them in a single layer in a freezer bag or airtight container. They will keep for about a month. Thaw a slice in the refrigerator for a few hours or at room temperature for about 30 minutes before enjoying.
Graham cracker crumbs are a classic and delicious alternative. You can also use crushed vanilla wafers, digestive biscuits, or even crushed pretzels for a sweet-and-salty twist. Keep the same ratio of 1 ½ cups crumbs to ⅓ cup melted butter. If using a less sweet crumb like graham crackers, you might want to mix in a tablespoon of sugar with the crumbs before adding the butter.
Your Dream Dessert Awaits
There you have it! Your guide to creating an unforgettable decadent chocolate delight that’s sure to wow. This Triple Chocolate Mousse Torte is more than just mixing ingredients. It’s about creating something beautiful and sharing a moment of pure happiness. So put on your apron, embrace the process, and get ready for the best chocolate experience of your life. Every creamy, dreamy bite is worth the effort. Now go bake some magic!
Equipment
- Grand bol
- Fouet
- Spatule
- Plaque à pâtisserie
- Papier sulfurisé
Ingredients
- 4 œufs
- 150 g sucre
- 30 g cacao en poudre
- 65 g farine tout usage
- 5 g poudre à lever
- 1 g sel
- 240 ml crème épaisse
- 120 ml sauce caramel
- 90 g pépites de chocolat
- q.s. sucre glace pour saupoudrer
- q.s. cacao en poudre pour saupoudrer
- q.s. sauce caramel pour le décor
Instructions
- Préchauffez votre four à 175°C. Mélangez les miettes de biscuits chocolatés avec le beurre fondu, pressez dans un moule à charnière de 9 pouces et faites cuire pendant 10 minutes. Laissez refroidir complètement sur une grille.
- Pour la couche de chocolat noir, faites fondre le chocolat noir avec le beurre et l'eau au bain-marie. Laissez refroidir légèrement. Fouettez la crème jusqu'à obtenir des pics mous. Battez les jaunes d'œufs et le sucre jusqu'à ce que le mélange soit pâle. Incorporez le chocolat fondu au mélange d'œufs, puis incorporez la crème fouettée. Étalez sur la croûte refroidie et réfrigérez pendant 30 minutes.
- Répétez le processus avec le chocolat au lait. Faites fondre, refroidir, fouetter la crème, battre les jaunes et le sucre, puis mélanger et étaler sur la couche de chocolat noir. Réfrigérez encore 30 minutes.
- Pour la couche de chocolat blanc, faites fondre le chocolat blanc avec le beurre et l'eau à feu doux. Laissez refroidir légèrement, fouettez la crème et battez les jaunes d'œufs avec le sucre. Incorporez le tout et étalez sur la couche de chocolat au lait. Réfrigérez pendant 30 minutes supplémentaires.
- Passez un couteau fin autour de l'intérieur du moule à charnière pour détacher, déverrouillez le moule et soulevez délicatement. Coupez le torte en utilisant un couteau trempé dans de l'eau chaude pour des bords propres et servez froid.