
A Decadent Peanut Butter Cake That Will Make Your Heart Sing
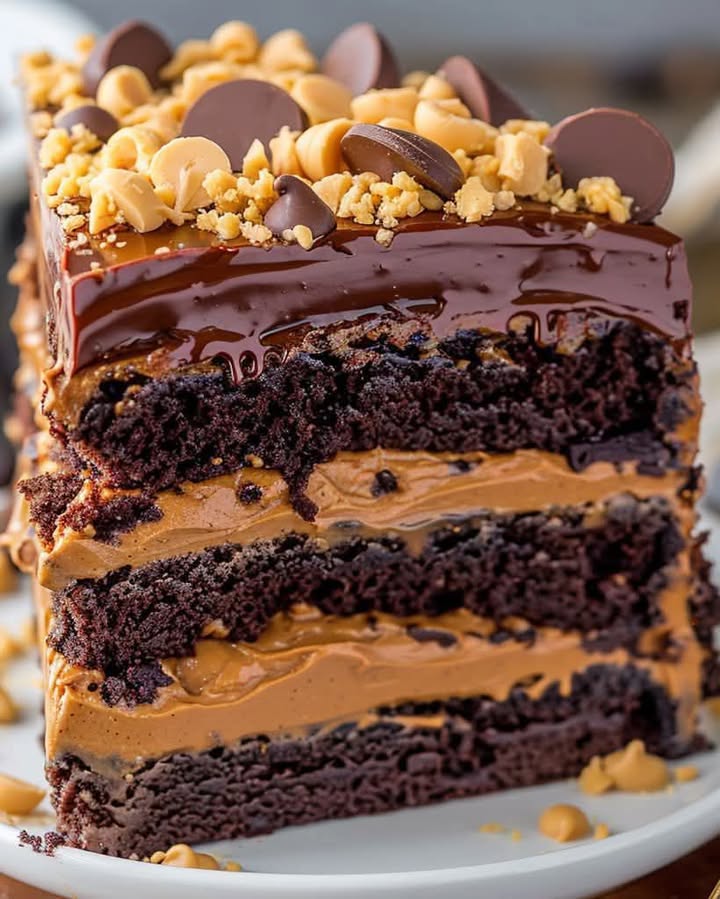
Imagine a rich, chocolatey cake layered with creamy peanut butter and topped with a luscious chocolate ganache. This Decadent Peanut Butter Cake is the stuff of dreams, and it’s about to become your new favorite dessert. I first made this for my husband’s birthday, and it was an instant hit. Now, it’s a must-have at every family gathering.
The Sweet History Behind This Heavenly Treat
This recipe has its roots in the classic ooey-gooey cakes that are a staple in Southern baking. The combination of chocolate and peanut butter is a match made in heaven, and it’s no wonder it’s become a beloved treat. Over the years, I’ve tweaked the traditional recipe to create a more indulgent and modern version. It’s a perfect blend of old and new, and it always brings a smile to everyone’s face.
Why You’ll Fall in Love with This Decadent Peanut Butter Cake
There’s so much to love about this cake. The deep, rich flavor of the chocolate layers perfectly complements the smooth, nutty peanut butter filling. Plus, it’s surprisingly easy to make, even if you’re not a seasoned baker. The best part? It’s a showstopper that will impress anyone, from your pickiest eaters to your most discerning guests.
Perfect Occasions to Prepare This Divine Dessert
This Decadent Peanut Butter Cake is perfect for any special occasion. Whether it’s a birthday, anniversary, or just a weekend treat, it’s sure to be a hit. I’ve even made it for a casual dinner party, and it was the star of the evening. It’s one of those desserts that can elevate any event, making it feel extra special.
Ingredients for Your Decadent Peanut Butter Cake
- 1 cup all-purpose flour
- 1/2 cup cocoa powder
- 1 tsp baking soda
- 1/2 tsp salt
- 1 cup unsalted butter, softened
- 1 cup granulated sugar
- 1 cup brown sugar, packed
- 4 large eggs
- 1 tsp vanilla extract
- 1 cup buttermilk
- 1 cup hot water
- 1 cup creamy peanut butter
- 2 cups powdered sugar
- 1/2 cup heavy cream
- 1 cup chocolate chips
- 1 cup peanut butter chips
- 1/2 cup chopped peanuts
Substitution Options for Your Decadent Peanut Butter Cake
- Buttermilk: If you don’t have buttermilk, you can make a substitute by adding 1 tablespoon of lemon juice or white vinegar to 1 cup of milk and letting it sit for 5 minutes.
- Peanut Butter: For a different twist, you can use almond butter or sunflower seed butter.
- Heavy Cream: Half-and-half or whole milk can be used as a substitute, but the texture may be slightly different.
Preparation: Step-by-Step Guide to Baking Perfection
Step 1: Preheat and Prep
Preheat your oven to 350°F (175°C). Grease and flour three 8-inch round cake pans. This step is crucial to ensure your cake doesn’t stick and comes out beautifully. The aroma of the preheating oven already makes me excited!
Step 2: Mix the Dry Ingredients
In a medium bowl, whisk together the flour, cocoa powder, baking soda, and salt. The dark, rich color of the cocoa powder mixed with the flour is a sight to behold. It’s like magic happening right before your eyes.
Step 3: Cream the Butter and Sugars
In a large bowl, beat the butter, granulated sugar, and brown sugar until creamy and fluffy. Add the eggs one at a time, beating well after each addition. Stir in the vanilla extract. The mixture should be light and airy, with a delightful aroma that fills your kitchen.
Step 4: Combine Wet and Dry Ingredients
Alternately add the flour mixture and buttermilk to the butter mixture, beginning and ending with the flour mixture. Mix just until combined. The batter will be smooth and glossy, with a deep, rich color that promises a delectable treat.
Step 5: Add Hot Water and Pour Batter
Stir in the hot water until the batter is smooth. The hot water helps to enhance the chocolate flavor and gives the cake a moist, tender crumb. Pour the batter evenly into the prepared cake pans. The pans should be about two-thirds full, which is perfect for even baking.
Step 6: Bake and Cool
Bake for 30-35 minutes or until a toothpick inserted into the center comes out clean. The kitchen will be filled with the heavenly scent of baking chocolate. Cool in the pans for 10 minutes, then remove to wire racks to cool completely. Patience is key here; the cake needs to cool to room temperature to avoid crumbling.
Step 7: Make the Peanut Butter Filling
Beat the peanut butter, powdered sugar, and heavy cream together until smooth and fluffy. The filling should be thick and creamy, with a wonderful, nutty aroma. It’s hard not to sneak a taste, but save it for the cake!
Step 8: Assemble the Cake
Place one layer on a serving plate and spread with peanut butter filling. Repeat with the remaining layers. The layers should be even and the filling should be spread generously. It’s like building a tower of deliciousness, and it’s a joy to watch it come together.
Step 9: Make the Chocolate Ganache
Melt the chocolate chips and heavy cream together until smooth. Pour over the top of the cake. The ganache should be glossy and pourable, adding a luxurious, finishing touch to the cake. Watch as it cascades down the sides, creating a beautiful, decadent look.
Step 10: Garnish and Serve
Garnish with peanut butter chips and chopped peanuts. The added crunch and texture make the cake even more irresistible. Slice and serve, and get ready for the compliments to roll in!
Chef’s Tip: Add a Secret Ingredient
For an extra special touch, add a pinch of sea salt to the peanut butter filling. The salt enhances the flavors and adds a subtle, savory note that balances the sweetness perfectly.
Timing: A Breakdown of Your Baking Schedule
Prep Time: 25 minutes
Cooking Time: 35 minutes
Total Time: 1 hour
Kcal: 500 kcal per serving
Servings: 12 servings
Chef’s Secret: A Little Extra Love
One of my secret tricks is to brush the cake layers with a simple syrup (equal parts water and sugar, heated until the sugar dissolves) before adding the peanut butter filling. This keeps the cake super moist and adds a touch of sweetness that takes it to the next level.
Extra Info: A Fun Fact About Chocolate and Peanut Butter
Did you know that chocolate and peanut butter were first combined in the 1920s when a man named H.B. Reese created the iconic Reese’s Peanut Butter Cups? Since then, the combination has become a classic, and it’s no wonder why. The flavors complement each other perfectly, and it’s a pairing that never gets old.
Necessary Equipment: Tools for Success
- Three 8-inch round cake pans
- Mixing bowls
- Electric mixer
- Wire cooling racks
- Serving plate
- Offset spatula
Storage: Keeping Your Cake Fresh
To keep your Decadent Peanut Butter Cake fresh, store it in an airtight container at room temperature for up to 3 days. If you live in a warm climate, it’s best to store it in the refrigerator to prevent the peanut butter filling from going rancid. Just make sure to bring it back to room temperature before serving for the best texture and flavor.
If you need to store it longer, you can freeze the cake. Wrap each slice tightly in plastic wrap, then place them in a freezer bag. They will keep for up to 2 months. When you’re ready to enjoy, simply thaw the slices at room temperature for a few hours.
Pro tip: If you’re freezing the entire cake, it’s best to do so before adding the ganache. Once the cake is fully thawed, you can then add the ganache and garnishes. This way, the ganache will stay smooth and glossy, and the cake will still be fresh and delicious.
Tips and Advice: Making the Most of Your Baking Experience
- Room Temperature Ingredients: Make sure all your ingredients, especially the butter and eggs, are at room temperature. This ensures they mix smoothly and evenly, resulting in a better texture.
- Measure Accurately: Use a kitchen scale to measure your ingredients for the most accurate results. This is especially important for the flour, as too much can make the cake dense.
- Don’t Overmix: Mix the batter just until the ingredients are combined. Overmixing can lead to a tough, dry cake, which is the last thing you want.
Presentation Tips: Making Your Cake Look Stunning
- Add a Border: Use a piping bag to add a border of peanut butter frosting around the edges of the cake. This not only looks professional but also helps to hold the ganache in place.
- Decorate with Nuts: Sprinkle some chopped peanuts or peanut butter chips on top of the ganache for a decorative touch. You can also arrange them in a pattern for a more elegant look.
- Use a Cake Stand: Present your cake on a pretty cake stand. This elevates the presentation and makes it look like a masterpiece.
Healthier Alternative Recipes: Variations for Every Diet
Here are six possible variations of this Decadent Peanut Butter Cake that cater to different dietary needs and preferences:
- Vegan Version: Substitute the butter with vegan margarine, the eggs with applesauce or flax eggs, and the buttermilk with a plant-based milk. Use dairy-free chocolate chips and coconut cream for the ganache.
- Gluten-Free Version: Use a gluten-free flour blend in place of the all-purpose flour. Make sure to check that all other ingredients are certified gluten-free.
- Low-Sugar Version: Replace the granulated and brown sugars with a low-calorie sweetener like stevia or erythritol. Use sugar-free chocolate chips and a sugar-free peanut butter.
- Whole Wheat Version: Substitute half of the all-purpose flour with whole wheat flour. This adds a nutty flavor and a bit more fiber to the cake.
- Nut-Free Version: Use sunflower seed butter instead of peanut butter and omit the peanut butter chips and chopped peanuts. You can add a sprinkle of sea salt for a little extra flavor.
- Mini Cakes: Bake the cake in a mini muffin tin for individual servings. This is perfect for parties or when you want to indulge without overdoing it.
Common Mistakes to Avoid: Perfecting Your Decadent Peanut Butter Cake
Mistake 1: Overmixing the Batter
Overmixing the batter can lead to a tough, dense cake. The key is to mix just until the ingredients are combined. You want to see a smooth, even batter, but there’s no need to beat it excessively. Pro tip: Use a spatula to fold in the final bits of flour gently, ensuring everything is well incorporated without overmixing.
Mistake 2: Not Using Room Temperature Ingredients
Using cold ingredients, especially butter and eggs, can result in a lumpy, uneven batter. Room temperature ingredients mix more smoothly and evenly, leading to a better texture. Take the butter and eggs out of the refrigerator at least 30 minutes before you start baking to ensure they reach the right temperature.
Mistake 3: Not Letting the Cake Cool Completely
Patience is a virtue, especially in baking. If you try to assemble the cake while it’s still warm, it can crumble and fall apart. Let the cake layers cool completely on a wire rack before adding the peanut butter filling and ganache. This ensures a neat, professional-looking cake that holds its shape.
Mistake 4: Overbaking the Cake
Overbaking can dry out the cake, making it less enjoyable. Keep an eye on the cake and test it with a toothpick. When the toothpick comes out clean, the cake is done. If you’re unsure, it’s better to err on the side of slightly underbaked rather than overbaked. A slightly underbaked cake will still be moist and delicious.
Mistake 5: Not Leveling the Cake Layers
If your cake layers are domed, they won’t stack neatly. Use a serrated knife to level the tops of the cake layers before assembling. This ensures a flat, even surface for the peanut butter filling, making the cake look and taste better. Pro tip: Save the cake scraps for a little snack or to crumble over ice cream.
FAQ: Answers to Your Burning Questions
Can I use natural peanut butter for this recipe?
Yes, you can use natural peanut butter, but it might make the filling a bit runnier. To counter this, you can add a bit more powdered sugar to thicken it. Just make sure to stir the natural peanut butter well before using it to incorporate any oil that may have separated.
How can I make the cake less sweet?
To make the cake less sweet, you can reduce the amount of sugar in the cake batter and the peanut butter filling. Start by reducing the sugar by 1/4 cup and adjust to your taste. You can also use a bittersweet chocolate for the ganache to balance the sweetness.
Can I make this cake ahead of time?
Absolutely! You can bake the cake layers and make the peanut butter filling up to a day in advance. Store the cake layers at room temperature, wrapped in plastic wrap, and the filling in the refrigerator. Assemble the cake on the day you plan to serve it for the best texture and flavor.
What can I do if I don’t have buttermilk?
If you don’t have buttermilk, you can make a substitute by adding 1 tablespoon of lemon juice or white vinegar to 1 cup of milk and letting it sit for 5 minutes. This will curdle the milk and give it the same tangy flavor as buttermilk.
Can I use a different type of nut butter?
Yes, you can use other types of nut butter, such as almond butter or cashew butter. Just keep in mind that the flavor and consistency may vary slightly. If the nut butter is very thick, you may need to add a bit more heavy cream to achieve the right consistency for the filling.
How do I store leftover cake?
Store leftover cake in an airtight container at room temperature for up to 3 days. If you live in a warm climate, it’s best to store it in the refrigerator to prevent the peanut butter filling from going rancid. Just make sure to bring it back to room temperature before serving for the best texture and flavor.
Can I freeze the cake?
Yes, you can freeze the cake. Wrap each slice tightly in plastic wrap, then place them in a freezer bag. They will keep for up to 2 months. When you’re ready to enjoy, simply thaw the slices at room temperature for a few hours.
What can I do if my cake is too dry?
If your cake turns out dry, it might be because it was overbaked or the ingredients weren’t mixed properly. To salvage it, you can brush the cake layers with a simple syrup (equal parts water and sugar, heated until the sugar dissolves) before adding the peanut butter filling. This will add moisture and a touch of sweetness.
How do I make the ganache shiny?
To make the ganache shiny, make sure the chocolate and heavy cream are well-combined and smooth. If the ganache is too thick, you can add a bit more cream to thin it out. Pour the ganache over the cake while it’s still warm and smooth, and it will set with a beautiful, glossy finish.
Can I use a different type of chocolate for the ganache?
Yes, you can use different types of chocolate for the ganache. Dark chocolate, milk chocolate, or even white chocolate can be used. Just keep in mind that the flavor and sweetness will vary, so choose the type of chocolate that best suits your taste.
Final Thoughts: Enjoy Your Decadent Peanut Butter Cake
There you have it, a Decadent Peanut Butter Cake that’s sure to be a hit at any gathering. With its rich, chocolatey layers, creamy peanut butter filling, and luscious chocolate ganache, it’s a dessert that will make your heart sing. Whether you’re a seasoned baker or a beginner, this recipe is easy to follow and guaranteed to impress. So, grab your apron, preheat your oven, and get ready to create a masterpiece that will delight your friends and family. Happy baking!
Equipment
- Trois moules à gâteau ronds de 8 pouces
- Bols de mélange
- Mélangeur électrique
- Grille de refroidissement
- Assiette de service
- Spatule décalée
Ingredients
- 120 g farine tout usage
- 50 g cacao en poudre
- 5 g poudre à lever
- 1 g sel
- 240 g beurre non salé, ramolli
- 200 g sucre blanc
- 220 g sucre brun, tassé
- 4 œufs
- 5 g extrait de vanille
- 240 ml lait fermenté
- 240 ml eau chaude
- 240 g beurre de cacahuète crémeux
- 120 g sucre glace
- 120 ml crème épaisse
- 150 g pépites de chocolat
- 120 g pépites de beurre de cacahuète
- 60 g cacahuètes hachées
Instructions
- Préchauffez votre four à 175°C. Graissez et farinez trois moules à gâteau de 8 pouces.
- Dans un bol moyen, fouettez la farine, le cacao en poudre, la poudre à lever et le sel.
- Dans un grand bol, battez le beurre, le sucre blanc et le sucre brun jusqu'à ce que le mélange soit crémeux et léger. Ajoutez les œufs un à un en battant bien après chaque ajout. Incorporez l'extrait de vanille.
- Ajoutez alternativement le mélange de farine et le lait fermenté à la préparation de beurre, en commençant et en terminant par le mélange de farine. Mélangez juste jusqu'à ce que le tout soit bien combiné.
- Incorporez l'eau chaude jusqu'à ce que la pâte soit lisse. Versez la pâte également dans les moules à gâteau préparés.
- Faites cuire pendant 30-35 minutes ou jusqu'à ce qu'un cure-dent inséré au centre en ressorte propre. Laissez refroidir dans les moules pendant 10 minutes, puis retirez et laissez refroidir complètement sur des grilles.
- Battez le beurre de cacahuète, le sucre glace et la crème épaisse jusqu'à ce que le mélange soit lisse et crémeux.
- Placez une couche sur une assiette de service et étalez la garniture au beurre de cacahuète dessus. Répétez avec les couches restantes.
- Faites fondre les pépites de chocolat et la crème épaisse ensemble jusqu'à obtenir un mélange lisse. Versez sur le dessus du gâteau.
- Garnissez avec des pépites de beurre de cacahuète et des cacahuètes hachées. Tranchez et servez.
Notes
Nutrition

Hi, I’m Olivia Parker, the founder of BakingSecret.com and a lifelong lover of all things sweet and homemade. I grew up in a small town in Oregon, where the smell of fresh cookies in my family’s kitchen sparked my passion for baking. Over the years, I turned that passion into a mission: to help home bakers feel confident, inspired, and creative.
After studying food science and working in several artisan bakeries across the U.S., I decided to create a space where everyone from beginners to seasoned bakers can find reliable recipes, expert tips, and a warm, welcoming community. BakingSecret.com is my way of sharing the magic of baking with the world. When I’m not testing new recipes, you’ll find me exploring farmers’ markets, collecting vintage cookbooks, or perfecting my sourdough technique.