
A Sweet Slice of Heaven: My Fluffy Banana Cake Story
Every time I bake this Fluffy Banana Cake, it’s like a little piece of my heart goes into the oven. It’s not just a cake; it’s a memory, a warm hug, and a delicious way to use up those overripe bananas. I’ve tested this recipe countless times, and it never fails to bring a smile to everyone’s face. So, let’s dive into the world of fluffy, banana-filled goodness!
A Brief History of This Irresistible Treat
Banana cake has been a beloved treat for generations. It’s one of those classic recipes that every family has their own version of. In my grandmother’s kitchen, it was a simple, no-fuss dessert that always felt like a special treat. Over the years, I’ve added my own twist, making it even fluffier and more delightful. Whether you’re trying it for the first time or looking to perfect your own version, this Fluffy Banana Delight is sure to become a favorite.
Why You’ll Love This Fluffy Banana Delight
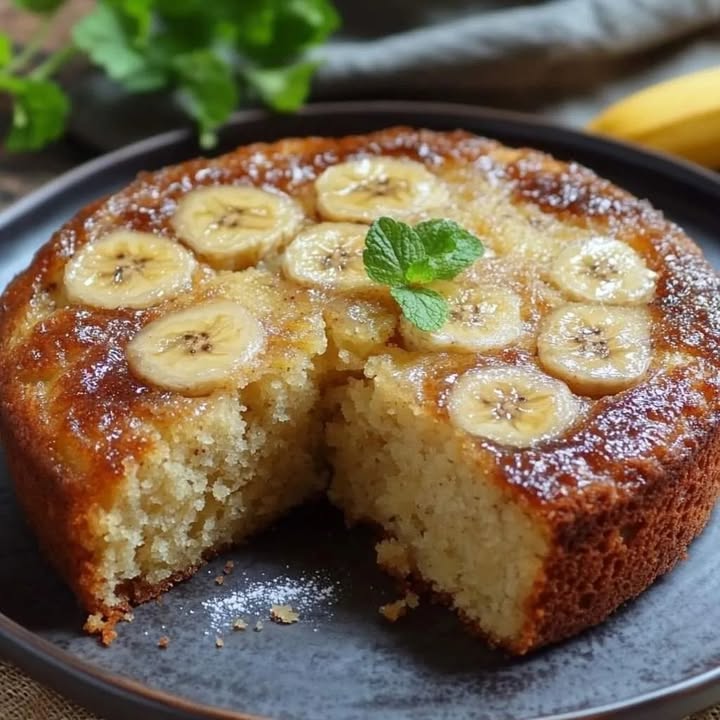
This Fluffy Banana Cake is a true crowd-pleaser. It’s incredibly moist, with a perfect balance of sweetness and a rich banana flavor. The best part? It’s super easy to make. Even if you’re not a baking expert, you can whip up this cake in no time. Plus, it’s a great way to use up those extra ripe bananas sitting on your counter.
Perfect Occasions to Prepare This Recipe
This Fluffy Banana Delight is perfect for any occasion. Whether it’s a Sunday brunch, a family gathering, or a cozy night in, this cake is always a hit. It’s also a wonderful gift for friends and neighbors—just wrap it up in a pretty box and watch the smiles appear.
Ingredients
- 2 cups of wheat flour
- 1 cup of sugar
- 1/2 cup butter, softened
- 1 cup mashed ripe bananas (about 2 to 3 bananas)
- 1/2 cup of milk
- 2 large eggs
- 1 teaspoon vanilla extract
- 1 teaspoon of baking powder
- 1 teaspoon of baking soda
- 1/4 teaspoon salt
Substitution Options
If you need to swap out some ingredients, here are a few options:
- Butter: You can use coconut oil or vegetable oil as a substitute.
- Milk: Feel free to use almond milk or oat milk for a dairy-free option.
- Wheat Flour: Substitute with all-purpose flour or a gluten-free flour blend.
Preparation Section
Step 1: Preheat and Prep
Start by preheating your oven to 180°C (350°F). While the oven is heating up, grease and flour a medium-sized pan. This step is crucial to ensure your cake doesn’t stick and comes out perfectly. The aroma of butter and the sight of the pan ready to go always makes me excited to start baking.
Step 2: Mix the Dry Ingredients
In a large bowl, mix together the flour, sugar, baking powder, baking soda, and salt. Use a whisk to combine them thoroughly. This mixture will give your cake its structure and texture. The fine powder and sweet smell of sugar always make me feel like a professional baker.
Step 3: Cream the Butter and Eggs
In another bowl, beat the softened butter with the eggs until the mixture is creamy and smooth. Add the mashed bananas, milk, and vanilla extract, mixing well. The mashed bananas add a natural sweetness and a creamy texture, while the vanilla extract enhances the overall flavor. The color and aroma of the mixture are simply divine.
Step 4: Combine Wet and Dry Ingredients
Gradually add the dry ingredients to the banana mixture, mixing until the batter is homogeneous. Be careful not to overmix; you want to keep the batter light and airy. The batter should be smooth and slightly thick, perfect for pouring into the prepared pan.
Step 5: Bake to Perfection
Pour the batter into the prepared pan and smooth the top with a spatula. Bake for 30-35 minutes, or until a toothpick inserted into the center of the cake comes out clean. The golden-brown top and the heavenly aroma of baking bananas will tell you when it’s done. Pro tip: If the top is browning too quickly, cover it loosely with aluminum foil.
Step 6: Cool and Serve
Remove the cake from the oven and let it cool in the pan for a few minutes. Then, carefully unmold the cake onto a wire rack to cool completely. Serve warm or at room temperature. The cake is best enjoyed fresh, with a cup of coffee or tea. The texture is light, fluffy, and absolutely delicious.
Chef’s Tip: A Secret to Enhance the Recipe
To take this cake to the next level, add a pinch of cinnamon to the dry ingredients. The subtle spice complements the banana flavor beautifully, adding a touch of warmth and complexity.
Timing
Prep Time: 15 minutes
Cooking Time: 30-35 minutes
Total Time: 2 hours (including cooling time)
Chef’s Secret: A Unique Trick
For an extra moist and fluffy texture, try using buttermilk instead of regular milk. Buttermilk adds a tangy flavor and helps the cake rise more evenly, resulting in a melt-in-your-mouth experience.
Extra Info: An Interesting Fact
The first recorded banana bread recipe dates back to the Great Depression, when housewives used overripe bananas to create a new and delicious treat. Today, it’s a beloved classic, and this Fluffy Banana Delight is a modern twist on that timeless favorite.
Necessary Equipment
- Medium-sized cake pan
- Large mixing bowls
- Whisk
- Spatula
- Toothpick
- Wire rack
Storage: How to Keep Your Cake Fresh
Storing your Fluffy Banana Cake properly is key to keeping it fresh and delicious. Here are some tips:
Room Temperature: Store the cake in an airtight container at room temperature for up to 3 days. This keeps it moist and prevents it from drying out.
Refrigerator: If you live in a warmer climate or want to extend the shelf life, store the cake in the refrigerator. Wrap it tightly in plastic wrap or aluminum foil, and place it in an airtight container. It will stay fresh for up to 5 days.
Freezer: For long-term storage, you can freeze the cake. Cut it into slices, wrap each slice in plastic wrap, and place them in a freezer bag. Frozen cake can last up to 3 months. When you’re ready to enjoy, simply thaw it at room temperature for a few hours.
Tips and Advice
To make sure your Fluffy Banana Cake turns out perfectly, follow these tips:
- Use very ripe bananas for the best flavor and sweetness.
- Measure your ingredients accurately for consistent results.
- Don’t overmix the batter; it should be just combined to avoid a dense cake.
- Let the cake cool completely before serving to enhance its texture.
Presentation Tips
Make your Fluffy Banana Cake look and taste even better with these presentation ideas:
- Top with a dollop of whipped cream and a sprinkle of cinnamon.
- Add a few slices of fresh banana and a drizzle of caramel sauce.
- Decorate with a simple dusting of powdered sugar.
- Create a banana-flavored frosting and spread it on top for a festive look.
Variations: Healthier Alternatives to Try
Here are six variations of this classic recipe, each with a unique twist:
- Whole Wheat Banana Cake: Swap the wheat flour for whole wheat flour for a healthier, fiber-rich version. The nutty flavor of whole wheat complements the sweetness of the bananas perfectly.
- Honey Banana Cake: Replace the sugar with honey for a natural, less processed sweetener. Honey adds a subtle, floral note to the cake, making it even more delicious.
- Gluten-Free Banana Cake: Use a gluten-free flour blend in place of the wheat flour. This version is perfect for those with gluten sensitivities, and the texture remains light and fluffy.
- Vegan Banana Cake: Substitute the eggs with a vegan egg replacer and use plant-based milk. This version is cruelty-free and equally tasty, with a soft, moist texture.
- Banana Walnut Cake: Add a half cup of chopped walnuts to the batter for a crunchy, nutty addition. Walnuts add a lovely texture and a boost of omega-3 fatty acids.
- Banana Chocolate Chip Cake: Fold in a half cup of dark chocolate chips for a decadent treat. Dark chocolate is rich in antioxidants and adds a luxurious touch to the cake.
For more fantastic baking ideas, check out our other recipes, like the Apple Sharlotka Delight, Pineapple Cream Cheese Cake, Hawaiian Carrot Cake, and Chocolate Sour Cake.
Common Mistakes to Avoid
Mistake 1: Overmixing the Batter
Overmixing can lead to a dense, tough cake. The key is to mix the wet and dry ingredients just until they are combined. Overmixing activates the gluten in the flour, which can make the cake heavy and chewy. To avoid this, mix gently and stop once the batter is smooth.
Mistake 2: Using Under-ripe Bananas
Under-ripe bananas lack the sweetness and depth of flavor that make this cake so delicious. Make sure your bananas are very ripe, with brown spots and a strong banana aroma. Ripe bananas not only add a rich flavor but also help keep the cake moist and flavorful.
Mistake 3: Not Greasing the Pan Properly
Failing to grease the pan properly can result in a cake that sticks and breaks apart. Make sure to thoroughly grease the pan and dust it with flour. This ensures that the cake will slide out easily and maintain its shape. If you don’t have flour, you can use a non-stick spray for the same effect.
Mistake 4: Opening the Oven Too Often
Opening the oven door frequently can cause the cake to sink and lose its fluffiness. Try to resist the temptation to peek and wait until the end of the baking time. If you need to check, do so quickly and close the door as soon as possible. This will help maintain the oven’s temperature and ensure an even bake.
FAQ
Can I use self-rising flour instead of wheat flour?
Yes, you can use self-rising flour, but you’ll need to omit the baking powder and baking soda. Self-rising flour already contains leavening agents, so adding more could result in an overly puffed cake. Just use 2 cups of self-rising flour and leave out the additional leavening agents.
How can I make this cake dairy-free?
To make this cake dairy-free, you can substitute the butter with coconut oil or vegetable oil and use a dairy-free milk alternative like almond milk or oat milk. These substitutions work well and will still give you a delicious, fluffy cake.
Can I use a different type of sugar?
Yes, you can use different types of sugar, such as brown sugar or coconut sugar. Brown sugar will add a slight molasses flavor and a richer, more caramel-like sweetness, while coconut sugar will give a subtle, earthy taste. Just make sure to use the same amount as the white sugar called for in the recipe.
What if I don’t have a wire rack?
If you don’t have a wire rack, you can cool the cake in the pan for about 10-15 minutes. Then, carefully run a knife around the edges to loosen it, and gently invert it onto a plate or cutting board. Let it cool further before serving. This method works well, but a wire rack does help the cake cool more evenly.
Can I freeze the mashed bananas?
Absolutely! Mashed bananas can be frozen for later use. Simply mash the bananas, place them in an airtight container or freezer bag, and freeze for up to 3 months. When you’re ready to use them, thaw them in the refrigerator overnight or at room temperature for a few hours.
How can I tell if the cake is done?
To check if the cake is done, insert a toothpick into the center. If it comes out clean or with a few moist crumbs, the cake is ready. If there is wet batter on the toothpick, continue baking for a few more minutes. The top should be golden brown and the cake should spring back when lightly pressed.
Can I add nuts to the cake?
Yes, you can add nuts to the cake for extra texture and flavor. Chopped walnuts, pecans, or almonds are great choices. Just fold about 1/2 to 1 cup of chopped nuts into the batter before pouring it into the pan. The nuts will add a nice crunch and complement the banana flavor.
What if I don’t have a medium pan?
If you don’t have a medium pan, you can use a loaf pan or a muffin tin. Adjust the baking time accordingly. For a loaf pan, bake for 45-50 minutes, and for a muffin tin, bake for 20-25 minutes. Always check for doneness with a toothpick to ensure the cake is fully baked.
Can I reduce the amount of sugar?
Yes, you can reduce the amount of sugar, but keep in mind that sugar not only adds sweetness but also contributes to the cake’s texture. Reducing the sugar by up to 1/4 cup should still result in a delicious cake, but reducing it further may affect the texture. You can also try using a sugar substitute like stevia or monk fruit, following the package instructions for the equivalent amount.
Is this cake suitable for people with gluten sensitivities?
As written, this cake is not gluten-free. However, you can make it gluten-free by using a gluten-free flour blend in place of the wheat flour. Make sure to use a high-quality gluten-free flour blend that is designed for baking. This will help maintain the cake’s texture and flavor.
For more delicious and nutritious meals, check out Healthline for tips and recipes that will keep your tummy happy and your body healthy. And if you’re looking for more delightful baking ideas, explore our Baking Secrets section for a treasure trove of recipes that will make your kitchen the happiest place on Earth.
A Final Thought on This Fluffy Banana Delight
There’s something magical about a Fluffy Banana Cake. It’s not just a dessert; it’s a celebration of simple pleasures and a way to share love through food. Whether you’re baking for a special occasion or just because, this recipe is sure to bring joy and comfort to your table. So, grab those ripe bananas, preheat your oven, and get ready to create a little piece of heaven right in your kitchen. Happy baking!
Equipment
- Medium-sized cake pan
- Large mixing bowls
- Whisk
- Spatula
- Toothpick
- Wire rack
Ingredients
- 2 cups wheat flour
- 1 cup sugar
- 1/2 cup butter, softened
- 1 cup mashed ripe bananas (about 2 to 3 bananas)
- 1/2 cup milk
- 2 large eggs
- 1 tsp vanilla extract
- 1 tsp baking powder
- 1 tsp baking soda
- 1/4 tsp salt
Instructions
- Preheat your oven to 180°C (350°F) and grease and flour a medium-sized pan.
- In a large bowl, mix together the flour, sugar, baking powder, baking soda, and salt.
- In another bowl, beat the softened butter with the eggs until creamy. Add the mashed bananas, milk, and vanilla extract, mixing well.
- Gradually add the dry ingredients to the banana mixture, mixing until homogeneous but avoiding overmixing.
- Pour the batter into the prepared pan and bake for 30-35 minutes, or until a toothpick comes out clean.
- Let the cake cool in the pan for a few minutes before transferring it to a wire rack to cool completely.
Notes
Nutrition

Hi, I’m Olivia Parker, the founder of BakingSecret.com and a lifelong lover of all things sweet and homemade. I grew up in a small town in Oregon, where the smell of fresh cookies in my family’s kitchen sparked my passion for baking. Over the years, I turned that passion into a mission: to help home bakers feel confident, inspired, and creative.
After studying food science and working in several artisan bakeries across the U.S., I decided to create a space where everyone from beginners to seasoned bakers can find reliable recipes, expert tips, and a warm, welcoming community. BakingSecret.com is my way of sharing the magic of baking with the world. When I’m not testing new recipes, you’ll find me exploring farmers’ markets, collecting vintage cookbooks, or perfecting my sourdough technique.