
I’ll never forget the first time I broke into a molten lava cake with my fork. The warm chocolate oozed out like a river of pure happiness, and I knew right then that this wasn’t just another dessert. It was magic on a plate. That moment sparked my love for making hot cakes molten chocolate at home, and trust me, once you master this recipe, you’ll want to make it every single week.
Welcome to my kitchen, where today we’re exploring the wonderful experience of creating hot cakes molten chocolate. Whether you’re a seasoned baker or just starting out, this treat is sure to impress your family and friends. The best part? It’s actually easier to make than most people think. You don’t need fancy equipment or professional training. Just a few simple ingredients and about 20 minutes of your time.
Hot cakes molten chocolate has become one of the most beloved desserts in restaurants and home kitchens around the world. You might have seen it on dessert menus under different names like chocolate lava cake or molten cake. No matter what you call it, the concept stays the same: a warm chocolate cake with a gooey, liquid center that flows out when you cut into it. It’s the kind of dessert that makes people stop mid-conversation and just enjoy the moment.
What Makes Hot Cakes Molten Chocolate So Special?
Let me tell you what sets hot cakes molten chocolate apart from every other dessert in your recipe box. First, there’s that incredible gooey center. When you break through the perfectly baked exterior, warm chocolate flows out like lava from a volcano. This isn’t an accident or a mistake. It’s the whole point of the dessert, and it’s what makes people fall in love with every single bite.
The texture contrast is what really makes this dessert shine. The outer layer has a cake-like texture that’s soft but holds its shape. Then you get to the middle, which is completely different. It’s silky, warm, and flows like the finest chocolate sauce you’ve ever tasted. This combination creates an experience that regular cakes just can’t match.
Regular cakes are baked all the way through until they’re uniform from edge to center. They’re great for birthdays and celebrations, but they don’t have that element of surprise. With hot cakes molten chocolate, every single time you serve it, people react with genuine delight. I’ve made this dessert dozens of times, and the reaction never gets old.
The rich flavor is another reason dessert lovers can’t get enough of this treat. You’re using high-quality chocolate in a concentrated form. There’s no heavy frosting or layers of filling to distract from the pure chocolate experience. It’s intense, it’s decadent, and it satisfies your chocolate cravings like nothing else can.
Now, let’s talk about the term molten lava cake and how it relates to what we’re making. The name comes from how the chocolate center looks when it flows out of the cake. It resembles lava flowing from a volcano, which is why someone clever decided to call it a lava cake. Some people also call it a chocolate lava cake or simply a molten cake. All these names describe the same wonderful dessert.
The technique for making this dessert is pretty straightforward once you understand the secret. You’re essentially under-baking the center on purpose while making sure the outside cooks completely. This isn’t the same as serving raw cake batter, which some people worry about. The chocolate center is actually a mixture that becomes smooth and liquid when heated, then stays that way even as the outer cake firms up.
Here’s what makes this dessert different from other chocolate cakes:
- The center stays liquid and warm while the outside is fully baked
- You serve it immediately while it’s still hot from the oven
- It’s typically made in individual portions rather than one large cake
- The baking time is very precise – even one extra minute can change the results
- It uses a higher ratio of chocolate to flour than regular cakes
Many restaurants charge premium prices for this dessert. At places like Chili’s, you might pay around $7 to $9 for a molten cake. But when you make it at home, each serving costs just a fraction of that price. Plus, you get the satisfaction of creating restaurant-quality dessert in your own kitchen.
The single serve lava cake format is perfect for dinner parties. Everyone gets their own individual cake, which feels special and elegant. You don’t have to worry about cutting slices or portions. Each person breaks into their own cake and experiences that amazing moment when the chocolate flows out.
I remember trying to perfect my lava cake recipe for 2 when I first started dating my husband. I wanted to impress him with a romantic dessert, but I didn’t want leftovers sitting around tempting me for days. The individual serving size worked perfectly. We each had our own cake, and there was nothing left to worry about the next day.
Some bakers like to follow the pioneer woman molten cake approach, which often includes adding a piece of chocolate in the center before baking. Others prefer mixing everything together and relying on timing alone to create that molten center. Both methods can work beautifully when done right.
One question I get asked all the time: Is molten lava cake just uncooked cake? The answer is no. The batter is actually cooked. The eggs are set, and the flour is baked through. What creates the liquid center is the high chocolate and butter content, which melts during baking and stays liquid even though it’s been heated to a safe temperature. You’re not eating raw batter when you enjoy this dessert.
The secret to a good lava cake comes down to three things: quality ingredients, proper timing, and the right temperature. You need good chocolate because it’s the star of the show. Cheap chocolate chips won’t give you the same smooth, rich center. The timing has to be exact because the difference between perfect and over-baked is just a minute or two. And your oven needs to be at the right temperature so the outside bakes while the inside stays liquid.
What I love most about this dessert is how impressive it looks and tastes, yet how simple it actually is to make. You’re basically mixing melted chocolate with butter, eggs, sugar, and a small amount of flour. That’s it. No complicated techniques or special skills required. The magic happens in the oven, not in your mixing bowl.

Crafting the Perfect Hot Cakes Molten Chocolate at Home
Now that you understand what makes these little cakes so incredible, let’s roll up our sleeves and actually make them. I promise you’ll be amazed at how straightforward this process really is. The ingredient list is short, and if you’ve ever made a batch of brownies, you already have most of the skills you need.
When I’m gathering ingredients for hot cakes molten chocolate, I always start with chocolate. This isn’t the time to use whatever’s hanging out in your pantry from last Halloween. You want quality here. I typically reach for dark chocolate with at least 60% cocoa content. Bittersweet chocolate works beautifully too. The chocolate creates both the cake structure and that gorgeous flowing center, so it’s doing double duty in this recipe.
Butter comes next on my shopping list. Real butter, not margarine. The butter adds richness and helps create that silky texture in the molten center. I usually need about half a cup for a batch that serves four people. Some folks worry about the butter content, but honestly, this is a dessert meant to be enjoyed occasionally, not every day. When I make it, I go all in.
Here’s something interesting: the amount of flour in this recipe is surprisingly small. You’re only using about a quarter cup for four individual cakes. That’s way less than you’d use in a regular cake or even in something like a savoy cake. This low flour ratio is intentional because too much flour would make the center bake all the way through, and we definitely don’t want that.
Eggs are your binding agent here. Two whole eggs plus two egg yolks give you the structure you need while keeping everything rich and custardy. I remember the first time I tried making this with just whole eggs. The texture wasn’t quite right. Adding those extra yolks made all the difference. The center became smoother and more luxurious.
Sugar balances the bitterness of the dark chocolate. I use about a third of a cup, though you can adjust based on how sweet you like your desserts. My husband has a serious sweet tooth, so sometimes I add an extra tablespoon. My sister, on the other hand, prefers less sugar to let the chocolate flavor shine through.
The basic steps for making molten chocolate lava cake go like this: First, you melt your chocolate and butter together. I do this in the microwave in short bursts, stirring between each one. Some people prefer a double boiler, which works great too. Just don’t overheat it. You want everything melted and smooth, not scorched.
While that mixture cools slightly, I whisk together my eggs, egg yolks, and sugar until they’re light and a bit foamy. This takes maybe three minutes with a hand mixer. You’re not making meringue here, just combining everything well and adding a little air. Then comes the fun part: you fold the chocolate mixture into the eggs. The batter will be smooth and glossy and smell absolutely amazing.
After sifting in your flour and giving everything a gentle stir, you’re basically done with the hard part. The batter gets divided among your prepared ramekins. By the way, greasing those ramekins properly is crucial. I use butter and then dust them with cocoa powder instead of flour. This adds a little extra chocolate flavor and looks prettier when you turn them out.
The Secret to a Good Lava Cake
Okay, this is where I’m going to share what took me probably a dozen attempts to figure out. The secret to a perfect lava cake isn’t in the mixing or the ingredients. It’s all about the baking time and temperature. Getting this right is the difference between dessert that makes people gasp with delight and dessert that’s just, well, a regular chocolate cake.
Your oven needs to be at 425 degrees Fahrenheit. Not 400, not 450. Exactly 425. I know some ovens run hot or cold, so if yours has quirks, you might need to adjust. My mom’s oven runs about 25 degrees cooler than the dial says, so she sets hers to 450 to get the actual temperature she needs. An oven thermometer is your friend here, trust me.
The baking time is typically between 12 and 14 minutes. That’s it. Such a tiny window, right? What I’ve learned is that 13 minutes works perfectly in my oven for the size ramekins I use. The edges should look set and slightly pulling away from the sides. The center will still look a bit jiggly when you gently shake the ramekin. That jiggle is good. That’s what you want.
Here’s the thing that nobody tells you at first: the cakes continue cooking even after you take them out of the oven. The residual heat keeps working on that center. So if you bake them until they look completely done, you’ve already gone too far. I learned this the hard way when my first batch came out as delicious but completely solid chocolate cakes. Still tasty, but not the molten lava cake experience I was going for.
For a single serve lava cake, the timing is especially important because you’re often making just one or two at a time. Funny enough, when I make individual portions, I sometimes reduce the baking time by about 30 seconds because my oven seems to work more efficiently with less in it. You might need to experiment a bit with your setup.
Speaking of small batches, a lava cake recipe for 2 has become my go-to for date nights at home. Why make four when you only need two? Plus, these really are best enjoyed fresh from the oven. Making exactly what you need means no temptation to eat more than you planned. Though I’ll admit, sometimes we make an extra one “just in case,” and it never goes to waste.
The pioneer woman molten cake recipe has a clever twist that I’ve borrowed a few times. She suggests placing a piece of chocolate truffle in the center of each ramekin before adding the batter. This creates an extra-gooey center that’s almost guaranteed to flow. It’s a nice insurance policy if you’re nervous about the timing. However, I’ve found that with practice, you don’t really need it. The traditional method works beautifully.
Temperature control extends beyond just the oven. Room temperature eggs mix more smoothly into the chocolate mixture than cold ones straight from the fridge. I usually set my eggs out about thirty minutes before I start baking. Same with the butter if you’re letting it soften before creaming, though for this recipe, you’re melting it anyway.
One trick I picked up from a pastry chef friend: you can actually prepare the batter and fill the ramekins ahead of time. Keep them in the refrigerator for up to 24 hours, then bake directly from cold. You’ll need to add about 2 minutes to the baking time since they’re starting cold. This makes hosting dinner parties so much easier. While everyone’s finishing their main course, you just pop these in the oven, and boom, dessert is ready right when you need it.
Quality chocolate really does make a difference in the final result. I’ve experimented with different brands and cocoa percentages. The best results came from Ghirardelli and Lindt chocolate bars. Those waxy chocolate chips you find in the baking aisle don’t melt the same way and can create a grainy texture instead of that smooth, flowing center you’re looking for. Similar to how quality ingredients matter in red velvet cake pops, using the good stuff here pays off.
The butter quality matters too, though maybe not quite as much as the chocolate. I use unsalted butter so I can control the salt level in the recipe. European-style butter with higher fat content creates an even richer result, but regular unsalted butter from the grocery store works just fine. I’m not suggesting you need to spend a fortune on fancy imported butter, just don’t use the cheapest option.
When you’re ready to serve, run a thin knife around the edge of each ramekin. Place a small plate upside down on top, then flip the whole thing over. Give it a gentle tap, and the cake should slide right out. If it sticks, it might need just another few seconds in the oven next time, or you didn’t grease the ramekin well enough. I’ve had a few stick over the years, and while it’s not the end of the world, it’s definitely less impressive when you’re trying to wow your guests.
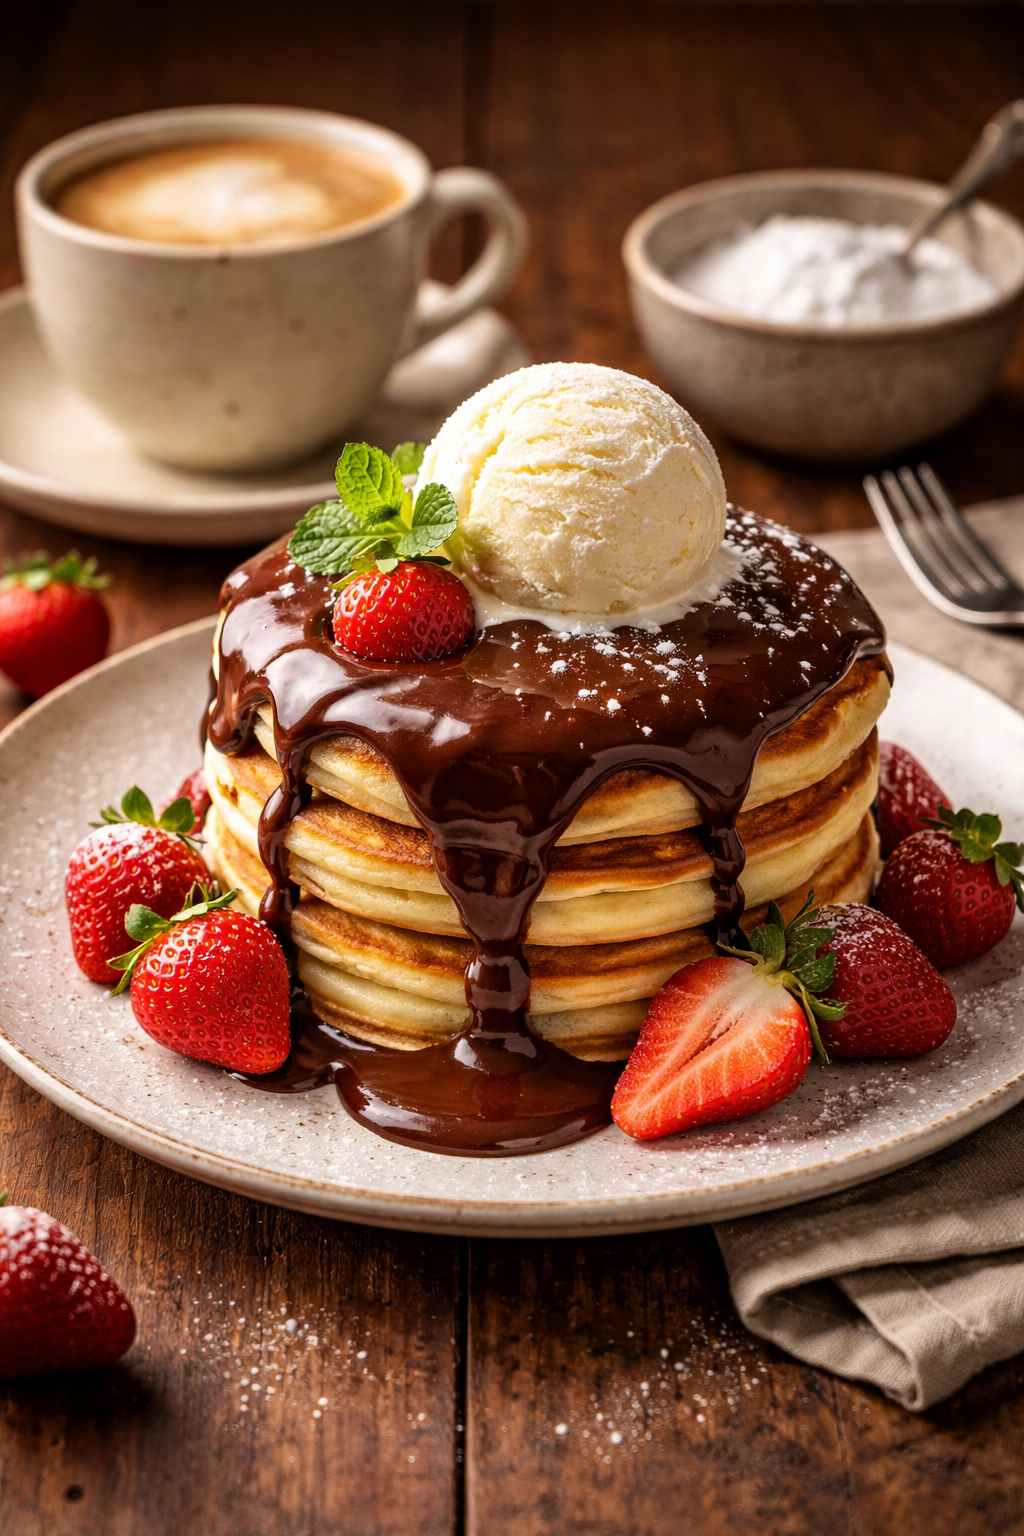
The presentation matters more than you might think. A dusting of powdered sugar, a scoop of vanilla ice cream, or some fresh raspberries on the side takes this from “nice homemade dessert” to “restaurant-worthy finale.” The cold ice cream melting into the hot chocolate is honestly magical. It’s a different kind of delicious than lemon cream cheese dump cake recipe offers, but equally satisfying in its own way.
Don’t stress too much about perfection on your first attempt. Even if the center isn’t quite as molten as you hoped, or it flows out a bit too much, you’re still eating warm chocolate cake. That’s a win in my book. Like learning to make any new recipe, whether it’s mushroom cake or this chocolate creation, practice makes perfect.
FAQs About Hot Cakes Molten Chocolate
Over the years of making these cakes, I’ve gotten tons of questions from friends, family, and readers. Some folks worry they’ll mess it up, others wonder if they can customize it, and quite a few are curious about the science behind that flowing center. Let me tackle the most common questions I hear, because honestly, understanding these details will make you a much more confident baker.
What is the difference between lava cake and molten cake?
Here’s the honest truth: there’s basically no difference at all. They’re two names for the exact same dessert. The term lava cake comes from how the chocolate flows out like volcanic lava when you cut into it. Meanwhile, molten cake refers to the melted, liquid state of the chocolate center. Some restaurants prefer one name over the other, probably based on what sounds fancier on their menu. I’ve also seen it called chocolate lava cake, molten chocolate lava cake, or even just “chocolate fondant” in French restaurants. The recipe and technique remain identical regardless of what you call it. So don’t get confused when you see different names – you’re making the same delicious dessert.
How much is the molten cake at Chili’s?
Last time I checked, Chili’s charges somewhere between $7 and $9 for their molten cake, though prices can vary by location and with menu changes. Their version comes with vanilla ice cream on top, which is a nice touch. But here’s what’s wild: when I make this at home, each serving costs me maybe $2 to $2.50, depending on the chocolate I buy. The most expensive ingredient is definitely the quality chocolate, but even splurging on the good stuff keeps your cost way below restaurant prices. Plus, making it yourself means you can customize it however you want. Want extra chocolate? Go for it. Prefer a scoop of salted caramel ice cream instead of vanilla? Nobody’s stopping you. The control you have in your own kitchen is worth so much more than what you’d save in dollars.
Is molten lava cake just uncooked cake?
This is probably the question I get asked most often, and I totally understand why people worry about this. The answer is no, it’s not uncooked. Everything in that cake has been properly heated and is safe to eat. The eggs have set, the flour has been baked, and the chocolate and butter have been thoroughly heated through. What creates that liquid center isn’t raw batter – it’s the high ratio of chocolate and butter that stays in a melted, flowing state even after cooking. Think about it this way: when you melt chocolate on the stove and let it cool slightly, it stays liquid for a while before hardening again, right? That’s essentially what’s happening inside your cake. The oven heats everything to a safe temperature, but the chocolate-rich center maintains its liquid consistency because of its composition, not because it’s undercooked. The timing is precise to ensure the outer edges firm up into cake while the center remains gloriously gooey.
By the way, if you’ve ever wondered about making variations on this classic, you absolutely can. I’ve seen people add a tablespoon of espresso powder to intensify the chocolate flavor. Others swirl in a bit of peanut butter before baking. My cousin once made a white chocolate version that was surprisingly good, though I’m still a dark chocolate purist at heart. The foundation of the lava cake recipe is flexible enough to handle these creative twists.
One thing I’ve noticed is that altitude can affect your results. I live at sea level, but when I made these at my friend’s mountain cabin, they needed about a minute less baking time. The lower air pressure at higher elevations changes how things bake. If you’re at a high altitude and your first batch doesn’t turn out perfect, try reducing the baking time slightly and see if that helps.
Speaking of variations, the chocolate lava cake recette – that’s the French way of saying recipe – sometimes includes a splash of liqueur like Grand Marnier or Kahlua in the batter. I’ve tried this a few times for adult dinner parties, and the depth of flavor is really something special. Just a tablespoon is enough to add complexity without making it taste boozy. Obviously, skip this if you’re serving kids or anyone who avoids alcohol.
Presentation tips can really elevate your dessert game. I like to serve mine on white plates because the contrast makes the chocolate look even more dramatic. A mint leaf on top adds a pop of color and a hint of freshness that cuts through the richness. Some fancy restaurants dust the plate with cocoa powder in a pattern before setting down the cake. You can do this at home with a small strainer and some cocoa powder – it looks incredibly professional with minimal effort.
The ramekin size matters more than you might think. I use 6-ounce ramekins, which create a nice portion size without being overwhelming. If you use 4-ounce ramekins, reduce your baking time by about a minute. Larger 8-ounce ramekins need an extra minute or so. The batter-to-surface-area ratio changes with different sizes, which affects how quickly everything cooks. This is similar to how baking time varies with different pan sizes in recipes across the cakes and cupcakes category – size always matters when it comes to timing.
Here’s something interesting about micronutrient intake and chocolate: dark chocolate actually contains beneficial minerals like iron, magnesium, and copper. While this dessert is definitely an indulgence rather than a health food, using quality dark chocolate means you’re at least getting some nutritional value along with your treat. According to nutrition experts, choosing foods with naturally occurring minerals can contribute to a balanced diet, even when those foods are desserts. I’m not suggesting you eat lava cake for the health benefits, but it’s nice to know your chocolate choice adds something beyond just flavor.
Storage is another topic worth covering. Honestly, these are best eaten immediately, but life happens. If you absolutely must save one for later, let it cool completely, cover it tightly, and refrigerate for up to two days. When you’re ready to eat it, microwave it for about 30 seconds to warm the center back up. It won’t be quite as perfect as fresh from the oven, but it’ll still be pretty darn good. I’ve never tried freezing them because they’re so quick to make that I’d rather just whip up a fresh batch.
For those attempting a single serve lava cake for the first time, don’t be intimidated. Start with just one or two ramekins so you’re not overwhelmed. Pay close attention to the timing, and remember that you can always adjust on your next attempt. My first solo cake was slightly overbaked, but I learned from it and nailed it the second time. That’s the beauty of a recipe that comes together this quickly – you can practice without investing hours of your day.
Dietary modifications are possible, though I’ll be upfront that some work better than others. I’ve successfully made a gluten-free version using almond flour instead of regular flour. The texture was slightly different but still delicious. However, my attempts at a vegan version haven’t been as successful. The eggs really do play an important role in the structure, and I haven’t found a substitute that works quite right yet. If someone out there has cracked the code on vegan lava cakes, please let me know!
Temperature checks are something professional bakers use that home cooks often skip. If you have an instant-read thermometer, the edges of your cake should reach about 160-170°F while the center stays around 140°F. This gives you that perfect contrast between set cake and flowing center. I don’t always use a thermometer myself because I’ve made these enough times to judge by appearance, but it’s a helpful tool when you’re learning.
The type of cocoa powder you use for dusting your ramekins makes a subtle difference. Dutch-processed cocoa has a smoother, less acidic flavor than natural cocoa powder. Either works fine, but I prefer Dutch-processed for this application because it tastes a bit more sophisticated. It’s a tiny detail that most people won’t consciously notice, but it adds to the overall experience.
If you’re making these as part of a larger menu, consider what came before. After a heavy meal, a single serve lava cake might be just right – intensely flavorful but not a huge portion. If you had a lighter dinner, maybe serve it with extra ice cream or whipped cream. I’ve learned to read the room and adjust accordingly. One time I served these after a huge Italian feast, and honestly, we probably should have chosen something lighter. Live and learn, right?
Pairing drinks with your hot cakes molten chocolate can enhance the whole experience. A bold red wine like Cabernet Sauvignon complements the dark chocolate beautifully. Coffee is another excellent choice – the slight bitterness plays off the sweetness perfectly. For non-alcoholic options, I love serving these with cold milk or a rich hot chocolate. My kids actually prefer milk because the temperature contrast between cold milk and hot cake is fun to experience.
Finally, don’t let fear of failure keep you from trying. Yes, the timing is specific, and yes, there’s a learning curve. But even a slightly imperfect molten lava cake is still a fantastic chocolate dessert. The worst thing that happens is you end up with a fully baked chocolate cake, which honestly isn’t the worst outcome in the world. I’ve eaten plenty of “failed” lava cakes over the years, and they were all delicious. The real failure would be never trying at all.
So grab your ramekins, get some quality chocolate, and give this recipe a shot. Whether you’re making a romantic lava cake recipe for 2 or a full batch for dinner guests, the process is rewarding and the results are always impressive. There’s something deeply satisfying about creating restaurant-quality desserts in your own kitchen, and this one is absolutely within your reach.
Common Questions About Making Molten Chocolate Cakes
Can I make the batter ahead of time?
Absolutely! You can prepare the batter and fill your ramekins up to 24 hours in advance. Just cover them tightly with plastic wrap and refrigerate until you’re ready to bake. When baking from cold, add about 2 minutes to the baking time since the batter starts at a lower temperature. This makes entertaining so much easier because you can do the prep work earlier in the day and just pop them in the oven when you need them. I do this all the time for dinner parties, and it takes so much stress out of dessert timing.
What can I use instead of ramekins?
You can use any oven-safe dish that’s roughly the same size – muffin tins work in a pinch, though you’ll need to reduce the baking time to about 8-10 minutes since they’re shallower. Small ceramic bowls, custard cups, or even cleaned-out tin cans (with the labels removed) can work. Just make sure whatever you use is well-greased. I’ve even used coffee mugs for a more casual presentation, though getting them out can be a bit trickier. The key is finding something in that 4 to 6-ounce range so the batter-to-surface ratio stays similar.
Why did my lava cake come out completely liquid inside?
This usually means you under-baked them. While we want a molten center, it should still have some structure – it should flow when you cut into it, not pour out like soup. Try adding 30 seconds to a minute to your baking time next attempt. Also check that your oven is actually reaching the temperature you set it to. My sister had this problem repeatedly until she discovered her oven was running 25 degrees cooler than the dial indicated. An oven thermometer solved her problem immediately.
Can I reheat leftover lava cakes?
You can, though they’re never quite as good as fresh. Microwave them for about 25-30 seconds to warm the center back up. The texture won’t be exactly the same because the cake has fully set in the refrigerator, but warming it helps re-melt some of that chocolate center. Honestly though, these are so quick to make that I usually just make fresh ones instead of dealing with leftovers. If you do have extras, they’re actually pretty good eaten cold the next morning with your coffee – just a different experience.
What’s the best chocolate to use for molten lava cakes?
Look for quality baking chocolate or chocolate bars with at least 60% cocoa content. Brands like Ghirardelli, Lindt, Valrhona, or Callebaut all work beautifully. Avoid chocolate chips because they’re formulated to hold their shape during baking, which means they don’t melt as smoothly. You want chocolate that melts into a silky, flowing consistency. I usually buy chocolate bars from the baking aisle and chop them myself. Dark chocolate gives you the most intense flavor, but you can use semi-sweet if you prefer something a bit sweeter.
How do I know when my lava cakes are done?
The edges should look set and pull away slightly from the sides of the ramekin, while the center should still look a bit soft and jiggly when you gently shake the pan. The tops will have a thin crust but won’t look completely firm. This visual check takes practice to master, but once you’ve made them a few times, you’ll recognize exactly what to look for. If you’re really nervous, use an instant-read thermometer – the edges should be around 160-170°F while the center stays closer to 140°F.
Can I make these without eggs?
I haven’t found a truly successful egg substitute for this recipe yet. Eggs provide structure and richness that’s really hard to replicate. I’ve tried flax eggs and commercial egg replacers, but the texture just doesn’t come out right – the cakes either don’t set properly or they don’t have that custardy quality. If you have an egg allergy, you might be better off looking for a specifically developed vegan lava cake recipe rather than trying to modify this one. It’s frustrating, I know, but sometimes certain recipes just need certain ingredients to work properly.
Why do some recipes add instant espresso powder?
Espresso powder doesn’t make the cake taste like coffee – instead, it intensifies and deepens the chocolate flavor. Just a teaspoon can make your chocolate taste more chocolatey, if that makes sense. It’s a trick professional bakers use all the time. The coffee flavor is so subtle that even people who don’t like coffee won’t notice it, they’ll just think the chocolate tastes richer. I add it about half the time, depending on my mood and what I have on hand. It’s definitely not required, but it’s a nice enhancement.
How far in advance can I dust the ramekins with cocoa powder?
You can prepare your ramekins several hours ahead without any problem. Just grease them with butter, dust with cocoa powder, and set them aside at room temperature until you’re ready to fill them. I wouldn’t do this more than 8 hours in advance because the butter can start to absorb the cocoa powder and it might get a bit sticky. If you’re prepping the day before, I’d suggest greasing them but waiting to dust with cocoa until closer to baking time. It only takes a minute anyway, so there’s no real time savings in doing it super early.
What should I serve alongside molten chocolate cakes?
Vanilla ice cream is the classic choice for good reason – the cold creaminess against the hot chocolate is absolutely perfect. Fresh raspberries or strawberries add brightness that cuts through the richness. Whipped cream (maybe with a splash of vanilla or amaretto) is another great option. I’ve also served them with a drizzle of salted caramel sauce, which adds a sweet-salty dimension. For a really fancy presentation, try a small scoop of coffee ice cream or a dollop of mascarpone cream. Whatever you choose, you want something that provides contrast to the intense chocolate.
Making hot cakes molten chocolate at home really is one of those skills that makes you feel like a baking superstar. The first time that chocolate flows out perfectly, you’ll understand why this dessert has captivated people for decades. Don’t worry about getting it perfect on the first try – just enjoy the process, learn from each batch, and remember that even imperfect chocolate cake is still pretty amazing.
Equipment
- Mixing Bowls
- Whisk
- Rubber Spatula
- Ramekins
- Microwave or Double Boiler
Ingredients
- 1/2 cup butter
- 1 cup dark chocolate at least 60% cocoa
- 2 whole eggs
- 2 egg yolks
- 1/3 cup sugar adjust to taste
- 1/4 cup all-purpose flour
- q.s. cocoa powder for dusting ramekins
Instructions
- Preheat the oven to 425°F (220°C).
- Melt the butter and dark chocolate together in the microwave or double boiler until smooth.
- Cool the chocolate mixture slightly.
- In a separate bowl, whisk together the eggs, egg yolks, and sugar until light and foamy.
- Fold the melted chocolate mixture into the egg mixture until combined.
- Sift in the flour and gently stir until just incorporated.
- Grease ramekins with butter and dust with cocoa powder.
- Divide the batter among the prepared ramekins.
- Bake for 12-14 minutes until the edges are set and the center is still jiggly.
- Let cool for a minute before inverting onto plates and serve immediately.