
Why I Can’t Stop Baking Isabelle Pineapple Cake
Last summer, I was invited to a backyard barbecue where someone brought the most amazing cake I’d ever tasted. It was light, fruity, and had this perfect golden color that caught everyone’s eye. When I asked what it was, the baker smiled and said, “It’s an Isabelle pineapple cake.” I practically begged for the recipe on the spot. That one slice changed everything I thought I knew about pineapple desserts.
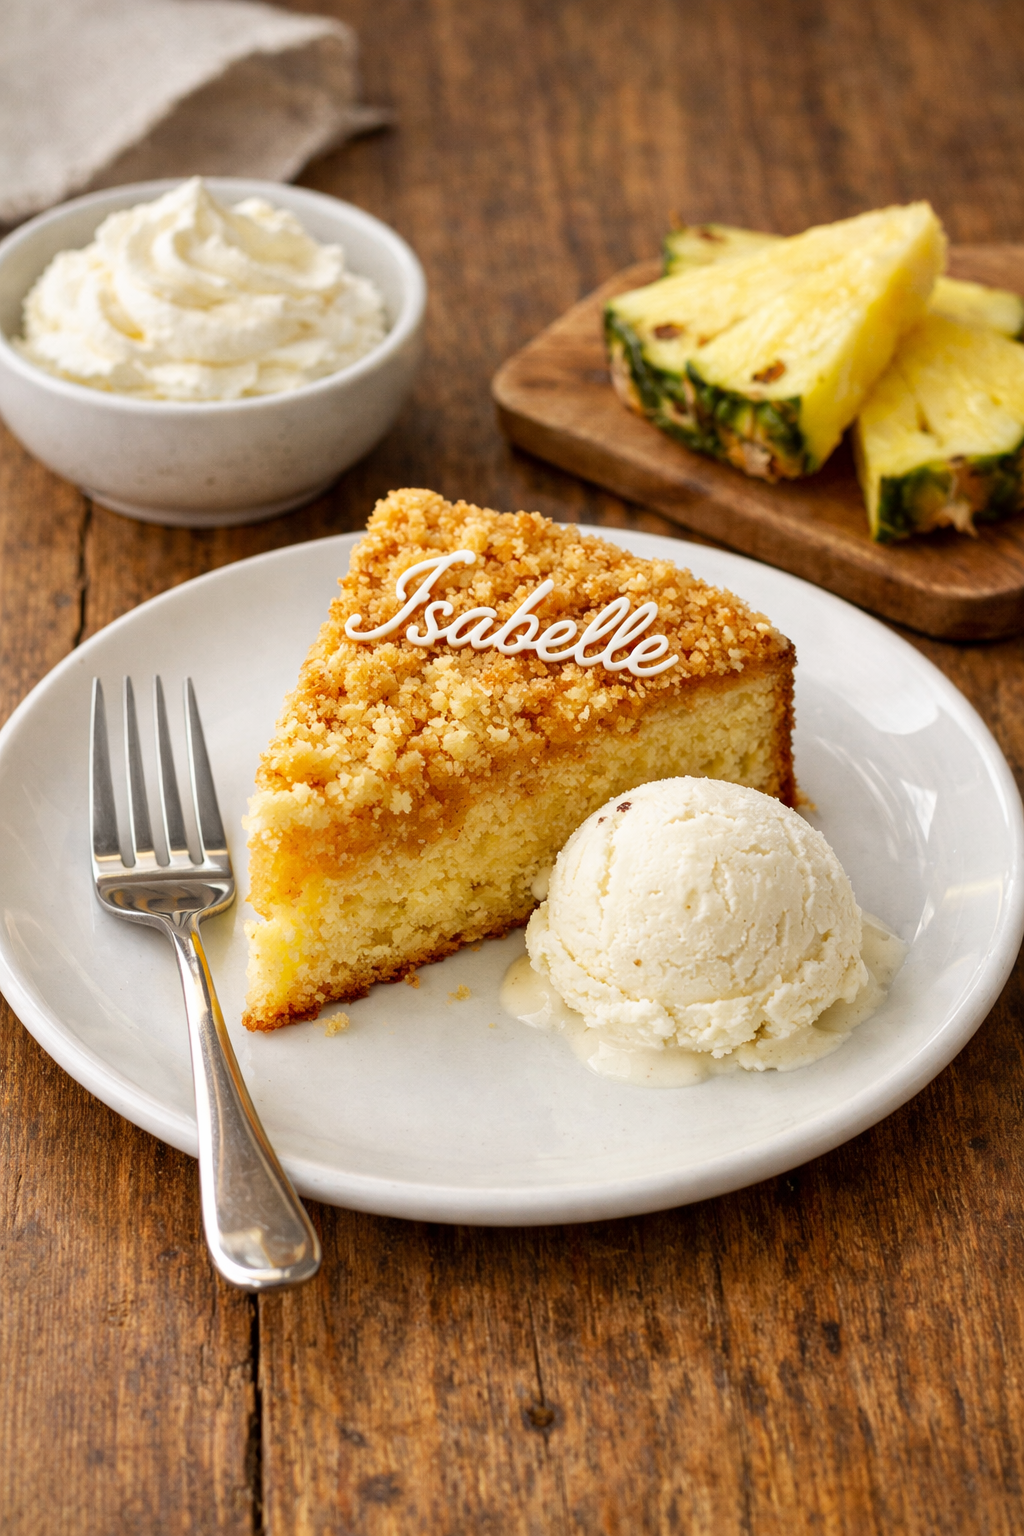
Welcome to my blog! Today, I’m excited to share with you a delectable treat that has captured the hearts (and taste buds) of many: the Isabelle pineapple cake. This isn’t your grandma’s canned pineapple upside-down cake, though I love those too. This tropical delight is not just any ordinary cake. It’s a unique and special dessert that has a story and a flavor profile all its own.
In this post, we’ll explore what makes Isabelle pineapple cake special, its origins, and how to make it at home. Trust me, once you try this recipe, it will become a regular in your baking rotation. Let’s get started!
What Makes Isabelle Pineapple Cake Special?
The Isabelle pineapple cake stands out for its perfect balance of sweet and tangy flavors, making it a favorite among dessert lovers. Unlike other pineapple cakes that can be heavy or overly sweet, this version hits all the right notes. The tanginess from the pineapple cuts through the sweetness in a way that keeps you reaching for another slice.
Its moist texture and the use of fresh pineapple make it a refreshing and delightful treat, especially during the warmer months. I’ve made this cake for spring picnics, summer gatherings, and even fall parties. It never fails to impress. People always ask me what my secret is, and honestly, it’s just following the traditional method that makes this cake so special.
The magic happens in how the ingredients work together. The pineapple juice soaks into the cake layers, creating pockets of tropical flavor in every bite. The cake itself stays incredibly moist for days, which is rare for homemade cakes. Many bakers struggle with dry cakes, but this recipe solves that problem beautifully.
What really sets this cake apart is its versatility. You can dress it up with cream cheese frosting for a fancy occasion or keep it simple with a light glaze for casual gatherings. I’ve served it both ways, and it’s always a hit. The pineapple flavor shines through no matter how you choose to finish it.
Another thing I love about the Isabelle pineapple cake is how it appeals to different age groups. Kids love the fruity sweetness, while adults appreciate the more complex flavor notes. My nephew, who usually turns his nose up at anything that isn’t chocolate, actually asked for seconds at his birthday party last year.
The Story Behind This Tropical Treasure
You might be wondering, where did Isabelle pineapple cake originate? The history of this cake is as charming as its taste. While there are different stories about its origins, most sources point to Asian bakeries, particularly in Taiwan and parts of Southeast Asia, where pineapple cakes have been a beloved treat for generations.
The name “Isabelle” likely comes from a specific bakery or baker who perfected this particular style. Some say it was named after a French-trained pastry chef who worked in Asia and combined European baking techniques with local tropical fruits. Others believe it was simply a marketing name that stuck because it sounded elegant and memorable.
What we know for sure is that this cake represents a beautiful fusion of baking traditions. It takes the European tradition of layered butter cakes and marries it with the abundant tropical fruit available in Asian markets. This combination created something entirely new and wonderful.
In Taiwan, pineapple has long been considered a symbol of good fortune and prosperity. The word for pineapple in Taiwanese sounds similar to the phrase “bring fortune.” This cultural significance made pineapple-based treats incredibly popular for celebrations and special occasions. The Isabelle pineapple cake carries on this tradition with style.
Over time, the recipe traveled across continents through immigrant communities and food enthusiasts. Today, you can find variations of this cake in bakeries from Los Angeles to London. Each version has its own twist, but the core elements remain the same: fresh pineapple, a tender crumb, and that irresistible tropical flavor.
What Goes Into Making This Cake So Good?
When people ask me what are the ingredients in Isabelle pineapple cake, they’re often surprised by how simple the list is. The beauty of this recipe lies not in exotic or hard-to-find items but in the quality of basic ingredients and how they’re combined.
The star ingredient is, of course, fresh pineapple. While canned pineapple can work in a pinch, fresh fruit makes a noticeable difference. The juice is brighter, the flavor is more vibrant, and the texture is better. I usually buy a whole pineapple and cut it myself. Yes, it takes a bit more effort, but your taste buds will thank you.
For the cake base, you’ll need standard baking ingredients: all-purpose flour, sugar, butter, eggs, and baking powder. The ratios matter here. The cake needs enough butter for richness but not so much that it becomes heavy. The eggs provide structure while keeping everything tender.
Many recipes include a touch of vanilla extract to enhance the overall flavor without competing with the pineapple. I also add a pinch of salt, which might seem counterintuitive in a sweet cake, but it actually helps balance the flavors and makes the pineapple taste even more pronounced.
Some bakers add coconut milk or cream to their batter, which gives the cake an extra tropical dimension. I’ve tried it both ways, and while the coconut version is delicious, I prefer the classic recipe that lets the pineapple be the main attraction.
The frosting or glaze is where you can get creative. A simple cream cheese frosting is my go-to choice. The slight tanginess of cream cheese complements the pineapple beautifully. For a lighter option, a pineapple glaze made from reduced pineapple juice and powdered sugar works wonderfully.
How Long Will Your Cake Stay Fresh?
One question I get all the time is: how long do Isabelle pineapple cakes last? The good news is that this cake has excellent keeping qualities, thanks to the moisture from the pineapple.
When stored properly at room temperature in an airtight container, the cake will stay fresh for about three days. The flavor actually develops and deepens during this time. I’ve noticed that day two is often when the cake tastes its absolute best, as the pineapple flavor has had time to permeate every layer.
If you want to extend its life, refrigeration is your friend. In the fridge, the Isabelle pineapple cake can last up to a week. Just make sure it’s well covered to prevent it from absorbing other food odors. Before serving, let it sit at room temperature for about thirty minutes. This brings back the soft, tender texture that might firm up slightly in the cold.
For longer storage, this cake freezes beautifully. I’ve frozen individual slices wrapped in plastic wrap and then placed in freezer bags. They keep for up to three months this way. When you’re ready to enjoy a slice, just thaw it in the refrigerator overnight. It tastes almost as good as the day it was baked.
One tip I learned the hard way: if you’re using cream cheese frosting, the cake should always be refrigerated. Cream cheese can spoil at room temperature. For gatherings where the cake will sit out for several hours, I recommend using a sugar-based glaze instead, which is more stable.

Getting the Freshest Ingredients for Your Isabelle Pineapple Cake
Now that you know how well this cake keeps, let’s talk about what really matters: getting your hands on the best possible ingredients to make your Isabelle pineapple cake absolutely spectacular.
Here’s the thing about choosing pineapple. I used to just grab whatever looked decent at the grocery store, but after making this cake about twenty times, I’ve learned a few tricks. The smell test is your best friend. A ripe pineapple should smell sweet and tropical at the base. If there’s no smell or it smells fermented, keep looking. I also gently tug on one of the inner leaves at the top. If it comes out easily, that’s usually a good sign of ripeness.
The color can be misleading, by the way. Some varieties are golden when ripe, others stay greenish. What you really want is a pineapple that feels heavy for its size and gives just slightly when you press on it. Not mushy, mind you, just a gentle give. I made the mistake once of using an overripe pineapple, and the cake turned out weirdly mushy. Learn from my errors!
When it comes to the other ingredients, quality matters but you don’t need to break the bank. I use regular unsalted butter from my local supermarket, not fancy European stuff. Same with the flour. All-purpose works perfectly fine. Save your money for good vanilla extract though. The artificial stuff has this chemical aftertaste that I can always detect in baked goods.
Funny enough, my aunt swears by using cake flour instead of all-purpose, claiming it makes the texture even lighter. I’ve tried both, and honestly, I couldn’t tell much difference. But if you already have cake flour in your pantry, go ahead and use it. This recipe is pretty forgiving.
For eggs, I prefer using ones that are at room temperature. This might sound like baking snobbery, but cold eggs don’t incorporate into the batter as smoothly. I just set mine on the counter about an hour before I start baking. If I forget, I’ll put them in a bowl of warm water for five minutes. Works every time.
Preparing Your Pineapple Like a Pro
Okay, so you’ve got your beautiful fresh pineapple. Now what? This is where some people get intimidated, but I promise it’s easier than it looks.
First, I cut off the top and bottom of the pineapple to create flat surfaces. Then I stand it upright and slice down the sides, following the curve of the fruit to remove the skin. Don’t worry about getting every single brown spot in one go. After you’ve removed the outer layer, you can go back and cut out the remaining eyes with the tip of your knife.
Some fancy chefs cut diagonal channels to remove all the eyes at once in a spiral pattern. It looks impressive, but honestly, I don’t bother. Life’s too short, and a few extra cuts doesn’t hurt anyone. Plus, you waste less pineapple my way.
Once your pineapple is peeled, cut it into quarters lengthwise and remove the tough core from each piece. The core is edible but pretty fibrous and not great in a cake. I usually snack on it while I’m baking though. Waste not, want not, right?
For the Isabelle pineapple cake, you’ll want to dice the pineapple into small chunks, roughly half-inch pieces. Some recipes call for crushed pineapple, but I find that diced gives you better texture and those little bursts of fruit throughout the cake. Just like when I make my carrot bundt cake, having distinct pieces of the star ingredient makes each bite more interesting.
Here’s a tip nobody told me when I started: save that pineapple juice! As you’re cutting, all that liquid collecting on your cutting board is liquid gold. I pour it into a measuring cup and use it in the cake batter or the glaze. It’s way more flavorful than anything from a can.
The Essential Ingredient Lineup
Let me walk you through exactly what you’ll be gathering for this recipe. I like to lay everything out on my counter before I start, which my grandmother always called “mise en place.” Sounds fancy, but it just means you won’t realize halfway through mixing that you’re out of baking powder.
You’ll need about two cups of fresh pineapple chunks. That’s usually half a medium pineapple, sometimes a bit less if you’ve got a really large one. The exact amount isn’t super critical. I’ve made this cake with anywhere from one and a half to two and a half cups, and it always turns out great.
For the cake itself, grab two cups of all-purpose flour. I measure mine by spooning it into the measuring cup and leveling it off, not by scooping directly from the bag. That packs in too much flour and can make your cake dense. Learned that lesson the hard way in culinary school.
You’ll want one and a half cups of granulated sugar. I know that sounds like a lot, but remember, the pineapple is quite tart. The sugar balances that tanginess perfectly. If you’re watching your sugar intake, you can reduce it to one and a quarter cups, though the cake won’t be quite as sweet.
Three-quarters of a cup of unsalted butter is what I use. That’s a stick and a half, for those of us who think in butter sticks. Make sure it’s softened to room temperature. You should be able to press your finger into it easily, but it shouldn’t be melty or greasy.
Four large eggs go into my recipe. Some versions use three, but I like the structure and richness that four eggs provide. The cake holds together better and has this lovely golden color that looks gorgeous when you slice into it.
Two teaspoons of baking powder will give you the lift you need. Make sure yours is fresh. Baking powder loses its effectiveness over time. I test mine by dropping a bit into hot water. If it fizzes vigorously, it’s good to go. If nothing happens, toss it and get a new container.
A teaspoon of vanilla extract adds depth. I’ve also experimented with coconut extract, which gives an extra tropical vibe. Half vanilla and half coconut is pretty amazing if you want to try something different.
Finally, half a teaspoon of salt. Never skip the salt in baking. It’s not there to make things salty, it’s there to enhance all the other flavors. Think of it as the secret ingredient that makes everything else taste more like itself.
By the way, if you need to make this for someone with dietary restrictions, you might want to check out my gluten free mug cake post for tips on substituting flour. The pineapple cake can be adapted for gluten-free diets with the right blend of alternative flours, though I’ll admit the texture changes slightly.
Optional Ingredients That Take It Up a Notch
While the basic Isabelle pineapple cake is wonderful on its own, there are some additions I sometimes throw in depending on my mood or who I’m baking for.
Shredded coconut is probably my favorite add-in. About half a cup mixed into the batter gives you this wonderful tropical combination that reminds me of piña coladas. My friend Maria always requests this version for her birthday. She says it tastes like vacation in cake form.
Crushed macadamia nuts add a nice crunch and a buttery flavor that complements the pineapple beautifully. I sprinkle them on top before baking rather than mixing them in. That way they stay crispy instead of getting soft.
A tablespoon of rum or coconut rum in the batter is something I only do for adult gatherings, obviously. It’s subtle, not boozy at all after baking, but it adds this sophisticated warmth to the flavor profile. My husband actually prefers it this way, though I usually stick with the non-alcoholic version since I bake this for all kinds of occasions.
Some bakers like adding cream cheese to the batter itself, not just the frosting. This creates an incredibly moist, dense cake that’s almost cheesecake-like. I’ve done this for fancier presentations, especially when I’m decorating with cake flowers and want something that photographs really well.
Lemon zest is another great addition. Just the zest from one lemon brightens up the whole cake and makes the pineapple flavor pop even more. I discovered this by accident when I was making this cake alongside a lemon tart and had extra zest. Happy accidents are the best kind of recipe discoveries.
If you’re someone who likes keeping track of what you’re eating, the nutrition profile of this cake is actually not too bad compared to other desserts. It’s similar to what you’d find in something like nutrition crab cakes in terms of protein from the eggs, though obviously higher in sugar. The pineapple does add some vitamin C and fiber, so that’s something, right?
Tools You’ll Actually Need
Let me save you some trouble and tell you what equipment will make your life easier when making this cake.
A good 9×13 inch baking pan is my preference for this recipe. You can also use two 8-inch round pans if you want to make a layer cake. I’ve even used a bundt pan, which creates this beautiful ring shape that looks impressive with minimal effort.
An electric mixer makes creaming the butter and sugar so much easier. I use my stand mixer, but a handheld one works just fine. You could technically do it by hand with a wooden spoon, but your arm will get tired. I know because I tried it once when my mixer broke.
A sharp serrated knife is essential for cutting the pineapple. Those regular chef’s knives just don’t grab the tough skin as well. My serrated bread knife works perfectly for this job.
Measuring cups and spoons are obvious, but I want to mention that having both dry and liquid measuring cups matters. That one-cup glass measuring cup with the spout is for liquids. The nested cups are for dry ingredients. Using the right one for the right ingredient gives you more accurate measurements.
Parchment paper isn’t absolutely necessary, but it makes getting the cake out of the pan so much easier. I cut a piece to fit the bottom of my pan and give it a quick spray of cooking oil. The cake just slides right out every single time.
Storing Your Isabelle Pineapple Cake the Right Way
If you’re lucky enough to have leftovers after serving this cake (which honestly doesn’t happen often in my house), you’ll want to know the best ways to keep it tasting fresh and delicious.
The first thing I learned about storing this cake is that it’s actually pretty forgiving. Unlike some finicky desserts that go stale overnight, the Isabelle pineapple cake has natural moisture from the fruit that keeps it tender for days. But there are definitely right and wrong ways to store it, and I’ve made enough mistakes to know the difference.
At room temperature, your cake will stay wonderfully fresh for about three to four days when stored in an airtight container. I use one of those plastic cake carriers with the locking lid. Works like a charm. If you don’t have one of those, you can cover the cake tightly with plastic wrap or aluminum foil. The key word here is tightly. Any air getting in will dry out the edges.
Here’s something I discovered by accident: placing a slice of bread in the container with your cake actually helps maintain moisture. Sounds weird, I know. My mom used to do this with cookies, and one day I tried it with leftover cake. The bread absorbs excess moisture and releases it back slowly, keeping everything at the perfect texture. Just tuck a piece along the side, not touching the frosting.
One mistake I made early on was leaving the cake uncovered on the counter because I was planning to finish it the next day. Big error. The surface dried out and formed this crusty layer that was pretty unpleasant. Even if you think you’ll eat it soon, always cover it properly. Takes two seconds and saves your cake.
Now, if you’ve frosted your Isabelle pineapple cake with cream cheese frosting, refrigeration isn’t optional, it’s mandatory. Cream cheese-based frostings can spoil at room temperature, especially in warm weather. I learned this the hard way at a summer picnic where the frosting started looking… let’s just say questionable after a few hours in the heat.
When refrigerating, the same rules apply about airtight storage. The fridge can be a surprisingly dry environment, which is ironic considering how cold it is. Your cake can actually dry out faster in an uncovered fridge than on the counter. Wrap it well or use that cake carrier.
The cold does firm up the texture a bit, though. That’s why I always recommend bringing refrigerated cake to room temperature before serving. Just let it sit out for about thirty to forty-five minutes. The butter in the cake softens back up, the flavors come alive again, and it tastes almost as good as when it was fresh from the oven. Patience pays off here.
Funny enough, some people actually prefer the cake cold straight from the fridge. My sister is one of those people. She says it’s more refreshing that way, especially on hot days. To each their own, I suppose. I won’t judge your cake-eating preferences.
Freezing for Future Enjoyment
Here’s where things get really interesting. This cake freezes beautifully, which means you can make it ahead for parties or just keep some stashed away for when a craving hits.
I freeze individual slices wrapped in plastic wrap, then placed together in a freezer bag with all the air squeezed out. This method is genius because you can pull out just one slice at a time instead of defrosting the whole thing. It’s like having a personal bakery in your freezer.
The cake will keep in the freezer for up to three months without any noticeable loss in quality. I’ve pushed it to four months once, and it was still pretty good, just slightly less vibrant in flavor. For best results, stick to the three-month guideline.
When you’re ready to enjoy a frozen slice, transfer it to the fridge the night before. Slow thawing in the refrigerator maintains the texture better than quick-thawing on the counter. Though I’ll confess, when I’m desperate for cake at midnight, I’ve been known to microwave a frozen slice for about twenty seconds. Not ideal, but desperate times and all that.
One tip about freezing: if you’re planning to freeze the cake, I’d recommend doing it before adding frosting. Frostings can get weird in the freezer, especially cream cheese ones. They sometimes separate or get watery when thawed. Instead, freeze the plain cake layers and add fresh frosting when you’re ready to serve. Takes a bit more planning but results in a much better final product.
I’ve also frozen this cake as a whole, unfrosted, wrapped tightly in several layers of plastic wrap and then aluminum foil. It’s perfect for those times when you want to bake ahead for a big event. Just thaw it overnight in the fridge, still wrapped, then bring it to room temperature before decorating and serving.
Maximizing Freshness from Day One
The best storage starts with how you handle the cake right after baking. Let me share some tricks I’ve picked up over the years.
First, make absolutely sure your cake is completely cool before you cover or store it. I know it’s tempting to wrap it up while it’s still warm, especially when you’re in a hurry. But trapped steam creates condensation, which makes your cake soggy and can even encourage mold growth. Nobody wants moldy cake. Give it at least two hours to cool completely.
If you’ve made a layer cake and assembled it with frosting between the layers, that actually helps preserve moisture. The frosting acts as a barrier that seals in freshness. It’s one reason why frosted cakes often last longer than unfrosted ones.
For unfrosted cakes, I sometimes brush the top with a simple syrup made from equal parts sugar and water (or pineapple juice for extra flavor). This creates a protective glaze that locks in moisture. Professional bakeries do this all the time. It’s not necessary for this particular recipe since the pineapple keeps things moist, but it’s a handy trick to know for drier cakes.
The location where you store your cake matters too. Don’t put it near the stove or in direct sunlight. Seems obvious, but I’ve seen people do it. A cool, dark pantry or a shaded corner of your counter is ideal. Heat speeds up spoilage and can even melt frosting.
By the way, if you’re interested in understanding more about proper serving sizes and portion control, which can help you plan how much cake to make and store, the CDC has some useful guidelines. It’s helped me figure out realistic amounts when baking for different sized groups.
Signs Your Cake Has Seen Better Days
Let’s talk about when it’s time to say goodbye to your leftovers. Even with perfect storage, cakes don’t last forever.
The first sign something’s off is usually the smell. Fresh Isabelle pineapple cake smells sweet and tropical. If it starts smelling sour or fermented, that’s the pineapple going bad. Trust your nose on this one. I once ignored a slightly off smell because the cake looked fine, and let me tell you, that was not a good decision.
Visual cues are important too. Any visible mold, even just a tiny spot, means the whole cake needs to go. Mold spores spread throughout baked goods even when you can only see them in one place. Don’t just cut around it. Not worth the risk.
Texture changes can indicate staleness. If the cake has become hard or crusty, or if it’s developed a slimy feel, it’s past its prime. The pineapple pieces can get mushy and unpleasant after too long as well.
Frosting can be a telltale sign too. If your cream cheese frosting has separated, developed an odd color, or tastes tangy in a bad way (not the good cream cheese tang), it’s time to toss it. Food safety isn’t something to mess around with, especially with dairy-based products.
Serving Stored Cake Like It’s Fresh
Even properly stored cake can benefit from a little TLC before serving. Here are my tricks for making day-old cake taste like it just came out of the oven.
For refrigerated cake, I already mentioned bringing it to room temperature, but you can go one step further. A quick fifteen-second zap in the microwave can revive the texture and make the butter in the cake slightly warm and aromatic. Just don’t overdo it or you’ll end up with hot spots and melted frosting.
Another trick is adding fresh garnishes. Even if your stored cake looks a bit tired, a dollop of fresh whipped cream, some extra pineapple chunks, or a sprinkle of toasted coconut can make it look and taste special again. Presentation matters, and these little touches distract from any minor staleness.
If the edges have dried out slightly, I sometimes trim them off before serving. A thin slice around the perimeter removes any crusty bits and leaves you with the still-moist center portions. It’s a small sacrifice that makes a big difference in eating quality.
For frozen and thawed cake, serving it with something cold like ice cream or sorbet can mask any textural changes from the freezing process. Mango sorbet and this cake are absolutely incredible together. The cold, smooth sorbet contrasts beautifully with the tender cake.
Planning Ahead for Parties and Events
One of the best things about knowing how well this cake stores is that you can plan ahead for events without stressing about last-minute baking.
For a weekend party, I’ll often bake the cake on Wednesday evening. It sits in an airtight container on my counter until Friday night, when I frost and decorate it. By Saturday, it’s at peak flavor with the pineapple having fully infused into every crumb. This is actually when the cake tastes best to me, that second or third day.
If I’m really organized (doesn’t happen often, but sometimes), I’ll bake and freeze the layers up to a month before an event. Then I just have to thaw, frost, and serve. It’s like having a secret weapon in my freezer, ready to deploy when needed.
This advance preparation is especially helpful during busy holiday seasons. Instead of scrambling to bake everything in one chaotic day, I spread it out over weeks. My freezer becomes a treasure trove of partially completed desserts just waiting for their final touches. If you’re looking for more make-ahead dessert ideas, you might want to explore other options in our cakes and cupcakes collection, where several recipes work beautifully with this same prepare-ahead strategy.
The takeaway here is simple: understanding how to store your Isabelle pineapple cake properly gives you flexibility and confidence. You can bake when it’s convenient, serve when it’s needed, and ensure every slice tastes as delicious as possible. That’s what I call a winning combination.
So go ahead and bake that cake, even if it’s just for yourself. With these storage tips, you can enjoy it throughout the week, one wonderful slice at a time. There’s something really nice about knowing you have homemade cake waiting for you at home. It makes even ordinary days feel a little more special.
Frequently Asked Questions
What makes Isabelle pineapple cake special?
The Isabelle pineapple cake stands out because of its perfect balance between sweet and tangy flavors that never becomes overwhelming. The use of fresh pineapple creates a natural moisture that keeps the cake tender for days, unlike many homemade cakes that dry out quickly. Its texture is light yet satisfying, and the tropical flavor profile works for any season or occasion. The cake’s versatility in terms of frosting options and add-ins means you can customize it to your preferences while maintaining its essential character.
How long do Isabelle pineapple cakes last?
When stored in an airtight container at room temperature, this cake stays fresh for three to four days. If frosted with cream cheese or kept in warm conditions, refrigerate it where it will last up to a week. For longer storage, the cake freezes beautifully for up to three months without significant quality loss. Always bring refrigerated or frozen cake to room temperature before serving for the best texture and flavor. Proper storage is key to maintaining that wonderful moist crumb.
Where did Isabelle pineapple cake originate?
The Isabelle pineapple cake most likely originated in Asian bakeries, particularly in Taiwan and parts of Southeast Asia where pineapple cakes have long been traditional treats. The name “Isabelle” may have come from a specific bakery or a French-trained pastry chef who combined European techniques with tropical ingredients. The cake represents a beautiful fusion of Western baking methods and Asian fruit traditions. Over time, the recipe traveled globally through immigrant communities and food enthusiasts, evolving slightly in different regions while maintaining its core identity.
What are the ingredients in Isabelle pineapple cake?
The basic ingredients include fresh pineapple, all-purpose flour, granulated sugar, unsalted butter, eggs, baking powder, vanilla extract, and salt. The star is definitely the fresh pineapple, which provides both flavor and moisture. Quality matters more than exotic ingredients, so standard supermarket items work perfectly fine. Optional additions like shredded coconut, macadamia nuts, or rum can enhance the tropical profile. The frosting typically uses cream cheese, butter, powdered sugar, and vanilla, though a simple pineapple glaze is also delicious.
Can I make Isabelle pineapple cake ahead of time?
Absolutely, and it actually benefits from being made a day or two in advance. The flavors develop and deepen as the pineapple juice permeates the cake layers. You can bake the unfrosted cake up to three days ahead and store it covered at room temperature, then frost it the day of serving. For even longer advance preparation, freeze the baked layers for up to three months and frost them after thawing. This make-ahead flexibility makes it perfect for party planning when you want to spread out your baking tasks.
Can I use canned pineapple instead of fresh?
While fresh pineapple is definitely preferred, canned pineapple can work in a pinch. Drain it very well and pat it dry with paper towels to remove excess moisture, which can make your cake soggy. The flavor won’t be quite as bright and vibrant as with fresh fruit, but it will still be tasty. If using canned, look for pineapple packed in juice rather than syrup to avoid making the cake overly sweet. I’ve used canned during winter months when fresh pineapple quality is questionable, and the results were still quite good.
What’s the best frosting for Isabelle pineapple cake?
Cream cheese frosting is the classic choice because its slight tanginess complements the sweet pineapple perfectly. A simple buttercream works well too if you prefer something sweeter. For a lighter option, try a pineapple glaze made from reduced pineapple juice and powdered sugar. I’ve also seen versions with whipped cream frosting, though that requires refrigeration and doesn’t hold up as well for events. The beauty of this cake is that it’s delicious with any of these options, so choose based on your preference and the occasion.
Can I make this cake gluten-free?
Yes, you can adapt this recipe for gluten-free diets by substituting a good quality gluten-free flour blend for the all-purpose flour. Look for blends that already contain xanthan gum, which helps provide structure. The texture will be slightly different, perhaps a bit more tender and delicate, but still delicious. I’d recommend using a blend specifically designed for cakes rather than an all-purpose gluten-free flour. Everything else in the recipe remains the same, including the baking time and temperature.
Why did my cake turn out dense instead of light?
Dense cake usually results from overmixing the batter once you’ve added the flour, which develops too much gluten. Make sure you’re measuring flour correctly by spooning it into your measuring cup rather than scooping, which packs in too much. Using expired baking powder can also prevent proper rising. Finally, check your oven temperature with a thermometer, as baking at too low a temperature can cause the cake to become dense. Room temperature ingredients, especially butter and eggs, also help create a lighter texture by incorporating more easily.
Can I double this recipe for a larger crowd?
Definitely, this recipe doubles beautifully. Just make sure you have large enough mixing bowls and baking pans to accommodate the increased volume. You might need to extend the baking time slightly, so start checking for doneness a few minutes before you think it should be ready. I’ve successfully doubled this recipe many times for big family gatherings. Alternatively, you can make two separate batches if your equipment is limited, which also reduces the risk of overmixing when dealing with large quantities of batter.
Equipment
- 9x13 inch baking pan
- Electric mixer
- Measuring cups and spoons
- Parchment paper (optional)
- Sharp serrated knife
Ingredients
- 2 cups fresh pineapple chunks
- 2 cups all-purpose flour
- 1.5 cups granulated sugar
- 3/4 cup unsalted butter, softened
- 4 large eggs
- 2 teaspoons baking powder
- 1 teaspoon vanilla extract
- 1/2 teaspoon salt
- 1/2 cup shredded coconut (optional)
- 1/2 cup crushed macadamia nuts (optional)
- 1 tablespoon rum (optional)
- 1 teaspoon lemon zest (optional)
Instructions
- Preheat your oven to 350°F (175°C).
- Prepare a 9x13 inch baking pan with cooking spray or line it with parchment paper.
- Cut the fresh pineapple into small half-inch chunks and reserve the juice.
- In a large bowl, cream together the butter and sugar until light and fluffy.
- Add the eggs one at a time, beating well after each addition.
- Mix in the vanilla extract.
- In a separate bowl, combine the flour, baking powder, and salt.
- Gradually add the dry ingredients to the wet mixture, alternating with the reserved pineapple juice, mixing until just combined.
- Fold in the pineapple chunks gently into the batter.
- Pour the batter into the prepared baking pan and smooth the top.
- Bake for 30-35 minutes, or until a toothpick inserted into the center comes out clean.
- Allow the cake to cool in the pan for 10 minutes before transferring to a wire rack to cool completely.
- Frost with cream cheese frosting or drizzle with a light pineapple glaze if desired.