
A Lemon Ice Cream Delight That’ll Make Your Summer!
Picture this: it’s a scorching summer afternoon, and you’re craving something cool, creamy, and oh-so-refreshing. The last thing you want is to fuss with an ice cream machine or spend hours in the kitchen. Well, guess what? I’ve got the perfect solution for you—Homemade Lemon Ice Cream Delight. It’s zesty, creamy, and so easy to make that even your kids can help whip it up. What makes it extra special? You don’t need any fancy gadgets. Just a bowl, a whisk, and a freezer. Trust me, once you try this recipe, you’ll never go back to store-bought lemon ice cream again!
The Sweet History Behind Lemon Ice Cream
Lemon desserts have been around for centuries, but lemon ice cream became popular in the 19th century when ice cream itself started gracing dinner tables across Europe and America. Back then, making ice cream was a labor of love, requiring endless churning by hand. Thankfully, we’ve come a long way since then! My grandma used to make this no-churn version on lazy Sundays, and her secret ingredient was always freshly squeezed lemon juice. She’d say, “Nothing beats the tangy kick of a real lemon!” I’ve carried on her tradition, adding my own twist—a sprinkle of lemon zest for that extra burst of aroma.
Why You’ll Love This Lemon Ice Cream Recipe
This Lemon Ice Cream Delight is everything you want in a dessert. It’s refreshing yet indulgent, simple yet sophisticated. Plus, it’s made with just four ingredients, so you won’t feel overwhelmed. The creamy texture comes from whipped cream and condensed milk, while the zesty lemon juice adds a bright, tangy flavor that balances out the sweetness. Whether you’re hosting a party or craving a midnight snack, this recipe has got you covered.
Perfect Occasions to Whip Up This Dessert
Need ideas for when to serve this icy treat? How about a backyard barbecue, a poolside hangout, or a cozy family movie night? It’s also a showstopper at potlucks and birthday parties. Once, I brought this to a friend’s baby shower, and everyone raved about how light and refreshing it was compared to heavy cakes. Pro tip: Pair it with fresh berries or shortbread cookies for an elegant touch.
Ingredients for Your Lemon Ice Cream Delight
- 1 cup of freshly squeezed lemon juice
- 1 can (14 oz) of condensed milk
- 2 cups of very cold whipping cream
- 1 tablespoon of lemon zest (optional, for more aroma)
Substitution Options
No lemons? No problem! Try using lime juice for a tropical twist or orange juice for a sweeter citrus flavor. If you’re watching your sugar intake, swap the condensed milk with a low-sugar alternative or coconut cream. For vegans, coconut whipping cream combined with maple syrup works beautifully.
Step 1: Whisk That Cream Until It’s Cloud-Like
Grab your electric mixer and beat the whipping cream until it forms stiff peaks. Imagine soft, fluffy clouds floating in your bowl—that’s what you’re aiming for! Be patient; this step takes about 3-5 minutes. Pro tip: Make sure your cream is super cold before whipping. Room-temperature cream won’t hold its shape as well.
Step 2: Mix in the Sweetness and Zest
Once your cream is ready, gently fold in the condensed milk, lemon juice, and zest. Folding means mixing slowly and carefully to keep all that air you whipped into the cream. Picture yourself folding a delicate cake batter—you don’t want to deflate those lovely peaks. The mixture will turn a pale yellow color, looking like sunshine in a bowl.
Step 3: Freeze and Wait
Pour the mixture into a loaf pan or any freezer-safe container. Smooth the top with a spatula, cover it with plastic wrap, and pop it into the freezer. Now comes the hardest part—waiting! Let it freeze for at least 4 hours, though overnight is best if you can resist the temptation. As it sets, the flavors meld together, creating a symphony of tangy and sweet notes.
Step 4: Serve and Savor
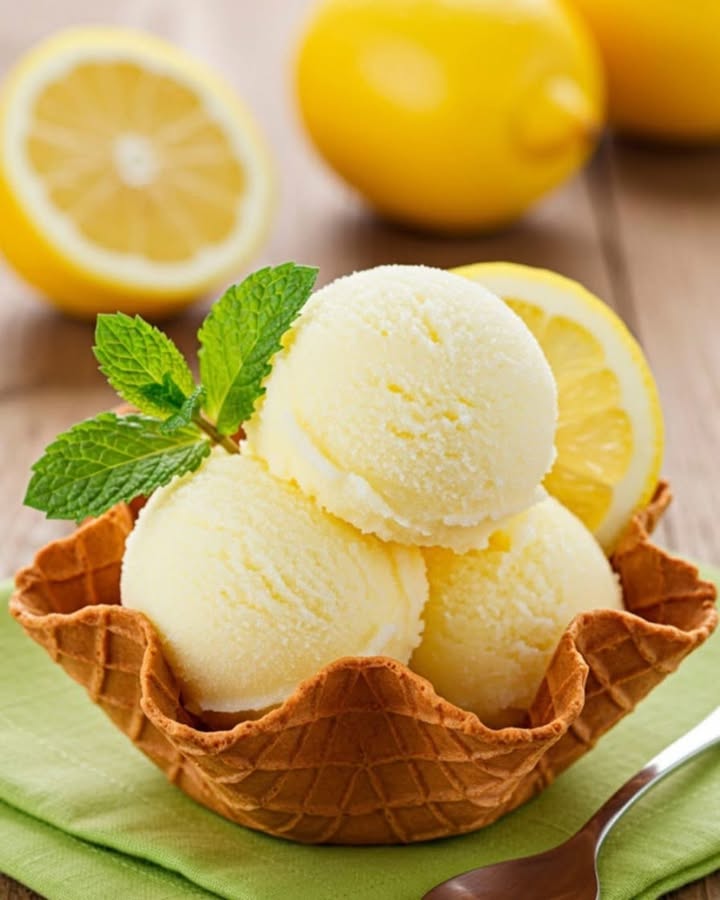
When your ice cream is firm, scoop it into bowls or cones and dig in! Each bite should be smooth, creamy, and bursting with citrusy goodness. Garnish with extra zest or a sprig of mint for a restaurant-worthy presentation. Trust me, your taste buds will thank you.
Chef’s Tip: A Secret Weapon for Extra Creaminess
For an ultra-smooth texture, strain the lemon juice through a fine mesh sieve before adding it to the mix. This removes any seeds or pulp, ensuring every spoonful is silky perfection.
Timing Breakdown
- Prep Time: 15 minutes
- Freezing Time: 4-6 hours (or overnight)
- Total Time: About 5 hours
An Interesting Fact About Lemons
Did you know lemons are one of the most versatile fruits? They’re packed with vitamin C and have been used for centuries not only in cooking but also as natural cleaning agents. Their bright scent is known to boost mood too—perfect for lifting spirits during dessert time!
Necessary Equipment
- Electric mixer or whisk
- Large mixing bowl
- Loaf pan or freezer-safe container
- Plastic wrap
- Spatula
Storage Tips
Store your Lemon Ice Cream Delight in an airtight container to prevent freezer burn. Press a piece of parchment paper directly onto the surface before sealing—it helps maintain that creamy texture. For longer storage, label the container with the date. Properly stored, it can last up to two weeks in the freezer.
If you notice ice crystals forming, simply let the ice cream sit at room temperature for 5-10 minutes before serving. This allows the crystals to melt slightly, restoring the original texture.
Another trick: Portion the ice cream into smaller containers. This way, you can grab a single serving without thawing the entire batch. Perfect for late-night cravings!
Tips and Advice
- Use organic lemons for the zest—they’re free from pesticides.
- Chill your mixing bowl and beaters before whipping the cream for better results.
- Taste the mixture before freezing to adjust sweetness or tanginess to your liking.
Presentation Ideas
- Serve scoops in hollowed-out lemon halves for a fun, rustic look.
- Drizzle with honey or caramel sauce for added flair.
- Garnish with edible flowers or sprinkles for a festive touch.
Healthier Alternatives
Here are six variations to suit different dietary needs:
- Low-Sugar Version: Replace condensed milk with sugar-free condensed milk or almond milk sweetened with stevia.
- Vegan Option: Use full-fat coconut milk instead of whipping cream and add a splash of vanilla extract.
- Protein-Packed: Blend in a scoop of unflavored protein powder for a post-workout treat.
- Dairy-Free Delight: Opt for cashew cream blended until smooth as a base.
- Keto-Friendly: Swap condensed milk with keto-approved sweeteners like erythritol.
- Fruit-Infused Twist: Add pureed strawberries or mangoes for a fruity spin.
Mistake 1: Using Bottled Lemon Juice
Bottled lemon juice lacks the vibrant flavor and freshness of freshly squeezed lemons. Always use real lemons for the best taste. Pro tip: Roll the lemons on the counter before juicing to release more liquid.
Mistake 2: Overmixing the Batter
Overmixing deflates the whipped cream, leaving you with dense ice cream. Fold gently to preserve that airy texture.
Mistake 3: Skipping the Freezing Step
Patience is key! Rushing the freezing process results in a slushy consistency rather than firm ice cream. Plan ahead and give it enough time to set.
Mistake 4: Not Storing Properly
Forgetting to cover the ice cream tightly leads to freezer burn. Always seal it well and press parchment paper onto the surface.
Mistake 5: Ignoring Lemon Zest
Zest adds depth and aroma. Don’t skip it unless you’re absolutely out of lemons—it’s worth the effort!
FAQs
Can I use a blender instead of a mixer?
While a blender might work for small batches, it’s not ideal for whipping cream. An electric mixer gives you better control and fluffier results.
How long does homemade ice cream last?
Stored properly, it can last up to two weeks. However, for optimal flavor and texture, enjoy it within the first week.
Can I freeze the mixture without a loaf pan?
Absolutely! Any shallow, freezer-safe container works fine. Just ensure it’s covered tightly.
What if my ice cream is too hard?
Let it sit at room temperature for a few minutes to soften. Alternatively, microwave it briefly (about 10 seconds) for easier scooping.
Is this recipe kid-friendly?
Yes! Kids love helping squeeze the lemons and fold the ingredients. Just supervise them during prep.
Can I add alcohol to this recipe?
Sure! A splash of limoncello or vodka enhances the lemon flavor and prevents the ice cream from freezing too solid.
Do I need to chill the bowl beforehand?
Chilling the bowl helps stabilize the whipped cream faster, especially in warm kitchens.
Can I double the recipe?
Definitely! Just make sure your bowl and freezer space can accommodate the larger quantity.
Why is my ice cream grainy?
Graininess often happens due to improper freezing or overmixing. Ensure you fold gently and freeze undisturbed.
Can I make this ahead of time?
Yes! This recipe is perfect for making ahead since it needs time to freeze anyway. Prep it the night before your event.
Wrapping It Up
There you have it—your ultimate guide to making Lemon Ice Cream Delight. With its zesty flavor, creamy texture, and ease of preparation, this dessert is sure to become a staple in your home. Whether you’re cooling off on a hot day or impressing guests at a gathering, this recipe delivers every time. So grab those lemons, gather your ingredients, and get ready to create magic in your kitchen. Happy chilling! 🍋✨
Equipment
- Large mixing bowl
- Electric mixer or whisk
- Spatula
- Loaf pan or freezer-safe container
- Plastic wrap
Ingredients
- 1 cup freshly squeezed lemon juice
- 14 oz condensed milk (1 can)
- 2 cups very cold whipping cream
- 1 tablespoon lemon zest (optional) for more aroma
Instructions
- Whisk the whipping cream with an electric mixer until it forms stiff peaks.
- Gently fold in the condensed milk, lemon juice, and lemon zest.
- Pour the mixture into a loaf pan or freezer-safe container, smooth the top, cover with plastic wrap, and freeze for at least 4 hours or overnight.
- Scoop the ice cream into bowls or cones and enjoy, garnishing with extra lemon zest or mint if desired.