
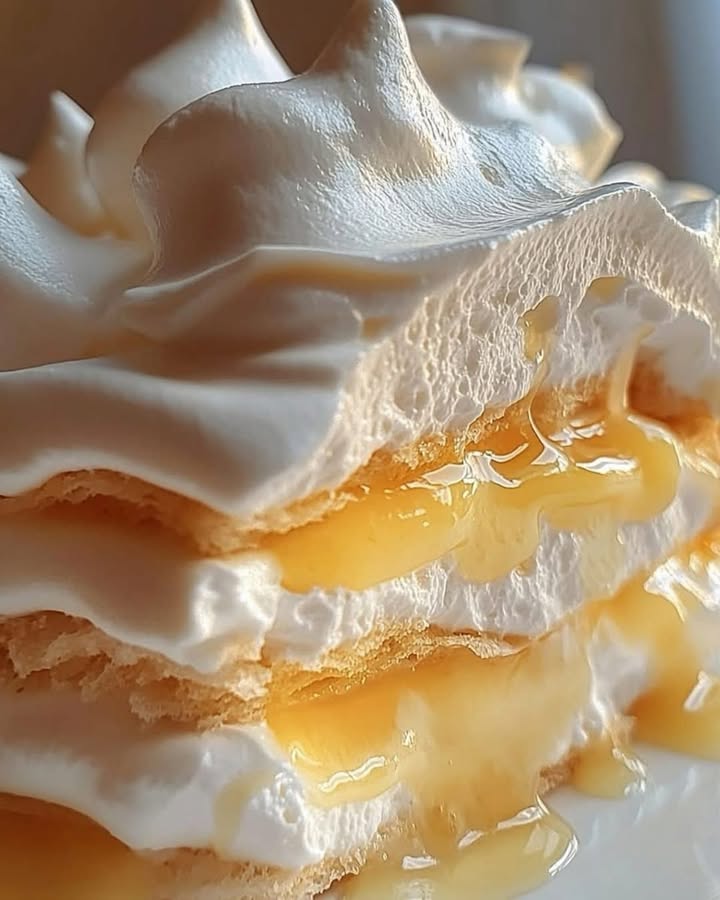
A Burst of Sunshine in Every Bite
There’s something magical about the combination of tangy lemon and fluffy meringue. I remember the first time I made this Lemon Meringue Tartlet. It was for a summer garden party, and my friends couldn’t stop raving about how fresh and light it tasted. The golden peaks of meringue glistened under the sun, and the zesty filling balanced perfectly with the buttery crust. This dessert is like sunshine on a plate—sweet, bright, and utterly irresistible.
A Little History Behind the Delight
The love affair with lemon desserts dates back centuries. Lemon meringue pies became popular in the 19th century, thanks to French and British bakers who mastered the art of meringue. Over time, home cooks adapted the recipe into smaller, more elegant versions like tartlets. I love how this dish bridges tradition and modernity. Whether served at a fancy dinner or a casual brunch, these tartlets are always a crowd-pleaser. Plus, they’re fun to make! Watching the meringue puff up in the oven feels like a little kitchen miracle every time.
Why You’ll Love This Recipe
This Lemon Meringue Tartlet recipe is a winner for so many reasons. First, it’s packed with flavor—sweet, tangy, and creamy all at once. Second, it’s surprisingly simple to make, even if you’re new to baking. And third, it looks impressive without requiring hours of effort. Trust me, your guests will think you spent all day perfecting it. The aroma of fresh lemons mingling with buttery pastry is enough to make anyone smile.
Perfect Occasions to Whip Up These Tartlets
These tartlets are versatile enough for any occasion. They’re perfect for springtime gatherings, bridal showers, or holiday feasts. I’ve also served them as a refreshing dessert after heavy meals. Honestly, though, they don’t need a special event. Sometimes, I bake them just because—it’s hard to resist that burst of citrusy goodness on a random Tuesday!
Ingredients You’ll Need
- 4 large eggs, separated
- Juice and zest of 2 lemons
- 1 cup granulated sugar
- 1 cup water
- 2 tablespoons cornstarch (maicena)
- 1/4 teaspoon salt
- 1/2 cup unsalted butter
- 1 pre-baked pie crust or tart shell
- 1/4 teaspoon cream of tartar
Substitution Options
If you’re missing an ingredient, don’t worry! Here are some swaps:
- Cornstarch: Use arrowroot powder as a thickener.
- Butter: Margarine works in a pinch, but butter gives the best flavor.
- Eggs: For vegans, try aquafaba for the meringue and a plant-based custard alternative.
- Lemons: Bottled lemon juice can substitute, but fresh lemons add unbeatable zestiness.
Step 1: Preheat and Prep
Start by preheating your oven to 175°C (350°F). This ensures everything bakes evenly later. While the oven heats, gather your ingredients. Zesting the lemons fills the air with their bright scent—it’s one of my favorite parts of this recipe. Pro tip: Roll the lemons gently on the counter before zesting to release more oils for extra fragrance.
Step 2: Make the Filling
In a saucepan, mix water, sugar, cornstarch, salt, lemon juice, and zest. Cook over medium heat, stirring constantly until the mixture thickens and bubbles form. This usually takes 5–7 minutes. Watch closely; the transformation from liquid to silky filling is mesmerizing. Keep stirring to prevent lumps!
Step 3: Add Butter
Once the filling thickens, remove it from the heat and stir in the butter. As the butter melts, it creates a glossy, velvety texture. Imagine spreading sunshine onto your spoon—it’s that good. Let the mixture cool slightly while you prepare the next step.
Step 4: Temper the Yolks
Beat the egg yolks in a bowl, then slowly whisk in a bit of the hot lemon mixture to temper them. This prevents scrambling. Once combined, pour the tempered yolks back into the saucepan and cook for another 2 minutes. The result? A rich, smooth filling ready to shine.
Step 5: Fill the Crust
Pour the lemon filling into your pre-baked crust, smoothing it out with a spatula. The contrast between the golden crust and vibrant yellow filling is stunning. Chef’s tip: Chill the filled crust briefly to set the filling before adding meringue.
Step 6: Whip the Meringue
In a clean bowl, beat the egg whites and cream of tartar until stiff peaks form. Gradually add sugar, continuing to whip until the meringue turns glossy. Picture clouds of sweetness floating above your tartlet. Spread this heavenly topping over the filling, sealing the edges to avoid shrinkage.
Step 7: Bake and Serve
Bake the tartlets for 10–15 minutes until the meringue turns golden brown. Let them cool completely before slicing. Patience pays off here—the flavors meld beautifully during resting. Serve chilled or at room temperature for maximum enjoyment.
Timing Breakdown
- Prep Time: 20 minutes
- Cooking Time: 30 minutes
- Resting Time: 2 hours
- Total Time: Approximately 2 hours and 50 minutes
Chef’s Secret
To achieve picture-perfect meringue peaks, make sure your mixing bowl and beaters are completely grease-free. Even a drop of oil can ruin the texture. A quick wipe with vinegar does the trick!
An Interesting Fact About Lemons
Lemons are powerhouse fruits. Did you know they contain more sugar than strawberries by weight? Yet their acidity masks the sweetness, making them ideal for balancing flavors in desserts like our Lemon Meringue Tartlet.
Necessary Equipment
- Mixing bowls
- Whisk or electric mixer
- Saucepan
- Spatula
- Oven-safe tart pans
Storage Tips
Store leftover tartlets in the refrigerator, covered loosely with plastic wrap. They stay fresh for up to 3 days. Avoid freezing, as the meringue may weep upon thawing. To maintain crispness, keep the crust separate until assembly.
If you must freeze, wrap individual portions tightly in foil. Thaw overnight in the fridge. Remember, though, nothing beats freshly baked tartlets!
For short-term storage, place the tartlets in an airtight container. This minimizes exposure to moisture, preserving both taste and texture.
Tips and Advice
- Use room-temperature eggs for easier separation and whipping.
- Don’t skip tempering the yolks—it prevents curdling.
- Chill the crust briefly before adding the filling for stability.
Presentation Ideas
- Garnish with thin lemon slices or edible flowers.
- Dust powdered sugar lightly over the meringue for elegance.
- Serve on colorful plates to highlight the tartlets’ beauty.
Healthier Alternatives
Want to lighten things up? Try these variations:
- Low-Sugar Version: Reduce sugar in the filling and use stevia in the meringue.
- Gluten-Free Option: Swap the crust for almond flour or gluten-free pastry.
- Vegan Twist: Use coconut cream for the filling and aquafaba for the meringue.
- Whole Grain Base: Opt for a whole wheat or oat-based crust.
- Fruit Swaps: Experiment with lime or orange instead of lemon.
- No-Bake Style: Skip baking the meringue and torch it for a dramatic finish.
Common Mistakes to Avoid
Mistake 1: Skipping Tempering
Adding yolks directly to hot filling scrambles them. Always temper to blend smoothly. Pro tip: Whisk continuously while incorporating the hot mixture.
Mistake 2: Overbeating the Meringue
Overwhipped meringue becomes grainy and dry. Stop beating once peaks hold their shape. Practice makes perfect!
Mistake 3: Underbaking the Meringue
Pale meringue lacks flavor depth. Aim for a golden hue, which signals caramelization and enhanced taste.
FAQs
Can I use store-bought crust?
Absolutely! Store-bought crust saves time and still delivers great results. Just blind-bake it according to package instructions.
How do I prevent meringue from shrinking?
Seal the meringue edges against the filling. This anchors it and reduces shrinkage during baking.
What if my filling is too runny?
Return it to low heat and continue cooking. Cornstarch needs sufficient time to activate fully.
Can I double the recipe?
Yes! Simply adjust quantities proportionally. Ensure your pans accommodate the larger batch.
Why did my meringue collapse?
Collapsing happens due to underbaking or humidity. Bake thoroughly and cool in a dry environment.
Is it okay to refrigerate leftovers?
Definitely. Refrigeration keeps the tartlets safe and tasty for a few days.
Can I use bottled lemon juice?
While possible, fresh lemon juice offers superior flavor. Bottled juice lacks zest’s aromatic punch.
Do I have to use cream of tartar?
No, but it stabilizes the meringue. Substitute with a pinch of salt if unavailable.
Can I prep ahead?
You can make the filling a day in advance. Assemble and bake just before serving for best results.
What tools help most?
An electric mixer speeds up whipping, and a nonstick saucepan simplifies cleanup.
Final Thoughts
This Lemon Meringue Tartlet is more than a dessert—it’s a celebration of flavors, textures, and colors. Whether you’re a seasoned baker or a curious beginner, this recipe invites you to create something truly special. So grab those lemons, fire up the oven, and let’s bring a touch of sunshine to your table!
Equipment
- Mixing bowls
- Whisk or electric mixer
- Spatula
- Saucepan
- Oven-safe tart pans
Ingredients
- 4 large eggs, separated
- 2 lemons, juice and zest
- 1 cup granulated sugar
- 1 cup water
- 2 tablespoons cornstarch maicena
- 1/4 teaspoon salt
- 1/2 cup unsalted butter
- 1 pre-baked pie crust or tart shell
- 1/4 teaspoon cream of tartar
Instructions
- Preheat your oven to 175°C (350°F) and zest the lemons.
- In a saucepan, mix water, sugar, cornstarch, salt, lemon juice, and zest. Cook over medium heat until thickened and bubbly (5–7 minutes).
- Once thickened, remove from heat and stir in the butter until melted.
- Beat the egg yolks and slowly whisk in a bit of the hot lemon mixture to temper. Pour back into the saucepan and cook for 2 more minutes.
- Pour the lemon filling into the pre-baked crust and chill briefly.
- In a clean bowl, whip the egg whites and cream of tartar until stiff peaks form. Gradually add sugar until glossy.
- Spread the meringue over the lemon filling, sealing the edges to prevent shrinkage.
- Bake for 10–15 minutes until the meringue is golden brown. Let cool before slicing.
Notes
Nutrition

Hi, I’m Olivia Parker, the founder of BakingSecret.com and a lifelong lover of all things sweet and homemade. I grew up in a small town in Oregon, where the smell of fresh cookies in my family’s kitchen sparked my passion for baking. Over the years, I turned that passion into a mission: to help home bakers feel confident, inspired, and creative.
After studying food science and working in several artisan bakeries across the U.S., I decided to create a space where everyone from beginners to seasoned bakers can find reliable recipes, expert tips, and a warm, welcoming community. BakingSecret.com is my way of sharing the magic of baking with the world. When I’m not testing new recipes, you’ll find me exploring farmers’ markets, collecting vintage cookbooks, or perfecting my sourdough technique.