
Mango Coconut Tart: A Tropical Treat for Every Occasion
Nothing beats the Mango Coconut Tart if you’re craving a taste of the tropics. It’s got juicy mangoes, creamy coconut milk, and a buttery crust. Sweet, tangy, and totally addictive. I made this for a summer party once, and it was a smash hit. People couldn’t stop raving about how good it looked and tasted.
The Origins of Mango Coconut Tart
This tart is inspired by tropical island flavors. Mangoes and coconuts grow everywhere in warm climates. Traditionally, they’re used in simple desserts. This version kicks it up a notch with gelatin for a smooth filling. It’s old-school meets modern technique.
Why You’ll Love This Recipe
It’s easy to make but looks fancy. The filling sets perfectly, and shredded coconut adds a nice crunch. It’s light, refreshing, and works for any occasion—casual or fancy.
Perfect Occasions for Mango Coconut Tart
Serve it at barbecues, brunches, or holiday dinners. Bring it to potlucks or give it as a gift. Whenever you need something sweet and classy, this tart has your back.
Ingredients for Mango Coconut Tart
- 1 pre-made tart crust
- 2 cups fresh mango puree
- 1 cup coconut milk
- ½ cup sugar
- 2 tablespoons gelatin
- 2 tablespoons lime juice
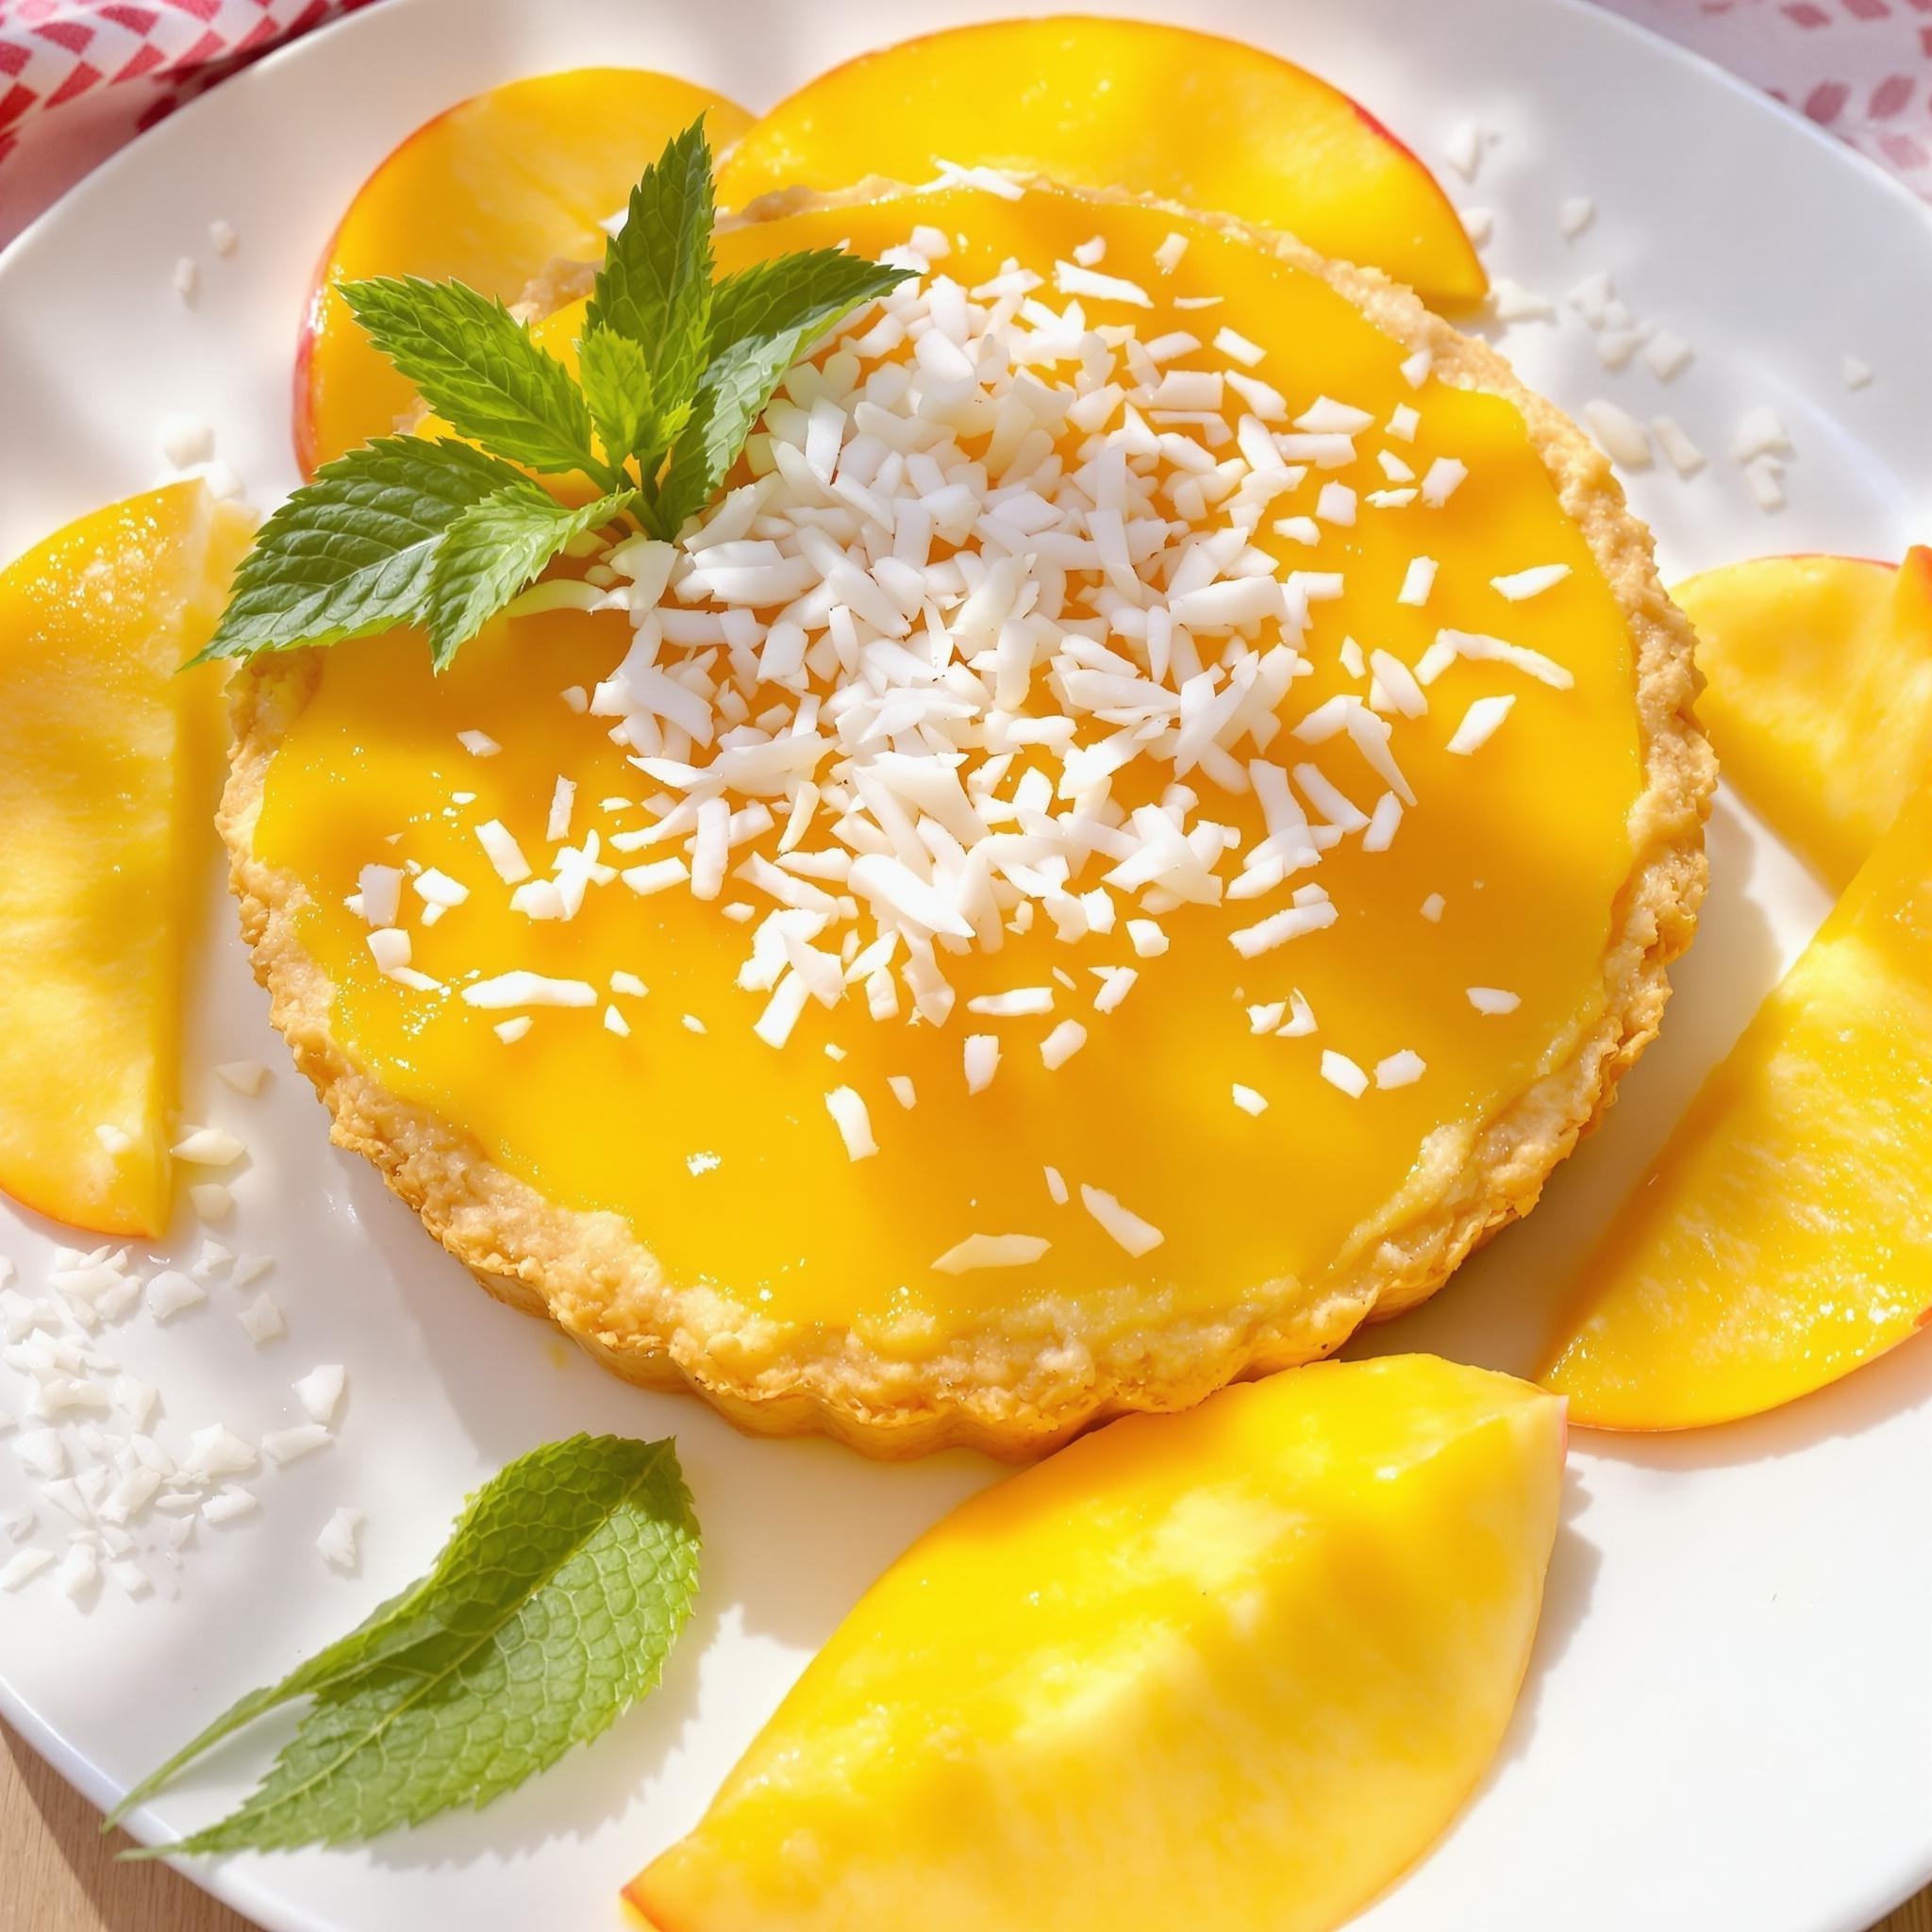
- ¼ cup shredded coconut (for garnish)
- Fresh mango slices (for garnish)
Substitution Options
No fresh mangoes? Use canned puree. Swap coconut milk for almond milk if you want something lighter. Try honey or maple syrup instead of sugar. For gluten-free, grab a GF crust.
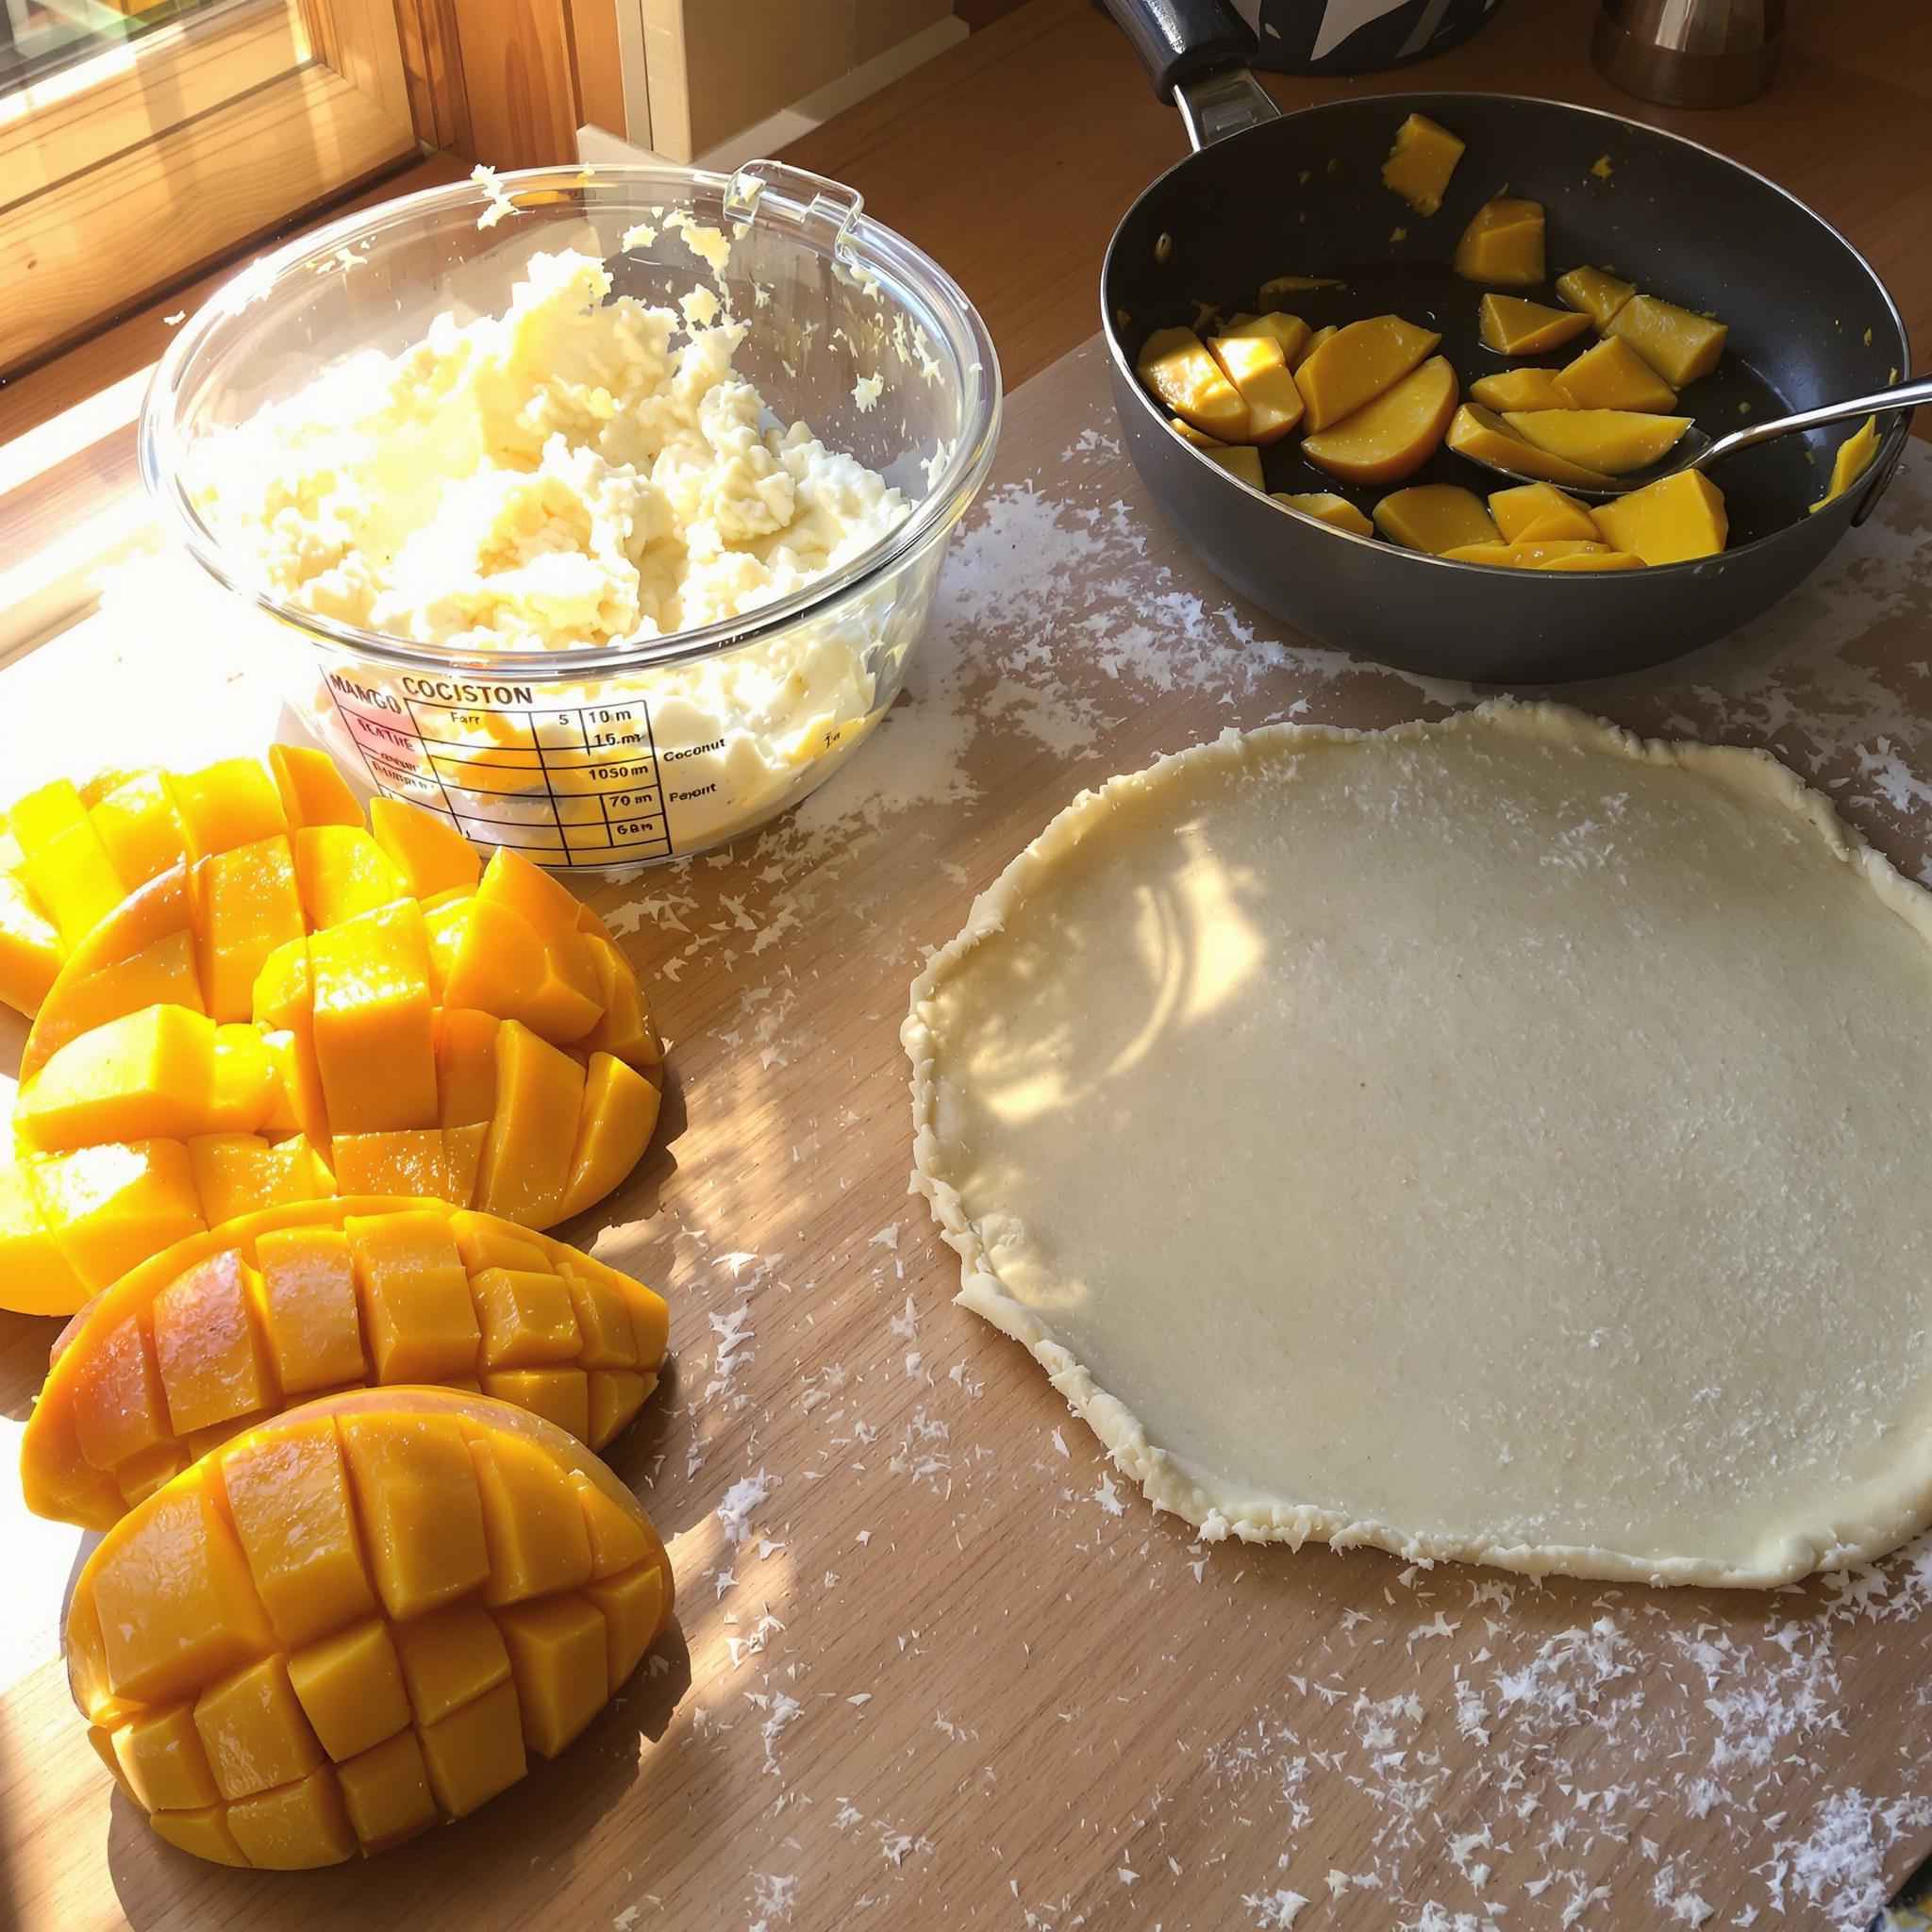
Step 1: Prepare the Tart Crust
Preheat your oven as per the crust package instructions. Bake until golden brown, then let it cool. A crisp crust holds the filling better. Pro tip: poke holes in the bottom before baking to avoid bubbles.
Step 2: Make the Mango Filling
In a saucepan, mix mango puree, coconut milk, sugar, and lime juice. Heat gently, stirring often. Don’t boil it. Your kitchen will smell amazing. This step ensures the sugar dissolves completely.
Step 3: Add Gelatin
Dissolve gelatin in hot water, then stir it into the mango mix until smooth. Gelatin firms up the filling. Take your time to avoid lumps. If needed, strain it for a silky texture.
Step 4: Assemble the Tart
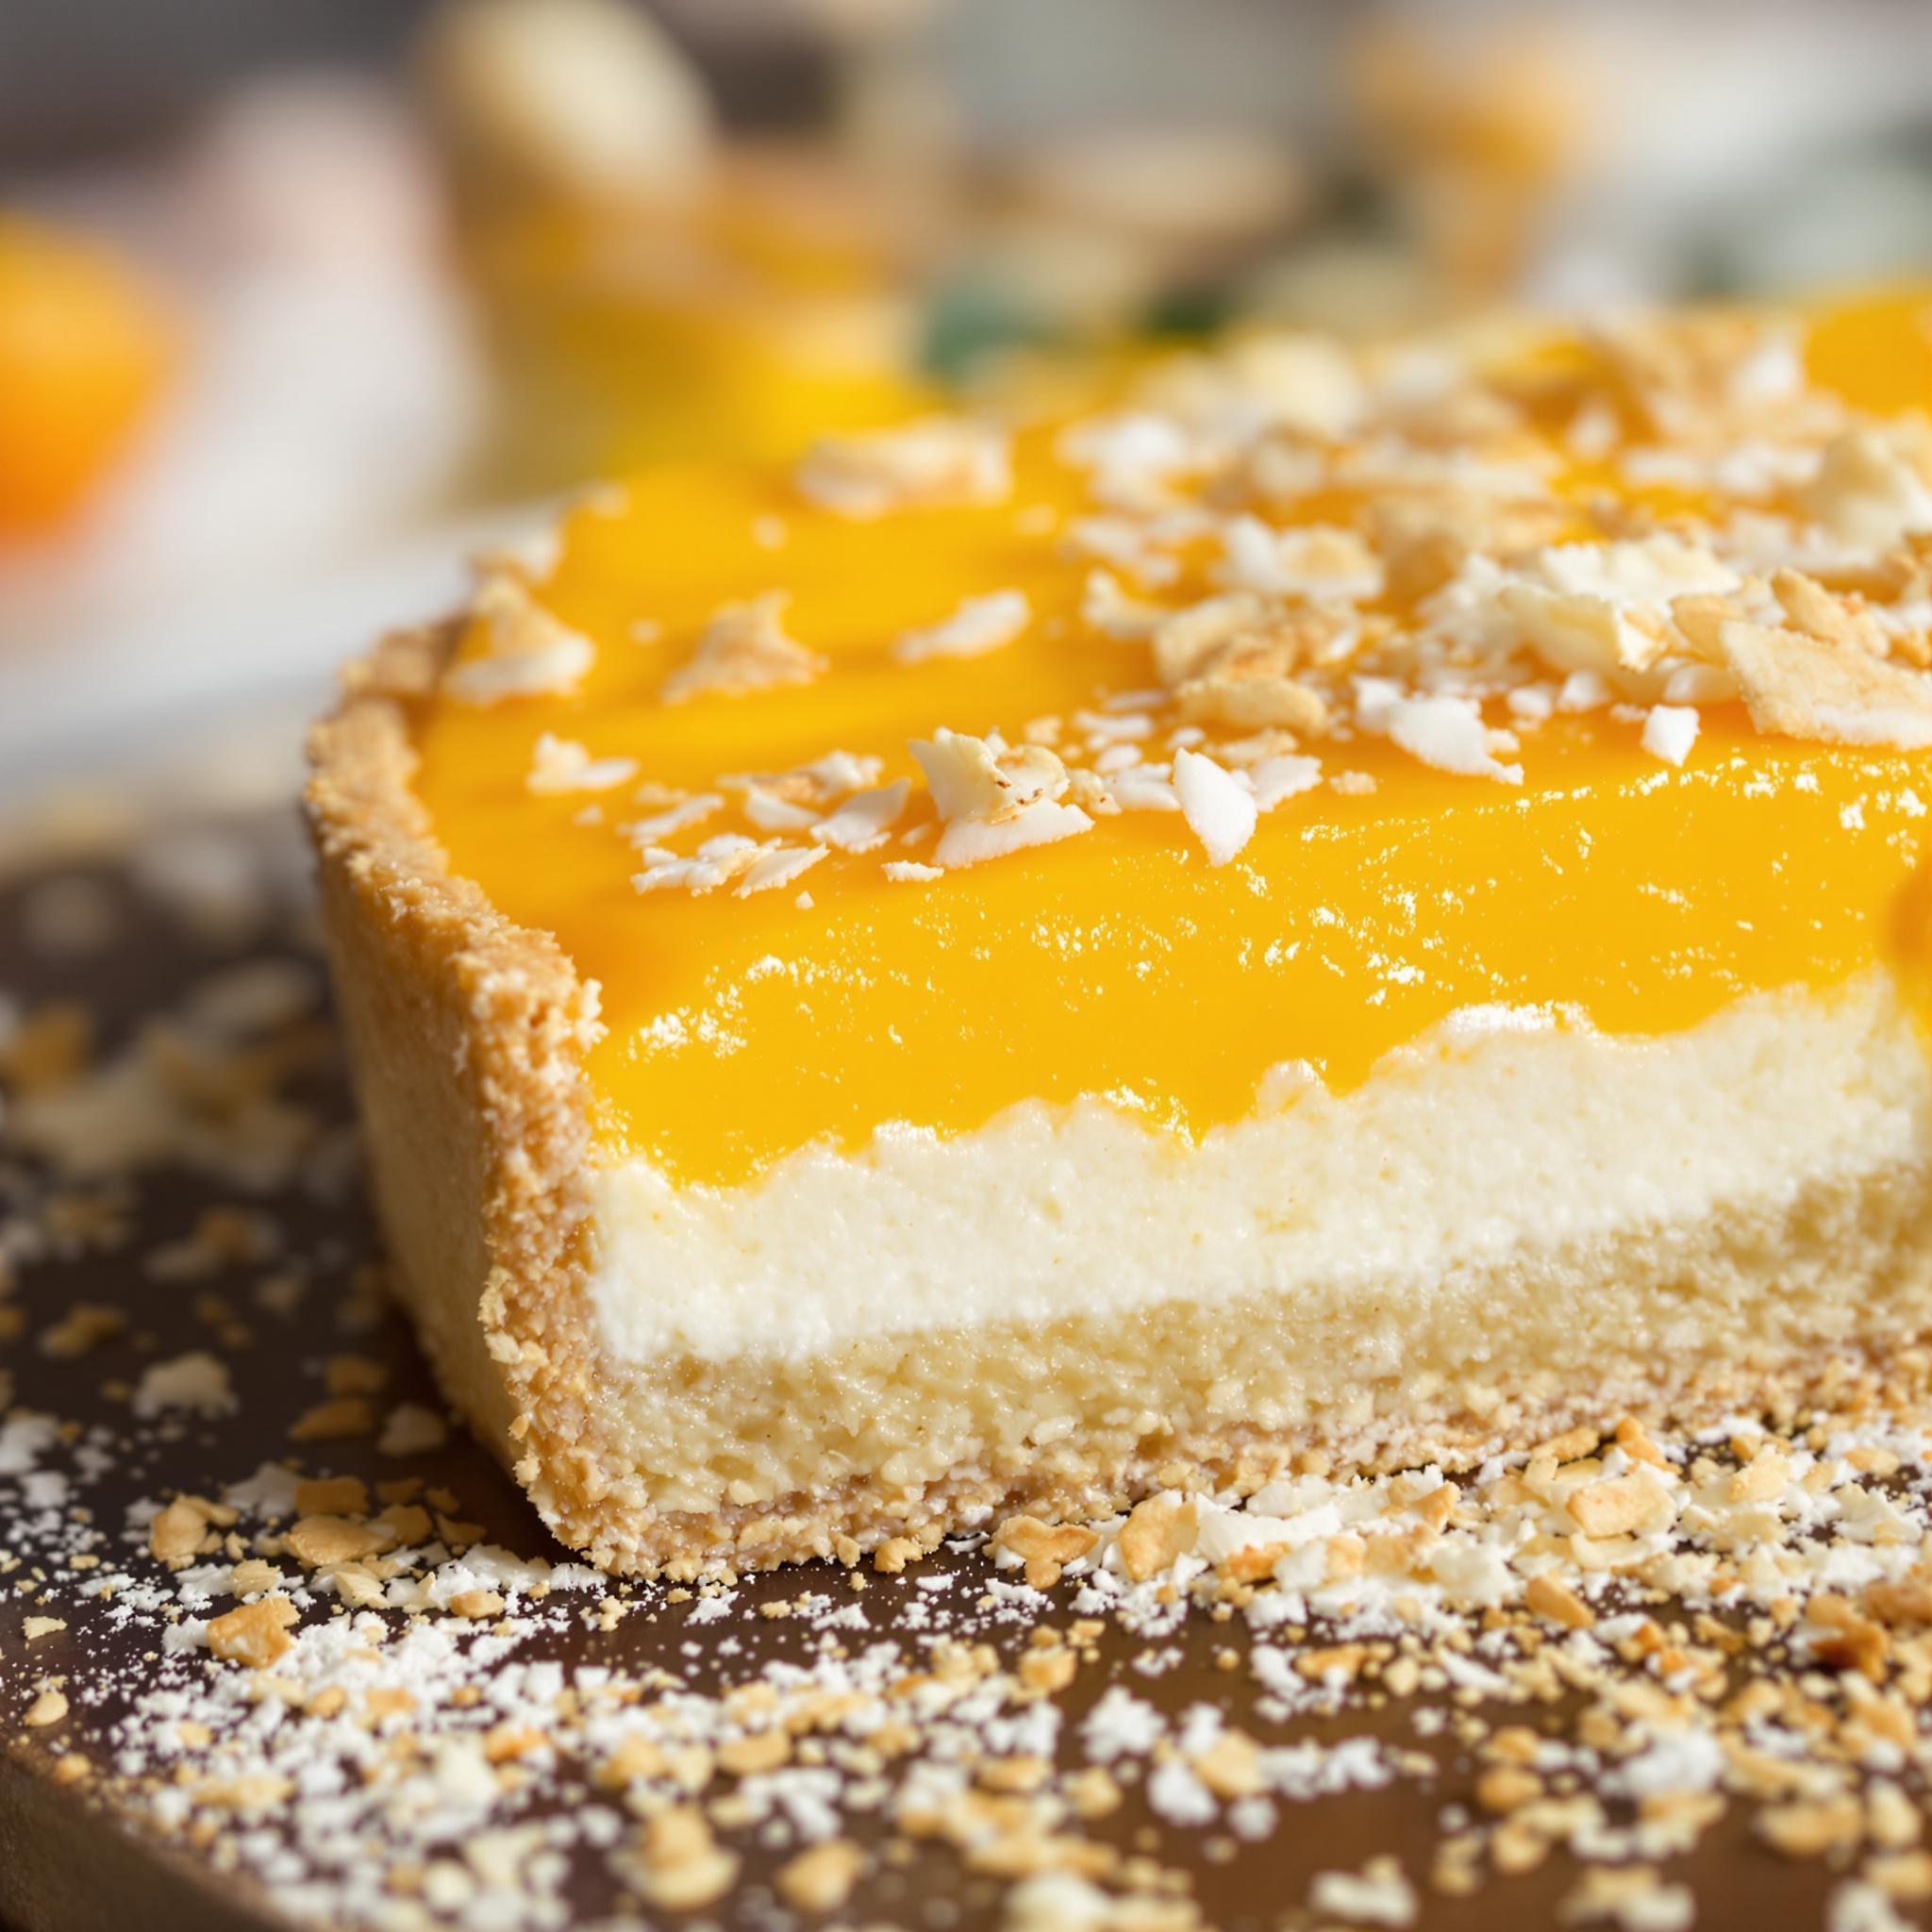
Pour the mango mix into the cooled crust and spread evenly. Chill for at least 4 hours to set. Watching the colors blend is oddly satisfying. The bright orange filling looks sharp against the crust.
Step 5: Garnish and Serve
Once set, sprinkle shredded coconut on top. Add fresh mango slices for color. Slice carefully with a sharp knife. Each bite bursts with tropical flavor. Serve chilled—it’s way better that way.
Chef’s Tip
Toasted coconut makes a big difference. Spread it on a pan and bake at 350°F for 5 minutes, stirring often. It adds crunch and a nutty aroma.
Time Required
Prep time: 20 minutes | Cooking time: 10 minutes | Resting time: 4 hours | Total time: 4 hours 30 minutes.
Nutritional Information
Per slice (makes 8 slices): Calories: 250 | Protein: 3g | Fat: 12g | Carbs: 32g | Sugar: 20g.
Extra Information
Mangoes are packed with vitamin C and antioxidants. They’re called the “king of fruits” in tropical areas. Their sweetness pairs perfectly with creamy coconut.
Necessary Tools
- Oven
- Saucepan
- Whisk
- Spatula
- Sharp knife
Storage Instructions
Keep the tart in the fridge. Cover it with plastic wrap to stay fresh. It lasts up to 3 days. Avoid freezing—it messes with the texture. Serve cold for the best taste. Keep garnishes separate until serving.
Tips and Tricks
Use ripe mangoes for the best flavor. Blend them smooth for a velvety filling. Chill overnight for firmer results. Toasted coconut makes it look and taste better.
Serving Suggestions
- Pair with whipped cream or vanilla ice cream.
- Serve with fresh berries for contrast.
Healthier Alternatives for Mango Coconut Tart
Here are six ways to make this tart healthier:
- Low-Sugar Version: Use stevia or monk fruit instead of sugar.
- Vegan Option: Replace gelatin with agar-agar.
- Gluten-Free Crust: Use almond flour or a store-bought GF crust.
- Lighter Filling: Substitute coconut milk with unsweetened almond milk.
- No-Bake Crust: Crush graham crackers or nuts for a no-bake base.
- Fruit Variations: Try peach or pineapple puree instead of mango.
Common Mistakes to Avoid
Mistake 1: Overheating the Filling
Boiling ruins the texture. Heat gently and stir constantly. Low heat and patience are key.
Mistake 2: Skipping Cooling Time
Rushing the chilling process makes the filling runny. Give it at least 4 hours to set. Plan ahead.
Mistake 3: Using Underripe Mangoes
Underripe mangoes lack sweetness. Choose fragrant, ripe ones. Press the skin lightly—it should have some give.
Mistake 4: Overloading Garnishes
Too much coconut or fruit looks messy. Use garnishes sparingly.
Mistake 5: Not Preparing Ahead
This tart needs time to set. Don’t start last minute. Prep a day early for less stress.
Frequently Asked Questions
Can I use frozen mangoes?
Yes, thaw and drain them first. Fresh is better, but frozen works fine.
How do I know when the filling is set?
It should feel firm to the touch. Let it chill for at least 4 hours.
Can I make this tart vegan?
Absolutely! Use agar-agar and a vegan crust.
What can I substitute for lime juice?
Lemon juice works just as well.
How long does the tart last?
It stays fresh in the fridge for up to 3 days. Keep it covered.
Can I freeze the tart?
Freezing changes the texture. Eat it fresh for the best experience.
Do I need to toast the coconut?
Toasting is optional but recommended. It adds flavor and crunch.
Can I use a homemade tart crust?
Yes, just make sure it’s fully baked before adding the filling.
Is this tart kid-friendly?
Definitely! Kids love the sweet mango and coconut flavors.
What occasions suit this tart?
It’s great for birthdays, holidays, or casual gatherings. Perfect for any celebration.
Conclusion
The Mango Coconut Tart is a dessert that screams sunshine. Creamy, tropical, and easy to make, it’s a winner for bakers of all levels. Give it a try and share the tropical goodness with your friends and family!
Equipment
- Oven
- Saucepan
- Whisk
- Spatula
- Sharp knife
Ingredients
- 200 g mascarpone
- 100 g sucre
- 3 œufs
- 12 unités biscuits à la cuillère ou boudoirs
- 150 g Kinder Bueno (environ 4 à 5 barres)
- 150 ml café fort refroidi
- 2 c.s liqueur de café optionnel
- 1 c.c extrait de vanille
- q.s. cacao en poudre pour la décoration
- q.s. morceaux de Kinder Bueno pour la décoration (facultatif)
Instructions
- Séparez les blancs des jaunes d'œufs. Fouettez les jaunes avec le sucre jusqu'à ce que le mélange blanchisse.
- Ajoutez le mascarpone et l'extrait de vanille, mélangez jusqu'à obtenir une crème lisse.
- Montez les blancs en neige ferme et incorporez-les délicatement à la préparation.
- Mélangez le café avec la liqueur de café si désiré.
- Trempez les biscuits dans le café, disposez-les au fond des verrines.
- Ajoutez des morceaux de Kinder Bueno sur les biscuits trempés.
- Répartissez une couche de crème au mascarpone sur les biscuits et les morceaux.
- Répétez l'opération jusqu'à remplir les verrines.
- Réfrigérez au moins 4 heures, de préférence toute la nuit.
- Saupoudrez de cacao avant de servir.