
Why Marble Cake Delight is a Must-Try
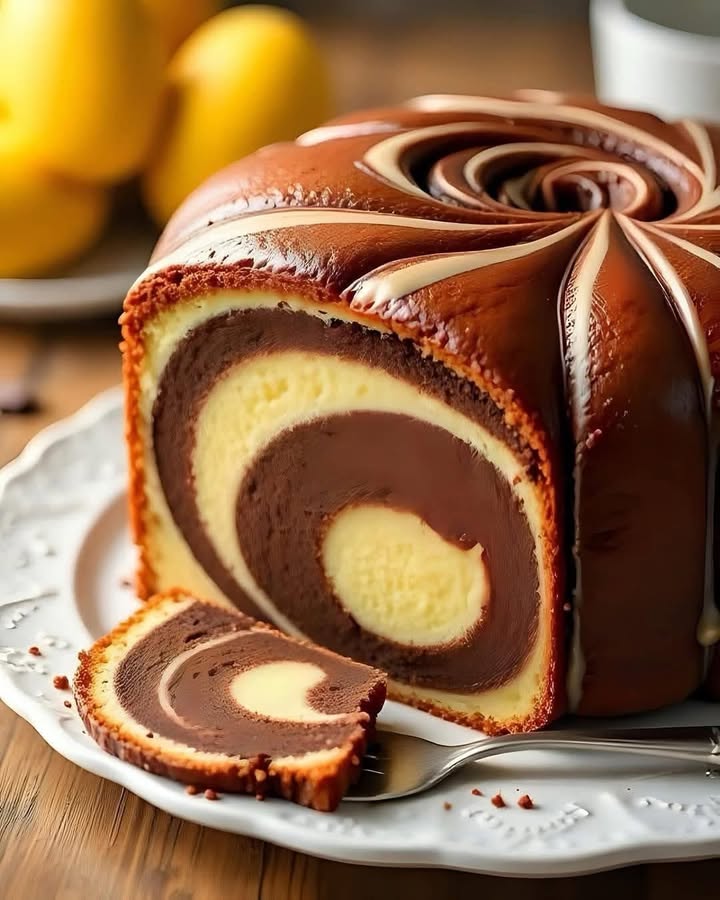
There’s something magical about the swirls of vanilla and chocolate in a Marble Cake Delight. The first time I made this cake, my kitchen smelled like a dream—buttery sweetness mingling with rich cocoa. It was for my niece’s birthday, and let me tell you, that cake stole the show! Everyone kept asking for seconds (and thirds). Whether you’re new to baking or a seasoned pro, this recipe is simple, satisfying, and oh-so-delicious.
The Story Behind Marble Cake Delight
Marble cake has been a classic for generations, with its origins tracing back to 19th-century Germany. Back then, bakers wanted to create something visually stunning yet easy to make. Over time, it became a staple at family gatherings and celebrations. My version keeps the charm of tradition alive while adding a modern twist. The secret? A perfect balance of flavors and textures that will have your guests raving.
Why You’ll Love This Recipe
This Marble Cake Delight is all about simplicity and flavor. The buttery vanilla base pairs beautifully with the deep richness of cocoa. Plus, the marbling technique is fun and forgiving—no need to be a perfectionist here! Whether you’re baking for a special occasion or just because, this cake is sure to become a family favorite.
Perfect Occasions to Bake This Cake
From birthdays to Sunday brunches, this cake fits every occasion. It’s also a hit at potlucks, baby showers, or even as a cozy treat on a rainy afternoon. I once brought it to a book club meeting, and it sparked so many compliments that I had to share the recipe!
Ingredients for Your Marble Cake Delight
- 1 cup of unsalted butter, softened
- 1 cup of granulated sugar
- 4 large eggs
- 1 cup of whole milk
- 2 cups of all-purpose flour
- 2 teaspoons of baking powder
- 1/2 teaspoon of salt
- 1/3 cup of cocoa powder
- 1 teaspoon of vanilla extract
Substitution Options
If you’re out of whole milk, use buttermilk or almond milk for a slightly tangy twist. Swap granulated sugar with coconut sugar for a deeper flavor. For a dairy-free version, replace butter with margarine or coconut oil. And if you prefer a gluten-free option, try using a 1:1 gluten-free flour blend.
Step 1: Creaming Butter and Sugar
Start by beating the softened butter and sugar until light and fluffy. This step is crucial—it traps air into the batter, giving your cake a soft, airy texture. As you mix, notice how the mixture turns pale yellow and becomes spongy. Pro tip: Make sure your butter is at room temperature for the best results.
Step 2: Adding Eggs
Crack in the eggs one at a time, beating well after each addition. This ensures the eggs are fully incorporated, creating a smooth batter. The aroma of butter and eggs blending together is heavenly! If the mixture looks curdled, don’t worry—it will come together once you add the dry ingredients.
Step 3: Mixing Dry Ingredients
In another bowl, whisk together the flour, baking powder, and salt. This step ensures even distribution of leavening agents, which helps the cake rise beautifully. Imagine the powdery softness of the flour as you sift it—so satisfying!
Step 4: Combining Wet and Dry Mixtures
Alternate adding the dry mixture and milk to the batter, starting and ending with the dry ingredients. This method prevents overmixing, which can lead to a dense cake. Watch as the batter transforms into a creamy, velvety masterpiece.
Step 5: Creating the Chocolate Batter
Separate one-third of the batter and mix it with cocoa powder. This creates the rich chocolate layer that gives the cake its signature marbled look. The contrast between the vanilla and chocolate batters is simply irresistible.
Step 6: Achieving the Marble Effect
Pour the vanilla batter into a greased loaf pan, then dollop the chocolate batter on top. Use a knife to gently swirl the two batters together. Don’t overdo it—you want distinct swirls, not a muddy mix. Chef’s tip: Swirl in an “S” shape for the prettiest pattern.
Step 7: Baking to Perfection
Bake your Marble Cake Delight at 350°F (175°C) for 50–60 minutes. The cake is done when a toothpick inserted comes out clean. As it bakes, your kitchen will fill with the warm, comforting scent of vanilla and chocolate—a true mood booster.
Step 8: Cooling and Serving
Let the cake cool completely before slicing. This allows the flavors to meld and makes cutting easier. Serve it plain or with a dusting of powdered sugar for an elegant touch. Trust me, one bite will transport you to dessert heaven!
Timing Breakdown
Prep time: 20 minutes
Cooking time: 50–60 minutes
Resting time: 30 minutes (cooling)
Total time: Approximately 1 hour 40 minutes
Chef’s Secret
To enhance the chocolate flavor, add a teaspoon of instant coffee powder to the cocoa mixture. It deepens the richness without making the cake taste like coffee.
Extra Info
Did you know that marble cake symbolizes unity? Its intertwined layers represent harmony, making it a meaningful choice for weddings or anniversaries. How sweet is that?
Necessary Equipment
You’ll need a stand mixer or hand mixer, a loaf pan, a spatula, a whisk, measuring cups and spoons, and a cooling rack. Simple tools for a stunning result!
Storage Tips
Store your Marble Cake Delight in an airtight container at room temperature for up to three days. For longer storage, wrap slices individually in plastic wrap and freeze for up to a month. Thaw at room temperature before serving.
If you live in a humid area, refrigerate the cake to keep it fresh. Just bring it back to room temperature before enjoying.
Avoid storing the cake uncovered, as it can dry out quickly. Keep it snug and safe for maximum yumminess.
Tips and Advice
- Use room-temperature eggs for better emulsification.
- Sift the cocoa powder to remove lumps and ensure a smooth batter.
- Grease your loaf pan generously to prevent sticking.
Presentation Ideas
- Dust with powdered sugar for a classic look.
- Drizzle with chocolate ganache for extra indulgence.
- Add fresh berries on the side for a pop of color.
Healthier Alternatives
Here are six variations to make your Marble Cake Delight healthier:
- Gluten-Free: Use almond flour instead of all-purpose flour.
- Low-Sugar: Replace sugar with stevia or monk fruit sweetener.
- Vegan: Substitute eggs with flax eggs and use plant-based milk.
- Protein-Packed: Add a scoop of vanilla protein powder to the batter.
- Oil-Free: Swap butter with applesauce for a lighter texture.
- Whole Grain: Use whole wheat flour for added fiber.
Common Mistakes to Avoid
Mistake 1: Overmixing the Batter
Overmixing can lead to a tough, dense cake. Mix just until the ingredients are combined. Pro tip: Stop mixing as soon as you no longer see streaks of flour.
Mistake 2: Skipping the Cooling Step
Cutting the cake too soon can cause it to crumble. Patience pays off—let it cool completely for clean slices.
Mistake 3: Using Cold Ingredients
Cold butter and eggs won’t cream properly, affecting the cake’s texture. Take them out of the fridge 30 minutes before starting.
Mistake 4: Overbaking
An overbaked cake is dry and crumbly. Check for doneness a few minutes before the timer goes off. Insert a toothpick—if it comes out clean, it’s ready.
Mistake 5: Uneven Swirling
Swirling too much blends the batters, losing the marbled effect. Aim for gentle, deliberate movements.
FAQ
Can I use a bundt pan instead of a loaf pan?
Yes, you can! Just adjust the baking time slightly, as bundt pans may require a bit longer in the oven.
How do I know when the cake is done?
Insert a toothpick into the center. If it comes out clean or with a few crumbs, the cake is ready.
Can I freeze this cake?
Absolutely! Wrap slices tightly in plastic wrap and store them in the freezer for up to a month.
What’s the best way to reheat frozen slices?
Thaw at room temperature or microwave for 10–15 seconds for a warm treat.
Can I double the recipe?
Yes, doubling works perfectly. Just make sure your bowls and pans are large enough to handle the increased volume.
Why is my cake sinking in the middle?
This usually happens if the cake isn’t fully baked or if you open the oven door too early. Resist peeking until the minimum baking time is up.
Can I add nuts or chocolate chips?
Of course! Fold in chopped walnuts or chocolate chips for added texture and flavor.
What’s the difference between baking powder and baking soda?
Baking powder contains both an acid and a base, while baking soda needs an acidic ingredient to activate. This recipe uses baking powder for consistent rise.
Why does my cake taste eggy?
Using too many eggs or undermixing can cause this. Follow the recipe closely and beat well after each egg addition.
Can I reduce the sugar?
Yes, but reducing sugar may affect the cake’s moisture and structure. Try reducing by no more than 25%.
Final Thoughts
There’s nothing quite like the joy of slicing into a beautifully swirled Marble Cake Delight. With its rich history, delightful flavors, and endless versatility, this cake deserves a spot in your recipe collection. So grab your apron, preheat that oven, and get ready to bake a masterpiece that everyone will love. Happy baking!
Equipment
- Stand mixer or hand mixer
- Loaf pan
- Spatula
- Whisk
- Measuring cups and spoons
Ingredients
- 1 cup unsalted butter, softened
- 1 cup granulated sugar
- 4 large eggs
- 1 cup whole milk
- 2 cups all-purpose flour
- 2 teaspoons baking powder
- 1/2 teaspoon salt
- 1/3 cup cocoa powder
- 1 teaspoon vanilla extract
Instructions
- Beat the softened butter and sugar until light and fluffy.
- Add the eggs one at a time, beating well after each addition.
- Whisk together the flour, baking powder, and salt in another bowl.
- Alternate adding the dry mixture and milk to the batter, starting and ending with dry ingredients.
- Separate one-third of the batter and mix it with cocoa powder.
- Pour the vanilla batter into a greased loaf pan, then dollop the chocolate batter on top and swirl gently.
- Bake at 350°F (175°C) for 50–60 minutes until a toothpick comes out clean.
- Let the cake cool completely before slicing and serving.
Notes
Nutrition

Hi, I’m Olivia Parker, the founder of BakingSecret.com and a lifelong lover of all things sweet and homemade. I grew up in a small town in Oregon, where the smell of fresh cookies in my family’s kitchen sparked my passion for baking. Over the years, I turned that passion into a mission: to help home bakers feel confident, inspired, and creative.
After studying food science and working in several artisan bakeries across the U.S., I decided to create a space where everyone from beginners to seasoned bakers can find reliable recipes, expert tips, and a warm, welcoming community. BakingSecret.com is my way of sharing the magic of baking with the world. When I’m not testing new recipes, you’ll find me exploring farmers’ markets, collecting vintage cookbooks, or perfecting my sourdough technique.