
No-Bake German Cheesecake: A Dreamy, Decadent Dessert
I have a confession. My oven and I have a complicated relationship. Sometimes, especially on hot summer days, we need a break from each other. That’s when my No-Bake German Cheesecake becomes my kitchen hero. Imagine this: a rich, chocolatey filling that’s impossibly creamy, a nutty caramel topping, and a crunchy cookie crust. All without turning on the oven once! It’s the kind of dessert that looks like you spent all day in a fancy bakery, but the secret is, it’s wonderfully simple. This recipe is my go-to for last-minute guests and “I need chocolate” emergencies.
The Story Behind This Easy Cheesecake
Traditional German cheesecake, or *Käsekuchen*, is often baked and can be quite dense. My version is a playful, modern twist. It takes that beloved European dessert idea and makes it no-fuss. I wanted to capture the spirit of indulgence without the stress. I tested this recipe for my friend’s birthday party. The Texas heat was fierce, and baking was out of the question. This cheesecake was the star of the show! It’s now a family favorite, requested at every gathering. It blends the deep cocoa flavor with a tropical hint of coconut and the satisfying crunch of pecans.
Why You’ll Love This No-Bake Cheesecake Recipe
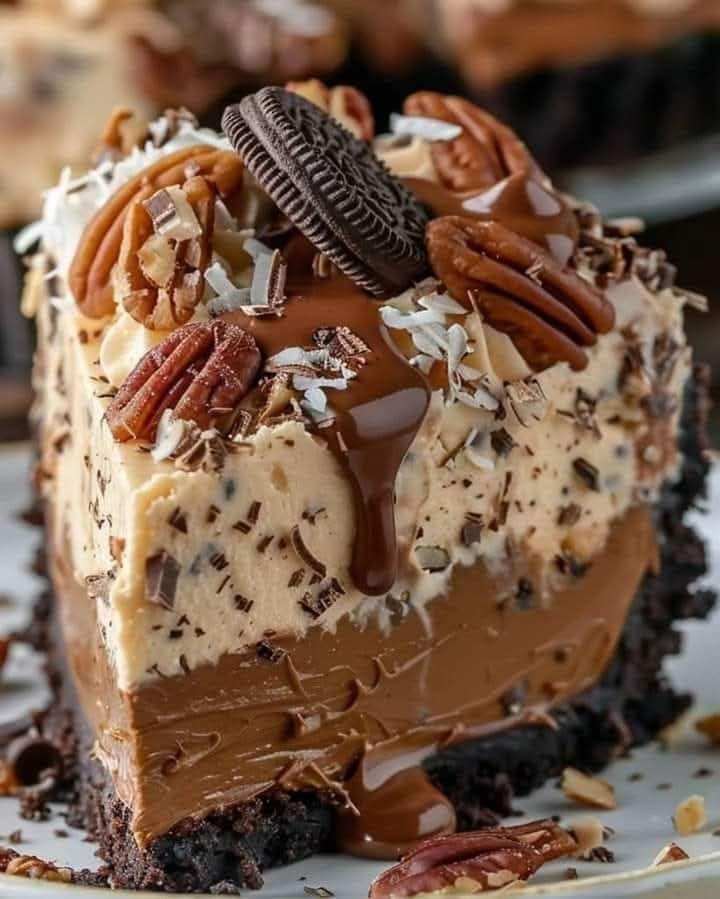
You will adore this recipe for so many reasons! First, it’s incredibly forgiving. No worrying about water baths or cracked tops. Second, the flavor is deep and complex. It’s not just chocolate; it’s a chocolate *experience*. The texture is light yet rich, melting on your tongue. Third, it’s a visual masterpiece. The layers of dark cheesecake, golden topping, and chocolate shavings make everyone’s eyes light up. It’s perfect for new bakers and seasoned pros who want a stunning, stress-free dessert.
Perfect Occasions for Your German Chocolate Creation
This cheesecake shines at any event! It’s a showstopper for holidays like Thanksgiving or Christmas. Bring it to a potluck and watch it disappear first. It’s ideal for summer BBQs and picnics since it’s served cold. I love making it for birthdays instead of a traditional cake. It also makes a wonderful “just because” treat to brighten a weekday. Any time you want to share something special, this is your recipe.
Ingredients for Your No-Bake German Cheesecake
Gathering your ingredients is the first step to dessert magic. Here’s what you’ll need:
- 1 1/2 cups chocolate cookie crumbs (like Oreo® baking crumbs)
- 1/3 cup melted butter
- 16 oz cream cheese, softened
- 1 cup powdered sugar
- 1/2 cup unsweetened cocoa powder
- 1 teaspoon vanilla extract
- 1 1/2 cups heavy whipping cream
- 1 cup semi-sweet chocolate chips, melted and cooled
- 1 cup shredded coconut
- 1 cup chopped pecans
- 1/4 cup sweetened condensed milk
- 1/4 cup caramel sauce
- 1/4 cup chocolate shavings for garnish
- Chocolate sandwich cookies and pecan halves for garnish
Handy Substitution Options
Don’t worry if you’re missing an ingredient! Here are some easy swaps:
- Cookie Crumbs: Use graham cracker crumbs for a different crust flavor.
- Nuts: Swap pecans for walnuts or almonds.
- Coconut: Omit it if you’re not a fan, or use toasted coconut for extra crunch.
- Heavy Cream: A full-fat coconut cream can work for a dairy-free option (check your cream cheese too).
- Chocolate Chips: Use milk or dark chocolate based on your preference.
How to Make No-Bake German Cheesecake: A Step-by-Step Guide
Step 1: Create the Chocolate Cookie Base
Grab a medium bowl and mix your chocolate cookie crumbs with the melted butter. The butter will coat every crumb, making them look glossy and rich. Press this mixture firmly into the bottom of a 9-inch springform pan. Use the bottom of a glass or a measuring cup to get it nice and even. This crust is your foundation, so pack it down well. Pop the pan in the fridge to let the crust set and become firm. This chilling time helps it hold its shape when you add the creamy filling later.
Step 2: Whip Up the Chocolate Dream Filling
In a large mixing bowl, beat the softened cream cheese until it’s completely smooth. No lumps allowed! Then, sift in the powdered sugar and unsweetened cocoa powder. Sifting prevents clumps and gives you a silky texture. Add the vanilla extract for that warm, aromatic note. Beat everything together on medium speed. You’ll see the mixture turn into a thick, dark, and luxurious chocolate paste. The scent is absolutely heavenly at this point.
Step 3: Fold in the Fluffy Clouds
Now, pour your heavy whipping cream into a separate, clean, cold bowl. Whip it on high speed until stiff peaks form. This means when you lift the beaters, the cream stands up straight in beautiful, fluffy peaks. Gently fold this whipped cream into your chocolate cream cheese mixture. Use a spatula and a light hand, cutting through the center and folding over from the bottom. This keeps the air in the cream, making your filling light and mousse-like. Pro tip: Make sure your cream cheese mix isn’t too cold, or it will be hard to fold smoothly.
Step 4: Marry the Melty Chocolate
Take your cup of semi-sweet chocolate chips that you’ve melted and slightly cooled. You don’t want it hot, or it will melt the whipped cream. Pour the glossy, melted chocolate into the cheesecake batter. Gently stir and fold until the chocolate is fully incorporated. You’ll see beautiful dark chocolate streaks swirl through the lighter batter before it all blends into one uniform, deep brown color. This step adds an intense, pure chocolate flavor that is the heart of this dessert.
Step 5: Chill and Set to Perfection
Retrieve your crust from the fridge. Spoon your velvety chocolate filling over the crust. Spread it out evenly with a spatula, making a nice, smooth top. Carefully tap the pan on the counter a few times to release any air bubbles. Now, the hardest part: patience. Cover the pan and refrigerate it for at least 4 hours, but overnight is even better. This long chill is crucial. It allows the cheesecake to firm up completely so you get clean, beautiful slices later.
Step 6: Craft the Coconut-Pecan Caramel Topping
About an hour before serving, make the signature German chocolate topping. In a small saucepan, combine the shredded coconut, chopped pecans, sweetened condensed milk, and caramel sauce. Cook this over medium heat. Stir it constantly! The sweetened condensed milk will bubble and thicken, coating the nuts and coconut in a sticky, golden glaze. This should take about 5-7 minutes. Once it has thickened nicely, remove it from the heat and let it cool for 10-15 minutes. You want it spreadable but not piping hot.
Step 7: The Grand Finale: Assembly and Garnish
Take your firmly set cheesecake from the fridge. Spread the slightly cooled coconut-pecan mixture over the top. Create an even layer, going all the way to the edges. Now for the fun part—garnishing! Sprinkle chocolate shavings generously over the top. Artfully place a few chocolate sandwich cookies and pecan halves around the border. Return the whole masterpiece to the fridge for one final hour. This lets the topping set and the flavors fully marry. Chef’s tip: For clean slices, dip your knife in hot water and wipe it dry between each cut.
Timing Your Dessert Masterpiece
Good things take time, especially when no baking is involved! Here’s your timeline:
- Prep Time: 30 minutes (active, fun kitchen time)
- Chill Time: 5 hours (includes the final hour with topping)
- Total Time: 5 hours 30 minutes (mostly hands-off!)
- Servings: 10 generous slices
- Calories: Approximately 450 kcal per serving
My Chef’s Secret for the Best Texture
My secret is all about the cream cheese. Let it sit on the counter for a good 2-3 hours before you start. It must be truly softened at room temperature. If it’s even slightly cold, you’ll end up with tiny lumps in your filling, no matter how long you beat it. Smooth, room-temperature cream cheese is the key to that flawlessly velvety, lump-free texture that makes this no-bake cheesecake so incredible.
A Sweet Bit of Extra Info
That coconut-pecan-caramel topping? It’s inspired by the classic “German Chocolate Cake” frosting, which is actually named after Samuel German, an American chocolatier! So while this cheesecake has a German-inspired name, it’s a wonderful American mash-up of flavors and no-bake convenience. It’s a delicious piece of culinary history you can make in your own kitchen.
Necessary Equipment
You don’t need fancy tools! Here’s your list:
- 9-inch springform pan (essential for easy removal)
- Electric hand mixer or stand mixer
- Mixing bowls (medium and large)
- Small saucepan
- Spatula
- Measuring cups and spoons
Storing Your No-Bake German Cheesecake
This cheesecake stores beautifully. Keep it covered in the refrigerator. The crust will stay firm, and the flavors will continue to develop. It’s best enjoyed within 3-4 days for optimal texture.
You can also freeze it for longer storage. Wrap the whole cheesecake (or individual slices) tightly in plastic wrap, then in aluminum foil. It will keep in the freezer for up to 2 months. Thaw it overnight in the refrigerator before serving.
Remember to add garnishes like fresh whipped cream or extra caramel sauce after thawing. This keeps everything looking and tasting its best. Proper storage is a great way of avoiding food waste and enjoying your creation for days.
Tips and Advice for Success
- Use full-fat cream cheese and heavy cream for the richest flavor and best set.
- When melting chocolate, do it in short bursts in the microwave, stirring frequently, to avoid burning.
- If your kitchen is very warm, consider chilling your mixing bowl before whipping the cream.
- For a neat presentation, run a knife around the edge of the cheesecake before unclasping the springform pan.
Presentation Tips to Impress Your Guests
Make it look as good as it tastes! Serve each slice on a white plate for contrast. Drizzle a little extra caramel sauce around the plate. Add a small dollop of whipped cream on the side. For a festive touch, sprinkle with edible gold dust or festive sprinkles. You can even serve it with a side of fresh berries to cut through the richness.
Healthier & Fun Variations to Try
Love this recipe? Here are six ways to mix it up:
- Vegan Dream: Use vegan cream cheese, coconut whipped cream, and dairy-free chocolate. It’s just as decadent!
- Mint Chocolate Twist: Add 1/2 teaspoon of peppermint extract to the filling for a refreshing kick.
- Orange Zest Delight: Fold the zest of one orange into the filling for a bright, citrusy note.
- Peanut Butter Cup: Swirl 1/2 cup of melted peanut butter into the filling before chilling.
- Cookies and Cream: Use whole Oreo® cookies (filling and all) for the crust and fold crushed cookies into the batter.
- Espresso Infusion: Dissolve 1 tablespoon of instant espresso powder into the melted chocolate for a mocha flavor.
If you love playing with chocolate desserts, you might also enjoy our other no-bake treats or baked delights like our classic cake mix biscotti for a crunchy cookie option. For pure chocolate lovers, our double chocolate biscotti is a must-try. And if you’re looking for something different, our choc chip biscotti recipe is a family favorite. For those with dietary needs, we have fantastic gluten free biscotti recipes that everyone can enjoy.
Common Mistakes to Avoid
Mistake 1: Using Cold Cream Cheese
This is the biggest culprit for a lumpy filling. Cold cream cheese will never blend smoothly with the other ingredients. No matter how long you mix, little bits will remain. Always plan ahead. Take the cream cheese out of the fridge at least 2 hours before you start baking. It should be as soft as room-temperature butter. This ensures a silky, perfect texture every single time.
Mistake 2: Not Whipping the Cream to Stiff Peaks
If your heavy cream is only softly whipped, your cheesecake won’t set properly. It will be runny and loose. Whip the cream until it is very firm. When you lift the beaters, the peaks should stand up straight without flopping over. This structure is what gives the no-bake cheesecake its firm, sliceable body. A soft peak will collapse and make a soupy dessert.
Mistake 3: Adding Hot Melted Chocolate
Pouring hot, just-melted chocolate into your creamy filling is a disaster. It will melt the whipped cream and ruin the airy texture. It can even cause the cream cheese to separate. Always let your melted chocolate cool for at least 10-15 minutes. It should be barely warm to the touch. Stir it into the filling gently to keep all that wonderful air intact.
Mistake 4: Skipping the Long Chill Time
Impatience leads to a soupy mess. Four hours is the minimum chilling time. The filling needs that long for the ingredients to fully set and bond together. If you try to cut it before it’s ready, it will ooze and not hold its shape. For the absolute best results, make it the day before. An overnight chill guarantees perfect, clean slices that look professional.
Mistake 5: Overcooking the Coconut-Pecan Topping
The topping should be thick and glossy, not dry or chewy. If you cook it too long, the sweetened condensed milk can become grainy and the nuts can burn. Stir constantly over medium heat and remove it from the burner as soon as it thickens and bubbles. It will continue to thicken as it cools. Let it cool slightly before spreading so it doesn’t melt the top of your beautiful cheesecake.
For more decadent ideas beyond this no-bake wonder, explore our full collection of cheesecake recipes here, from classic New York style to fun fruity versions.
Frequently Asked Questions
Can I make this cheesecake ahead of time?
Absolutely! This is one of the best make-ahead desserts. You can prepare the entire cheesecake, with the topping, and store it covered in the refrigerator for up to 2 days before serving. The flavors actually improve as they meld together. Just add any final cookie or pecan garnishes right before you serve it so they stay crisp and look fresh. It’s a huge time-saver for parties and holidays.
Why did my cheesecake turn out too soft or runny?
A runny cheesecake usually has two causes. First, the heavy cream may not have been whipped to stiff enough peaks. It needs to be very firm. Second, it likely didn’t chill long enough. The refrigerator time is not a suggestion—it’s a requirement for the structure to develop. If it’s still soft after 4 hours, just give it more time. Your fridge temperature can also affect this; make sure it’s set cold enough (below 40°F).
What can I use instead of a springform pan?
A springform pan is ideal because the removable sides make serving easy. If you don’t have one, you can use a regular 9-inch pie dish. The downside is you’ll have to serve it directly from the dish. You could also use a deep cake pan lined with parchment paper strips that overhang the sides. These “slings” will help you lift the cheesecake out once it’s set, though it requires more careful handling.
Is it possible to make this recipe gluten-free?
Yes, it’s very easy to make gluten-free. Simply ensure your chocolate cookie crumbs are from a certified gluten-free brand. Many grocery stores carry gluten-free chocolate sandwich cookies or baking crumbs. Double-check that your other ingredients, like vanilla extract and cocoa powder, are also labeled gluten-free to avoid any cross-contamination. The rest of the recipe is naturally gluten-free!
Can I freeze the cheesecake for later?
You can definitely freeze this cheesecake. It freezes very well. Wrap the whole chilled cheesecake (without the final decorative cookie garnish) tightly in plastic wrap, then in foil. It will keep for up to 2 months. Thaw it overnight in the refrigerator. The texture may be slightly denser after freezing, but the flavor will still be fantastic. Add fresh garnishes after it’s thawed.
My topping is too thick to spread. What should I do?
If your coconut-pecan caramel topping cools and becomes too stiff, don’t worry! Simply place the saucepan back over very low heat. Add a teaspoon of milk, cream, or extra caramel sauce. Stir gently until it loosens up to a spreadable consistency. Let it cool again for just a minute or two before spreading it on the cheesecake. Avoid adding too much liquid, or it will make the topping runny.
How do I get perfectly clean slices?
Clean slices are all about the right tool and technique. Use a long, thin, sharp knife. Dip the blade in a tall glass of hot water. Wipe it completely dry with a clean towel. Make a smooth, single cut through the cheesecake. Repeat this process—dip, wipe, cut—for every single slice. The hot knife glides through the cold layers without dragging or cracking the beautiful topping.
Can I use a different type of nut?
Of course! While pecans are traditional for the German chocolate flavor, you can use what you love or have on hand. Chopped walnuts are a very close substitute with a similar texture. Toasted almonds or hazelnuts would also be delicious and add their own unique flavor. Just keep the measurement the same (1 cup chopped) to maintain the topping’s perfect balance.
Why is it called a “German” cheesecake?
This name comes from the topping, which mimics the iconic coconut-pecan frosting on a classic German Chocolate Cake. That cake itself was named for “Baker’s German’s Sweet Chocolate,” created by Samuel German. So, this no-bake cheesecake borrows that famous American flavor combination, giving a nod to its delicious inspiration, rather than being a traditional baked German *Käsekuchen*.
What’s the best way to melt the chocolate chips?
The safest way is using a double boiler. Place a heatproof bowl over a pot of gently simmering water (don’t let the bowl touch the water). Stir the chips until smooth. For speed, use the microwave. Put chips in a microwave-safe bowl and heat in 30-second bursts, stirring well after each, until melted. Be careful not to overheat, or the chocolate will seize and become grainy.
Your New Favorite Dessert Awaits
This No-Bake German Cheesecake is more than just a recipe. It’s a ticket to an impressive, delicious dessert without any oven stress. The deep chocolate, the chewy coconut, the crunchy pecans—every bite is a celebration. I promise it will earn you compliments and recipe requests. So gather your ingredients, clear some fridge space, and get ready to make a dessert that feels as special as you are. Happy no-baking! #lovealletherecipes #dessert
Equipment
- Grand bol
- Mixeur électrique
- Spatule
- Moule à charnière de 9 pouces
- Casserole
Ingredients
- 1 1/2 tasse miettes de biscuits au chocolat comme les miettes de chocolat d'Oreo
- 1/3 tasse beurre fondu
- 16 oz fromage à la crème ramolli
- 1 tasse sucre en poudre
- 1/2 tasse cacao en poudre non sucré
- 1 cuillère à café extrait de vanille
- 1 1/2 tasse crème fouettée épaisse
- 1 tasse pépites de chocolat semi-sucrées fondues et refroidies
- 1 tasse coconut râpé
- 1 tasse noix de pécan hachées
- 1/4 tasse lait concentré sucré
- 1/4 tasse sauce caramel
- 1/4 tasse copeaux de chocolat pour la garniture
- q.s. biscuits sandwich au chocolat pour la garniture
- q.s. moitiés de noix de pécan pour la garniture
Instructions
- Mélangez les miettes de biscuits au chocolat avec le beurre fondu et pressez fermement dans un moule à charnière de 9 pouces. Réfrigérez pour que cela prenne.
- Battez le fromage à la crème ramolli dans un bol jusqu'à ce qu'il soit lisse, puis tamisez le sucre en poudre et le cacao en poudre, en ajoutant l'extrait de vanille, et mélangez jusqu'à ce que le mélange épaississe.
- Battez la crème fouettée dans un bol séparé jusqu'à obtenir des pics fermes, puis incorporez doucement dans le mélange de chocolat-crème.
- Incorporez doucement le chocolat fondu dans la préparation du cheesecake jusqu'à ce qu'il soit complètement mélangé.
- Versez la garniture sur la croûte refroidie, lissez le dessus et réfrigérez pendant au moins 4 heures ou toute la nuit.
- Pour la garniture, combinez la noix de coco, les noix de pécan hachées, le lait concentré sucré et le caramel dans une casserole et faites cuire jusqu'à épaississement, puis laissez refroidir légèrement.
- Étalez le mélange noix de coco-noix de pécan refroidi sur le cheesecake et décorez avec des copeaux de chocolat, des biscuits et des moitiés de noix de pécan. Réfrigérez pendant une heure supplémentaire.