
Why This No-Bake Lemon Dessert is a Game Changer
Picture this: It’s a hot summer afternoon, and the last thing you want to do is turn on your oven. But dessert cravings? They don’t take a break. That’s when I stumbled upon this magical No-Bake Lemon Dessert. Fresh, creamy, and with that zesty citrus kick, it’s like sunshine on a plate. The best part? You can whip it up in no time, and it’s so easy even my dog could make it (well, almost). Let me tell you why this recipe has become my go-to for family gatherings and lazy weekends.
A Little History of This Citrus Treat
This dessert reminds me of those old-school fridge cakes my grandma used to make. Back then, people didn’t have fancy ovens or gadgets, so they relied on simple ingredients and creativity. This No-Bake Lemon Dessert is like a modern twist on those classics. I first tried making it after a friend mentioned how her mom used condensed milk and cookies to create something divine. I added a splash of lemon juice for brightness, and voilà—it became a hit at my dinner parties!
Why You’ll Fall in Love with This Recipe
Imagine layers of creamy goodness, crunchy cookies, and a tangy citrus punch—all without breaking a sweat. This No-Bake Lemon Dessert is perfect for anyone who loves desserts but hates the hassle. Plus, it’s budget-friendly and uses pantry staples you probably already have. Whether you’re a seasoned baker or a kitchen newbie, this recipe will make you feel like a pro.
Perfect Occasions to Whip Up This Dessert
From casual potlucks to holiday feasts, this dessert fits right in. It’s ideal for summer picnics, bridal showers, or even cozy movie nights. I’ve served it at birthday parties, and everyone always asks for seconds. It’s also great for those “oops, I forgot dessert” moments. Just pull it out of the fridge, and you’re golden!
Ingredients You’ll Need
- 1 can (370g) of condensed milk
- 400 ml of whipping cream
- 150 ml of fresh lemon juice
- 100 ml of milk
- 1 pack of roasted cookies
Substitutions to Make It Your Own
If you’re missing an ingredient or want to switch things up, here are some ideas:
- Condensed milk: Sweetened condensed coconut milk works too.
- Whipping cream: Use heavy cream if that’s what you have.
- Lemon juice: Lime juice gives it a fun twist.
- Cookies: Try graham crackers or digestive biscuits for variety.
Step 1: Mix the Creamy Base
In a large bowl, combine the condensed milk and lemon juice. Watch as the mixture thickens slightly—it’s like magic happening before your eyes! Add the whipping cream and whisk until smooth. The aroma of fresh lemon will fill your kitchen, and you’ll already start dreaming of that first bite. Pro tip: Use a hand mixer for extra fluffiness.
Step 2: Layer Like a Pro
Now comes the fun part—layering! Grab your favorite mold and start by spreading a generous layer of the creamy mixture. Dip each cookie briefly in milk (don’t soak them!) and arrange them neatly on top. Repeat until the mold is full, finishing with a creamy layer. The contrast between the soft cream and crunchy cookies is what makes this dessert shine.
Step 3: Chill and Wait
Patience is key here. Cover the mold with plastic wrap and pop it into the fridge. Let it chill for at least 4 hours, though overnight is even better. As it sets, the flavors meld together, creating a symphony of sweetness and tang. Trust me, waiting is hard, but it’s worth it.
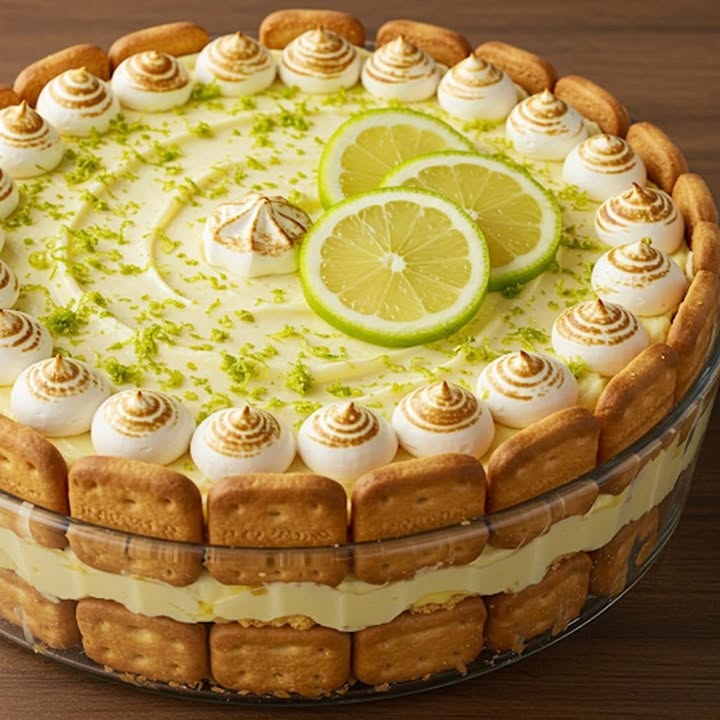
Step 4: Unmold and Decorate
When it’s ready, gently unmold the dessert onto a serving plate. Sprinkle crushed cookies and lemon zest on top for a touch of elegance. The bright yellow zest against the creamy white layers looks absolutely stunning. Slice it up and watch everyone dig in with delight.
Chef’s Tip for Extra Wow Factor
Here’s my secret: Add a pinch of salt to the lemon juice before mixing. It enhances the citrus flavor and balances the sweetness. Your guests won’t know what hit them!
Timing Breakdown
- Prep time: 15 minutes
- Cooking time: 0 minutes (no oven needed!)
- Resting time: 4–8 hours
- Total time: Approximately 5 hours
An Interesting Fact About Lemons
Did you know lemons are one of the most versatile fruits? They’ve been used for centuries not just in cooking but also for cleaning and skincare. Their high vitamin C content makes them a natural mood booster too. So while you’re enjoying this dessert, you’re actually doing yourself a favor!
Necessary Equipment
- Mixing bowls
- Whisk or hand mixer
- Mold or baking dish
- Plastic wrap
Storage Tips
This dessert keeps well in the fridge for up to 3 days. Store it in an airtight container to prevent it from absorbing odors. If you live in a warm climate, keep it chilled until serving. For longer storage, freeze individual slices wrapped in parchment paper. Thaw them in the fridge before indulging.
One thing I love about this dessert is how forgiving it is. Even if it sits in the fridge for a day or two, the flavors continue to develop, making it taste even better. Just make sure to cover it properly to avoid drying out.
Pro tip: Label your container with the date so you don’t forget how long it’s been chilling. Trust me, life gets busy, and it’s easy to lose track!
Tips and Advice
- Use fresh lemon juice for the best flavor.
- Don’t over-soak the cookies; they should be slightly soft, not mushy.
- If you prefer a firmer texture, let it set in the freezer for 1–2 hours after refrigerating.
Presentation Ideas
- Serve on a rustic wooden board for a charming look.
- Garnish with edible flowers for a fancy touch.
- Add a drizzle of honey or caramel sauce for extra decadence.
Healthier Alternatives
If you’re looking to lighten things up, here are six variations:
- Low-sugar version: Use sugar-free condensed milk and cookies.
- Vegan option: Swap dairy products with plant-based alternatives.
- Gluten-free: Choose gluten-free cookies.
- Coconut twist: Replace milk with coconut milk for a tropical vibe.
- Protein-packed: Add a scoop of vanilla protein powder to the cream.
- Fruit-infused: Mix in fresh berries for added nutrition.
Mistake 1: Over-Soaking the Cookies
One common blunder is soaking the cookies too long in milk. They absorb liquid quickly and can turn soggy, ruining the texture. To avoid this, dip them briefly—just a second or two—and place them immediately into the mold. Pro tip: Keep a paper towel handy to blot excess moisture.
Mistake 2: Skipping the Resting Time
Some folks get impatient and skip the chilling step, but trust me, it’s crucial. Without enough time in the fridge, the layers won’t set properly, and the dessert may fall apart. Plan ahead and let it rest overnight for the best results.
Mistake 3: Using Bottled Lemon Juice
Bottled lemon juice often lacks the vibrant flavor of fresh lemons. Always opt for freshly squeezed juice—it makes a world of difference. Plus, it smells amazing while you’re prepping!
FAQs About No-Bake Lemon Dessert
Can I use limes instead of lemons?
Absolutely! Limes work beautifully and give the dessert a unique twist. The flavor will be slightly different but equally delicious.
Is this dessert suitable for vegans?
Not in its original form, but you can easily adapt it. Use coconut cream and vegan cookies to make it plant-based.
How far in advance can I prepare this dessert?
You can make it up to 2 days ahead. Just store it in the fridge and decorate before serving.
Can I freeze this dessert?
Yes! Wrap individual slices in parchment paper and freeze. Thaw in the fridge before serving.
What type of mold should I use?
A rectangular loaf pan or round cake mold works well. Silicone molds are especially helpful for unmolding.
Can I add fruit to the layers?
Definitely! Berries like strawberries or raspberries pair wonderfully with the citrus flavor.
Do I need a mixer to whip the cream?
No, but it helps. You can whisk by hand if you’re feeling strong!
Why does the dessert need so much resting time?
The resting time allows the cookies to soften and the flavors to meld, resulting in a cohesive and delicious treat.
Can I substitute the condensed milk?
While condensed milk gives the dessert its signature richness, you can try sweetened almond or cashew cream as alternatives.
No worries! Regular plain cookies or graham crackers work just fine.
Final Thoughts
This No-Bake Lemon Dessert is proof that simplicity can be extraordinary. With its creamy layers, zesty tang, and crunchy cookies, it’s a crowd-pleaser that requires zero stress. Whether you’re hosting a party or treating yourself, this dessert is sure to bring smiles. So grab your ingredients, channel your inner chef, and enjoy the magic of no-bake bliss!
Equipment
- Mixing bowls
- Whisk or hand mixer
- Mold or baking dish
- Plastic wrap