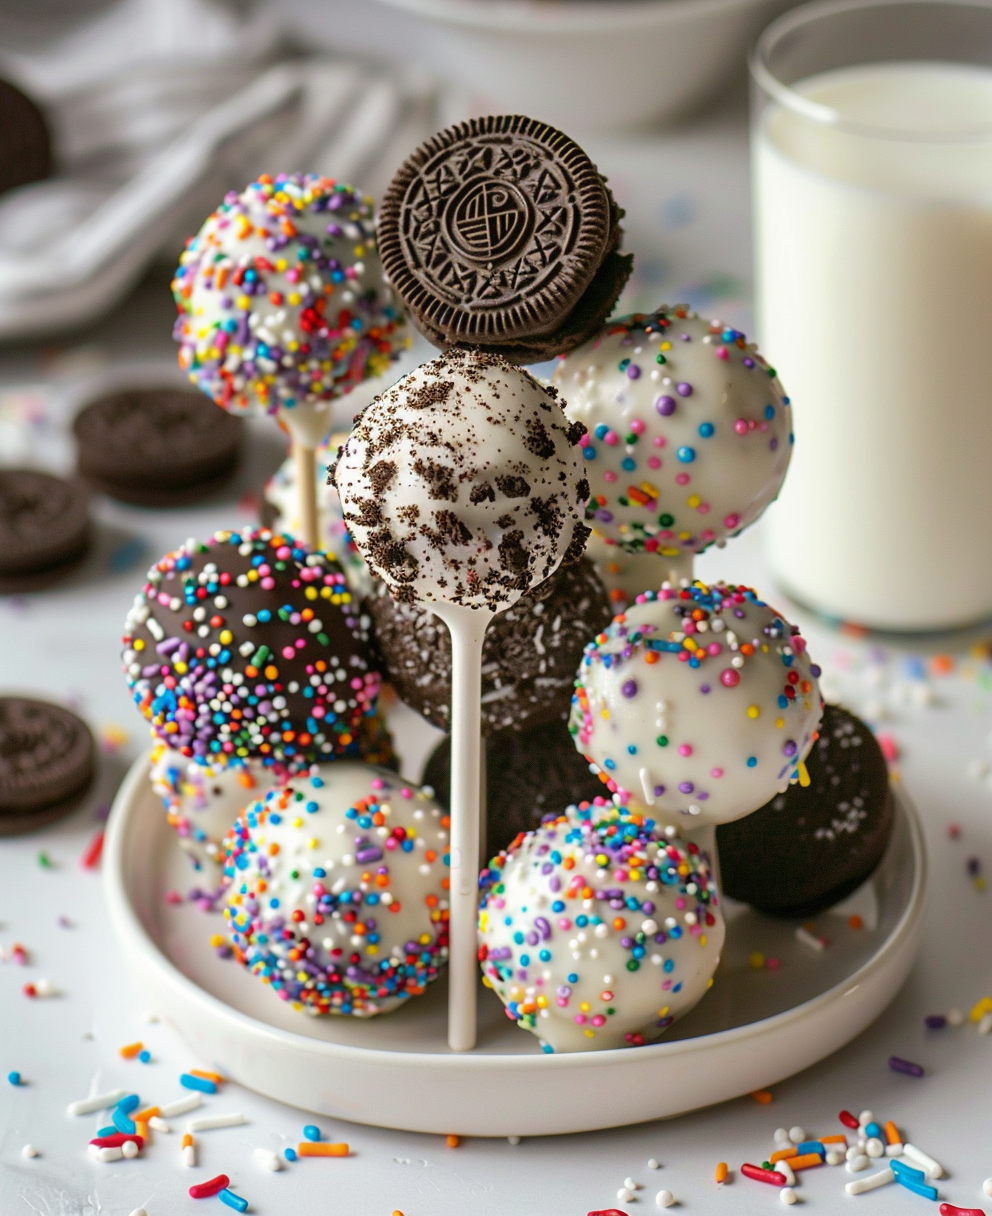
Why Oreo Cake Pops Are a Must-Try Treat
Let me start with a little story. Last Christmas, I was scrambling to find a dessert that would wow my family without taking hours to make. That’s when I stumbled upon oreo cake pops. These bite-sized balls of happiness were an instant hit! Everyone kept asking for seconds (and thirds). What makes them so special? They’re creamy, crunchy, and totally customizable. Whether you’re making oreo cake pops with frosting or trying something wild like oreo cake pops with Nutella, there’s a version for everyone.
A Little History Behind the Magic
Oreo cake pops didn’t just appear out of thin air—they’re part of the cake pop revolution popularized by Bakerella in the late 2000s. She showed us how to turn simple ingredients into edible art. My kids still laugh about the first time I tried dipping one—it looked more like a chocolate-covered blob than a pop! But over the years, I’ve perfected my technique. From golden oreo cake pops to festive oreo cake pops Christmas designs, this treat has become a staple at every family gathering.
Why You’ll Love Making Oreo Cake Pops
Here’s the deal: these cake pops are ridiculously easy to make. No baking required! Plus, they’re super versatile. Want something minty? Go for mint oreo cake pops. Feeling fancy? Try coating them in white chocolate. And don’t worry if you’re not a fan of cream cheese—there’s a way to make oreo cake pops without cream cheese. The best part? They’re ready in under an hour, which means less time in the kitchen and more time enjoying life.
When to Serve These Bite-Sized Wonders
There’s no wrong time to whip up a batch of oreo cake pops tasty treats. They’re perfect for birthdays, holidays, or even as a sweet surprise on a random Tuesday. I once brought them to a potluck, and they disappeared faster than I could say “yum.” If you’re looking for a show-stopping dessert, try decorating them for themed events like Christmas or Valentine’s Day.
What You’ll Need
- 1 package of Oreos (regular, golden, or flavored)
- 1 block of cream cheese (optional)
- 1 bag of candy melts or white chocolate chips
- Sprinkles, crushed nuts, or other toppings
- Lollipop sticks
Substitutions to Make It Your Own
- Swap cream cheese for Nutella to make oreo cake pops with Nutella.
- Use almond bark instead of candy melts for a quicker coating option.
- Try gluten-free Oreos if you need a gluten-free version.
Step 1: Crush Those Cookies
Grab your Oreos and crush them into fine crumbs. I use a food processor because it’s faster, but a ziplock bag and rolling pin work too. Watch those crumbs fly! This step is therapeutic—especially after a long day. Pro tip: Use golden Oreos for a buttery twist or mint Oreos for a refreshing kick.
Step 2: Mix in the Binder
If you’re using cream cheese, soften it first so it blends smoothly with the crumbs. Mix until the texture resembles wet sand. For a dairy-free option, Nutella works wonders here. The mixture should hold together when squeezed—it’s like playing with edible Play-Doh!
Step 3: Shape the Balls
Roll the mixture into small, bite-sized balls. Think marble-sized for easy popping. Place them on a baking sheet lined with parchment paper. Chef’s tip: Wet your hands slightly to prevent sticking. Let the balls chill in the fridge for 20 minutes to firm up.
Step 4: Dip and Decorate
Melt your candy coating according to the package instructions. Insert lollipop sticks into each ball, then dip them into the melted chocolate. Swirl gently to coat evenly. Before the chocolate hardens, sprinkle on your favorite toppings. Get creative—it’s your canvas!
How Long Does It Take?
Prep time is about 20 minutes, chilling time is another 20, and dipping takes roughly 10 minutes. Total time? About 50 minutes from start to finish. Not bad for such a crowd-pleaser!
Chef’s Secret
To avoid cracks in your coating, let the melted chocolate cool slightly before dipping. Too hot, and it can melt the outer layer of your cake pop. Patience pays off!
A Fun Fact About Oreos
Did you know Oreo once discontinued its Watermelon flavor? Yep, it was a limited edition, and fans were devastated. Speaking of flavors, the rarest Oreo ever made is the Firework Oreo, which had popping candy inside. Wild, right?
Tools You’ll Need
- Food processor or ziplock bag
- Baking sheet and parchment paper
- Microwave-safe bowl for melting chocolate
- Lollipop sticks
Storing Your Oreo Cake Pops
Once your cake pops are set, store them in an airtight container in the fridge. They’ll stay fresh for up to a week. If you’re wondering how long do oreo cake pops keep, the answer is about 7 days—but trust me, they won’t last that long!
For room temperature storage, keep them in a cool, dry place for up to two days. Avoid direct sunlight, or you’ll end up with melty messes.
If you’re gifting them, wrap each pop individually in cellophane bags tied with ribbon. They look adorable and travel well.
Tips and Advice
Don’t rush the chilling step—it’s key to keeping your pops intact. Also, sift your powdered sugar before mixing if you’re adding any. Oh, and always have extra lollipop sticks on hand; accidents happen!
Presentation Ideas
- Arrange them in a flowerpot for a playful touch.
- Create a mini bouquet by sticking them into foam blocks.
- Decorate with seasonal sprinkles for holidays.
Healthier Alternatives
Looking for lighter options? Here are six ideas:
- Gluten-Free: Use gluten-free Oreos and dairy-free chocolate.
- Low-Sugar: Opt for sugar-free Oreos and dark chocolate.
- Vegan: Replace cream cheese with coconut cream.
- Protein-Packed: Add a scoop of protein powder to the mix.
- Fruit-Infused: Roll the balls in freeze-dried fruit powder.
- Nutty Delight: Swap Nutella for almond butter.
Mistake 1: Skipping the Chill Time
Many people skip chilling the balls, thinking it’s unnecessary. Big mistake! Without chilling, your pops will fall apart during dipping. Always chill them for at least 20 minutes.
Mistake 2: Overloading the Coating
Dunking the pops too quickly can lead to uneven coatings. Take your time, swirl gently, and tap off excess chocolate. Pro tip: Hold the stick upright while tapping.
Mistake 3: Using Cold Chocolate
If your chocolate cools down too much, it won’t coat smoothly. Keep it warm by microwaving in short bursts or setting it over a double boiler.
FAQs About Oreo Cake Pops
How to Make Oreo Cakepops?
Start by crushing Oreos, mixing with cream cheese or Nutella, shaping into balls, chilling, and dipping in melted chocolate. Easy peasy!
What Flavor Did Oreo Discontinue?
Oreo discontinued its Watermelon flavor, leaving fans heartbroken. Limited editions often go away too soon.
What Are the Three Ingredients in Oreo Cake Pops?
The basics are Oreos, cream cheese (or Nutella), and candy melts. Simple yet delicious!
What Is the Rarest Flavor of Oreo?
The Firework Oreo is the rarest, featuring popping candy inside. A true collector’s item.
Can You Freeze Oreo Cake Pops?
Yes, you can freeze them for up to three months. Just thaw in the fridge before serving.
Do Oreo Cake Pops Need Refrigeration?
They’re best stored in the fridge to maintain freshness, especially if using cream cheese.
Are Golden Oreo Cake Pops Better?
Golden Oreos offer a buttery twist, while regular ones provide classic chocolatey goodness. It’s all about preference!
Can I Use White Chocolate Instead of Candy Melts?
Absolutely! White chocolate works great for oreo cake pops white chocolate fans.
How Do I Prevent Cracks in the Coating?
Let the chocolate cool slightly before dipping, and ensure your cake balls are cold but not frozen.
Can Kids Help Make These?
Definitely! Rolling balls and decorating are kid-friendly tasks. Just supervise the melting process.
Final Thoughts
Oreo cake pops are more than just a dessert—they’re a fun, creative way to bring joy to any occasion. Whether you stick to the classic recipe or experiment with flavors like Nutella or mint, these treats never disappoint. So grab your ingredients, roll up your sleeves, and get ready to impress. Trust me, once you make them, you’ll be hooked!

Equipment
- Food Processor or Rolling Pin
- Baking Sheet
- Microwave-Safe Bowl
- Lollipop Sticks
- Parchment Paper
Ingredients
- 1 package Oreos (regular, golden, or flavored)
- 1 block Cream Cheese (optional) or Nutella
- 1 bag Candy Melts or White Chocolate Chips
- to taste Sprinkles, crushed nuts, or other toppings
- 1 pack Lollipop Sticks
Instructions
- Crush the Oreos into fine crumbs using a food processor or rolling pin.
- If using cream cheese, soften it first and mix it with the Oreo crumbs until it resembles wet sand. Alternatively, use Nutella.
- Roll the mixture into small, bite-sized balls and place them on a lined baking sheet.
- Chill the balls in the fridge for 20 minutes to firm up.
- Melt the candy coating according to the package instructions.
- Insert lollipop sticks into each ball, dip them into the melted chocolate, and swirl gently to coat.
- Before the chocolate hardens, add your preferred toppings.


