
Introduction: Why You’ll Love This Oreo Dump Cake Recipe
Last summer, I found myself in a panic. My sister called to say she was bringing her kids over in an hour, and I had nothing prepared for dessert. I scanned my pantry and spotted a box of cake mix and a package of Oreos. That’s when I remembered the dump cake my grandmother used to make. I threw everything together, popped it in the oven, and hoped for the best. When I pulled out that bubbling, chocolatey masterpiece, everyone thought I’d spent hours in the kitchen. The secret? An Oreo dump cake takes about five minutes to prep.
Welcome to my kitchen! Today, I’m excited to share with you a super easy and delicious recipe that has saved me countless times. This no-fuss dessert is perfect for any occasion, from family gatherings to casual get-togethers. You don’t need fancy skills or expensive ingredients. If you can open a package and pour, you can make this cake.
I love Oreo dump cakes because they give you maximum flavor with minimum effort. The combination of crunchy cookies, moist cake, and gooey filling creates layers of texture that people can’t resist. You will too once you see how simple it is to pull off a dessert that looks and tastes like you’re a baking expert.
In this article, I’ll walk you through everything you need to know about making the perfect Oreo dump cake. We’ll cover what makes this dessert special, the ingredients and equipment you need, and some helpful tips to avoid common mistakes. By the end, you’ll have all the knowledge to create this crowd-pleaser whenever the craving hits.
What is an Oreo Dump Cake?
A dump cake gets its name from the simple method: you literally dump the ingredients into a pan. No mixing bowls required. No electric mixers needed. The concept started gaining popularity in the 1970s when home cooks discovered they could create delicious desserts by layering fruit, cake mix, and butter in a baking dish. The heat from the oven does all the work of combining the ingredients into a beautiful cake.
The Oreo dump cake puts a modern twist on this classic concept. Instead of using traditional fruit fillings, we incorporate everyone’s favorite chocolate sandwich cookies. The Oreos add a rich chocolate flavor and create pockets of creamy filling throughout the cake. As it bakes, the cookies soften slightly while still maintaining some of their signature crunch.
You might wonder how this differs from other Oreo-based treats. An oreo poke cake requires you to bake a cake first, then poke holes in it and fill those holes with pudding or cream. That’s more steps and more cleanup. An oreo cookie cake pan recipe typically involves actual mixing and blending of ingredients to create a traditional cake batter with crushed Oreos mixed in. The oreo dump cake skips all that fuss.
The beauty of this recipe lies in its simplicity and versatility. You can make it in a 9×13 pan for a crowd or scale it down for a smaller gathering. Some people add pudding layers to create what’s similar to an oreo dirt cake. Others incorporate fudge to make an oreo fudge cake variation. The basic method stays the same, but you can customize it to your taste.
I’ve seen versions of this recipe go viral on social media. The oreo dump cake TikTok trend introduced millions of people to this easy dessert. Videos show the satisfying process of layering cookies and watching the transformation in the oven. It’s become so popular because anyone can make it successfully on their first try.
Ingredients and Equipment Needed for Your Oreo Dump Cake
Let’s talk about what you’ll need to make this amazing dessert. The ingredient list is refreshingly short, which is part of why I make this cake so often.
For the classic Oreo dump cake, you’ll need:
- 1 package of Oreo cookies (the standard 14.3-ounce package works perfectly)
- 1 box of chocolate or white cake mix (I’ll explain the difference in a moment)
- 1/2 cup (1 stick) of melted butter
- Optional: 1 cup of milk or cream for extra moisture
- Optional: cream cheese or pudding for a richer texture
That’s it for the basic version. If you want to make an oreo poke cake with white cake mix, you would use white cake mix instead of chocolate. This creates a lighter color contrast with the dark cookies. I’ve made it both ways, and both are delicious. The white cake mix lets the Oreo flavor shine through more, while chocolate cake mix creates an intense chocolate experience.
Essential equipment you’ll need:
- A 9×13 inch baking dish (glass or metal both work fine)
- A small bowl for melting butter
- A knife for cutting Oreos (if you choose to cut them)
- Measuring cups
- Cooking spray or butter for greasing the pan
Notice what’s NOT on that list? Mixing bowls, electric mixers, or fancy baking tools. This recipe keeps things simple, which means less cleanup later.
Now, let’s talk about choosing the right Oreos. I’ve experimented with different types, and here’s what I’ve learned. Regular Oreos work beautifully and are the most budget-friendly option. Double-stuffed Oreos create extra pockets of cream that melt into the cake, making it even more decadent. I reach for these when I really want to impress.
You can also try Golden Oreos for a vanilla twist, or seasonal flavors if you’re feeling adventurous. I once made this with mint Oreos around the holidays, and it was a huge hit. Just keep in mind that some of the discontinued Oreo flavors you might remember from years past won’t be available anymore. Flavors like Candy Corn Oreos and Watermelon Oreos have come and gone.
Speaking of simple recipes, people often ask me how to make a 2-ingredient Oreo cake. This is even easier than the dump cake. You need just one package of Oreos and one container of Cool Whip (about 8 ounces). Crush the Oreos, fold them into the Cool Whip, and freeze the mixture in a loaf pan for a few hours. It creates a no-bake dessert that tastes like ice cream cake. While that’s not technically a dump cake, it shows just how versatile Oreos can be in simple desserts.
The oreo cake recipe no bake options are great for summer when you don’t want to turn on your oven. But the baked dump cake version offers something special. The heat transforms the ingredients in a way that cold desserts can’t match. The edges get slightly crispy, the middle stays gooey, and the whole thing fills your kitchen with an amazing aroma.
Before we move on to the actual recipe steps, here’s my biggest tip: don’t skimp on the butter. I know it seems like a lot, but that melted butter is what helps create the cake-like texture from the dry cake mix. It also helps everything get golden and slightly crispy on top. Trust the process, and you’ll understand why this simple combination works so well.

Step-by-Step Instructions for the Perfect Oreo Dump Cake
Now that you’ve got your ingredients ready, let’s get into the fun part. I’m going to walk you through exactly how I make this oreo dump cake, step by step. The process is so straightforward that my nine-year-old nephew made it by himself last month for his mom’s birthday. She cried happy tears, thinking he’d spent hours baking.
First things first: preheat your oven to 350°F. I always do this before anything else because I’ve learned the hard way what happens when you forget. One time I had everything assembled and then realized I hadn’t turned on the oven. The cake sat there getting soggy while I waited twenty minutes for the oven to heat up. Not ideal.
While the oven heats, grab your 9×13 baking dish and give it a good coating of cooking spray or butter. Don’t skip this step. I once thought the cake would release just fine without greasing, and let’s just say that cleanup took longer than making the actual dessert. A thin layer of butter on the bottom and sides makes all the difference when serving time comes around.
Here’s where the magic begins. Take your package of Oreos and decide how you want to layer them. Some people like to keep them whole, which creates dramatic pockets of cookie throughout the cake. I usually break mine in half to expose that creamy center. The filling melts into the cake as it bakes, creating little rivers of sweetness. If you’re feeling ambitious, you can even twist some apart and place the cream-side-up for visual appeal, though honestly, nobody will judge your cookie arrangement once they taste the finished product.
Spread about two-thirds of your Oreos across the bottom of the greased pan. Try to cover most of the surface, but don’t stress about gaps. The cake mix will fill in all those spaces. I like to reserve some cookies for the top layer because those get extra crispy and provide a nice textural contrast.
Next comes the cake mix. This is literally a dump-and-go situation. Open your box of cake mix and sprinkle it evenly over the Oreos. No mixing required. No eggs needed. No oil or water at this stage. Just pour that dry mix right out of the box and spread it around with your hand or a spatula until it covers everything relatively evenly. The first time I made this, I kept waiting for the next instruction, thinking surely I needed to add liquid. Nope. That’s the whole point of a dump cake.
By the way, if you’re making an oreo poke cake with white cake mix instead of the dump cake method, you’d need to follow the box instructions first, bake it, then poke holes and add pudding. Way more work. The dump cake skips all that.
Now for the butter. Melt your stick of butter in the microwave, about 30 seconds should do it. Then drizzle it all over the dry cake mix in a back-and-forth pattern. Try to cover as much surface area as possible. The butter is what activates the cake mix and helps it form that golden, slightly crunchy top layer. This is where people sometimes add a splash of milk or cream if they want an extra moist cake. I’ve done it both ways, and adding about a cup of milk poured around the edges creates almost a pudding-like consistency in spots. Kids especially love that version.
Take those reserved Oreos and place them on top of everything. Press them down slightly into the cake mix. These top cookies will get beautifully toasted and create a gorgeous presentation.
Slide your pan into that preheated oven and set your timer for 35 to 40 minutes. Every oven is different, so start checking around the 30-minute mark. You’re looking for the edges to be bubbling and golden brown, with the center looking set rather than liquidy. My oven runs hot, so I usually pull mine at 33 minutes. My sister’s oven takes the full 40. Use your judgment.
The smell that fills your kitchen during baking is absolutely incredible. It’s like chocolate chip cookies and birthday cake had a baby. My neighbor once knocked on my door asking what I was making because the aroma had drifted into her apartment.
Creative Variations to Try
Once you’ve mastered the basic technique, the world of variations opens up. I’ve experimented with this recipe more times than I can count, and here are my favorite twists.
For an oreo fudge cake variation, add a layer of hot fudge sauce between the Oreos and the cake mix. Use about half a jar, drizzling it over the cookies before adding the dry mix. The fudge melts and creates these intense pockets of chocolate that make the whole thing incredibly decadent. I made this version for my husband’s birthday last year, and he requested it again this year instead of traditional birthday cake.
Speaking of cake with oreos baked in, you can also mix crushed Oreos directly into a traditional cake batter if you prefer a more uniform distribution. But that requires actual mixing, which defeats the purpose of our easy dump method. I only mention it because sometimes people ask about the difference.
Want to add extra mix-ins? Mini chocolate chips scattered over the cake mix before adding butter work beautifully. So do chopped pecans or walnuts if you like that combination of textures. I’ve also added peanut butter chips for a Reese’s-like experience. My daughter loves when I add crushed candy canes around the holidays for a minty twist. Actually, if you enjoy that flavor combination, you might also love this chocolate peppermint cake roll that uses similar flavors in a more elegant presentation.
The TikTok trend I mentioned earlier showed people making oreo dump cake tiktok videos with all sorts of wild additions. I saw someone add an entire package of cream cheese chunks throughout, which essentially created an oreo dirt cake hybrid. Another creator swirled in Nutella before baking. The beauty of this recipe is that it’s nearly impossible to mess up, so feel free to experiment.
For a lighter version, try using white cake mix with Golden Oreos. The vanilla-on-vanilla situation is surprisingly sophisticated. It reminds me of a fancy French dessert, except it took five minutes instead of five hours. If you’re into elegant layered desserts, you might appreciate this triple chocolate mousse cake for special occasions when you have more time.
Serving and Storage Tips
Here’s where people always have questions. Does Oreo dump cake need to be refrigerated? Not necessarily, but it depends on how you plan to serve it and how long you’re keeping it.
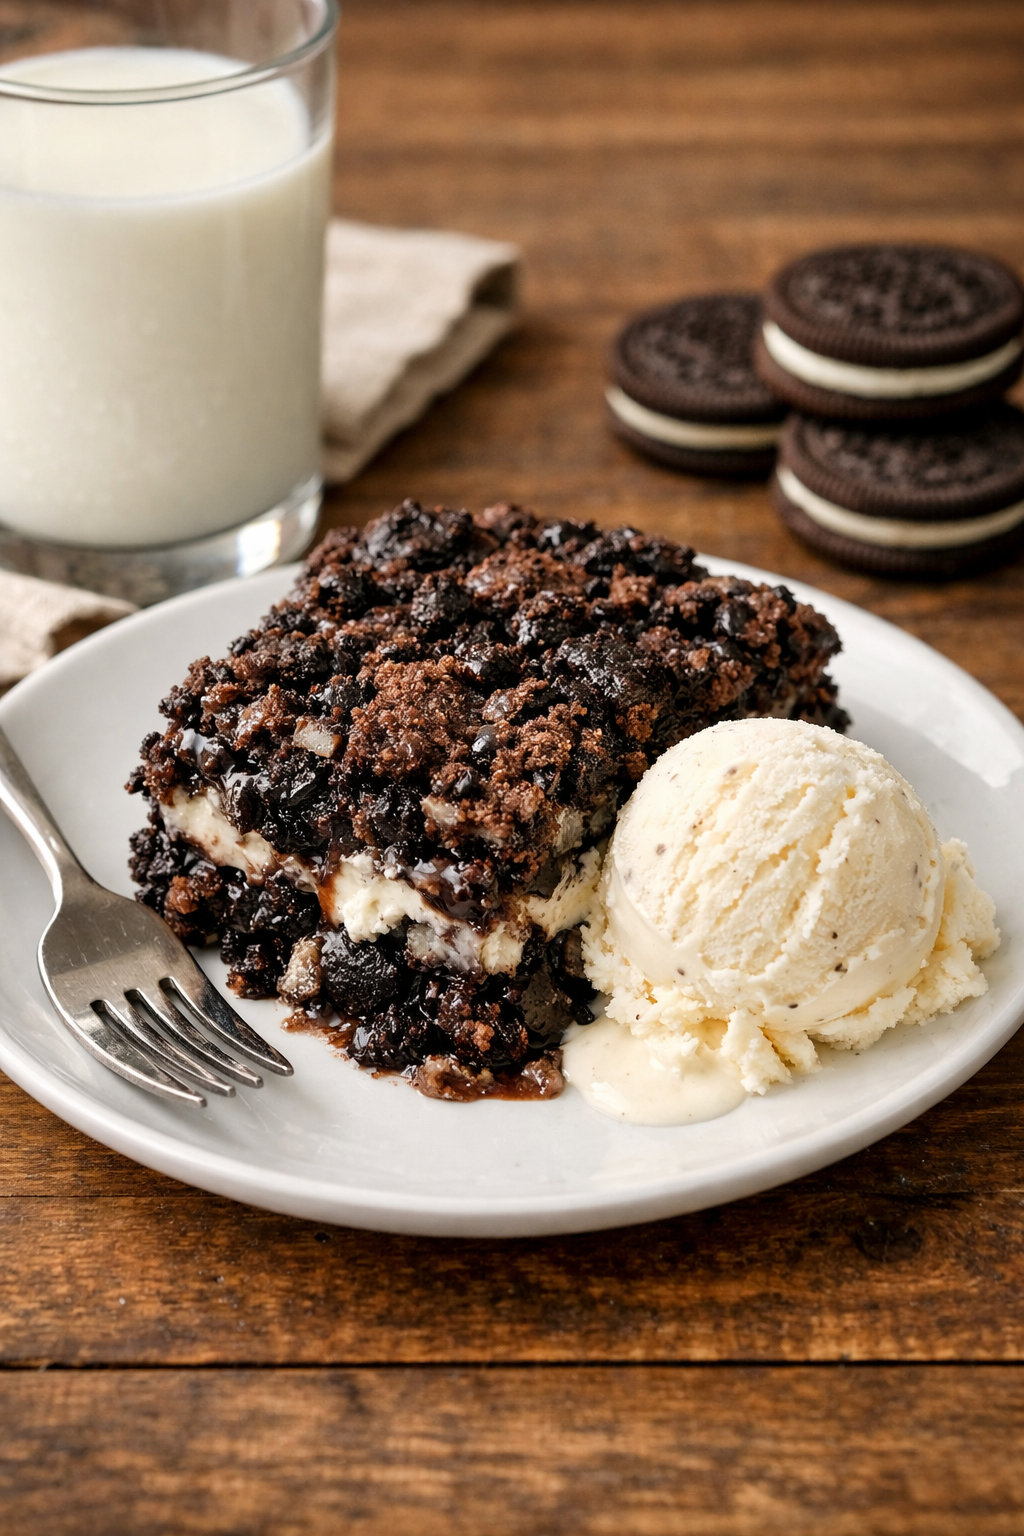
I prefer serving this cake warm, about 15 minutes out of the oven. The cookies are still slightly gooey, the cake portion is soft and steamy, and everything just melts together perfectly. Throw a scoop of vanilla ice cream on top of that warm cake, and you’ve got yourself a restaurant-quality dessert. The ice cream melts into all the nooks and crannies, creating this amazing hot-and-cold contrast that people go crazy for.
Room temperature works great too. Once the cake has cooled completely, you can leave it covered on the counter for about two days if your house isn’t too warm. The texture changes slightly as it sits. It becomes more cohesive, almost like a brownie in some spots. Some people actually prefer it this way.
For longer storage, refrigeration is your friend. Cover the pan tightly with plastic wrap or aluminum foil and stick it in the fridge. It’ll keep for up to five days, though in my house it never lasts that long. Cold slices are fantastic, by the way. They firm up and you can eat them with your hands like a bar cookie. My kids grab cold pieces for breakfast sometimes, and I pretend not to notice.
Funny enough, this cake also freezes beautifully. Cut it into individual portions, wrap each piece in plastic wrap, then place them all in a freezer bag. They’ll keep for up to three months. I do this when I’m planning ahead for parties or just want a quick dessert option available. Thaw slices in the microwave for about 30 seconds, and they taste freshly baked.
To make this a show-stopping party dessert, presentation matters. Serve it in individual mason jars layered with whipped cream for a modern twist on the oreo scoop cake concept. Or go full fancy by plating slices with a drizzle of chocolate sauce, a dollop of whipped cream, and a whole Oreo perched on top. I’ve done this for dinner parties, and people are always shocked when I tell them how easy it was to make.
Whipped cream is obviously a classic topping, but I’ve also served this with coffee ice cream, caramel sauce, fresh berries, and even a dusting of powdered sugar. One time I made a cream cheese frosting and spread it over the cooled cake, which transformed it into something that looked bakery-bought. That’s similar to how you might approach this no-bake orange creamsicle cheesecake where presentation elevates simple ingredients.
For holidays or celebrations, I sometimes stick birthday candles right into the top. The cake is sturdy enough to hold them, and it makes for a great alternative to traditional birthday cake. Last year for my friend’s promotion celebration, I wrote “Congrats” in chocolate syrup across the top. Little touches like that make it feel special without requiring extra effort.
The biggest tip I can give you about serving is to let people know what they’re eating. I’ve found that when I mention it’s a dump cake, people are even more impressed. They want the recipe immediately. I’ve probably shared this recipe with at least fifty people over the years, and I love hearing their success stories. One friend told me she made it for her book club and everyone thought she’d ordered it from a fancy bakery.
Whether you serve it hot with ice cream, cold from the fridge, or at room temperature with a cup of coffee, this oreo dump cake with cake mix never disappoints. It’s become my signature dessert, the thing people request when they’re coming over. And every time someone asks for the recipe, I smile knowing they’re about to discover just how ridiculously easy it is. Sometimes the simplest recipes really are the best ones.
More Creative Variations and Substitutions for Your Oreo Dump Cake
One thing I absolutely love about this recipe is how forgiving and flexible it is. You’re not locked into one specific formula. Over the years, I’ve played around with so many different versions that my family now expects something a little different each time I make it. Here’s the thing: once you understand the basic dump cake method, you can customize it endlessly to match your preferences, dietary needs, or whatever ingredients you happen to have on hand.
Let me walk you through some of my favorite variations and substitutions, including a few I discovered completely by accident that turned out amazing.
Making an Oreo Dirt Cake Version
The oreo dirt cake is a classic dessert that’s been around since the 1980s, and you can actually combine it with the dump cake concept for something really special. Traditional dirt cake uses layers of crushed Oreos, chocolate pudding, and cream cheese mixture, all served in a flower pot with gummy worms on top. Kids go absolutely nuts for it.
To merge this with your dump cake, here’s what I do: prepare instant chocolate pudding according to package directions and let it set in the fridge while your dump cake bakes. Once the cake cools completely, poke holes all over it with the handle of a wooden spoon. Pour the pudding over the top, letting it seep into those holes. Then spread a mixture of softened cream cheese and whipped topping over everything. Crush extra Oreos and sprinkle them on top. You’ve just created a hybrid that combines the best of both desserts.
I made this version for my son’s birthday party with a dinosaur theme, and instead of gummy worms, I stuck plastic dinosaurs all over the top. The kids thought they were digging for fossils. Best party dessert ever, and the parents kept asking me how long it took to make. Twenty minutes of actual work, but I let them believe I’m just that talented.
Experimenting with Different Oreo Flavors
The original Oreo flavor is a safe bet, but experimenting with different varieties adds a whole new dimension to this cake. I’ve tried at least a dozen different flavors over the years, and each one brings something unique.
Birthday Cake Oreos create a festive version that’s perfect for celebrations. The colorful sprinkles in the filling stay visible even after baking, which looks gorgeous when you cut into the cake. Peanut Butter Oreos are phenomenal if you’re a Reese’s fan. The peanut butter cream melts into the chocolate cake mix and creates this incredible flavor combination. My brother-in-law, who normally doesn’t like desserts, ate three pieces of this version.
Mint Oreos (sometimes called Oreo Thins Mint) work beautifully, especially around the holidays. The refreshing mint cuts through the richness of the cake. I sometimes add a few drops of peppermint extract to the melted butter for an even stronger mint flavor. Red Velvet Oreos with white cake mix create this stunning marbled effect that looks professionally designed.
Now, you asked about discontinued flavors. Oreo has released literally hundreds of limited-edition flavors over the years, and many have disappeared. Watermelon Oreos came out one summer and vanished. Same with Candy Corn Oreos, which people either loved or hated with no in-between. Swedish Fish Oreos were bright red and tasted exactly like the candy, but they’re gone now. Peeps Oreos showed up around Easter for a couple of years but haven’t been seen recently.
Here’s my advice: when you spot an interesting Oreo flavor at the store, grab an extra package and freeze it. Oreos freeze perfectly well for months, and you’ll be glad you stocked up when your favorite limited edition disappears. I learned this lesson the hard way after falling in love with S’mores Oreos only to find them discontinued in my area.
Creating an Oreo Scoop Cake
The oreo scoop cake is more about presentation than a different recipe. It’s basically the dump cake served in a way that makes it look like gourmet ice cream. I stumbled onto this idea when I ran out of clean plates at a barbecue and started serving the cake in coffee mugs with ice cream scoops.
Here’s how to do it properly: use an ice cream scoop to portion out servings of your baked dump cake into small bowls or parfait glasses. Top each scoop with a ball of vanilla ice cream, another scoop of cake, then finish with whipped cream and a whole Oreo on top. Drizzle chocolate or caramel sauce down the sides. It looks like something from an upscale restaurant dessert menu.
This presentation style works especially well for parties because you can prep the bowls ahead of time. I make individual servings in clear plastic cups, cover them with plastic wrap, and keep them in the fridge. When guests arrive, I just add the ice cream and toppings. Everyone gets their own perfectly portioned dessert, and there’s no messy cake cutting involved.
Using Different Cookies and Candies
While Oreos are the star of this show, you’re not locked into using only them. I’ve successfully made dump cakes with all sorts of cookies and candies. Golden Grahams cereal creates a s’mores-inspired version when combined with chocolate cake mix and mini marshmallows. Nutter Butters with yellow cake mix make a peanut butter lover’s dream dessert.
Chips Ahoy cookies work beautifully and create a more traditional chocolate chip cookie cake flavor. Biscoff cookies with white or vanilla cake mix result in a sophisticated, slightly caramelized flavor that adults especially appreciate. I made this version for a dinner party once, and my guests were convinced I’d used some fancy French recipe.
Candy bars chopped up also work great. I’ve done Snickers pieces with chocolate cake mix for a candy bar cake. Reese’s Peanut Butter Cups create an intensely rich peanut butter chocolate experience. Kit Kat bars broken into pieces add both chocolate and a crispy wafer texture. The possibilities really are endless once you start thinking creatively.
One experiment that failed: I tried using soft cookies like homemade chocolate chip cookies, and they just melted into mush. Stick with crunchy, processed cookies for best results. The preservatives that keep store-bought cookies crispy actually help them maintain some structure during baking.
No-Bake Oreo Cake Alternatives
Sometimes you just don’t want to turn on the oven, especially during summer heat waves. The oreo cake recipe no bake options are perfect for those situations. I mentioned the two-ingredient version earlier, but let me share a more elaborate no-bake option that still keeps things simple.
Crush an entire package of Oreos in a food processor until they’re fine crumbs. Reserve about a cup of crumbs for topping. Mix the rest with melted butter (about 6 tablespoons) and press this mixture into the bottom of a 9×13 pan to create a crust. Beat together one package of softened cream cheese, one cup of powdered sugar, and a teaspoon of vanilla until fluffy. Fold in one container of thawed Cool Whip. Spread this mixture over the Oreo crust. Top with the reserved crumbs and some whole Oreos for decoration. Refrigerate for at least four hours or overnight.
This version is incredibly creamy and rich, almost like a no-bake cheesecake. The texture is completely different from the baked dump cake, but it’s equally delicious. I actually prefer this method when making desserts for elderly relatives or very young children because it’s softer and easier to eat. Understanding the food-based nutrition guidelines can help you make smart choices about portion sizes and frequency when serving rich desserts like these, especially when considering dietary needs for different age groups.
The TikTok Trend Versions
The oreo dump cake tiktok phenomenon introduced some wild variations I never would have thought of on my own. One viral version adds a layer of chocolate chip cookie dough between the Oreos and cake mix. Yes, it’s safe to eat if you use edible cookie dough made without eggs, which you can find in most grocery stores now.
Another TikTok trend involves adding instant pudding mix (the dry powder) directly over the Oreos before adding the cake mix. This creates extra moisture and a richer flavor. I tried this with vanilla pudding mix, Golden Oreos, and white cake mix, and honestly, it was incredible. The pudding mix dissolves into the cake and creates this custardy layer that reminded me of Boston cream pie.
One creator I follow swirls in dollops of marshmallow fluff before baking, which puffs up and creates these sweet pockets throughout. Another adds a layer of caramel sauce. The most extreme version I saw involved layers of Oreos, brownie mix, cake mix, and chocolate chips all in one pan. I haven’t worked up the courage to try that one yet, but maybe someday.
Vegan and Gluten-Free Adaptations
People often assume this dessert can’t work for special diets, but you’d be surprised how well it adapts. For a vegan version, use a vegan cake mix (several brands make them), replace the butter with coconut oil or vegan butter, and check your Oreo package. Surprisingly, regular Oreos are accidentally vegan in many countries because they don’t contain dairy. Always check the label though, as formulations vary by region and production facility.
For gluten-free folks, use a gluten-free cake mix and gluten-free sandwich cookies. Several brands make Oreo-style cookies without gluten, including Kinnikinnick and Glutino. I made this version for my cousin who has celiac disease, and she was thrilled to finally be able to enjoy dump cake with everyone else at family gatherings. The texture is slightly different, a bit more crumbly, but the flavor is still fantastic.
You can make it dairy-free by using coconut oil instead of butter and choosing dairy-free cake mixes. Some people with lactose intolerance can still eat regular Oreos since they’re made without milk products in most formulations, but again, always verify the ingredients list.
By the way, if you’re looking for more creative cake with oreos baked in ideas beyond dump cakes, you might want to explore other cake and cupcake recipes that incorporate cookies in different ways, from layered creations to individual portions.
Frequently Asked Questions
What is the biggest mistake to avoid when making a dump cake?
The biggest mistake is mixing the ingredients together. I know it feels wrong to just dump dry cake mix on top of everything, but resist that urge to stir. The whole point of a dump cake is that the layers stay separate initially, then the heat and butter work their magic during baking. Mixing everything beforehand creates a dense, heavy texture instead of the light, cake-like result you’re going for. Also, don’t forget to grease your pan well, or you’ll spend more time scrubbing than you did making the dessert.
How do I make a 2-ingredient Oreo cake?
The simplest version uses just Oreos and Cool Whip. Crush one package of Oreos in a food processor, but leave some larger chunks for texture. Fold the crushed cookies into one large container (about 16 ounces) of thawed Cool Whip until everything is mixed. Press this mixture into a loaf pan or springform pan and freeze for at least four hours. The result tastes like cookies and cream ice cream cake. You can also add a third ingredient like cream cheese for a richer version, but the basic two-ingredient method works surprisingly well for such minimal effort.
Does Oreo dump cake need to be refrigerated?
For the first day or two, you can keep it covered at room temperature if your kitchen isn’t too warm. After that, refrigeration extends its life to about five days. If you’ve added pudding, cream cheese, or other perishable ingredients to your dump cake, definitely refrigerate it from the start. I personally think the cake tastes best at room temperature or slightly warm, so I’ll take it out of the fridge about thirty minutes before serving to take the chill off. Some people actually prefer eating it cold straight from the fridge, especially in summer, because it’s more refreshing that way.
What Oreo flavors are discontinued?
Oreo has discontinued dozens of limited-edition flavors over the years. Some notable ones include Watermelon, Candy Corn, Peeps, Swedish Fish, Root Beer Float, Jelly Donut, Fruit Punch, and Birthday Cake (though this one sometimes comes back). Lemon Twist, Banana Split, and Brownie Batter have also disappeared from shelves. The company regularly rotates flavors, testing new ones while retiring others based on sales. If you find a flavor you love, buy extra packages and freeze them because there’s no guarantee they’ll be available next month. Nabisco tends to bring back popular flavors occasionally, but it’s unpredictable.
Absolutely! Any sturdy, crunchy cookie works well in this recipe. Nutter Butters, Chips Ahoy, vanilla wafers, gingersnaps, Biscoff cookies, and even Girl Scout cookies like Thin Mints all create delicious variations. Graham crackers work great for a s’mores-inspired version. The key is using cookies that will maintain some texture during baking rather than completely dissolving. Avoid soft, homemade-style cookies as they tend to turn mushy. Each cookie type will create a different flavor profile, so don’t be afraid to experiment based on what you have in your pantry or what’s on sale.
How can I make the Oreo dump cake vegan or gluten-free?
For vegan versions, use a vegan cake mix, replace butter with coconut oil or vegan butter, and check that your Oreos are vegan (surprisingly, many are). For gluten-free, use gluten-free cake mix and gluten-free sandwich cookies like Kinnikinnick or Glutino brands. You might need to adjust baking time slightly as gluten-free mixes sometimes behave differently. The texture won’t be identical to the regular version, but it’s still delicious. I’ve made both adaptations for family members with dietary restrictions, and they were thrilled to have a version they could enjoy without worry.
Can I make Oreo dump cake in a slow cooker?
Yes, you can! Grease your slow cooker well and layer the ingredients the same way you would in a baking dish. Cook on high for about 2 to 3 hours, checking after two hours. The edges will get crispy while the middle stays gooey. This method works great when your oven is occupied with other dishes during holiday meals. I’ve also made it camping this way using a portable slow cooker and a generator. The main difference is that the top won’t get as golden brown as it does in the oven, but the taste is still fantastic.
How do I prevent my dump cake from being too dry?
If your cake turns out dry, you probably didn’t use enough butter, or your oven temperature was too high. Make sure you’re using a full stick of melted butter and drizzling it evenly across the entire surface. Some people add a cup of milk or cream around the edges before baking, which adds moisture. Also, don’t overbake. Start checking around the 30-minute mark even if the recipe says 40 minutes. Every oven is different. If you’re at high altitude, you might need to adjust baking time and temperature slightly, as baked goods tend to dry out faster in those conditions.
Can I double the Oreo dump cake recipe for a crowd?
You can, but I’d recommend making two separate pans rather than trying to double everything in one giant pan. The baking time becomes unpredictable in very deep pans, and you risk having raw middle sections while the edges burn. Two 9×13 pans bake more evenly and give you the right ratio of crispy edges to gooey middle. I’ve made three pans at once for large gatherings, and they all fit in my oven at the same time on different racks. Just rotate their positions halfway through baking to ensure even cooking.
What’s the best way to reheat leftover Oreo dump cake?
Microwave individual portions for about 20 to 30 seconds until warm but not hot. This brings back that fresh-from-the-oven texture and makes any ice cream or whipped cream topping melt beautifully into the cake. You can also reheat the entire pan in a 300°F oven for about 10 minutes covered with foil. Avoid reheating at high temperatures or for too long, as the cookies can become too hard and the cake portion can dry out. Honestly though, I love eating leftover dump cake cold straight from the fridge, so reheating isn’t always necessary depending on your preference.
Final Thoughts
The beauty of this dessert is that it grows with you as a baker. Whether you stick with the classic version or get adventurous with creative variations, you’ve got a reliable recipe that never lets you down. Don’t be afraid to experiment with whatever ingredients spark your interest, because that’s how you’ll discover your own signature version that becomes your go-to dessert for every occasion.
Equipment
- 9x13 inch baking dish
- Small bowl for melting butter
- Knife for cutting Oreos
- Measuring cups
- Cooking spray or butter for greasing
Ingredients
- 1 package 14.3-ounce package Oreo cookies
- 1 box cake mix chocolate or white
- 1/2 cup stick butter melted
- 1 cup optional milk or cream for extra moisture
Instructions
- Preheat your oven to 350°F.
- Grease a 9x13 inch baking dish with cooking spray or butter.
- Layer about two-thirds of the Oreos on the bottom of the greased pan.
- Sprinkle the dry cake mix evenly over the Oreos without mixing.
- Melt the stick of butter and drizzle it over the cake mix in a back-and-forth pattern.
- Optionally, pour around 1 cup of milk or cream around the edges for added moisture.
- Place the reserved Oreos on top of the cake mix and gently press down.
- Bake in the preheated oven for 35 to 40 minutes, checking for bubbling and golden edges.
Notes
Nutrition

Hello! I’m Sarah Mitchell, and I’m passionate about bringing creativity and innovation to baking. My love for baking started in high school when I first tried my hand at decorating cupcakes for a class project. What began as a fun hobby quickly became a full-time passion. I’ve spent the past decade working in bakeries and dessert shops, honing my skills in everything from simple cookies to intricate wedding cakes.
After working in some of the top bakeries across the country, I realized that baking was about more than just following recipes — it was about infusing your personality into each creation. At BakingSecret.com, I love creating recipes that push boundaries while staying true to the heart of classic baking. I specialize in creating delicious and visually stunning pastries that will wow your guests.
When I’m not baking, I enjoy teaching baking classes, trying out new cake decoration techniques, and traveling to find inspiration in global dessert traditions. I’m so excited to share my tips and tricks with you to help elevate your baking game!