
Why This Oreo No-Bake Cheesecake Is a Game-Changer
Picture this: it’s a hot summer afternoon, and you’re craving something sweet, creamy, and indulgent. But turning on the oven? No way! That’s when I discovered the magic of an Oreo No-Bake Cheesecake. It’s rich, dreamy, and packed with crunchy cookie bits in every bite. What makes it even better? You don’t need to be a professional chef to whip this up. Trust me, this dessert has become my go-to for family gatherings, potlucks, and those “just because” moments.
The Story Behind This Creamy Delight
Cheesecakes have been around for centuries, with roots tracing back to ancient Greece. But let’s be honest—this modern twist with Oreos is pure genius. The first time I made this Oreo No-Bake Cheesecake, it was for my nephew’s birthday. He’s a die-hard Oreo fan, so I knew I had to step up my game. When I served it, the room went silent. Not because they didn’t like it, but because everyone was too busy devouring it! Since then, it’s become a staple in my recipe book.
Why You’ll Fall Head Over Heels for This Recipe
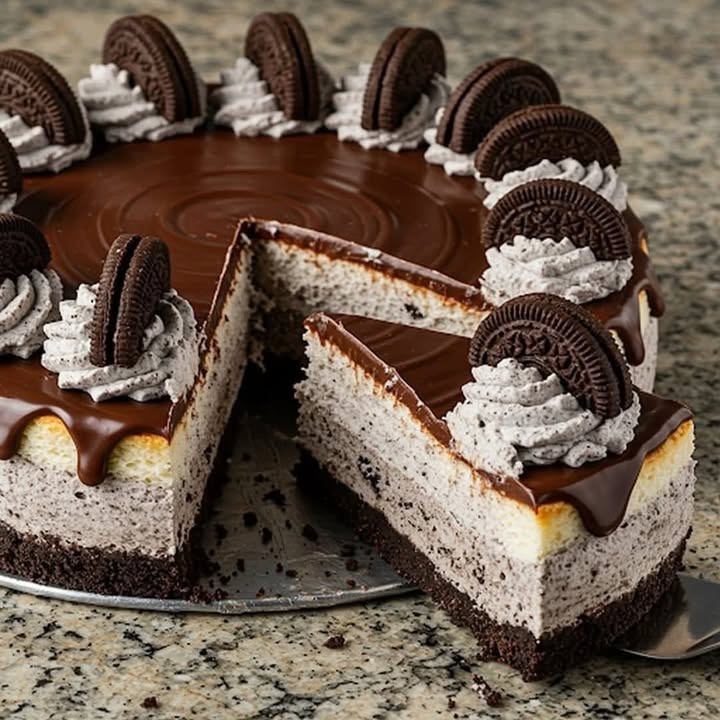
This cheesecake is all about simplicity without sacrificing flavor. The creamy filling paired with the crunchy Oreo base is a match made in dessert heaven. Plus, it’s no-bake, which means less time in the kitchen and more time enjoying life. Whether you’re a seasoned baker or a newbie, this recipe is foolproof and delivers restaurant-quality results every time.
Perfect Occasions for This Cheesecake
From casual weekend treats to holiday feasts, this Oreo No-Bake Cheesecake fits any occasion. Serve it at birthday parties, baby showers, or even as a surprise dessert after a cozy family dinner. It’s also a crowd-pleaser at potlucks because who can resist the combination of chocolate and cream cheese?
Ingredients You’ll Need
- For the base:
- 16 Oreo cookies
- 4 tablespoons of melted butter
- For the filling:
- 2 tablespoons of flavorless gelatin (optional)
- 16 Oreo cookies crushed into small pieces
- 500 ml of whipping cream
- 200 g of cream cheese
- 6 tablespoons of powdered sugar
- 1 teaspoon vanilla extract
- For decoration:
- Oreo cookies to taste
Substitution Options
If you’re looking to tweak the recipe, here are some ideas:
- Swap powdered sugar with honey or maple syrup for a natural sweetener.
- Use coconut oil instead of butter for a dairy-free base.
- Replace whipping cream with coconut cream for a vegan-friendly version.
Step 1: Prepare the Base
Start by crushing 16 Oreo cookies into a fine powder. I use a food processor, but a ziplock bag and rolling pin work just as well. Mix the crumbs with melted butter until it resembles wet sand. Press this mixture into an 18 cm mold, spreading it evenly. Pop it in the fridge while you prepare the filling. Pro tip: Use the bottom of a glass to press the base firmly for a sturdy crust.
Step 2: Prepare the Filling
In a large bowl, beat the whipping cream until it doubles in size and forms soft peaks. Set it aside. In another bowl, mix the cream cheese, powdered sugar, and vanilla extract until smooth and creamy. Gently fold the whipped cream into the cream cheese mixture using enveloping motions. This ensures a light and airy texture. Pro tip: Chill your mixing bowl beforehand for fluffier whipped cream.
Step 3: Activate the Gelatin (Optional)
If you’re using gelatin, soak it in 10 tablespoons of water for a few minutes. Heat it in the microwave for a few seconds until dissolved, then mix it into the filling. This step helps the cheesecake set firmer, but it’s optional if you prefer a softer texture. Pro tip: Avoid overheating the gelatin, as it can lose its setting properties.
Step 4: Integrate the Oreos and Assemble
Fold the crushed Oreo pieces into the filling, leaving some texture for that delightful crunch. Pour the mixture over the chilled base, smoothing it out with a spatula. Decorate with whole Oreos or halves for a fun touch. Pro tip: Chill the assembled cheesecake for 15 minutes before adding decorations to prevent them from sinking.
Step 5: Refrigerate and Enjoy
Place the cheesecake in the fridge for at least 3 hours, or until it’s firm and set. Once ready, slice and serve. Each bite is a symphony of creamy, crunchy, and chocolatey goodness. Chef’s tip: For an extra chill factor, freeze the cheesecake for 30 minutes before serving.
Timing Breakdown
- Prep time: 15 minutes
- Chilling time: 3 hours
- Total time: 3 hours 15 minutes
Chef’s Secret
To enhance the Oreo flavor, scrape the cream filling from a few cookies and swirl it into the cheesecake mixture. It adds an extra layer of richness that’s simply irresistible.
Extra Info
Did you know that Oreos were first introduced in 1912? They’ve been delighting taste buds for over a century, and their versatility makes them a favorite in desserts like this Oreo No-Bake Cheesecake.
Necessary Equipment
You’ll need a food processor or ziplock bag for crushing cookies, a mixing bowl, an electric mixer, a spatula, and an 18 cm springform mold. Simple tools for a spectacular result!
Storage Tips
This cheesecake stores beautifully in the fridge. Cover it with plastic wrap or place it in an airtight container to keep it fresh for up to 5 days. If you want to make it ahead, freeze it for up to a month. Thaw it in the fridge overnight before serving.
For leftovers, slice individual portions and store them in airtight containers. This way, you can grab a piece anytime without disturbing the rest of the cake.
Avoid leaving the cheesecake at room temperature for more than 2 hours, as the cream cheese filling can spoil quickly.
Tips and Advice
Always use cold whipping cream for the best results. If your cream cheese is too soft, chill it briefly before mixing. For a smoother filling, sift the powdered sugar before adding it to the cream cheese.
Presentation Ideas
- Serve slices on colorful plates with a drizzle of chocolate sauce.
- Garnish with fresh berries for a pop of color.
- Dust powdered sugar on top for an elegant touch.
Healthier Alternatives
Here are six variations to make this cheesecake healthier:
- Low-Sugar Version: Use stevia or monk fruit sweetener instead of powdered sugar.
- Vegan Option: Substitute cream cheese with cashew cream and butter with coconut oil.
- Gluten-Free Twist: Use gluten-free Oreos and ensure all other ingredients are certified gluten-free.
- Protein-Packed: Add a scoop of vanilla protein powder to the filling.
- Lighter Filling: Replace half the cream cheese with Greek yogurt.
- Fruit Infusion: Layer fresh strawberries or raspberries between the filling for a fruity twist.
Mistake 1: Overmixing the Filling
Overmixing can deflate the whipped cream, resulting in a dense cheesecake. To avoid this, fold the whipped cream gently into the cream cheese mixture. Pro tip: Use a spatula instead of a mixer for this step.
Mistake 2: Skipping the Chilling Time
Rushing the chilling process leads to a soggy cheesecake. Always refrigerate for at least 3 hours to allow the flavors to meld and the texture to set.
Mistake 3: Using Warm Butter
Warm butter won’t bind the cookie crumbs properly. Ensure the butter is melted but not hot when mixing with the base.
FAQs
Can I use regular sugar instead of powdered sugar?
Powdered sugar dissolves better in the filling, but regular sugar works in a pinch. Just make sure to blend it thoroughly to avoid graininess.
Do I need to use gelatin?
No, gelatin is optional. Without it, the cheesecake will be softer but still delicious.
Can I freeze this cheesecake?
Absolutely! Wrap it tightly and freeze for up to a month. Thaw in the fridge before serving.
What if I don’t have an electric mixer?
You can whisk the cream by hand, though it will take longer. Use a chilled bowl for better results.
How do I prevent the base from crumbling?
Press the base firmly into the mold and chill it before adding the filling. This helps it hold together.
Can I use homemade whipped cream?
Yes, homemade whipped cream works perfectly. Just ensure it’s stiff enough before folding it in.
Is this recipe kid-friendly?
Definitely! Kids love helping crush cookies and decorate the top.
Can I add other flavors?
Try adding peanut butter, caramel, or mint extract for a fun twist.
How do I know when the cheesecake is set?
The filling should feel firm to the touch and hold its shape when sliced.
What size mold should I use?
An 18 cm springform mold is ideal, but you can adjust based on your preference.
Final Thoughts
This Oreo No-Bake Cheesecake is proof that simple recipes can deliver extraordinary results. With its creamy texture, crunchy cookie base, and endless customization options, it’s a dessert that never fails to impress. So grab your ingredients, roll up your sleeves, and treat yourself to a slice of happiness. Your taste buds will thank you!
Equipment
- Food processor or ziplock bag
- Mixing bowl
- Electric mixer
- Spatula
- 18 cm springform mold
Ingredients
- 16 cookies Oreo cookies
- 4 tablespoons melted butter
- 2 tablespoons flavorless gelatin (optional)
- 16 cookies Oreo cookies, crushed into small pieces
- 500 ml whipping cream
- 200 g cream cheese
- 6 tablespoons powdered sugar
- 1 teaspoon vanilla extract
- to taste Oreo cookies for decoration
Instructions
- Crush 16 Oreo cookies into a fine powder and mix with melted butter until it resembles wet sand.
- Press the mixture into an 18 cm mold and refrigerate while preparing the filling.
- Beat whipping cream in a large bowl until it doubles in size and forms soft peaks, then set aside.
- In another bowl, mix cream cheese, powdered sugar, and vanilla extract until smooth.
- Gently fold the whipped cream into the cream cheese mixture using enveloping motions.
- If using gelatin, soak it in 10 tablespoons of water, then heat until dissolved and mix into the filling.
- Fold crushed Oreo pieces into the filling and pour over the chilled base, smoothing with a spatula.
- Decorate with whole or halved Oreos.
- Refrigerate for at least 3 hours until firm, then slice and serve.
Notes
Nutrition

Hi, I’m Olivia Parker, the founder of BakingSecret.com and a lifelong lover of all things sweet and homemade. I grew up in a small town in Oregon, where the smell of fresh cookies in my family’s kitchen sparked my passion for baking. Over the years, I turned that passion into a mission: to help home bakers feel confident, inspired, and creative.
After studying food science and working in several artisan bakeries across the U.S., I decided to create a space where everyone from beginners to seasoned bakers can find reliable recipes, expert tips, and a warm, welcoming community. BakingSecret.com is my way of sharing the magic of baking with the world. When I’m not testing new recipes, you’ll find me exploring farmers’ markets, collecting vintage cookbooks, or perfecting my sourdough technique.