
Introducing a Slice of Pure Bliss
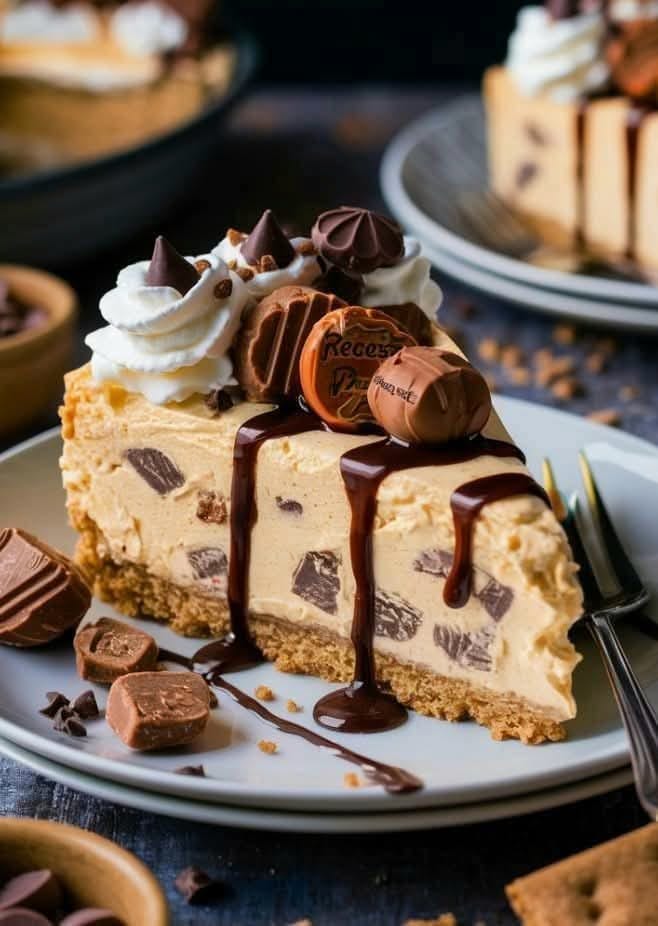
I’ve made a lot of desserts for my family. From birthday cakes to holiday pies. Let me tell you, nothing disappears faster from the kitchen counter than my no-bake peanut butter cheesecake. The moment I pull it out of the fridge, a small crowd gathers. The combination of creamy peanut butter, rich cream cheese, and crunchy candy is pure magic. This peanut butter cheesecake is my secret weapon for guaranteed smiles.
Even better? It never has to see the inside of an oven. That’s right, this is a no-bake masterpiece. So when the summer heat hits or you’re just plain tired, you can still whip up an impressive dessert. This recipe is all about mixing, chilling, and enjoying.
The Story of a No-Bake Legend
The ‘no-bake cheesecake’ is a beautiful modern twist on its classic cousin. Traditional cheesecake can be finicky. It needs careful baking and cooling to avoid a cracked top. But someone, one hot day, had a brilliant idea. What if we skip the baking part? This clever shift gave birth to a whole new category of creamy, dreamy desserts.
Using ingredients like whipped cream and softened cream cheese, we get that perfect cheesecake texture without heat. Adding peanut butter and chocolate candies turns it into a fun, indulgent treat. It feels inspired by beloved candy shop flavors and classic family recipes. It’s a dessert for right now, when the craving strikes!
Why You’ll Love This Peanut Butter Cheesecake
Let me count the ways you’ll adore this recipe!
- Easy as Pie (Easier!): No baking skills are required. If you can mix with a spoon and fold with a spatula, you are the head chef.
- Cool and Refreshing: It’s the ultimate warm-weather dessert. It feels light and cool, not heavy.
- The Perfect Texture: Imagine a creamy, whipped filling and a crunchy graham cracker base. It’s absolute heaven.
- Kid and Adult Approved: The peanut butter and chocolate candy combination is a universal crowd-pleaser.
- Make-Ahead Hero: Make it the night before. This gives you one less thing to worry about during your party.
Perfect Occasions for Peanut Butter Bliss
This isn’t just a dessert, it’s an event starter. Bring this to a potluck and watch it become the center of conversation. It’s ideal for birthday parties, family BBQs, or a Friday night treat. It’s perfect for holidays when the oven is already packed with a turkey or ham.
I love making it for summer picnics. It holds up great in a cooler. Sometimes, I just make it for a Tuesday. Why wait for a special day to feel special?
Your Ingredients for No-Bake Perfection
Gather these simple ingredients for our peanut butter cheesecake bliss.
For the Crust:
- 2 cups graham cracker crumbs
- 1/2 cup melted butter
- 1/4 cup granulated sugar
For the Filling:
- 2 cups heavy cream
- 16 oz cream cheese, softened
- 1 cup creamy peanut butter
- 1 cup powdered sugar
- 1 tsp vanilla extract
- 1 cup mini chocolate chips
- 1 cup Reeses Pieces candy
For the Fluffy Topping:
- 1 cup heavy cream, whipped
- 1/4 cup powdered sugar
- 1/2 cup mini chocolate chips
- 1/2 cup Reeses Pieces candy
- 1/2 cup assorted mini chocolate candies
- Chocolate syrup for drizzling
Quick and Easy Ingredient Swaps
Don’t stress if you’re missing something. Here are my favorite swaps:
- Graham Cracker Crust: Use chocolate cookie crumbs, vanilla wafers, or even pretzel crumbs for a salty-sweet twist.
- Peanut Butter: Any smooth peanut butter works. I like the classic creamy kind. You can also use a natural brand, just stir it well first.
- Candy: No Reeses Pieces? Chop up peanut butter cups, use M&M’s, or even just more chocolate chips.
- Cream Cheese: Please use full-fat for the best, richest texture. Low-fat can make the filling soft.
How to Make Your Peanut Butter Cheesecake Dream Real
Follow these easy steps for amazing results.
Step 1: The Crust Foundation
This is where your texture journey begins. In a medium bowl, mix the graham cracker crumbs and sugar. Pour in the melted butter and stir until the crumbs look like wet sand. They should hold together when you pinch them. Press this mixture firmly into your springform pan. A flat-bottomed glass helps make it even. Pro tip: Don’t press it up the sides. Keep it as a solid base. Now, pop it in the fridge. This chills the butter so your crust stays crisp.
Step 2: Whipping Up the Filling
Now for the creamy magic. First, whip the 2 cups of heavy cream in a large chilled bowl. Whip it until you see beautiful, stiff peaks. A stand mixer makes this easy. Set this fluffy cloud aside. In a separate big bowl, beat the softened cream cheese until it’s smooth. No lumps allowed! Then beat in the peanut butter, powdered sugar, and vanilla. The mixture will be thick and dreamy. Now, gently add the whipped cream into the peanut butter mix. Use a folding motion with your spatula to keep the air in. Finally, fold in your chocolate chips and Reeses Pieces.
Step 3: Creating the Epic Topping
This is the fun, pretty part! Pour the peanut butter filling onto your chilled crust. Smooth the top with a spatula. Clean out your mixing bowl (or use a new one). Whip the remaining heavy cream with the powdered sugar until stiff peaks form again. You can spread this gently over the entire cheesecake, or use a piping bag for swirls. Now comes the decorating party. Sprinkle all those mini chocolate chips, Reeses Pieces, and assorted candies over the whipped cream. Finish with artful drizzles of chocolate syrup. It should look like a candy store masterpiece.
Step 4: The Final Chill
Patience is the final ingredient. Cover the cheesecake and place it, very carefully, in the fridge. It needs at least 4 hours to set properly, but overnight is even better. This wait is what transforms it from a mousse into a perfect slice of heaven. When you’re ready to serve, run a hot knife around the edge of the springform pan. Unlatch it and lift off the sides. Use a warm, wet knife to cut clean slices.
My Cheesecake Secret Tip
Let your cream cheese sit on the counter for 1-2 hours. It needs to be truly soft. If it’s cold, you’ll get lumps, and you’ll have to over-mix it to get them out. Over-mixing can make your filling loose. Starting with soft cream cheese means a smooth, perfect texture every single time.
Your Recipe Timetable
Plan ahead for the best results.
- Prep Time: 30 minutes (It’s mostly mixing and decorating!)
- Cook Time: 0 minutes (No oven, remember?!)
- Chill Time: 4 hours minimum (Overnight is ideal)
- Total Time: 4 hours 30 minutes (Most of it is hands-off chilling)
- Servings: 12-14 heavenly slices
A Sweet Fact About Peanut Power
Peanut butter isn’t just delicious. It’s packed with good stuff. It’s a source of protein and healthy fats. Including nutritious, flavorful ingredients like this in your treats is part of building enjoyable healthy food patterns for life. This cheesecake is a celebration, but it’s nice to know our favorite flavors can have a nutritious side too!
Keeping Your Cheesecake Happy
Because there’s no egg and we rely on chill time, proper storage is key. This cheesecake must stay refrigerated. Cover it tightly with plastic wrap or store it in a cake carrier.
It will be at its absolute best if eaten within 3-4 days. The crust might get a little softer the longer it sits in the fridge, but the flavor is still fantastic.
I do not recommend freezing this cheesecake after it’s fully assembled with the whipped cream topping. The whipped cream can weep and get grainy when thawed. The filling alone (without toppings) can be frozen for up to a month.
My Top Tips for Success
- Whip it Good: Make sure your heavy whipping cream gets to stiff peaks. It gives the filling its structure.
- Fold Gently: When adding the whipped cream, fold it in with love. Don’t stir or beat it. You want to keep the air in.
- Chill Your Tools: A cold bowl and beaters help the cream whip up faster and hold its shape better.
- Room Temp is Key: I said it before, but it’s worth repeating. Soft, room-temperature cream cheese is non-negotiable.
Dishing It Out in Style
Make your slices look like they came from a bakery.
- Wipe your knife with a hot, damp cloth between each slice for a clean cut.
- Serve on a simple white plate with a drizzle of extra chocolate syrup and a sprinkle of powdered sugar.
- Add a dollop of extra whipped cream and a single, perfect Reeses Piece on top of each slice.
- Place the whole cheesecake on a cake stand. It instantly looks more festive.
Love This? Try These No-Bake & Cake Twists!
This recipe opens a world of no-bake dessert possibilities. For other amazing no-bake ideas that still deliver that wow factor, check out our family favorite Cookie Dough Ice Cream Cake Rolls. If you’re feeling more adventurous and want a stunning fruity chocolate option, you’ll adore the elegant look of a Raspberry Chocolate Cake Roll. For a special holiday or celebration, a beautiful White Chocolate Cranberry Bundt Cake is a classic choice. And if cherries are your thing, the rich combination in this Black Forest Chocolate Swiss Roll is simply divine.
Looking for more creamy dreamy ideas?
If you loved making this no-bake wonder, we have a world of cheesecake recipes waiting for you. Explore our entire collection of delicious cheesecake recipes for every occasion, from classic New York style to other easy no-bake versions.
Common Mistakes to Avoid
Let’s make sure your dessert is perfect every single time. Avoid these common traps!
Mistake 1: Using Cold Cream Cheese
This is the number one reason for a lumpy filling. Cold cream cheese will not blend smoothly. It creates little bits that no one wants. Always take your cream cheese out of the fridge 1-2 hours before you start. You should be able to poke it easily with your finger. This ensures a perfectly silky, lump-free peanut butter cheesecake base.
Mistake 2: Under-whipping the Cream
Your whipped cream is the structure of this dessert. If you don’t whip it to stiff peaks, it’s too soft. A soft cream will make your whole filling too soft. It might not set properly in the fridge. To test, lift your beaters out of the cream. The peaks should stand straight up and hold their shape firmly. If they flop over, keep whipping for another minute.
Mistake 3: Not Chilling Long Enough
I know, the waiting is the hardest part! But this cheesecake needs time to become firm. The minimum is 4 hours. If you cut into it too early, it will be a delicious but soupy mess. The cheesecake needs that overnight chill to really set its texture. Plan to make it the day before your event for the absolute best slicing results.
Mistake 4: Overmixing the Filling
Once you add the whipped cream, you must switch to gentle folding. If you keep using the electric mixer or stir aggressively, you’ll deflate all the lovely air you just whipped into the cream. That air is what gives the filling its light, creamy texture. Use a big rubber spatula and gently fold until you see no more white streaks.
Your No-Bake Cheesecake Questions, Answered
How do I know when my cheesecake is set?
The best test is time! Trust the chill. After 4 hours, especially overnight, the cheesecake will be firm to the touch. When you gently press the top, it should feel solid and not leave a lasting indent. A visual clue is that the top will look very set and not jiggle much when you move the pan. If you’re unsure, the overnight chill is your best friend. It guarantees a perfect, sliceable texture.
Can I make this cheesecake ahead of time?
Yes, and I highly recommend it! In fact, this cheesecake is a perfect make-ahead dessert. You can prepare it up to 2 days in advance. Just keep it covered tightly in the refrigerator. If you want to add the final whipped cream topping and the candy decorations, I suggest doing that the day you plan to serve it. This keeps the toppings fresh and the whipped cream looking its best.
Can I use a different pan if I don’t have a springform pan?
A springform pan is ideal because the sides come off, leaving you with a beautiful freestanding cake. If you don’t have one, you can use a regular 9-inch pie dish or a deep-dish pie plate. You’ll serve it from the dish with a spoon or pie server. It’s just as delicious, but the presentation is a bit more casual. A 9×13 inch baking dish would also work great for making bars.
Can I use natural peanut butter?
You can, but be careful. Natural peanut butter (the kind with oil on top) can separate more and has a different texture. For the best, most stable results, use a regular “no-stir” creamy peanut butter like Jif or Skippy. If you only have natural peanut butter, make sure to stir it extremely well before measuring. The oil separation can make your filling a bit greasy and less stable.
Why did my graham cracker crust get soggy?
A soggy crust usually means the butter wasn’t mixed in well enough, or the filling was very warm when poured on top. Ensure you mix the crumbs and melted butter until it resembles wet sand. Also, give the chilled crust a solid 15-20 minutes in the fridge after pressing it in. This helps the butter re-harden. Finally, make sure your filling is at room temperature, not warm, when you pour it over the chilled crust.
Can I freeze this peanut butter cheesecake?
I don’t recommend freezing the fully assembled cheesecake with the whipped cream topping. Whipped cream doesn’t freeze and thaw well. It can become watery and lose its texture. However, you can wrap the cheesecake (without toppings) tightly in plastic wrap and freeze it for up to 1 month. Thaw it in the refrigerator overnight before adding your fresh whipped cream and candy decorations.
What can I use instead of Reeses Pieces?
Get creative! Chopped peanut butter cups are a perfect substitute for that peanut butter-chocolate combo. You can also use plain M&M’s, chopped chocolate bars, toffee bits, or just extra mini chocolate chips. You can even leave out the extra candy altogether and let the peanut butter flavor shine, topping it with just the whipped cream and chocolate syrup.
Is it okay to use a hand mixer instead of a stand mixer?
Absolutely! A hand mixer works just fine for this recipe. For whipping the heavy cream, make sure your bowl and beaters are cold. This helps the cream whip up faster. A stand mixer is convenient because it’s hands-free, but a trusty hand mixer will get you there. Just be patient and keep whipping until you see those beautiful, firm peaks form.
Can I make this without the extra whipped cream topping?
Of course! The cheesecake is delicious all on its own. If you want to simplify, you can skip the final whipped cream layer. Just sprinkle the candies directly onto the set peanut butter filling. You can even drizzle the chocolate syrup right on top of the filling. The cheesecake will still be rich, creamy, and full of flavor.
How do I get clean slices when cutting the cheesecake?
Here’s my professional trick: Run a thin, sharp knife under very hot water. Wipe it dry with a towel. Make your cut. The hot knife will glide through the layers cleanly. Repeat this for every single slice. Wipe the knife clean and re-heat it with hot water each time. It’s a little extra step, but it gives you those picture-perfect, clean slices with every serving.
Go Make Some Bliss!
This no-bake peanut butter cheesecake recipe is my go-to for a reason. It delivers massive flavor with minimal effort. The look on your friends’ faces when you bring it out is worth every minute of prep. It’s creamy, crunchy, sweet, and just a little bit salty. It’s pure comfort in a slice. So grab your mixer, a bowl, and get ready to make your kitchen the happiest place in the house. Enjoy your peanut butter bliss!
Equipment
- Grand bol
- Fouet
- Spatule
- Moule à charnière
- Sacs de pâtisserie (optionnel)
Ingredients
- 2 tasses miettes de biscuits Graham
- 1/2 tasse beurre fondu
- 1/4 tasse sucre granulé
- 2 tasses crème épaisse
- 16 oz fromage à la crème, ramolli
- 1 tasse beurre de cacahuète crémeux
- 1 tasse sucre glace
- 1 cuil. à soupe extrait de vanille
- 1 tasse pépites de chocolat mini
- 1 tasse bonbons Reeses Pieces
- 1 tasse crème épaisse, fouettée
- 1/4 tasse sucre glace
- 1/2 tasse pépites de chocolat mini
- 1/2 tasse bonbons mini au chocolat assortis
- q.s. sauce chocolat pour verser
Instructions
- Dans un grand bol, mélangez les miettes de biscuits Graham et le sucre.
- Ajoutez le beurre fondu et remuez jusqu'à ce que le mélange ressemble à du sable humide.
- Presser le mélange fermement dans un moule à charnière et réfrigérer.
- Dans un grand bol frais, fouettez les 2 tasses de crème épaisse jusqu'à ce que des pics fermes se forment et réservez.
- Dans un autre bol, battez le fromage à la crème ramolli jusqu'à ce qu'il soit lisse.
- Ajoutez le beurre de cacahuète, le sucre glace et l'extrait de vanille et battez jusqu'à ce que tout soit bien mélangé.
- Incorporez délicatement la crème fouettée dans le mélange de beurre de cacahuète.
- Ajoutez les pépites de chocolat et les bonbons Reeses Pieces et incorporez délicatement.
- Versez la garniture au beurre de cacahuète sur la croûte réfrigérée et lissez le dessus.
- Dans un bol propre, fouettez la crème de reste avec le sucre glace jusqu'à ce que des pics fermes se forment.
- Étalez ou pochez la crème fouettée sur le cheesecake
- Décorez avec des pépites de chocolat mini, des bonbons Reeses Pieces, des bonbons assortis et arrosez de sauce chocolat.
- Couvrez et réfrigérez pendant au moins 4 heures ou toute la nuit avant de servir.
Notes
Nutrition

Hi, I’m Olivia Parker, the founder of BakingSecret.com and a lifelong lover of all things sweet and homemade. I grew up in a small town in Oregon, where the smell of fresh cookies in my family’s kitchen sparked my passion for baking. Over the years, I turned that passion into a mission: to help home bakers feel confident, inspired, and creative.
After studying food science and working in several artisan bakeries across the U.S., I decided to create a space where everyone from beginners to seasoned bakers can find reliable recipes, expert tips, and a warm, welcoming community. BakingSecret.com is my way of sharing the magic of baking with the world. When I’m not testing new recipes, you’ll find me exploring farmers’ markets, collecting vintage cookbooks, or perfecting my sourdough technique.