
Why These Peanut Butter Cheesecake Balls Are a Must-Try
Picture this: It’s a busy weekday, and you need something sweet to share with your family or bring to a potluck. You don’t have time to bake, but you still want something that screams indulgence. That’s when I discovered these No-Bake Peanut Butter Cheesecake Balls. They’re creamy, rich, and oh-so-easy to make. The first time I made them, my kids practically inhaled the whole batch before I could even snap a picture! Trust me, once you try these little bites of heaven, they’ll become a staple in your kitchen.
The Sweet History Behind These Cheesecake Balls
These Peanut Butter Cheesecake Balls remind me of those classic no-bake cookies my grandma used to whip up. Back then, simplicity was key—just mix, chill, and enjoy. Over the years, creative bakers added layers of flavor and texture, turning basic treats into showstoppers. This recipe combines the nostalgia of peanut butter desserts with the elegance of cheesecake. The result? A modern twist on a timeless favorite. Whether you’re a fan of peanut butter or cheesecake (or both!), these balls are a delightful fusion.
Why You’ll Fall Head Over Heels for This Recipe
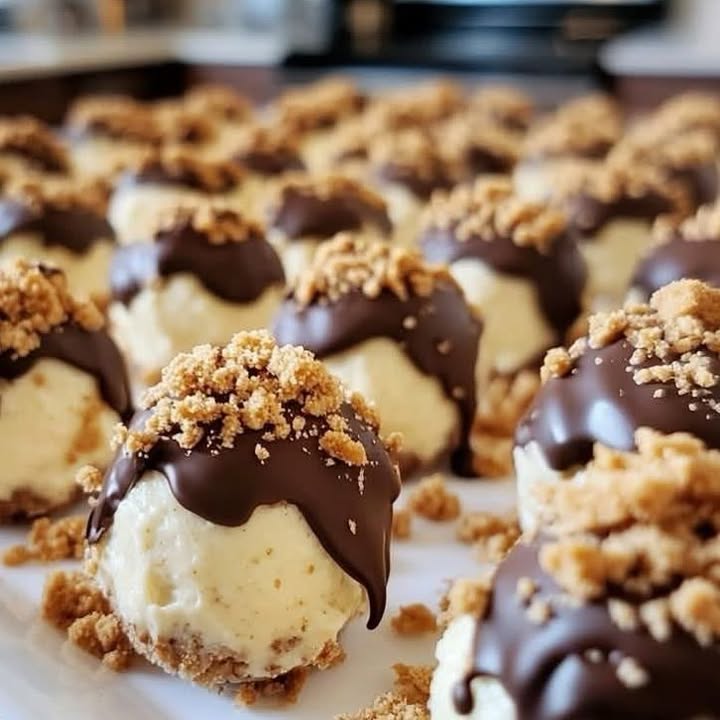
What’s not to love about these Peanut Butter Cheesecake Balls? First, there’s no baking involved. Yes, you read that right—no oven required! Second, they’re packed with flavors that complement each other perfectly. The creaminess of the cheesecake pairs beautifully with the nutty richness of peanut butter, while the chocolate coating adds a touch of decadence. Plus, they’re bite-sized, making them perfect for portion control (or sneaking an extra one without guilt).
Perfect Occasions to Whip Up These Cheesecake Balls
Whether it’s a holiday party, a birthday celebration, or just a random Tuesday, these Peanut Butter Cheesecake Balls fit the bill. They’re great for school bake sales, office gatherings, or as a sweet treat after dinner. I’ve even served them at baby showers and bridal events because they’re easy to make in large batches. Honestly, any excuse to make these is a good one!
Ingredients You’ll Need
- 1 package (8 oz) cream cheese, softened
- 1 cup powdered sugar
- 1 cup creamy peanut butter
- 1 teaspoon vanilla extract
- 1 1/2 cups crushed graham crackers or cookies
- 1/2 cup mini chocolate chips
- Melted chocolate for dipping
- Additional crushed graham crackers for coating
Substitution Options
- Cream cheese: Use dairy-free cream cheese if you’re avoiding dairy.
- Peanut butter: Swap with almond butter or sunflower seed butter for a nut-free option.
- Graham crackers: Substitute with crushed cookies like Oreos or digestive biscuits.
- Chocolate chips: Replace with chopped nuts or dried fruit for a different texture.
Step 1: Mixing the Base
Start by grabbing a large mixing bowl. Combine the softened cream cheese, powdered sugar, peanut butter, and vanilla extract. Mix until the mixture is smooth and creamy. You’ll notice how the peanut butter gives the batter a beautiful golden hue, while the vanilla adds a subtle aroma. Pro tip: Make sure your cream cheese is truly softened—it makes blending much easier and prevents lumps.
Step 2: Adding Texture
Now it’s time to fold in the crushed graham crackers and mini chocolate chips. This step transforms the smooth base into something more exciting. The graham crackers add a slight crunch, while the chocolate chips provide bursts of sweetness. Stir gently until everything is evenly distributed. Chef’s tip: Taste a small spoonful—you deserve it!
Step 3: Rolling the Balls
Using your hands, roll the mixture into small, 1-inch balls. Place them on a baking sheet lined with parchment paper. As you work, you’ll feel the soft, sticky texture of the dough, which is oddly satisfying. Pro tip: If the mixture feels too sticky, pop it in the fridge for 10 minutes to firm up slightly.
Step 4: Chilling the Balls
Once all the balls are rolled, slide the baking sheet into the freezer. Let them chill for about 30 minutes. This step firms them up, making them easier to dip in chocolate later. While they’re chilling, take a moment to prep your melted chocolate and crushed graham crackers for the next steps.
Step 5: Dipping and Coating
Remove the chilled balls from the freezer. Dip each one into the melted chocolate, ensuring they’re fully coated. Then, roll them in crushed graham crackers for an extra layer of flavor and texture. Place the coated balls back on the parchment paper. Pro tip: Use a fork to dip the balls—it keeps your hands clean and makes the process smoother.
Step 6: Setting the Chocolate
Finally, refrigerate the dipped balls until the chocolate sets. This usually takes about 15–20 minutes. Once set, you’ll see how glossy and professional they look. Serve them chilled for the best experience.
Timing Breakdown
- Prep time: 20 minutes
- Chilling time: 50 minutes total (30 minutes for the balls + 20 minutes for the chocolate)
- Total time: 1 hour 10 minutes
Chef’s Secret
To make the chocolate coating extra shiny, stir in a teaspoon of coconut oil or shortening while melting the chocolate. This trick works wonders and gives your Peanut Butter Cheesecake Balls a polished finish.
An Interesting Fact About Peanut Butter
Did you know that peanut butter was invented in the late 1800s by a doctor who wanted a protein-rich food for his patients? Today, Americans consume over 700 million pounds of peanut butter annually. No wonder recipes like these Peanut Butter Cheesecake Balls are so popular!
Necessary Equipment
- Large mixing bowl
- Baking sheet
- Parchment paper
- Fork or dipping tool
- Microwave-safe bowl for melting chocolate
Storage Tips
These Peanut Butter Cheesecake Balls store beautifully in the fridge. Keep them in an airtight container to prevent the chocolate from absorbing odors. They’ll stay fresh for up to a week. For longer storage, freeze them in a single layer, then transfer to a freezer-safe bag. Thaw in the fridge before serving.
If you’re taking them to an event, pack them in a cooler with ice packs to keep them chilled. This ensures the chocolate coating stays firm and doesn’t melt.
Finally, label your container with the date. It’s easy to forget how long they’ve been sitting in the fridge, and trust me, you don’t want to risk spoilage with such a delicious treat!
Tips and Advice
- Use high-quality chocolate for dipping—it makes a noticeable difference in taste.
- Roll the balls quickly to prevent them from warming up too much in your hands.
- Experiment with coatings like crushed peanuts, sprinkles, or cocoa powder for variety.
Presentation Ideas
- Serve the balls on a tiered dessert stand for a fancy touch.
- Place them in mini cupcake liners for easy handling.
- Arrange them on a platter with fresh berries for a pop of color.
Healthier Alternative Recipes
Looking for ways to lighten up these Peanut Butter Cheesecake Balls? Here are six variations:
- Low-Sugar Version: Use a sugar substitute like stevia instead of powdered sugar.
- Dairy-Free Delight: Swap cream cheese with a plant-based alternative.
- Gluten-Free Goodness: Use gluten-free graham crackers or cookies.
- Protein-Packed Balls: Add a scoop of protein powder to the mixture.
- Vegan Option: Use dairy-free chocolate and vegan cream cheese.
- Fruit-Infused Twist: Fold in dried cranberries or raisins instead of chocolate chips.
Mistake 1: Skipping the Chill Time
One common mistake is rushing through the chilling step. Without proper time in the freezer, the balls can fall apart when dipped in chocolate. To avoid this, always chill them for at least 30 minutes. Pro tip: If you’re short on time, place them in the freezer for 15 minutes instead of the fridge.
Mistake 2: Using Cold Cream Cheese
Cold cream cheese won’t blend smoothly, leaving lumps in your mixture. Always let it soften at room temperature for about 30 minutes before starting. If you forget, microwave it for 10–15 seconds to speed things up.
Mistake 3: Overloading the Coating
While it’s tempting to pile on the chocolate or graham cracker coating, too much can overwhelm the delicate flavors inside. Aim for a thin, even layer to let the peanut butter shine.
FAQ
Can I use crunchy peanut butter?
Absolutely! Crunchy peanut butter adds a nice texture contrast to the creamy filling. Just be aware that it might make rolling the balls slightly trickier due to the chunks.
How long do these last in the fridge?
Stored in an airtight container, these Peanut Butter Cheesecake Balls will last up to a week. However, they’re so tasty, they rarely stick around that long!
Can I freeze them?
Yes, you can freeze them for up to three months. Simply arrange them in a single layer on a baking sheet, freeze until solid, then transfer to a freezer-safe bag.
Do I have to use graham crackers?
Nope! Feel free to experiment with crushed cookies, pretzels, or even cereal for a fun twist.
What type of chocolate should I use?
Semi-sweet or dark chocolate works best for dipping. Milk chocolate is sweeter and also a great choice if you prefer milder flavors.
Can I make these ahead of time?
Definitely! These are perfect for making ahead since they need time to chill anyway. Prepare them the night before your event for stress-free entertaining.
Are these kid-friendly?
Oh, absolutely! Kids adore the combination of peanut butter and chocolate. Just supervise younger ones during the dipping process to avoid messy accidents.
Can I omit the chocolate coating?
Of course! If you’re short on time or simply prefer less chocolate, skip the coating and serve them plain or rolled in crushed graham crackers.
What if I don’t have a microwave?
No problem! Melt your chocolate using a double boiler on the stovetop. Just heat water in a saucepan, place a heatproof bowl on top, and melt the chocolate slowly.
Can I add alcohol to the recipe?
For adults-only versions, stir in a splash of liqueur like amaretto or bourbon for a boozy kick. Adjust the amount based on your preference.
Final Thoughts
These No-Bake Peanut Butter Cheesecake Balls are proof that simple recipes can deliver big flavors. Whether you’re a seasoned baker or a beginner, this treat is foolproof and fun to make. So grab your ingredients, roll up your sleeves, and get ready to impress everyone with these irresistible bites. Happy cooking!
Equipment
- Large mixing bowl
- Fork or dipping tool
- Baking sheet
- Parchment paper
- Microwave-safe bowl for melting chocolate
Ingredients
- 1 package (8 oz) cream cheese, softened
- 1 cup powdered sugar
- 1 cup creamy peanut butter
- 1 teaspoon vanilla extract
- 1.5 cups crushed graham crackers or cookies
- 0.5 cup mini chocolate chips
Instructions
- Combine the softened cream cheese, powdered sugar, peanut butter, and vanilla extract in a large mixing bowl until smooth and creamy.
- Fold in the crushed graham crackers and mini chocolate chips until evenly distributed.
- Roll the mixture into small, 1-inch balls and place them on a baking sheet lined with parchment paper.
- Chill the rolled balls in the freezer for about 30 minutes.
- Dip each chilled ball into the melted chocolate, ensuring they are fully coated, and roll them in crushed graham crackers.
- Refrigerate until the chocolate sets, about 15-20 minutes.
Notes
Nutrition

Hi, I’m Olivia Parker, the founder of BakingSecret.com and a lifelong lover of all things sweet and homemade. I grew up in a small town in Oregon, where the smell of fresh cookies in my family’s kitchen sparked my passion for baking. Over the years, I turned that passion into a mission: to help home bakers feel confident, inspired, and creative.
After studying food science and working in several artisan bakeries across the U.S., I decided to create a space where everyone from beginners to seasoned bakers can find reliable recipes, expert tips, and a warm, welcoming community. BakingSecret.com is my way of sharing the magic of baking with the world. When I’m not testing new recipes, you’ll find me exploring farmers’ markets, collecting vintage cookbooks, or perfecting my sourdough technique.