
What Makes Quinceanera Cakes So Special?
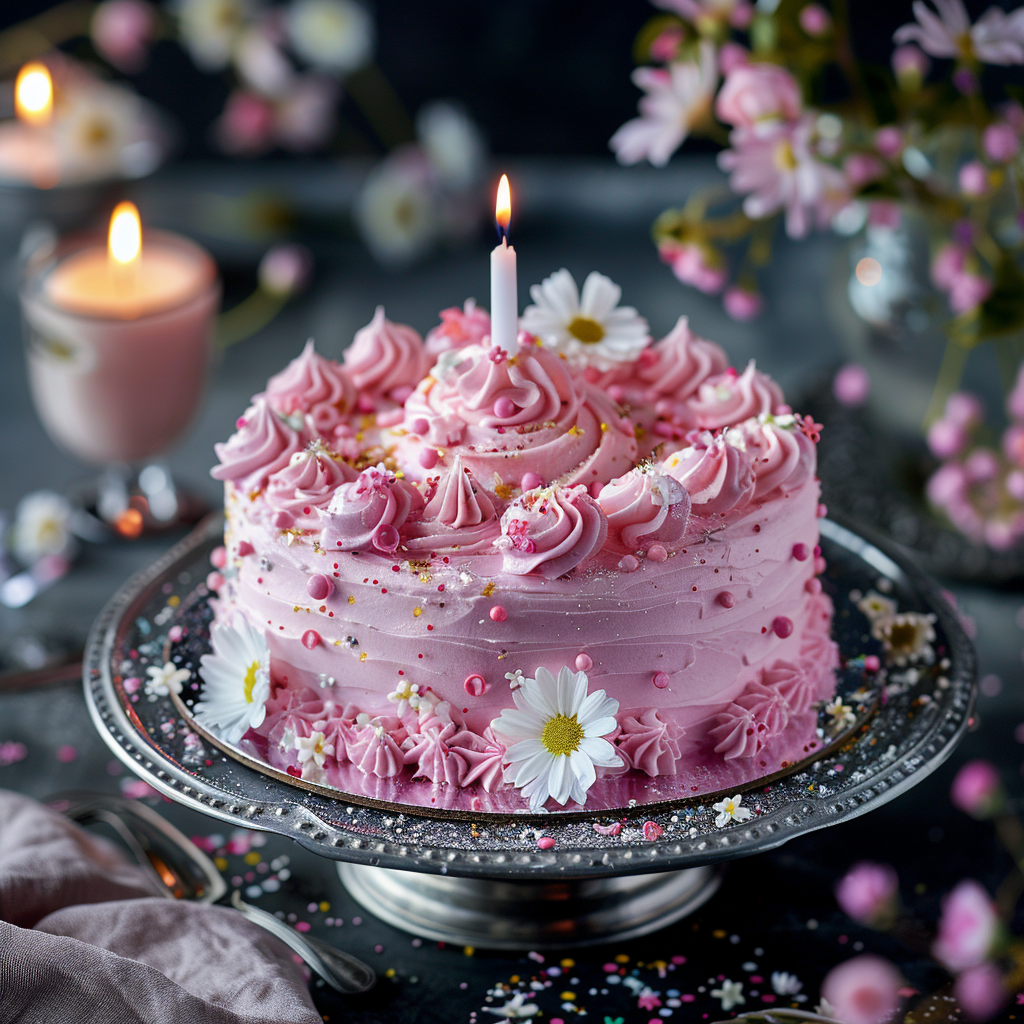
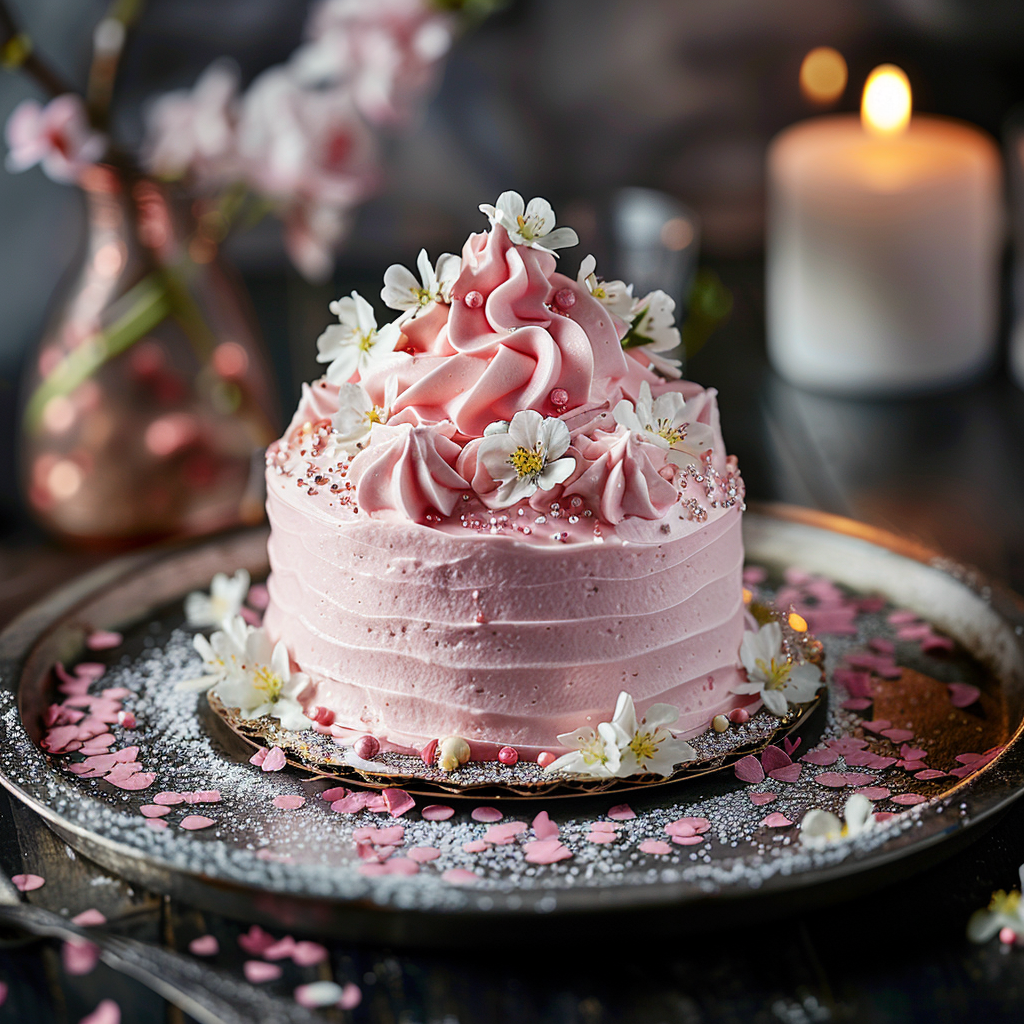
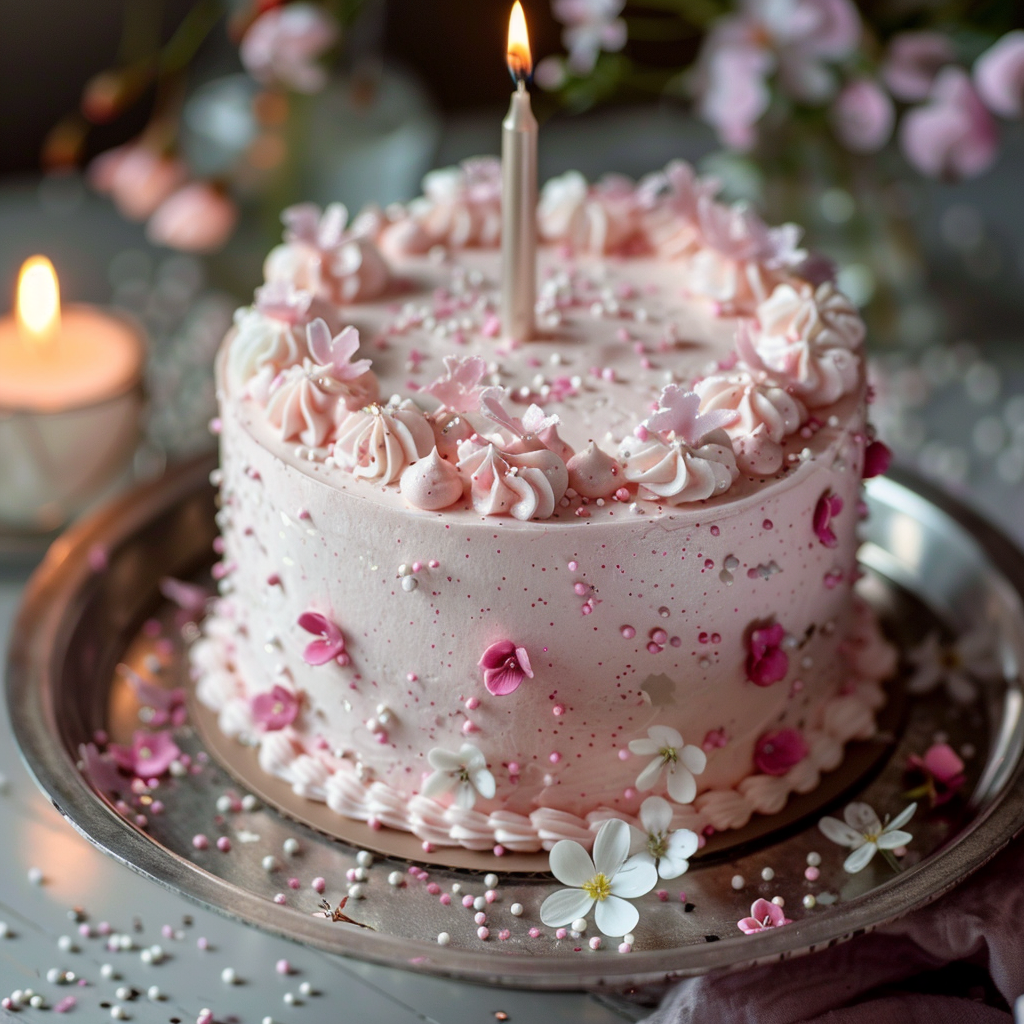
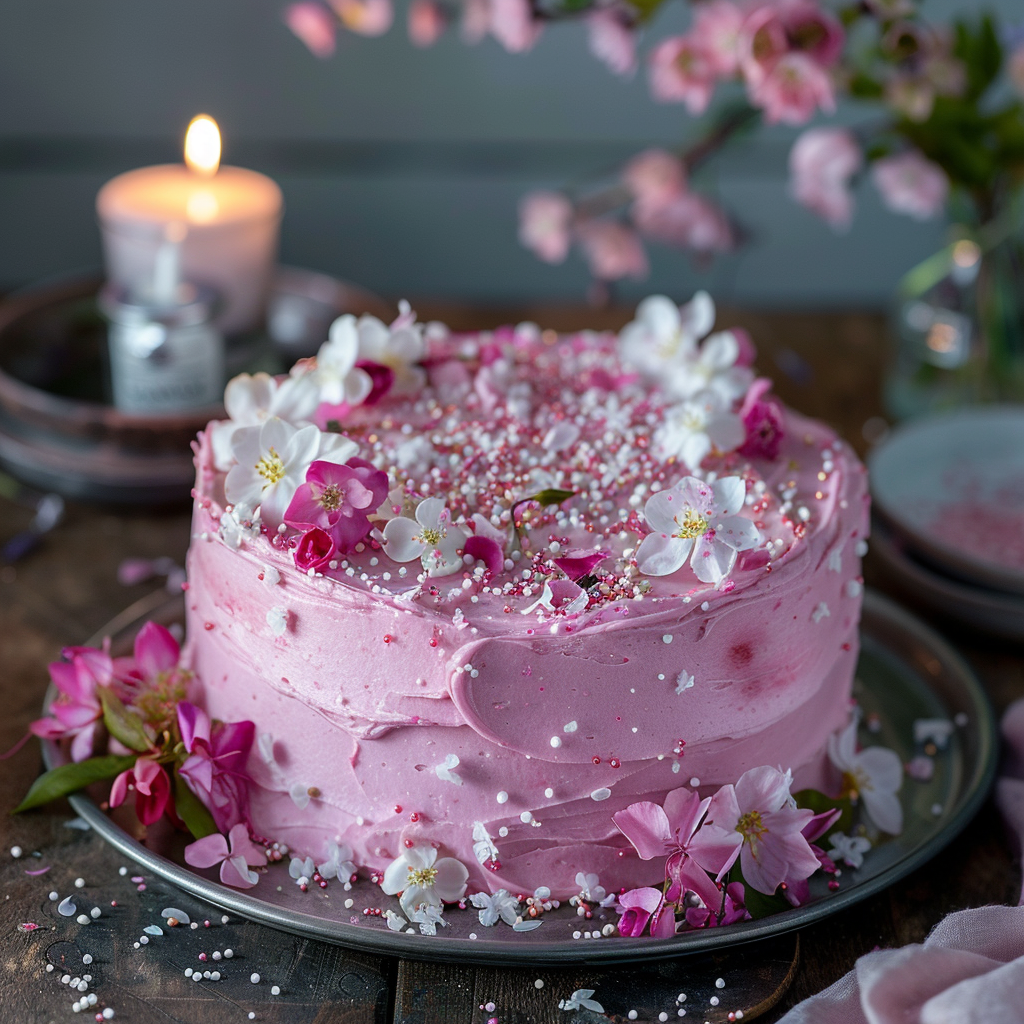
Picture this: a towering, dreamy cake sitting center stage at a party filled with laughter, music, and vibrant colors. That’s the magic of quinceanera cakes. I remember my niece’s quinceañera like it was yesterday. She wanted something bold yet elegant, so we went with a burgundy and rose gold theme. The cake was the star of the show—layers of fluffy vanilla sponge, creamy buttercream frosting, and edible flowers that looked too pretty to eat (but we did anyway). Whether you’re planning a big bash or just love baking, this recipe will help you create a cake that wows everyone.
A Little History Behind the Sweet Tradition
Quinceaneras are a cherished tradition in Latin American culture, marking a girl’s transition into womanhood at age 15. And what better way to celebrate than with an over-the-top cake? Back in the day, these cakes were simple—just a few layers with some frosting. But as trends evolved, so did the cakes. Think multi-tiered masterpieces adorned with intricate designs, colors like royal blue, turquoise, and purple, and even metallic accents like rose gold. I’ve seen everything from classic red velvet to modern ombre styles. It’s not just dessert—it’s a work of art!
Why You’ll Love This Recipe
This quinceanera cake recipe is a keeper because it’s customizable, delicious, and easier than you think. You can make it your own by choosing colors and flavors that match the theme of the celebration. Plus, it’s perfect for beginners who want to try their hand at decorating but don’t have years of experience. Trust me, once you see those layers stack up, you’ll feel like a professional pastry chef!
Perfect Occasions to Bake This Cake
While this cake is traditionally made for quinceañeras, it’s also ideal for weddings, birthdays, anniversaries, or any event where you need a show-stopping dessert. Whether you’re aiming for big quinceanera cakes or smaller ones, this recipe has got you covered. Imagine slicing into a rich chocolate layer surrounded by smooth fondant while friends and family cheer—it’s pure joy on a plate.
Ingredients You’ll Need
- 2 cups all-purpose flour
- 1 ½ cups granulated sugar
- 1 cup unsalted butter, softened
- 4 large eggs
- 1 tablespoon vanilla extract
- 1 cup whole milk
- 2 teaspoons baking powder
- ½ teaspoon salt
- 3 cups buttercream frosting
- Fondant or edible decorations (optional)
Substitution Options
- Swap whole milk with almond or coconut milk for a dairy-free option.
- Use gluten-free flour if you’re catering to dietary restrictions.
- Replace vanilla extract with almond or lemon extract for a unique twist.
Step 1: Preparing Your Batter
Start by preheating your oven to 350°F (175°C). In a large mixing bowl, cream the butter and sugar together until light and fluffy. Crack in the eggs one at a time, beating well after each addition. Add the vanilla extract for that sweet aroma. Slowly mix in the flour, baking powder, and salt, alternating with the milk. The batter should be smooth and silky, almost like a soft cloud. Pour it evenly into three round cake pans lined with parchment paper. Pro tip: Use a kitchen scale to divide the batter evenly for uniform layers.
Step 2: Baking the Layers
Pop the pans into the oven and bake for about 25-30 minutes. Keep an eye on them—they’re done when a toothpick inserted in the center comes out clean. Let the cakes cool completely before handling. Cooling is crucial; otherwise, the layers might crumble during assembly. While they cool, take a moment to admire the golden-brown edges and imagine how beautiful they’ll look stacked high.
Step 3: Assembling the Cake
Now comes the fun part—stacking! Spread a generous layer of buttercream frosting on the first layer, then carefully place the second layer on top. Repeat until all three layers are stacked. If you’re feeling fancy, add a thin crumb coat of frosting to seal in any loose crumbs. Chill the cake for 15 minutes before applying the final layer of frosting. For a polished look, use a bench scraper to smooth the sides. Chef’s tip: Dip your spatula in hot water before smoothing the frosting—it makes the process effortless.
Timing Breakdown
- Prep Time: 30 minutes
- Cooking Time: 30 minutes
- Resting Time: 45 minutes (cooling + chilling)
- Total Time: Approximately 1 hour 45 minutes
Chef’s Secret
To get sharp edges on your fondant-covered cake, roll the fondant slightly thicker than usual and use a straight-edged ruler to press along the sides. It’s a game-changer for achieving that professional finish.
An Interesting Tidbit About Quinceanera Cakes
Did you know that some quinceanera cakes weigh over 100 pounds? These massive creations often feature intricate details like cascading flowers, sugar figurines, and even LED lights inside! While our version won’t break the scale, it still packs plenty of wow factor.
Necessary Equipment
- Stand mixer or hand mixer
- Round cake pans (8-inch or 9-inch)
- Offset spatula
- Bench scraper
- Parchment paper
- Cake turntable (optional but helpful)
Storage Tips
If you’re not serving the cake right away, store it in the fridge. Cover it loosely with plastic wrap to prevent the frosting from drying out. Bring it back to room temperature before slicing for the best texture. Fondant-covered cakes can stay fresh for up to three days in the fridge. Avoid freezing unless absolutely necessary, as freezing can affect the fondant’s appearance.
For leftovers, cut individual slices and store them in airtight containers. They’ll keep for up to five days in the fridge. Reheat briefly in the microwave for a soft, melt-in-your-mouth experience.
Never leave your cake uncovered, especially if it’s decorated with delicate elements like fresh flowers or piped designs. Even a slight breeze can ruin hours of hard work!
Tips and Advice
- Always level your cakes before stacking to avoid lopsided layers.
- Use gel food coloring instead of liquid for vibrant hues without altering the consistency.
- Practice piping techniques on parchment paper before decorating the actual cake.
Presentation Ideas
- Add a personalized cake topper with the celebrant’s name.
- Surround the base with fresh flowers or candles for extra flair.
- Create a themed display using matching tablecloths and decor.
Healthier Alternatives
Here are six variations to make your quinceanera cakes healthier:
- Gluten-Free Option: Substitute regular flour with almond or oat flour.
- Low-Sugar Version: Use monk fruit sweetener instead of granulated sugar.
- Vegan Delight: Replace eggs with flaxseed meal mixed with water.
- Fruit-Infused Layers: Fold in mashed bananas or berries for natural sweetness.
- Whole Grain Goodness: Try whole wheat pastry flour for added nutrients.
- Dairy-Free Frosting: Opt for coconut cream-based frosting instead of buttercream.
Mistake 1: Overmixing the Batter
Overmixing can lead to dense, tough cakes. Once the dry ingredients are incorporated, stop mixing. The goal is to combine everything gently without overworking the gluten in the flour. Pro tip: Use a folding motion rather than vigorous stirring.
Mistake 2: Skipping the Crumb Coat
Without a crumb coat, stray crumbs can ruin the final frosting layer. Always apply a thin base layer of frosting, chill, and then proceed with the outer layer. This step ensures a smooth, professional finish.
Mistake 3: Rushing the Cooling Process
Patience is key here. Hot cakes will melt the frosting, causing a messy disaster. Allow ample time for cooling to ensure stability during assembly.
FAQs About Quinceanera Cakes
How much does a quinceañera cake cost?
The cost varies based on size, design, and location. A basic three-tier cake might start at $200, while custom designs with fondant and intricate details can range from $500 to $1,000 or more. DIY options are budget-friendly and allow for personalization.
What kind of cake is needed for a quinceañera?
Traditionally, quinceanera cakes are multi-tiered and visually stunning. Popular flavors include vanilla, chocolate, red velvet, and strawberry. Choose a flavor that complements the overall theme and guest preferences.
What food is typically served at a quinceañera?
Besides the cake, expect dishes like roasted chicken, rice and beans, empanadas, and salads. Desserts often include cookies, cupcakes, and fruit platters. Beverages like horchata and soda are also common.
How much cake for 100 guests?
A standard two-layer 9-inch cake serves about 24 people. For 100 guests, plan for four to five cakes or one large tiered cake with multiple layers. Always order a bit extra to accommodate unexpected attendees.
Where can I find quinceanera cakes pictures for inspiration?
Social media platforms like Pinterest and Instagram are treasure troves of ideas. Search hashtags like #quinceaneracakes2018 or #quinceaneracakesroyalblue for endless inspiration.
Can I make a quinceanera cake in advance?
Absolutely! Bake the layers ahead of time and freeze them. Thaw overnight in the fridge before assembling and frosting. Fondant-covered cakes hold up well for several days.
What tools do I need to decorate a quinceanera cake?
Essential tools include piping bags, tips, a turntable, offset spatulas, and a bench scraper. For fondant work, invest in a rolling pin and fondant smoother.
How do I choose colors for my quinceanera cake?
Match the cake colors to the party theme. Burgundy, rose gold, turquoise, and purple are popular choices. Consider the celebrant’s favorite colors or the overall vibe of the event.
A Final Word on Quinceanera Cakes
There’s nothing quite like the satisfaction of creating a breathtaking quinceanera cake. From its rich history to its endless customization possibilities, this dessert is truly a labor of love. Whether you’re crafting a burgundy masterpiece or a royal blue stunner, remember that the real magic lies in sharing it with loved ones. So grab your apron, fire up the oven, and let’s make memories—one slice at a time!
Equipment
- Stand mixer or hand mixer
- Round cake pans (8-inch or 9-inch)
- Offset spatula
- Bench scraper
- Parchment paper
- Cake turntable (optional but helpful)
Ingredients
- 2 cups all-purpose flour
- 1.5 cups granulated sugar
- 1 cup unsalted butter, softened
- 4 large eggs
- 1 tablespoon vanilla extract
- 1 cup whole milk
- 2 teaspoons baking powder
- 0.5 teaspoon salt
- 3 cups buttercream frosting
- to taste Fondant or edible decorations (optional)
Instructions
- Preheat your oven to 350°F (175°C).
- In a large mixing bowl, cream the butter and sugar together until light and fluffy.
- Crack in the eggs one at a time, beating well after each addition.
- Add the vanilla extract and mix it in.
- Slowly mix in the flour, baking powder, and salt, alternating with the milk.
- Pour the batter evenly into three round cake pans lined with parchment paper.
- Bake for about 25-30 minutes or until a toothpick inserted in the center comes out clean.
- Let the cakes cool completely before handling.
- Spread a layer of buttercream frosting on the first layer, then place the second layer on top.
- Repeat until all three layers are stacked and apply a thin crumb coat of frosting.
- Chill the cake for 15 minutes, then apply the final layer of frosting.
- For a polished look, smooth the sides with a bench scraper.
Notes
Nutrition

Hi, I’m Olivia Parker, the founder of BakingSecret.com and a lifelong lover of all things sweet and homemade. I grew up in a small town in Oregon, where the smell of fresh cookies in my family’s kitchen sparked my passion for baking. Over the years, I turned that passion into a mission: to help home bakers feel confident, inspired, and creative.
After studying food science and working in several artisan bakeries across the U.S., I decided to create a space where everyone from beginners to seasoned bakers can find reliable recipes, expert tips, and a warm, welcoming community. BakingSecret.com is my way of sharing the magic of baking with the world. When I’m not testing new recipes, you’ll find me exploring farmers’ markets, collecting vintage cookbooks, or perfecting my sourdough technique.