
Why These Strawberry Cream Tartlets Are a Must-Try
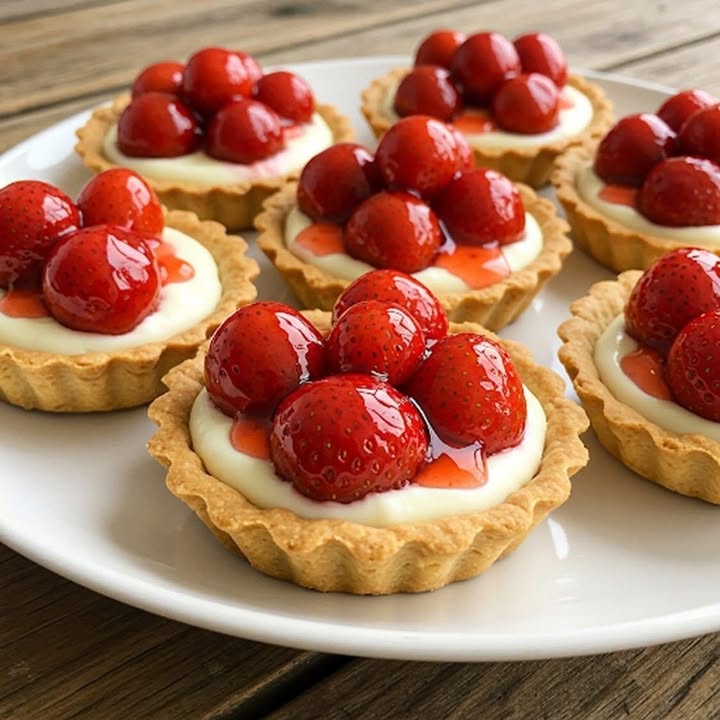
There’s something magical about desserts that combine crunch, creaminess, and a burst of fresh fruit. I first made these **Strawberry Cream Tartlets** for a summer garden party, and they were gone before the sun set! The combination of a buttery cookie crust, velvety cream cheese filling, and juicy strawberries is simply irresistible. Whether you’re baking for family or friends, this recipe will win hearts and satisfy sweet cravings.
A Little History Behind These Tartlets
Tartlets have been around for centuries, with roots in European pastry traditions. The French and Italians perfected small pastries as bite-sized delights for special occasions. Over time, bakers added their own twists, like creamy fillings and fruity toppings. My version brings together the best of both worlds: a modern creamy cheesecake-inspired filling paired with fresh strawberries. It’s a nod to tradition with a fun, contemporary flair.
Why You’ll Love This Recipe
These **Strawberry Cream Tartlets** are perfect for anyone who loves simple yet impressive desserts. The base is crunchy, the filling is smooth and rich, and the strawberries add a refreshing touch. Plus, they’re easy to make! Even if you’re new to baking, you’ll find this recipe straightforward and rewarding. Trust me—once you try them, you’ll want to make them again and again.
Perfect Occasions to Make These Tartlets
Need ideas? These tartlets are versatile! Serve them at brunch, baby showers, or birthday parties. They’re also ideal for holidays like Valentine’s Day or Mother’s Day, thanks to their vibrant red strawberries. I’ve even brought them to potlucks, where they became the star of the dessert table. Their individual size makes them perfect for sharing without any messy slicing.
Ingredients You’ll Need
- For the base:
- 1 cup crushed digestive or graham cookies
- 1/4 cup melted butter
- 2 tbsp sugar
- For the filling:
- 1 cup cream cheese (Philadelphia-style works best)
- 1/4 cup glass sugar (or powdered sugar)
- 1 tsp vanilla extract
- To decorate:
- 1 cup fresh, clean, and sliced strawberries
- Optional: 1/4 cup strawberry jam for shine
Substitution Options
Don’t stress if you’re missing an ingredient! Here are some swaps:
- Use almond flour instead of crushed cookies for a gluten-free option.
- Swap maple syrup or honey for sugar if you prefer natural sweeteners.
- Vegan cream cheese and coconut oil work well for dairy-free versions.
Step-by-Step Preparation
Step 1: Preheat the Oven
Start by preheating your oven to 180°C (350°F). This ensures the cookie base bakes evenly. While it heats up, gather all your ingredients. A little prep goes a long way in making the process smooth.
Step 2: Make the Crispy Base
Mix the crushed cookies, melted butter, and sugar in a bowl until it resembles wet sand. Press this mixture firmly into individual tartlet molds. Pro tip: Use the back of a spoon to press it down evenly. Bake for 10 minutes, then let it cool completely. The aroma of buttery cookies wafting through your kitchen is worth every second!
Step 3: Prepare the Creamy Filling
In a mixing bowl, beat the cream cheese, glass sugar, and vanilla extract until smooth and creamy. This step is crucial for achieving that melt-in-your-mouth texture. If you notice lumps, keep beating—it’ll come together beautifully.
Step 4: Assemble Your Tartlets
Once the bases are cool, spoon the creamy filling into each one. Arrange the sliced strawberries on top in a decorative pattern. I love creating flower shapes with the berries—it adds a touch of elegance. Optional but recommended: Heat the strawberry jam slightly and brush it over the fruit for a glossy finish.
Step 5: Chill Before Serving
Pop your tartlets in the fridge for at least an hour. This chilling time lets the flavors meld and makes the filling firm enough to hold its shape. Patience pays off here!
Chef’s Tip
For extra flair, sprinkle a pinch of lemon zest over the strawberries before serving. The citrus notes enhance the sweetness and make the dish pop.
Timing Breakdown
- Prep Time: 15 minutes
- Cooking Time: 10 minutes
- Resting Time: 1 hour (chilling)
- Total Time: 1 hour 25 minutes
Extra Info
Did you know strawberries are packed with vitamin C? Not only do they taste amazing, but they’re also good for your skin and immune system. That’s my excuse for eating two tartlets in one sitting!
Necessary Equipment
You don’t need fancy tools to make these tartlets. Grab a mixing bowl, spatula, tartlet molds, and a whisk. A small brush is handy if you’re using jam for shine.
Storage Tips
These tartlets are best enjoyed fresh, but leftovers can be stored in the fridge for up to two days. Cover them loosely with plastic wrap to prevent the strawberries from getting soggy. For longer storage, freeze the unfilled bases and assemble later.
If freezing, place the cooled bases in an airtight container. When ready to serve, thaw at room temperature, add the filling, and top with strawberries. Voilà—you have freshly made tartlets!
Pro tip: Avoid stacking the tartlets when storing, as the delicate berries might get squished. Keep them in a single layer for best results.
Tips and Advice
- Choose ripe but firm strawberries for the best flavor and appearance.
- Don’t skip chilling the tartlets—it firms up the filling and enhances the texture.
- If you’re short on time, use store-bought cookie crumbs for the base.
Presentation Ideas
- Serve on a tiered dessert stand for a fancy look.
- Garnish with mint leaves for a pop of color.
- Drizzle a bit of chocolate sauce around the plate for added drama.
Healthier Alternatives
Looking to lighten up? Try these variations:
- Low-Sugar Option: Replace sugar with stevia or monk fruit sweetener.
- Gluten-Free Base: Use almond flour or gluten-free cookies.
- Vegan Version: Swap cream cheese for cashew-based cream and butter for coconut oil.
- No-Bake Base: Mix crushed nuts with dates for a raw, no-bake crust.
- Fruit Swap: Use raspberries or blueberries instead of strawberries.
- Dairy-Free Shine: Use agave syrup instead of jam for gloss.
Common Mistakes to Avoid
Mistake 1: Overfilling the Tartlets
Overfilling can make the tartlets messy and difficult to eat. Stick to a moderate amount of filling to maintain balance. Pro tip: Use a piping bag for precision.
Mistake 2: Skipping the Chilling Step
Chilling sets the filling and ensures the tartlets hold their shape. Rushing this step can lead to a mushy mess. Patience is key!
Mistake 3: Using Overripe Strawberries
Soft, overripe strawberries can release too much juice, making the tartlets soggy. Always choose firm, ripe berries for the best results.
FAQ
Can I make these ahead of time?
Absolutely! You can prepare the bases and filling a day in advance. Assemble and chill just before serving.
How do I prevent the strawberries from turning brown?
To keep them fresh, toss the sliced strawberries in a bit of lemon juice before arranging them on the tartlets.
What can I use instead of cream cheese?
Greek yogurt or mascarpone cheese are great alternatives for a lighter or richer filling, respectively.
Do I have to use tartlet molds?
Not necessarily. Muffin tins lined with cupcake liners work fine in a pinch.
Can I freeze these tartlets?
Yes, but freeze only the unfilled bases. Add the filling and toppings after thawing for optimal freshness.
How many servings does this recipe make?
This recipe yields about 6–8 individual tartlets, depending on the size of your molds.
Place them in a ziplock bag and crush with a rolling pin or use a food processor for finer crumbs.
Can I use other fruits?
Of course! Try kiwi, mango, or blackberries for a fun twist.
Why is my filling grainy?
Graininess usually happens if the sugar isn’t fully incorporated. Beat the mixture longer for a smoother consistency.
Is this recipe kid-friendly?
Definitely! Kids love helping decorate with colorful strawberries. Just supervise when handling hot ingredients.
Final Thoughts
These **Strawberry Cream Tartlets** are more than just a dessert—they’re a celebration of flavors and textures. With their crunchy base, creamy filling, and fresh berries, they’re sure to impress anyone lucky enough to try them. So grab your apron, invite some friends over, and treat yourself to a delightful baking session. Happy baking!
Equipment
- Mixing bowl
- Whisk
- Spatula
- Tartlet molds
- Small brush optional for jam
Ingredients
- 1 cup crushed digestive or graham cookies
- 1/4 cup melted butter
- 2 tbsp sugar
- 1 cup cream cheese Philadelphia-style works best
- 1/4 cup glass sugar or powdered sugar
- 1 tsp vanilla extract
- 1 cup fresh strawberries clean and sliced
- 1/4 cup strawberry jam optional for shine
Instructions
- Preheat your oven to 180°C (350°F).
- Mix the crushed cookies, melted butter, and sugar in a bowl until it resembles wet sand; press into tartlet molds.
- Bake for 10 minutes, then let cool completely.
- Beat the cream cheese, glass sugar, and vanilla extract in a mixing bowl until smooth and creamy.
- Spoon the creamy filling into each cooled tartlet base and arrange strawberries on top.
- Optional: Heat strawberry jam and brush over fruit for a glossy finish.
- Chill the tartlets in the fridge for at least an hour before serving.