
A Slice of Sunshine: My Strawberry Kiwi Cheesecake Delight
You know that feeling when you need a dessert that feels like a celebration? Maybe it’s a birthday, a sunny weekend, or just a Tuesday that deserves a little sparkle. My friend, this Strawberry Kiwi Dream Cheesecake is that sparkle. This recipe became my go-to after a picnic where I brought a classic vanilla cheesecake. It was good, but my sister said, “It needs some color! Some life!” She was right. So, I went home, grabbed the brightest fruits in my kitchen, and created this creamy, tangy, and utterly dreamy masterpiece. Every bite is a perfect balance of rich, smooth cheesecake and the fresh, vibrant pop of strawberry and kiwi. It’s not just a dessert; it’s a little escape in a springform pan!
The Sweet Story Behind this Dreamy Dessert
Cheesecake has a history as rich as its texture, dating all the way back to ancient Greece! Of course, they didn’t have our modern cream cheese or fruity toppings. The tradition evolved, and the creamy, baked version we love today was perfected right here in America, especially in New York. My take on this classic is a modern, fruit-forward twist. I wanted something that looked as joyful as it tasted. Strawberries bring that classic sweet romance, while kiwi adds a surprising, zesty twist that makes people say, “What is that delicious flavor?” This version honors the timeless, velvety cheesecake base but wraps it in a burst of sunny, fresh fruit that feels utterly new and exciting.
Why You’ll Fall in Love With This Strawberry Kiwi Cheesecake
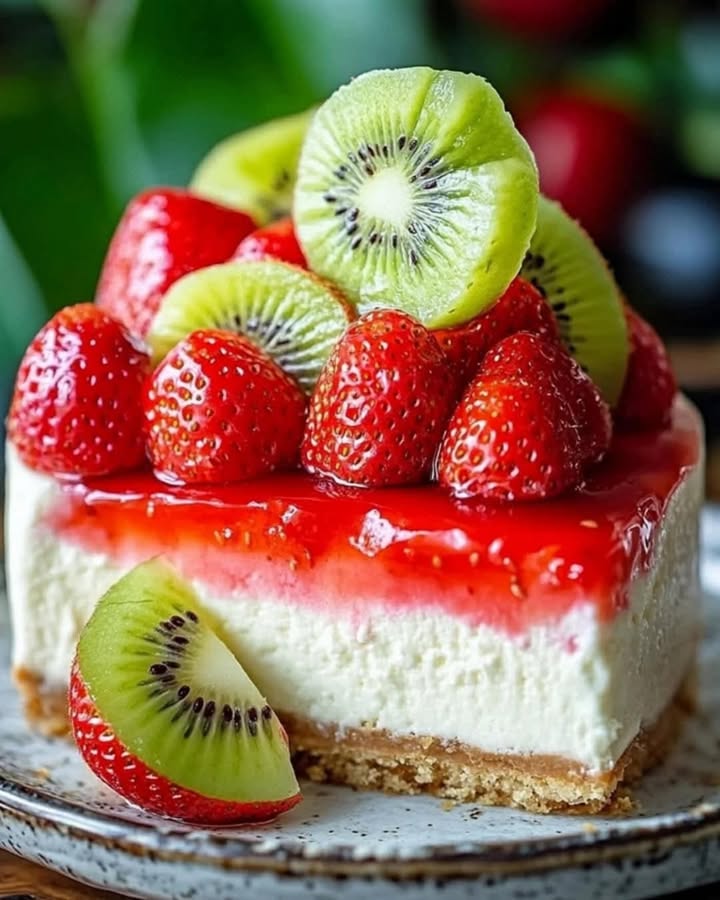
Let’s be honest, the visual appeal alone is a huge win. That swirl of pink and green is a total showstopper on any table. But beyond its looks, this recipe is a winner for so many reasons. First, the texture is foolproof—creamy, dense, and smooth without a single crack thanks to a simple cooling trick. Second, the flavor is incredible. The tangy kiwi cuts through the richness of the cheesecake in the best way possible. Finally, while it bakes, your whole house will smell like a happy, warm bakery. It’s a recipe that impresses without being overly complicated, which is my favorite kind of kitchen magic.
Perfect Occasions to Whip Up This Cheesecake
This isn’t a dessert you save for once a year. It’s versatile! It’s perfect for spring and summer gatherings like Mother’s Day brunches, baby showers (think of those pink and green themes!), or Fourth of July barbecues. It brightens up a holiday dessert table alongside richer treats. Honestly, it’s also my secret weapon for “just because” days. Bringing this to a friend who needs cheering up or making it as a special family weekend treat turns an ordinary moment into a sweet memory. If you love this fruity combo, you might also adore the zesty layers in our Lemon Mousse Cake for another bright flavor adventure.
What You’ll Need for Your Strawberry Kiwi Cheesecake
Let’s gather our sunshine in ingredients! Using room-temperature ingredients is the secret to a smooth, lump-free filling.
For the Crust:
- 2 cups graham cracker crumbs
- 1/4 cup unsalted butter, melted
For the Cheesecake Filling:
- 24 oz (680g) cream cheese, softened
- 1 cup granulated sugar
- 1 cup sour cream
- 1 teaspoon vanilla extract
- 3 large eggs
- 1/2 cup diced strawberries
- 1/2 cup diced kiwi
For the Topping:
- Sliced strawberries
- Sliced kiwi
- Kiwi and strawberry sauce (homemade or store-bought)
Easy Swaps: Ingredient Substitutions
No worries if you’re missing something! Here are some easy fixes:
- Graham Cracker Crumbs: Digestive biscuits or vanilla wafers work great too.
- Sour Cream: Full-fat plain Greek yogurt is a perfect 1:1 substitute.
- Fruit: For a different berry twist, try raspberries or blueberries instead of strawberries. Mango can stand in for kiwi for a tropical vibe!
- Springform Pan: In a pinch, a deep 9-inch pie dish works, but serving slices will be trickier.
Creating Your Dream Cheesecake, Step-by-Step
Follow these steps carefully for a perfect, crack-free cheesecake every single time. Let’s get baking!
Step 1: Prepping Your Pan & Oven
First, get your oven ready. Preheat it to 325°F (163°C). This lower temperature is key for gentle, even baking that prevents cracks. Take your 9-inch springform pan and give the bottom and sides a good coat of butter or non-stick spray. This little step is a lifesaver when it’s time to release your beautiful cheesecake later. I promise, you don’t want to skip it!
Step 2: Building the Buttery Crust
Grab a medium bowl and mix your graham cracker crumbs with that glorious melted butter. You want the mixture to look like wet sand and hold together when you pinch it. Dump it into your prepared pan and use the bottom of a glass or a measuring cup to press it down firmly and evenly. Bake this for just 10 minutes. This quick pre-bake gives the crust a head start, so it stays crisp and doesn’t get soggy from the filling. Let it cool on a rack while you make the filling.
Step 3: Making the Dreamy Filling
This is where the magic happens! In a large bowl, beat your softened cream cheese until it’s completely smooth and fluffy. No lumps allowed! Now, beat in the sugar, sour cream, and vanilla extract until it’s all one happy, creamy mixture. Pro tip: Scrape down the sides of the bowl often. Next, add the eggs one at a time, mixing just until each yellow yolk disappears into the batter. Over-mixing after adding eggs can incorporate too much air and cause cracking. Finally, gently fold in your diced strawberries and kiwi with a spatula. Those little pops of color are like hidden jewels!
Step 4: Baking to Perfection
Pour that gorgeous pink and green-speckled batter over your cooled crust. Use your spatula to spread it out nice and even. Now, place it in the center of your preheated oven. Bake for 60-70 minutes. The cheesecake is done when the edges are set but the center still has a slight, gentle jiggle—like a firm pudding. This is the most important visual cue! Do not overbake it looking for a completely firm center.
Step 5: The Crucial Cool-Down
Here’s my favorite trick for a flawless top. Once baking is done, turn off the oven. Crack the oven door open just an inch or two. Leave the cheesecake inside for a full hour. This lets it cool down as slowly as possible, which is the ultimate secret to preventing those dreaded cracks. Patience is your best friend here.
Step 6: Chilling for Flavor
After its oven bath, take the cheesecake out and let it cool completely on the counter. Then, cover it and tuck it into the fridge. It needs at least 4 hours to set properly, but overnight is truly best. This long chill allows the flavors to deepen and mingle beautifully, and gives you the perfect, sliceable texture.
Step 7: The Grand Finale: Toppings!
The fun part! Just before serving, arrange your fresh strawberry and kiwi slices on top in a pretty pattern. A simple drizzle of store-bought fruit sauce or a homemade puree makes it look like it came from a fancy bakery. For another stunning, fruit-filled dessert presentation, check out the elegant roll technique used in our Velvety Lemon Cream Roll Cake.
Your Strawberry Kiwi Cheesecake Timeline
Good things take time, and this dessert is no exception. Here’s the breakdown:
- Prep Time: 30 minutes (mostly mixing and dicing!)
- Baking Time: 60-70 minutes
- Cooling & Chilling Time: At least 5 hours (1 hour in oven, 1+ hour on counter, 4+ hours in fridge)
- Total Time: Approximately 6.5 to 7 hours (mostly hands-off)
- Servings: 12 perfect slices
My Number One Cheesecake Secret
For the absolute creamiest, dreamiest texture, **all your refrigerated ingredients must be at room temperature**. I take my cream cheese, sour cream, and eggs out of the fridge a good 2-3 hours before I start. This allows them to blend together seamlessly without any lumps and prevents you from over-mixing, which is the enemy of a smooth cheesecake. Trust me on this one!
A Fun Fruit Fact For Your Next Chat
Did you know the kiwifruit is actually a berry? And it originally came from China, not New Zealand! It was known as the “Chinese gooseberry” before marketers renamed it after New Zealand’s national bird to make it more appealing. Now, its bright green flesh and tiny black seeds are loved worldwide. When you’re choosing fruits for this or any recipe, considering food-based nutrition from trusted sources can help you get the best quality and flavor from your ingredients.
Gear You’ll Need to Make It
You don’t need fancy equipment, but these tools make it easier:
- 9-inch Springform Pan (non-negotiable for clean slices!)
- Electric Mixer (hand or stand)
- Large and Medium Mixing Bowls
- Measuring Cups and Spoons
- Rubber Spatula
- Wire Cooling Rack
How to Store Your Strawberry Kiwi Dream
Once decorated, this cheesecake is best enjoyed within 24 hours. Keep it covered in the refrigerator. The moisture from the fresh fruit topping will eventually start to weep, so it’s a now-or-never kind of treat! Luckily, it’s so delicious, leftovers are rarely a problem.
If you need to make it ahead, you can bake and chill the plain cheesecake (without the fresh fruit topping) for up to 3 days. Simply add your fresh strawberry and kiwi slices and sauce right before you’re ready to serve. This keeps everything looking and tasting its absolute freshest.
The undecorated cheesecake also freezes beautifully for up to 2 months. Wrap it tightly in a few layers of plastic wrap, then foil. Thaw it overnight in the refrigerator before adding your toppings and serving. This makes it a fantastic make-ahead dessert for busy times.
Pro Tips for Cheesecake Success
- Measure Precisely: Baking is a science. Use a kitchen scale for the cream cheese if you can for perfect results.
- Don’t Open the Oven Door: Resist the urge to peek during the first 50 minutes of baking! The rush of cold air can make your cheesecake fall or crack.
- Use a Water Bath: For the ultimate silkiness, bake your cheesecake in a water bath. Wrap the outside of your springform pan in heavy-duty foil, place it in a roasting pan, and pour hot water into the roasting pan until it comes halfway up the side of the springform pan.
- Dice Fruit Small: Keep your strawberry and kiwi pieces small (about 1/4-inch). Large chunks can sink or create wet spots.
Making It Picture-Perfect: Presentation Ideas
- Create a beautiful spiral of alternating strawberry and kiwi slices on top.
- Serve each slice with a little extra sauce drizzled on the plate and a mint leaf for color.
- For a party, make mini cheesecakes in a muffin tin with cupcake liners! Just reduce the baking time.
- Pair it with a glass of sparkling wine or a cup of strong coffee for the perfect finish.
Love This Recipe? Try These Other Dreamy Desserts!
If you’re a fan of show-stopping desserts that blend fruit and creamy textures, you’re in the right place. My blog is full of recipes just like this one. For all things creamy and baked, explore more in our complete cheesecake recipe collection. Here are a few more delicious spins you might love:
- Strawberry Swirl Cheesecake Bars: All the flavor in a portable, no-fuss bar form. Perfect for picnics and lunchboxes.
- No-Bake Kiwi Lime Cheesecake: A zesty, refreshing version for those hot summer days when you don’t want to turn on the oven.
- Chocolate-Dipped Strawberry Cheesecake: For the ultimate chocolate lover. A chocolate crust with a strawberry filling, finished with chocolate-dipped strawberries on top.
- Vegan Berry Cheesecake: A dairy-free delight made with cashews and coconut cream, topped with a mixed berry compote.
- Mini Eggnog Cheesecakes with Cranberry Kiwi Relish: A festive holiday twist! Spiced eggnog cheesecakes topped with a tangy cranberry and kiwi topping.
- Mango Kiwi Cheesecake Parfaits: Layer graham cracker crumbs, mango cheesecake mousse, and fresh kiwi in a glass for an elegant, deconstructed dessert.
Common Mistakes to Avoid
Mistake 1: Using Cold Ingredients
This is the #1 reason for a lumpy cheesecake batter. Straight-from-the-fridge cream cheese and eggs won’t blend smoothly with the sugar. You end up over-mixing to try to get rid of lumps, which adds too much air and leads to cracks. Fix it: Plan ahead! Leave your cream cheese, sour cream, and eggs on the counter for 2-3 hours before you start baking. They should feel cool to the touch, not cold.
Mistake 2: Overbaking the Cheesecake
It’s tempting to bake until the center is completely firm, like a cake. But a cheesecake is a custard. If you bake it until it’s firm in the center, it will be dry and dense by the time it chills. Fix it: Bake until the edges are puffed and set, but the center (about a 3-inch circle) still has a noticeable jiggle when you gently shake the pan. It will firm up perfectly in the refrigerator.
Mistake 3: Skipping the Slow Cool-Down
Taking a hot cheesecake straight from the oven to your cold counter (or worse, the fridge!) is a major shock. The drastic temperature change causes the center to sink and the top to crack. Fix it: Always use the “cracked oven” method. Let it cool slowly in the turned-off oven with the door open for that full hour. This gentle cooldown is your best defense against cracks.
Mistake 4: Not Letting it Chill Long Enough
I know it’s hard to wait! But slicing into a cheesecake that hasn’t fully set is a recipe for a soupy mess. The chilling time is when the structure truly solidifies. Fix it: Minimum 4 hours, but aim for overnight. This patience guarantees clean, beautiful slices and allows all the flavors to come together perfectly.
Your Strawberry Kiwi Cheesecake Questions, Answered
Can I use frozen strawberries and kiwi?
I do not recommend using frozen fruit inside the cheesecake batter. Frozen fruit releases a lot of water as it thaws, which can make your cheesecake filling watery and prevent it from setting properly. It can also cause soggy spots. Always use fresh, ripe fruit that you dice yourself for the filling. For the topping, fresh is also best for texture and appearance.
Why did my cheesecake crack on top?
Cracks usually happen from one of three things: overmixing the batter after adding the eggs (which adds air), overbaking, or cooling too quickly. The air bubbles expand and then collapse, causing cracks. Follow the tips above: mix gently after adding eggs, bake until just wobbly in the center, and cool it slowly in the oven. Even if it cracks, don’t worry! That’s what your beautiful fruit topping is for—it covers everything deliciously.
Can I make this cheesecake ahead of time?
Absolutely! In fact, it’s often better the next day. You can bake the cheesecake (without the fresh fruit topping) up to 3 days in advance. Keep it covered tightly in the refrigerator. Add the sliced strawberry and kiwi topping and the sauce just a few hours before you plan to serve it. This keeps the fruit looking fresh and vibrant.
Do I have to use a springform pan?
Yes, for this style of cheesecake, a springform pan is highly recommended. The removable sides allow you to cleanly release the cheesecake without having to flip it upside down. If you only have a regular cake pan, you’ll have to line it very carefully with parchment paper with overhanging edges to lift the cheesecake out, which can be tricky with a tall, creamy dessert.
What can I use instead of graham crackers for the crust?
You have several tasty options! Digestive biscuits, vanilla wafers, or shortbread cookies all make a wonderful crust. You can even use crushed-up gingersnaps for a spicy twist. Just use the same weight (about 200g of cookies) and the same amount of melted butter. Process them into fine crumbs and follow the same method.
How do I know when the cheesecake is done baking?
The visual and physical test is your best friend. Around the 60-minute mark, the edges should look puffed and set, and the center (about the size of a pancake) should still look slightly wet and jiggle like Jell-O when you gently nudge the pan. A toothpick inserted near the edge should come out clean, but the center will still be soft. Remember, it will continue to set as it chills.
My topping is getting watery. How can I prevent this?
Fresh fruit naturally releases juices, especially when combined with sugar in a sauce. To minimize this, don’t assemble the topping too far in advance. Just before serving, pat your fresh strawberry and kiwi slices dry with a paper towel before arranging them. If using a sauce, drizzle it on individual slices at the table instead of over the whole cake.
Can I freeze Strawberry Kiwi Cheesecake?
You can freeze the baked and cooled cheesecake before adding the fresh fruit topping. Wrap it tightly in plastic wrap, then in foil, and freeze for up to 2 months. Thaw it overnight in the refrigerator. The fresh fruit topping does not freeze well, so always add that after thawing. The texture may be slightly denser but still delicious.
Is there a no-bake version of this recipe?
You can adapt it! For a no-bake version, you would typically use gelatin or whipped cream to set a cream cheese and fruit puree mixture over a pre-made crust. The flavor profile would be similar but much lighter and fluffier in texture. It’s a great option for hot days. The taste would be different from the dense, baked classic, but still yummy.
What other fruits work well with this cheesecake base?
This creamy base is a dream with so many fruits! Try a mixed berry blend of raspberries, blueberries, and blackberries. For a tropical version, use mango and passionfruit. In the fall, a swirl of spiced apple compote or a pear-ginger sauce would be incredible. The possibilities are endless, just like with our rich Chocolate Cherry Swiss Roll Delight or the luxurious Hazelnut Chocolate Truffle Cake.
Ready to Make Some Sweet Memories?
There you have it—my secret recipe for the happiest, sunniest cheesecake around. It might look fancy, but the steps are simple when you take them one at a time. The most important ingredient is the joy you put into making it. So, grab your springform pan, pick out the reddest strawberries and the greenest kiwis you can find, and get ready to create a dessert that’s as fun to make as it is to eat. Whether it’s for a special someone or just a treat for yourself, this Strawberry Kiwi Dream Cheesecake is guaranteed to bring a big, fruity smile to everyone’s face. Now, go preheat that oven and let’s get dreaming!
Equipment
- Grand bol
- Fouet
- Spatule
- Moule à charnière 9 pouces
- Papier sulfurisé
Ingredients
- 2 tasses chapelure de biscuits Graham
- 1/4 tasse beurre non salé, fondu
- 24 oz fromage à la crème, ramolli
- 1 tasse sucre granulé
- 1 tasse crème sure
- 1 cuil. à café extrait de vanille
- 3 grands œufs
- 1/2 tasse fraises hachées
- 1/2 tasse kiwi haché
Instructions
- Préchauffez le four à 163°C (325°F) et préparez un moule à charnière de 9 pouces avec du beurre ou un spray antiadhésif.
- Dans un bol moyen, mélangez la chapelure de biscuits Graham avec le beurre fondu et appuyez au fond du moule à charnière.
- Portez la croûte au four pendant 10 minutes et laissez refroidir pendant que vous préparez la garniture.
- Dans un grand bol, battez le fromage à la crème ramolli jusqu'à ce qu'il soit lisse et crémeux.
- Ajoutez le sucre, la crème sure et l'extrait de vanille au fromage à la crème, en mélangeant jusqu'à ce que le tout soit bien combiné.
- Ajoutez les œufs un par un, en mélangeant jusqu'à ce que chaque jaune soit incorporé, puis incorporez délicatement les fraises et les kiwis hachés.
- Versez la garniture sur la croûte refroidie et étalez uniformément.
- Faites cuire au four pendant 60-70 minutes jusqu'à ce que les bords soient fermes et que le centre ait léger tremblement.
- Éteignez le four et entrouvrez la porte; laissez le cheesecake refroidir à l'intérieur pendant 1 heure.
- Refroidissez complètement à température ambiante, puis couvrez et réfrigérez pendant au moins 4 heures (de préférence toute la nuit).
- Avant de servir, garnissez de tranches de fraises et de kiwis frais et arrosez de sauce aux fruits.