
Introduction to Thumbprint Jam Cookies
There’s something magical about Thumbprint Jam Cookies. These buttery, melt-in-your-mouth treats are not only delicious but also incredibly fun to make. I remember the first time I baked them—it was a rainy Sunday afternoon, and I wanted to surprise my family with something sweet yet simple. The moment they bit into these cookies, their faces lit up with joy. That’s when I realized this recipe is more than just a dessert; it’s a way to create memories. Whether you’re a seasoned baker or a beginner, Thumbprint Jam Cookies are sure to become a favorite in your kitchen.
The Sweet History of Thumbprint Jam Cookies
Thumbprint cookies have been around for generations, with their origins often traced back to Scandinavian baking traditions. They were traditionally made during festive seasons like Christmas, where families would gather to bake and share these delightful treats. Over time, Thumbprint Jam Cookies evolved from being a holiday staple to an everyday indulgence. Modern versions now include a variety of jams, preserves, and even chocolate centers, making them versatile and adaptable to different tastes. I love how this cookie bridges the gap between tradition and innovation, bringing people together through its timeless charm.
Why You’ll Love This Thumbprint Cookie Recipe
What makes Thumbprint Jam Cookies so irresistible? First, they’re incredibly easy to prepare—no fancy techniques required! Second, the combination of buttery dough and fruity jam creates a perfect balance of flavors that everyone adores. Plus, they look adorable on any dessert table. Whether you’re baking for kids or adults, these cookies are guaranteed to impress. Trust me, once you try this recipe, you’ll find yourself coming back to it again and again.
Perfect Occasions to Make Thumbprint Jam Cookies
Thumbprint Jam Cookies are perfect for almost any occasion. Bake them for cozy family gatherings, potlucks, or holiday celebrations. They’re also ideal as gifts—just pack them in a pretty box with a ribbon, and you’ve got a thoughtful homemade present. Personally, I love making these cookies during the winter months when fresh berries aren’t as readily available. The vibrant jam filling adds a pop of color and cheer to gloomy days.
Ingredients for Thumbprint Jam Cookies
- 1 cup unsalted butter, softened
- 1/2 cup granulated sugar
- 1 large egg yolk
- 1 teaspoon vanilla extract
- 1 3/4 cups all-purpose flour
- 1/4 teaspoon salt
- 1/2 cup assorted fruit jams (strawberry, raspberry, apricot)
Substitution Options for Thumbprint Jam Cookies
If you want to experiment with this recipe, here are some substitutions you can try: Use almond extract instead of vanilla for a nuttier flavor. Swap out regular flour for gluten-free flour if you’re catering to dietary restrictions. For a vegan version, substitute the butter with coconut oil and use flaxseed meal mixed with water as an egg replacement. And feel free to get creative with the jam fillings—try Nutella, caramel sauce, or even lemon curd!
Preparation Steps for Thumbprint Jam Cookies
Step 1: Creaming the Butter and Sugar
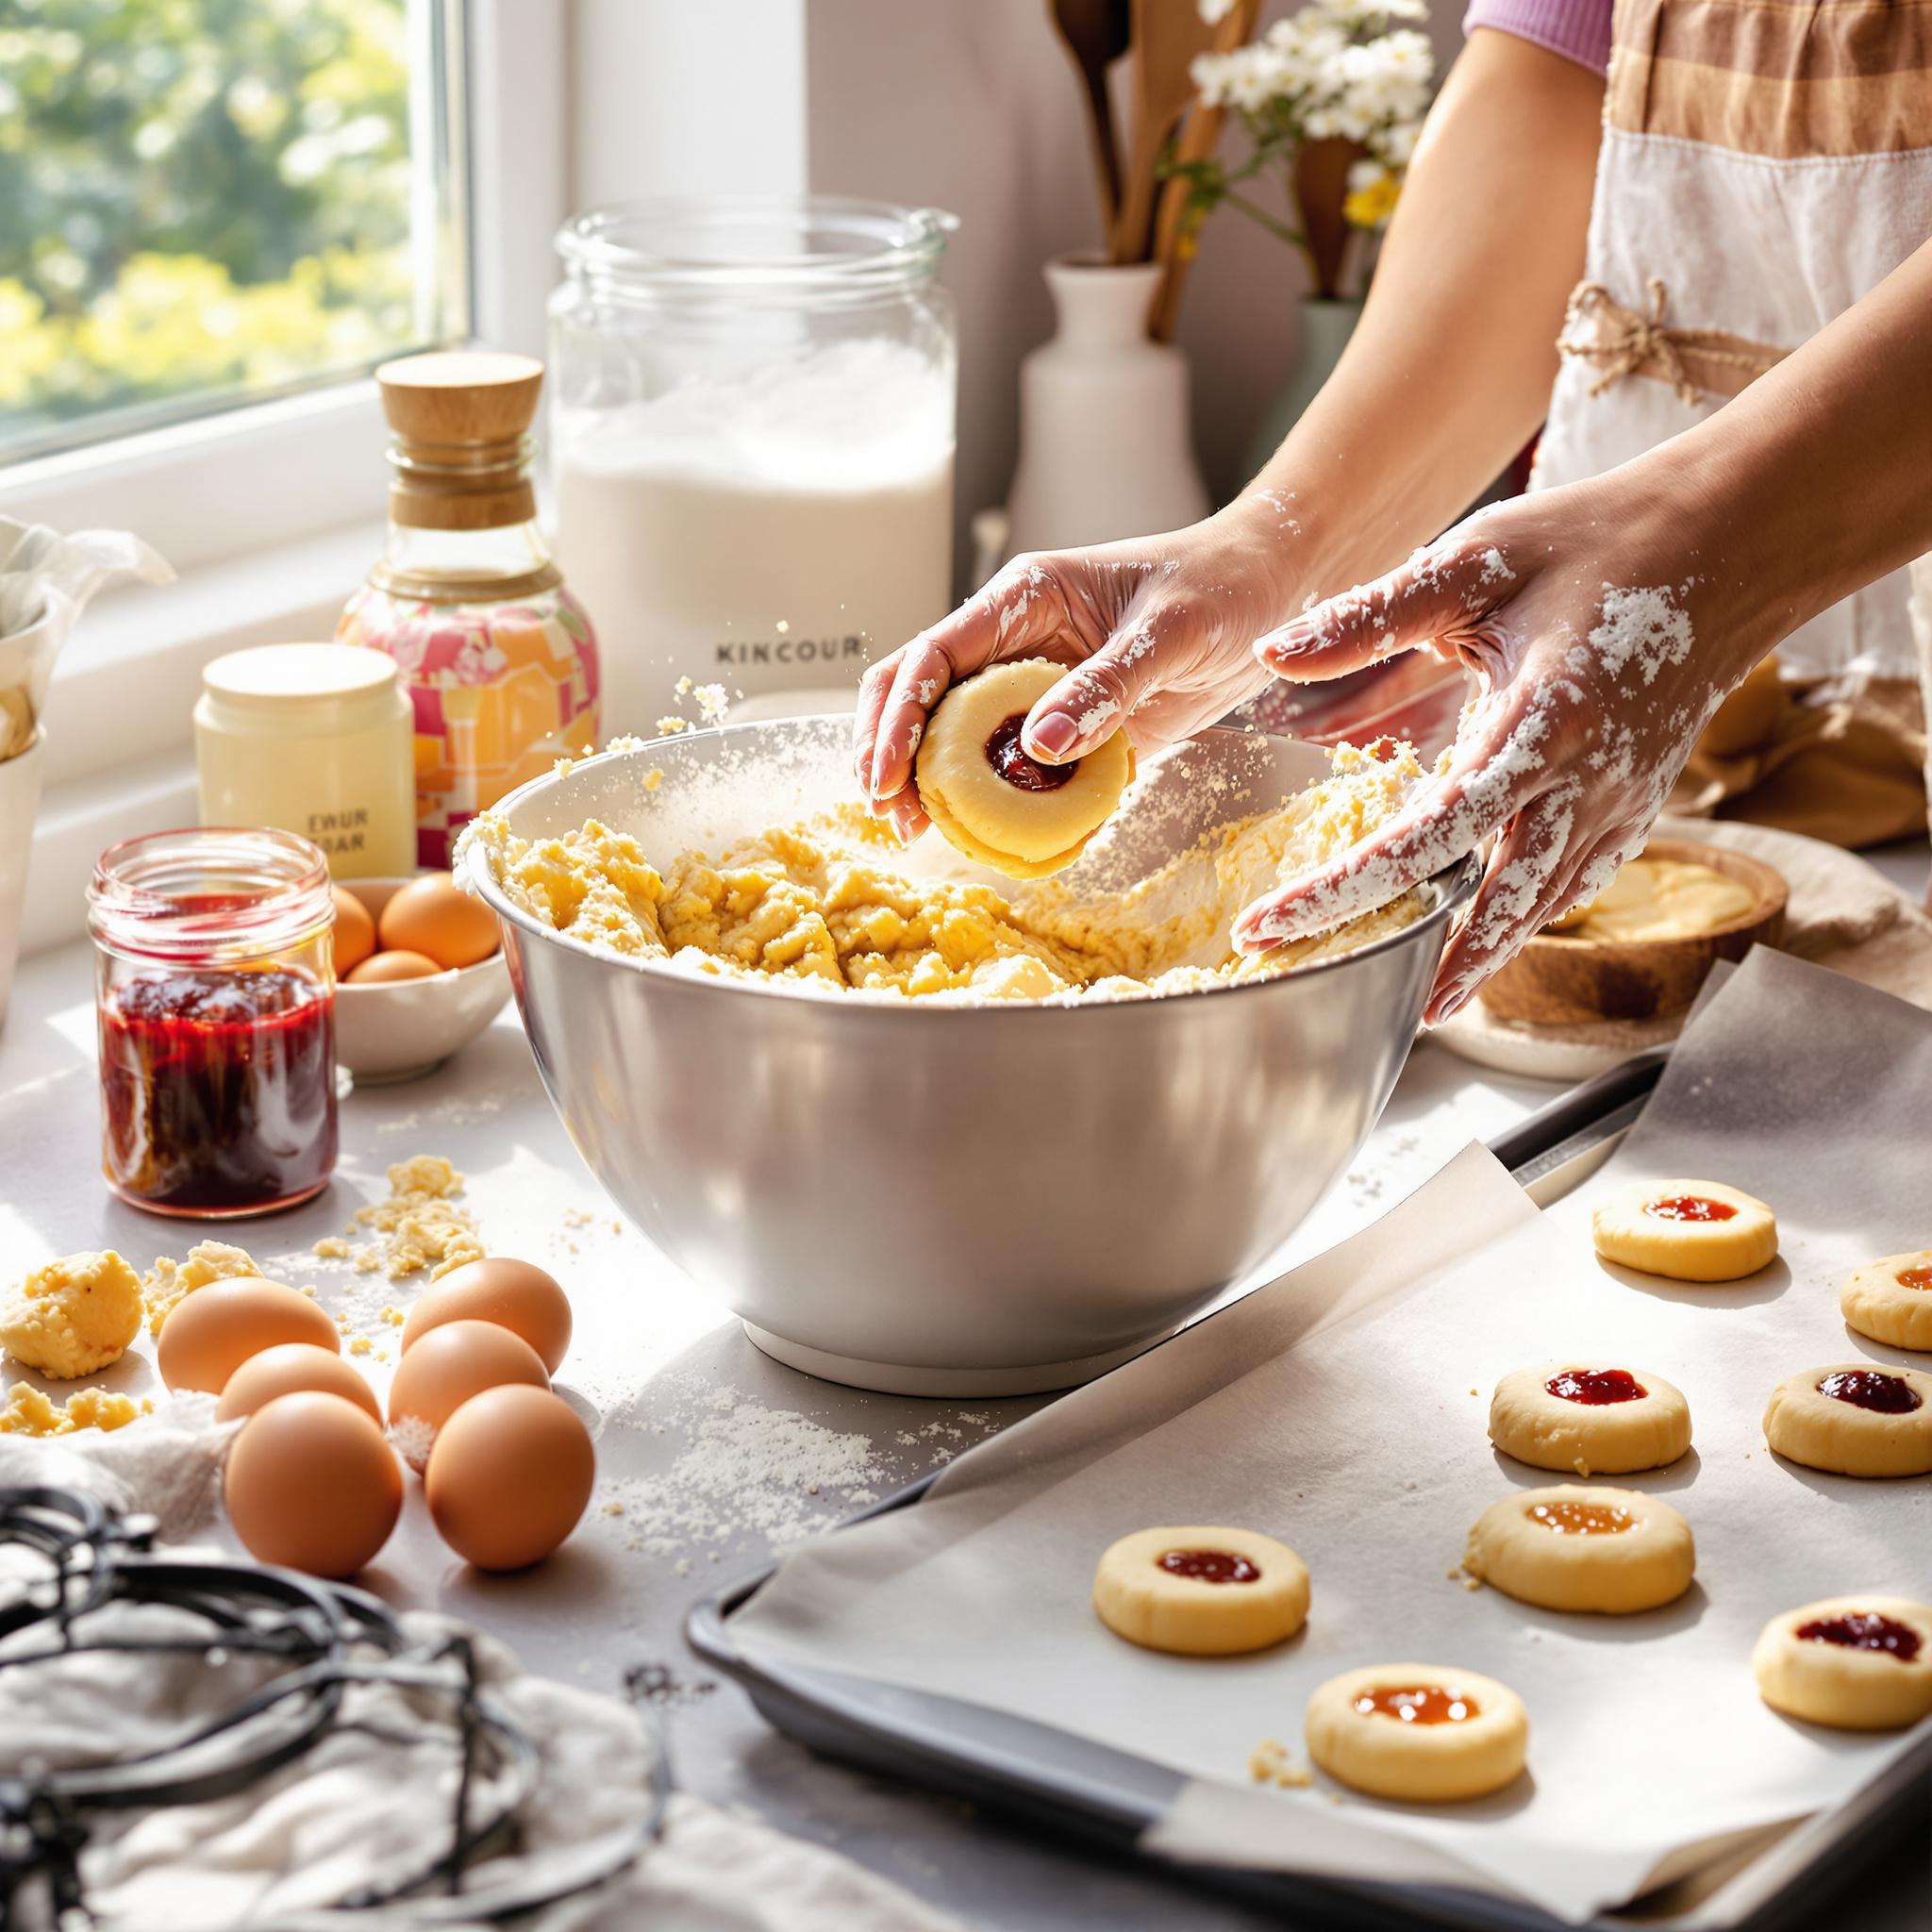
To start, cream together the softened butter and granulated sugar until light and fluffy. This step is crucial because it incorporates air into the dough, giving your cookies a tender texture. As you mix, watch how the mixture transforms into a pale yellow cloud-like consistency—it’s almost hypnotic! Pro tip: Make sure your butter is at room temperature for the best results.
Step 2: Adding Egg Yolk and Vanilla Extract
Next, beat in the egg yolk and vanilla extract. The aroma of vanilla will instantly fill your kitchen, setting the mood for baking magic. Be careful not to overmix; just blend until everything is well combined. At this stage, the dough should smell heavenly and look smooth, ready to take shape into delightful little cookies.
Step 3: Mixing in Flour and Salt
Gradually add the flour and salt to the wet ingredients, mixing until a soft dough forms. You’ll notice how the dough comes together beautifully, forming a cohesive ball that’s easy to handle. If the dough feels too sticky, chill it in the refrigerator for about 15 minutes before proceeding. Chilling helps prevent spreading during baking, ensuring your cookies hold their charming thumbprint shape.
Step 4: Shaping and Filling the Cookies
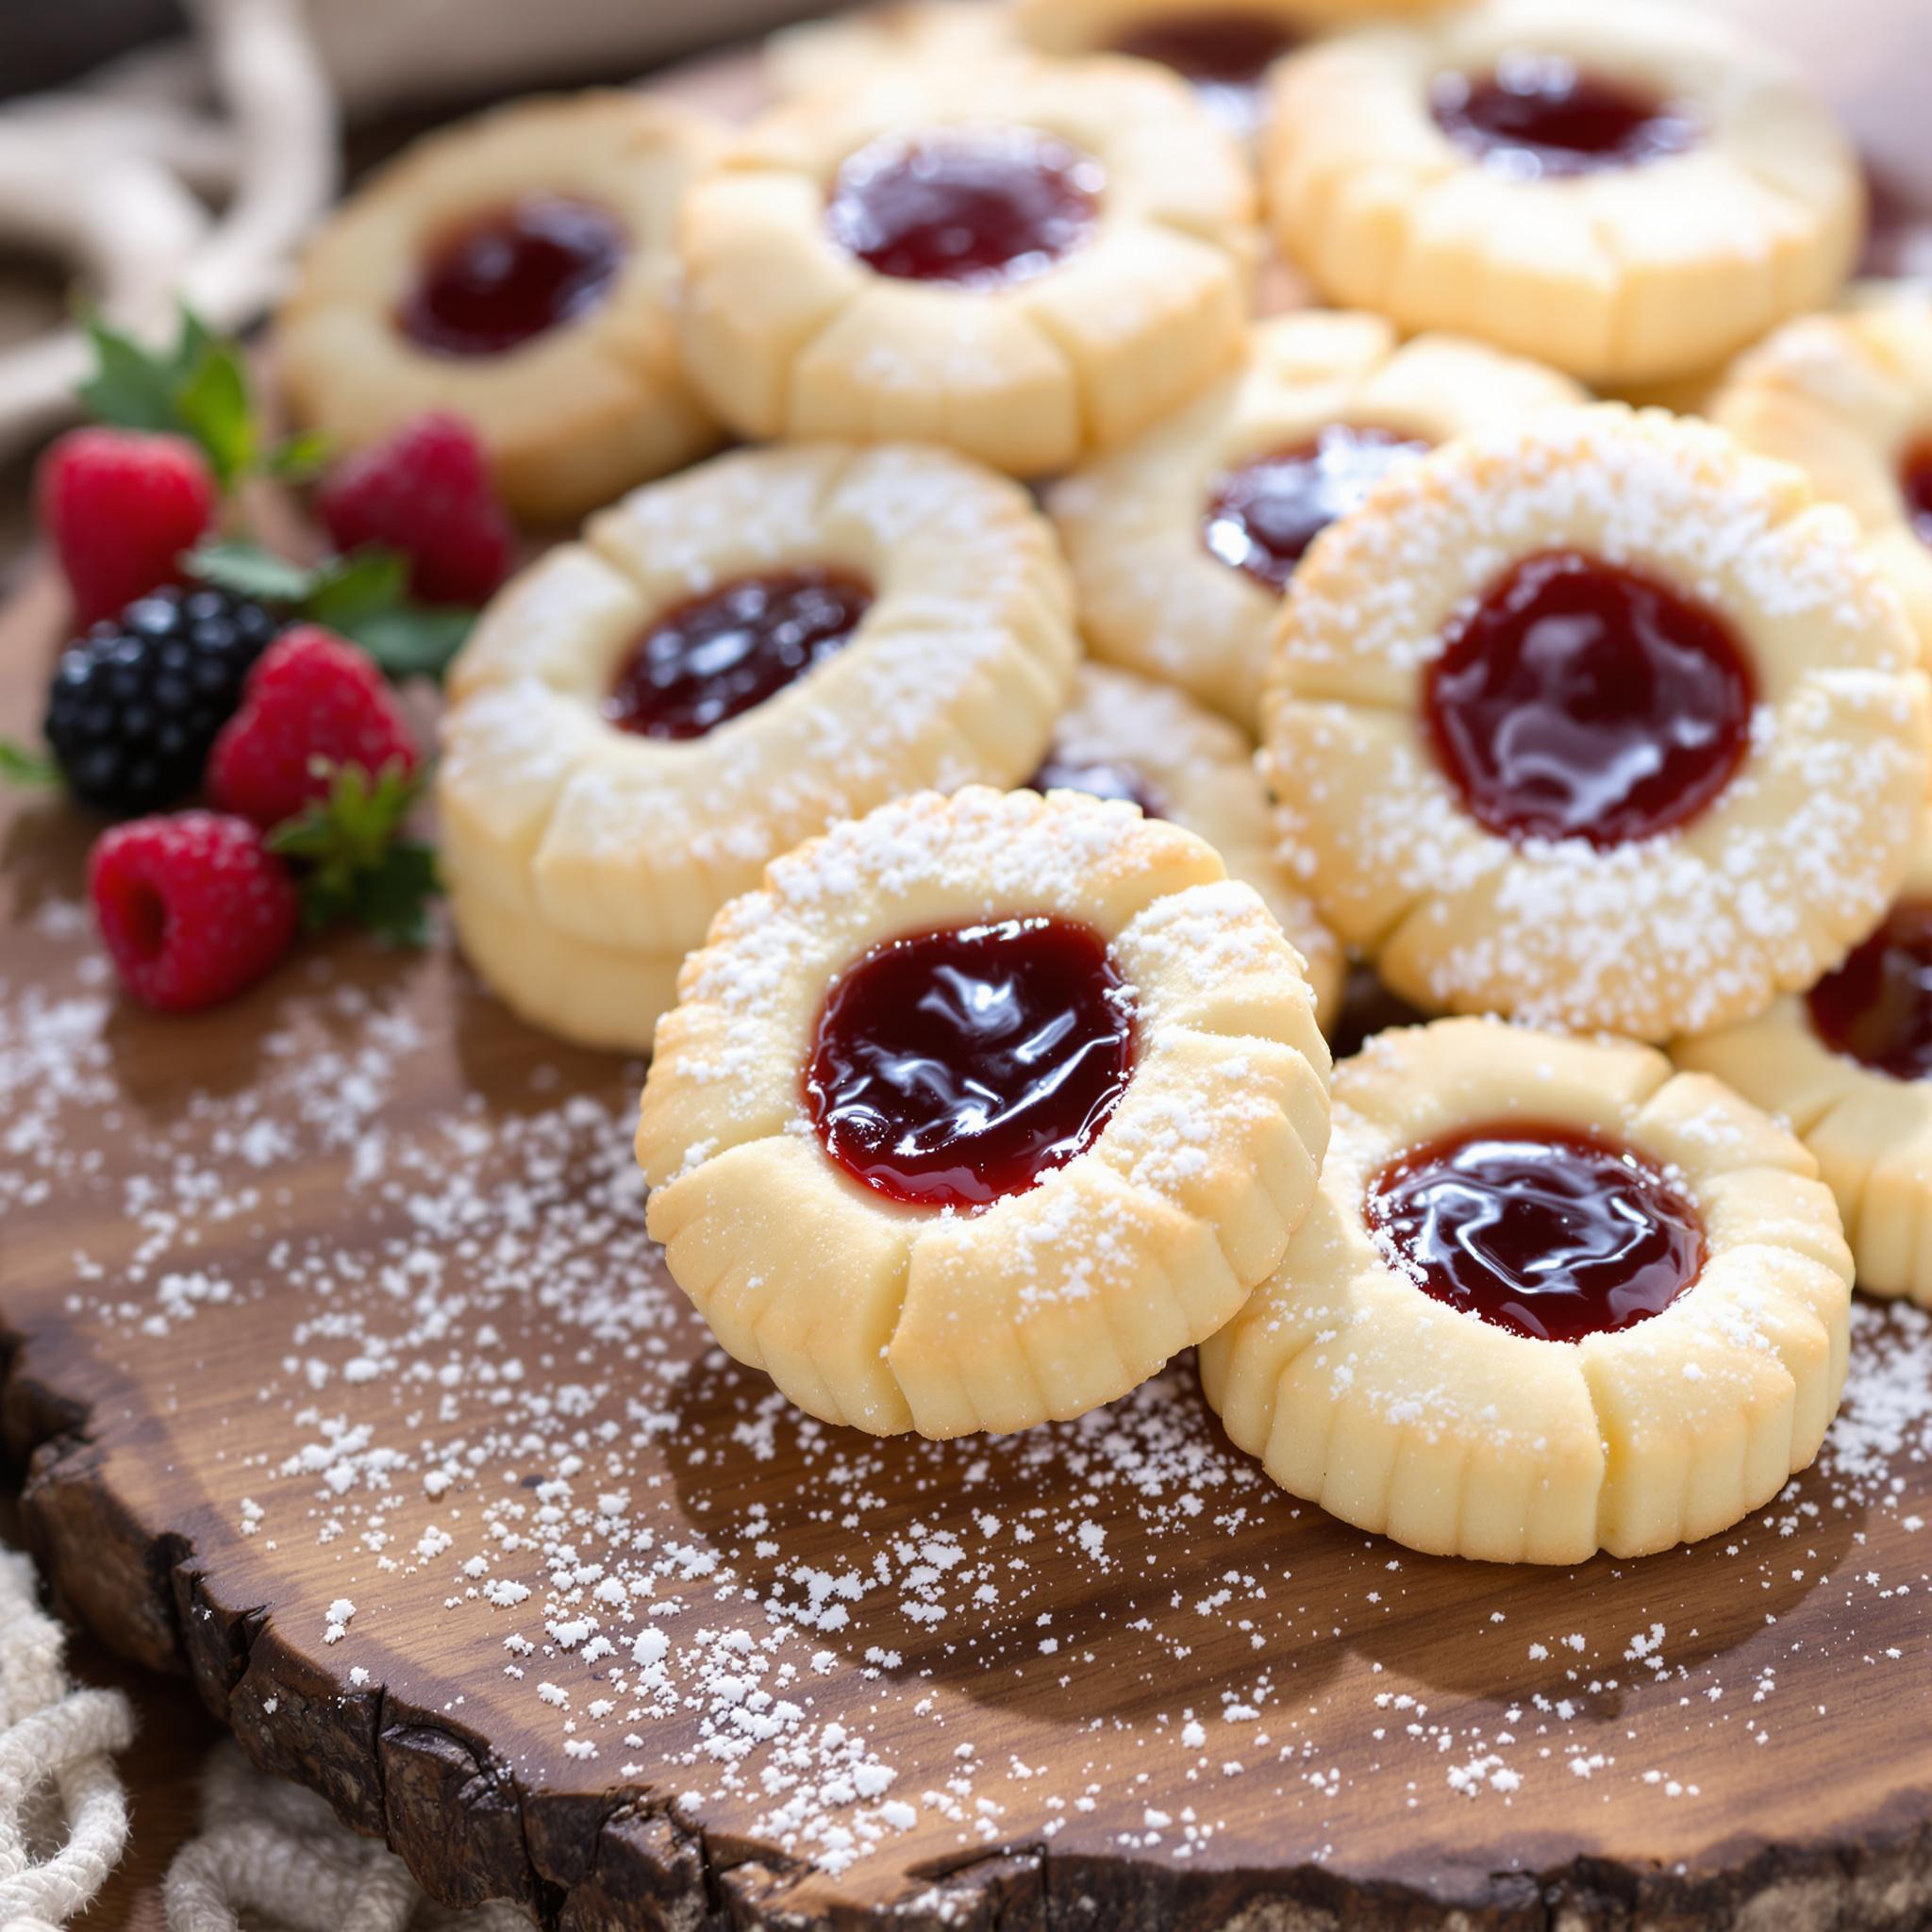
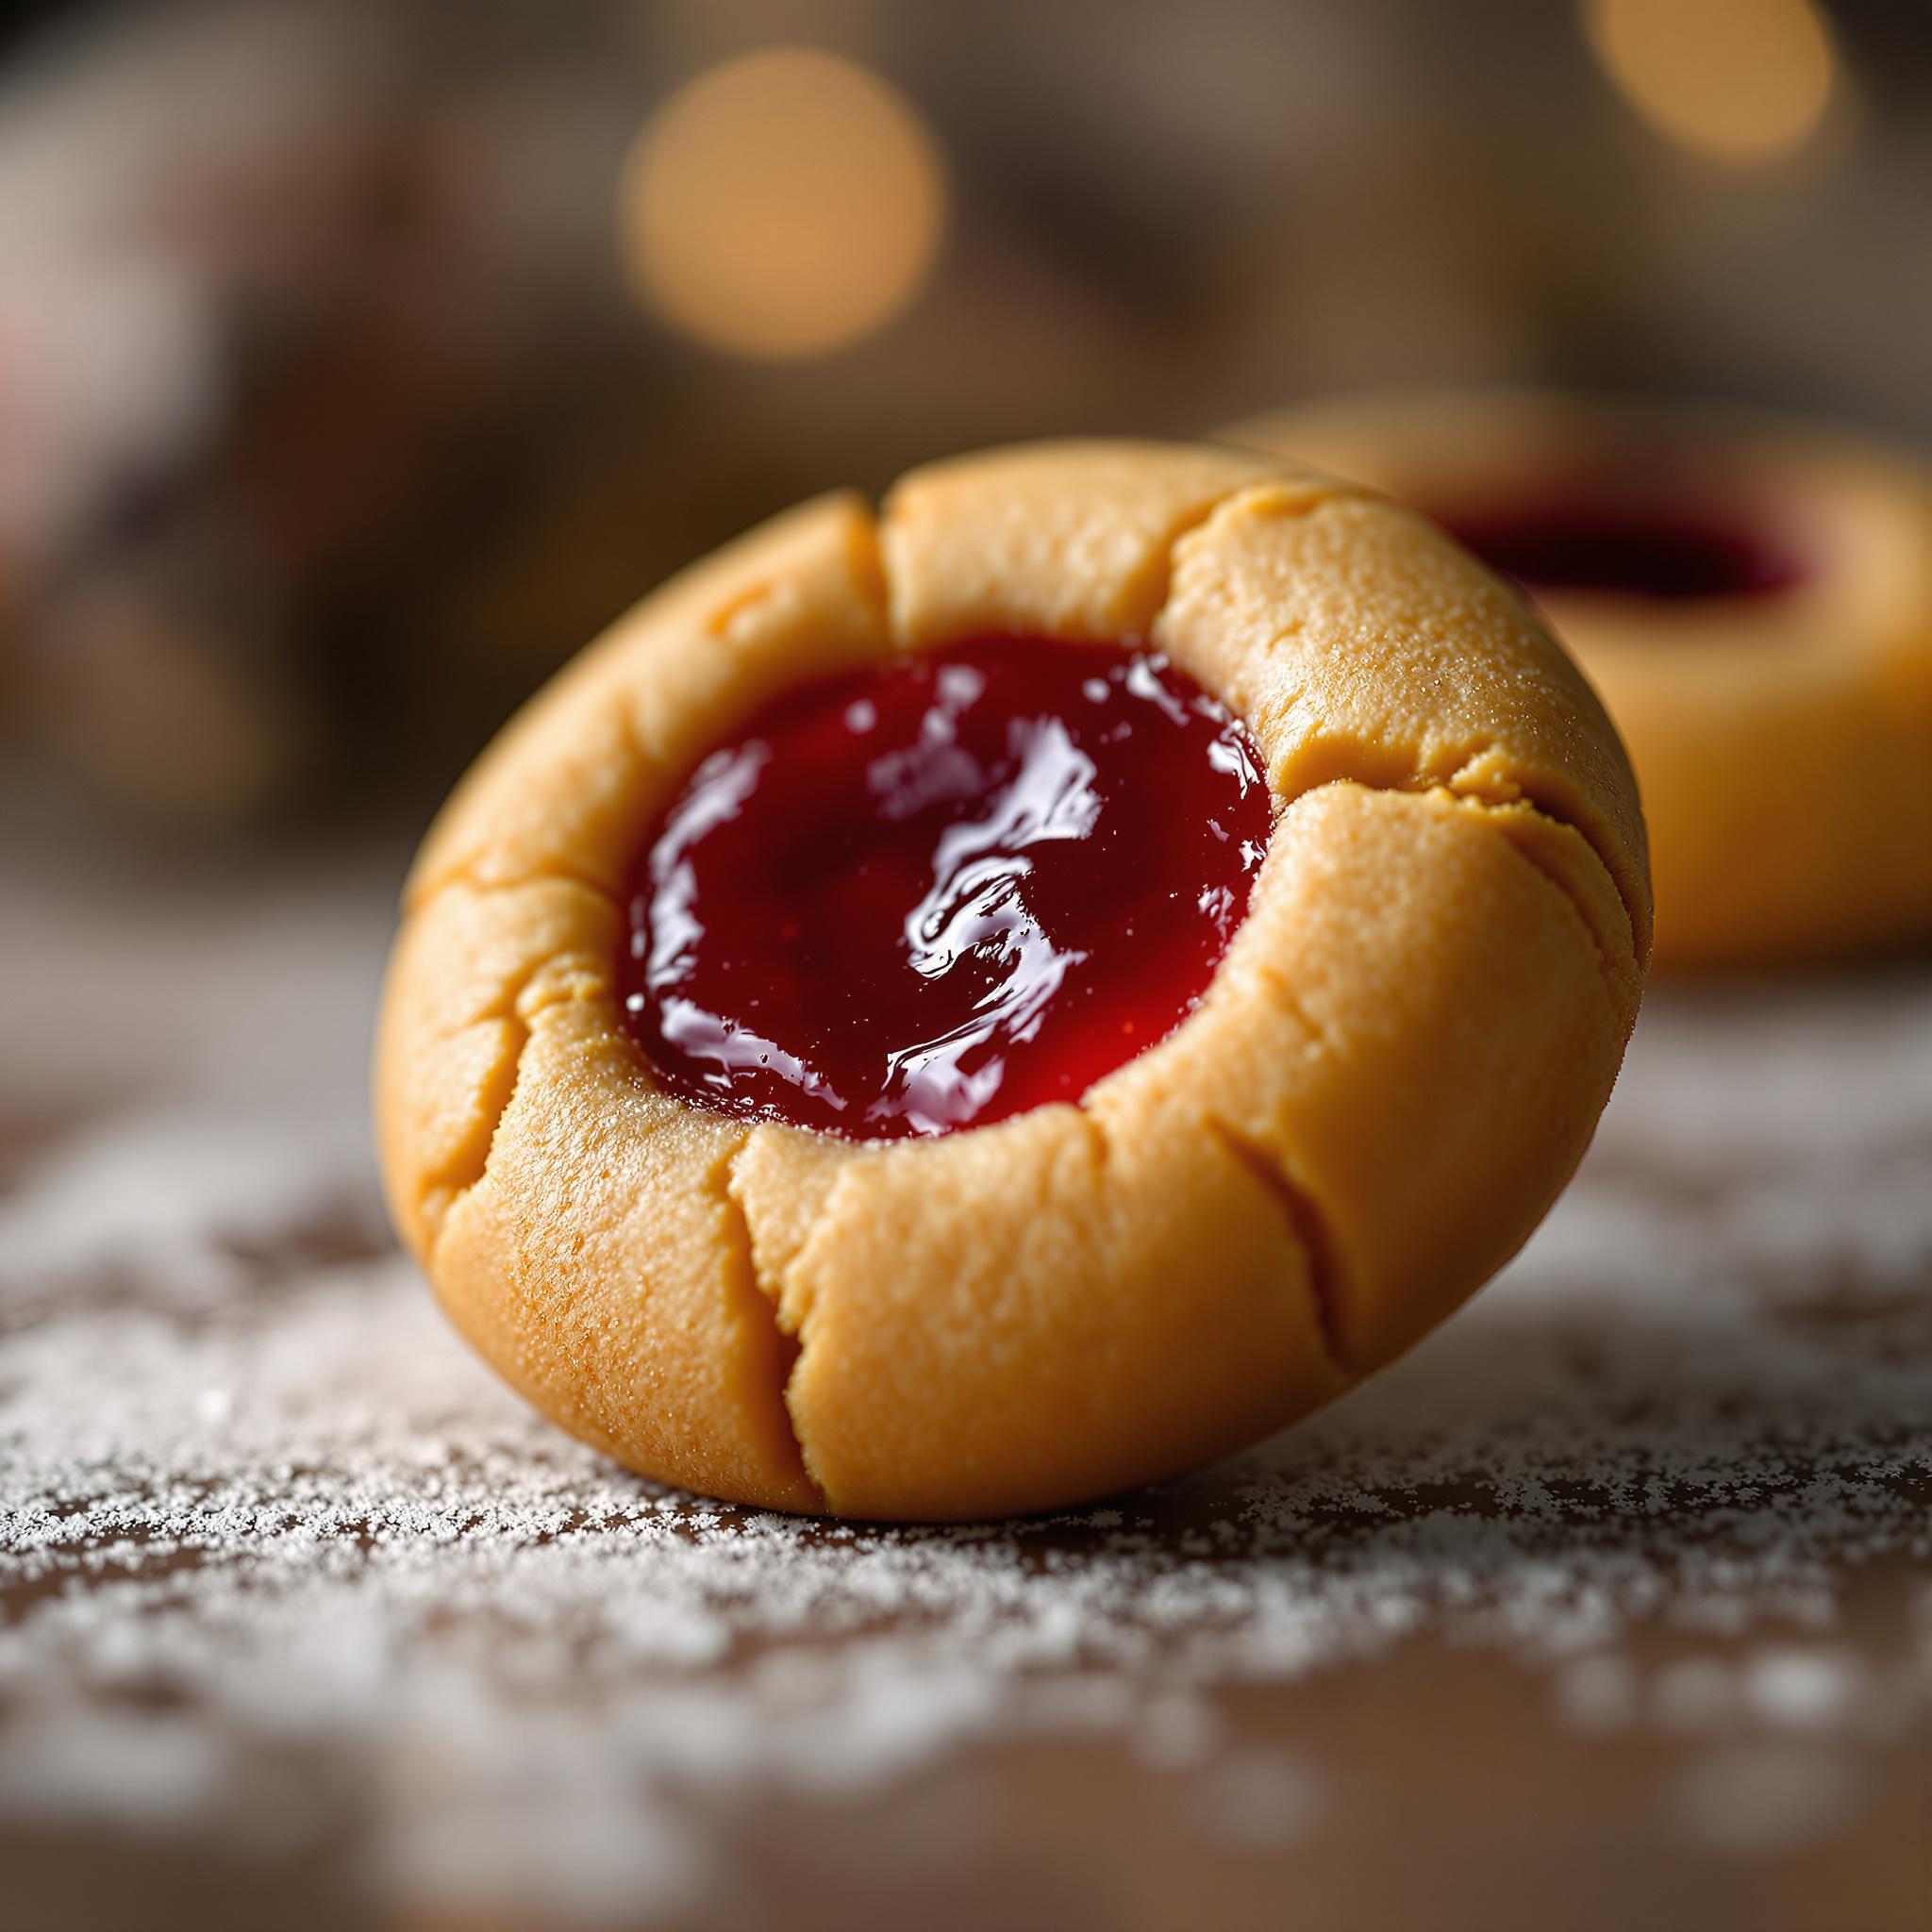
Roll small portions of dough into balls, roughly the size of a walnut. Place them on a lined baking sheet, leaving space between each cookie. Using your thumb or the back of a spoon, gently press an indentation into the center of each ball. Fill each cavity with a dollop of your chosen jam. The contrast between the golden dough and colorful jam is simply irresistible!
Step 5: Baking to Perfection
Bake the cookies in a preheated oven at 350°F (175°C) for 10-12 minutes, or until the edges turn lightly golden. Keep an eye on them—they bake quickly! Once done, let them cool completely before serving. As they cool, the jam sets slightly, creating a glossy finish that looks as good as it tastes.
Chef’s Tip for Perfect Thumbprint Jam Cookies
For an extra touch of elegance, sprinkle a pinch of coarse sugar on top of each cookie before baking. Not only does it add a hint of sparkle, but it also enhances the sweetness without overpowering the jam filling. It’s a small detail that makes a big difference!
Time Required to Prepare Thumbprint Jam Cookies
- Prep Time: 20 minutes
- Cooking Time: 12 minutes per batch
- Resting Time: 15 minutes (optional chilling)
- Total Time: Approximately 45 minutes
Nutritional Information for Thumbprint Jam Cookies
Each cookie contains approximately 120 calories, with 7g of fat, 2g of protein, and 13g of carbohydrates. While they’re certainly a treat, moderation is key. Enjoy them guilt-free by pairing them with a cup of tea or coffee.
Extra Information About Thumbprint Jam Cookies
Did you know that Thumbprint Jam Cookies are sometimes called “Jelly Thumbprints”? Regardless of the name, their appeal lies in their simplicity and versatility. From classic strawberry jam to exotic mango chutney, the possibilities for customization are endless.
Necessary Tools for Making Thumbprint Jam Cookies
- Mixing bowls
- Electric mixer or whisk
- Baking sheets
- Parchment paper
- Spoon or melon baller for shaping
Storage Instructions for Thumbprint Jam Cookies
Once cooled, store your Thumbprint Jam Cookies in an airtight container to maintain freshness. They can last up to a week at room temperature. For longer storage, freeze the unbaked dough balls and bake them whenever you crave a warm, gooey cookie.
If freezing baked cookies, layer them between sheets of parchment paper to prevent sticking. When ready to serve, thaw them at room temperature for a few hours. Freezing doesn’t compromise the taste or texture—in fact, it locks in the flavors beautifully.
Avoid refrigerating baked cookies, as the moisture can make them soggy. Instead, keep them sealed tightly to preserve their crisp edges and soft centers.
Tips and Tricks for Better Thumbprint Jam Cookies
- Use high-quality jam for the best flavor.
- Chill the dough if it becomes too soft to handle.
- Experiment with different jams to discover new favorites.
Serving Suggestions for Thumbprint Jam Cookies
Serve these cookies alongside a steaming mug of hot cocoa for a cozy treat. Alternatively, pair them with a glass of cold milk for a nostalgic snack. For special occasions, arrange them on a tiered dessert stand for an elegant presentation.
Healthier Alternatives for Thumbprint Jam Cookies
Here are six healthier variations of this classic recipe:
- Gluten-Free Version: Substitute all-purpose flour with almond flour or oat flour.
- Vegan Option: Replace butter with plant-based margarine and use flax eggs.
- Low-Sugar Choice:
- Protein-Packed Twist:
- Fruit-Filled Delight:
- Nutty Upgrade:
Use monk fruit sweetener instead of granulated sugar.
Add a tablespoon of protein powder to the dough.
Skip the jam and fill the cookies with diced fresh fruit.
Roll the dough balls in chopped nuts before baking.
Common Mistakes to Avoid When Making Thumbprint Jam Cookies
Mistake 1: Overfilling the Jam
One common mistake is adding too much jam, which causes it to spill over during baking. To avoid this, use just a small teaspoon of jam per cookie. Pro tip: Chill the shaped cookies before filling them to help the jam stay put.
Mistake 2: Skipping the Chilling Step
Skipping the chilling step can lead to flat, spread-out cookies. Always chill the dough if it feels too soft. This ensures your cookies retain their cute thumbprint shape.
Mistake 3: Overbaking
Overbaking can result in dry, crumbly cookies. Keep a close eye on them while they’re in the oven, and remove them as soon as the edges turn golden. Remember, they’ll continue to firm up as they cool.
Frequently Asked Questions About Thumbprint Jam Cookies
Can I use store-bought jam?
Absolutely! Store-bought jam works perfectly fine. Just ensure it’s smooth and seedless for easier piping or spooning.
To prevent cracks, handle the dough gently and avoid overmixing. Also, chilling the dough briefly can help maintain its structure.
Can I freeze the dough?
Yes, you can freeze the dough in individual portions. Simply thaw overnight in the fridge before baking.
What other fillings can I use?
Besides jam, try Nutella, dulce de leche, or even a dollop of cream cheese frosting for variety.
Definitely! Kids love helping shape the cookies and choosing their favorite jam flavors.
Can I make these gluten-free?
Yes, swap out regular flour for a gluten-free alternative to accommodate dietary needs.
Do I need a mixer to make the dough?
No, you can mix the dough by hand, though a mixer speeds up the process significantly.
Stored properly, they remain fresh for up to a week. Freeze for longer storage.
Can I double the recipe?
Of course! Doubling the recipe is a great idea if you’re baking for a crowd or gifting.
Why are they called Thumbprint Cookies?
The name comes from the thumb-shaped indentation used to hold the jam filling. It’s both functional and fun!
Conclusion
Thumbprint Jam Cookies are a delightful addition to any baker’s repertoire. With their rich history, customizable options, and undeniable charm, they’re sure to win hearts wherever they go. Whether you stick to the classic version or explore healthier alternatives, these cookies promise happiness in every bite. So grab your apron, gather your ingredients, and let the baking begin!
Equipment
- Mixing bowl
- Electric mixer
- Baking sheet
- Parchment paper
- Spoon or melon baller
Ingredients
- 1 cup unsalted butter, softened
- 1/2 cup granulated sugar
- 1 large egg yolk
- 1 teaspoon vanilla extract
- 1 3/4 cups all-purpose flour
- 1/4 teaspoon salt
- 1/2 cup assorted fruit jams (strawberry, raspberry, apricot)
Instructions
- Cream together the softened butter and granulated sugar until light and fluffy.
- Beat in the egg yolk and vanilla extract until combined.
- Gradually add the flour and salt, mixing until a soft dough forms.
- Roll dough into balls, press a thumbprint into each ball, and fill with jam.
- Bake at 350°F (175°C) for 10-12 minutes until edges are lightly golden.