
Is This the Ultimate Summer Fruit Salad?
I have to confess that I’ve spent many summers experimenting with fruit salads. They always seemed, well, just a bit boring. You know, a few berries tossed together. But then one lazy Sunday afternoon, while hosting a backyard BBQ for my family, I decided to layer all my favorite juicy fruits in a big, beautiful glass bowl. The result was magic! The colors stacked like a gorgeous sunset, and the flavors blended into something truly special. This layered summer fruit salad instantly became our star dish.
A Little Story Behind the Fruit Bowl
While fruit salads are common everywhere, the idea of a layered one feels like a modern celebration. It’s less about tradition and more about pure joy. My grandmother would make a simple fruit compote, but I wanted something that looked stunning right on the table. This version is my fun, vibrant twist, designed to wow guests and make kids actually eat their fruit! It’s a celebration of the season’s very best bounty.
Why You’ll Absolutely Love This Recipe
This isn’t just a salad; it’s a Ultimate Summer Fruit experience. First, it’s stunningly beautiful. The layered colors are a real showstopper. Second, it’s amazingly easy. There’s no cooking, just chopping and stacking. Third, the taste is incredibly fresh and vibrant. Each fruit brings its own sweet or tart note. And it’s versatile! It works as a healthy breakfast, a refreshing side, or even dessert.
The Perfect Occasions for This Star Salad
This salad shines at any sunny gathering. Think outdoor picnics, pool parties, Fourth of July barbecues, or brunches with friends. It’s also my go-to for a healthy weekday treat when I want a burst of energy. Bringing it to a potluck always earns compliments because it looks so professional yet is so simple.
Ingredients You’ll Need
This recipe is all about variety! You’ll need:
- 1 cup strawberries, hulled and sliced
- 1 cup blueberries
- 1 cup raspberries
- 2 kiwis, peeled and sliced
- 1 cup mango, peeled and diced
- 1 cup pineapple, peeled and diced
- 1 cup watermelon, diced
- 1 cup cherries, pitted and halved
- Fresh mint leaves for garnish
Ingredient Substitution Options
Don’t stress if you don’t have everything! Swap in what’s fresh and available.
- Strawberries: Use blackberries or diced peaches.
- Cherries: Pitted and halved grapes work well.
- Watermelon: Cantaloupe or honeydew melon are great alternatives.
- Mango: Papaya or even diced nectarines can be used.
- Mint Garnish: Fresh basil leaves offer a lovely, herbal twist.
Preparation: Let’s Build Your Masterpiece
Here’s where the fun happens! Follow these steps to create your gorgeous layered salad.
Step 1: Fruit Prep Party
Get all your fruits washed, peeled, and chopped according to the ingredient list. This is the foundation. I love doing this step with my kids. Let the vibrant reds of the strawberries, the deep purple of the blueberries, and the sunny orange of the mango inspire you! Pro tip: Use a melon baller for the watermelon if you want fancy, round shapes. It’s okay if the pieces aren’t perfect; rustic charm is lovely.
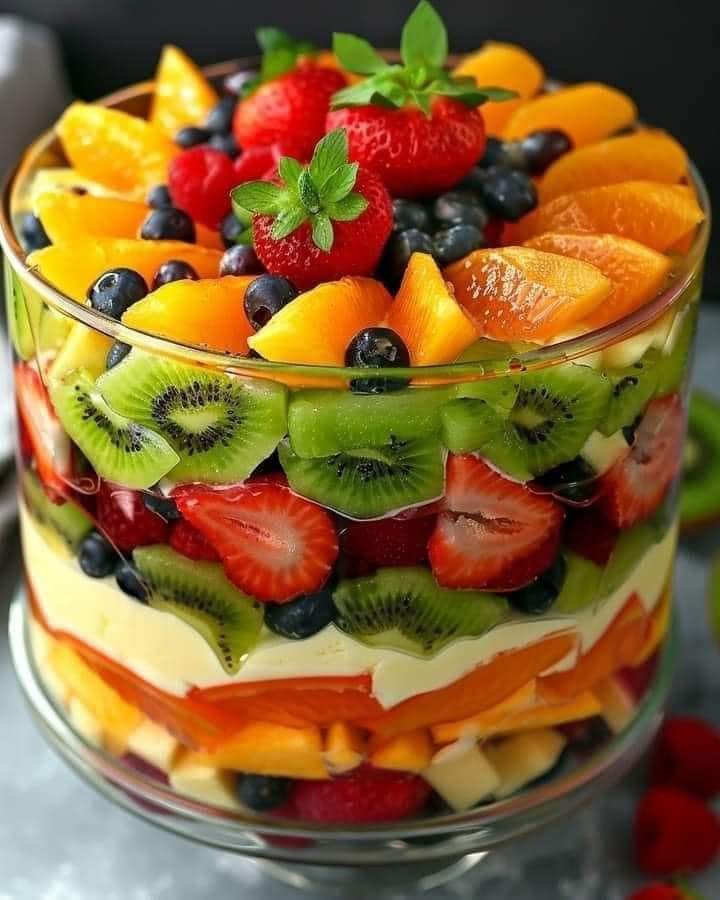
Step 2: The Art of Layering
Choose a clear glass bowl or a trifle dish. You want to see those gorgeous layers! Start with the strawberries. Their red creates a strong base. Then, carefully add a layer of blueberries. Follow with raspberries, then kiwi slices. Continue with mango, pineapple, watermelon, and finally cherries. The goal is to let each color and texture shine separately before they mingle.
Step 3: Repeat and Build
Keep repeating the pattern of layers until all your fruit is used up. The bowl will look spectacularly full and colorful. Don’t press down on the fruit too much; you want a light, airy structure. If your bowl is wide, you might only do one set of layers. Deep bowls allow for stunning repeats.
Step 4: The Finishing Touch
Take a handful of fresh mint leaves. Gently place them on the very top layer of your salad. The green mint provides a beautiful color contrast and adds a fresh aroma that complements all the sweet fruits. It’s the bouquet on your edible gift!
Step 5: The Essential Chill Time
Place your finished masterpiece in the refrigerator. Let it chill for at least one hour. This step is crucial. It allows the juices from the different fruits to start mingling ever so slightly at the edges, creating a natural, light syrup. It also makes the salad incredibly refreshing to eat.
Time Needed
Prep Time: 20 minutes
Chill Time: 1 hour
Total Time: 1 hour 20 minutes
Chef’s Secret
My secret is the **layer order**. I always start with firmer fruits (like strawberries and pineapple) at the bottom. I put the most delicate fruits (like raspberries) and juicier ones (like watermelon) in the middle or top. This prevents the bottom from getting soggy and keeps the structure beautiful until serving.
A Fruitful Fact
Did you know that the act of layering fruits actually helps preserve their individual textures better than tossing them all together? The berries don’t get crushed by heavier pieces. This method was a happy accident in my kitchen, but it turns out it’s a smart technique!
Necessary Equipment
- A large, clear glass bowl or trifle dish
- A sharp knife for chopping
- A cutting board
- A melon baller (optional, for fun shapes)
- Measuring cups
How to Store Your Salad
Leftovers can be stored covered in the refrigerator for up to 24 hours. The salad will become slightly more juicy as it sits, but it will still taste delicious. It’s best consumed the same day for optimal texture and color.
For longer storage, consider keeping the cut fruits separate in airtight containers in the fridge for 1-2 days and then layering them just before your event. This keeps everything crisp.
Unfortunately, this salad does not freeze well due to the high water content in fruits like watermelon and oranges. Freezing will ruin the texture, making it mushy upon thawing.
Tips and Advice
- Always use the freshest fruits you can find. A ripe, in-season peach is infinitely better than a hard, unripe one.
- If you need to prepare this ahead for a party, do all the chopping and keep fruits in separate containers. Assemble the layers about an hour before guests arrive.
- A sprinkle of lime zest over the top (just before serving) can add a wonderful, bright tang.
Presentation Ideas to Impress
- Serve it in individual clear glasses for a personal, elegant touch.
- Top with a very light drizzle of honey or a sprinkle of toasted coconut flakes right before serving.
- For adult gatherings, a splash of champagne or a drizzle of balsamic glaze over the top can transform it into a sophisticated dessert.
Healthier Alternatives and Variations
Want to mix it up? Here are six fantastic ideas!
- Citrus Twist Salad: Swap berries for segments of orange, grapefruit, and blood orange. Add pomegranate seeds for crunch.
- Tropical Paradise Bowl: Focus on tropical fruits. Use mango, pineapple, papaya, starfruit, and lychee. Garnish with toasted macadamia nuts.
- Herb-Infused Salad: Add finely chopped fresh basil or tarragon between the layers for an unexpected, fragrant flavor.
- Protein-Packed Salad: After layering, top the salad with a dollop of Greek yogurt or a sprinkle of chia seeds for a breakfast boost.
- Spiced Fruit Salad: Sprinkle a tiny amount of chili-lime seasoning or Tajín over the top for a sweet-and-spicy kick.
- No-Sugar Added Dessert: Serve the salad with a side of rich chocolate caramel cheesecake for a decadent yet fruit-forward dessert pairing.
Common Mistakes to Avoid
Mistake 1: Using Overripe or Underripe Fruit
This mistake happens when we grab whatever fruit is available without checking its readiness. Overripe fruit will be mushy and can make the whole salad soggy. Underripe fruit will be hard and lack sweetness. To avoid this, pick fruits that are just perfectly ripe. They should have a slight give when gently pressed and full color. Your salad’s success depends entirely on the quality of its stars.
Mistake 2: Skipping the Chill Time
We get excited and want to serve the salad immediately. But skipping the refrigerator rest means the flavors won’t meld, and the salad won’t be refreshingly cool. The chill time is not optional; it’s essential. It lets the natural juices mix a bit and brings the temperature down for that perfect summer bite. Plan ahead and build in that hour.
Mistake 3: Rough Tossing Instead of Gentle Layering
The point of this recipe is the beautiful, distinct layers. If you just dump all the fruit in and stir it, you’ll crush delicate berries and create a messy, juicy mixture instead of a structured salad. Take your time. Place each fruit type gently, one after the other. The visual appeal is half the fun!
Mistake 4: Adding Extra Sugar or Syrup
Many people think a fruit salad needs a sweet syrup. But with ripe, in-season fruits, their own sugar is perfect! Adding extra sugar or honey (except as a final tiny drizzle for presentation) can make the salad overly sweet and mask the natural flavors. Trust the fruit. If it’s ripe, it will be sweet enough on its own.
Frequently Asked Questions
Can I make this Ultimate Summer Fruit salad ahead of time?
Yes, you can prepare it up to 2 hours ahead of time. For best results, chop all the fruits and store them separately in airtight containers in the refrigerator. Then, layer them in the bowl about 1 hour before you plan to serve. This keeps the textures perfect and prevents the bottom layers from getting too soggy from the juices of the top fruits. If you must layer it fully ahead, expect it to be more juicy but still delicious after 3-4 hours.
What’s the best way to pit cherries quickly?
A cherry pitter tool is the fastest and cleanest method. If you don’t have one, you can use a straw or a small piping tip. Push the straw or tip through the stem end of the cherry to pop the pit out from the bottom. You can also carefully slice the cherry in half with a knife and pop the pit out with your fingers. Just wear an apron because cherry juice can stain!
Can I use frozen fruit for this layered salad?
I don’t recommend using frozen fruit for this specific layered presentation. Frozen fruit is often softer and releases a lot of water as it thaws. This would make your salad very watery and the layers would collapse. Frozen fruit is great for smoothies or cooked sauces, but for a fresh, beautiful salad like this, always opt for fresh, ripe produce.
My fruit salad got watery after a few hours. Is that normal?
Yes, that is completely normal and expected. Fruits like watermelon, pineapple, and oranges contain a lot of natural water. As the salad sits, these juices will gently release and pool at the bottom, creating a light, natural syrup. This isn’t a bad thing! It’s part of the process. Just serve it with a spoon to scoop up some of that delicious juice too.
Can I add bananas to this Ultimate Summer Fruit salad?
I advise against adding bananas to a salad you plan to store or serve later. Bananas brown very quickly and can become mushy, affecting the look and texture of the other fruits. If you love bananas, add them only at the very last minute before serving, and just on the top layer where they can be seen and eaten quickly.
Is there a low-carb or diabetic-friendly version?
You can make a lower-sugar version by focusing on fruits with a lower glycemic index. Berries like strawberries, blueberries, and raspberries are excellent choices. You could also include more watermelon and kiwi. Avoid or reduce high-sugar fruits like mango, pineapple, and very sweet cherries. Always consult with a healthcare provider for personalized dietary advice.
What can I serve with this fruit salad?
This salad is wonderful on its own! But it also pairs beautifully with savory brunch items like quiche or scrambled eggs. For dessert, serve it alongside a light peach cream cheesecake bar. For a party, it complements grilled meats and lemon garlic cod perfectly by offering a fresh, sweet contrast.
How do I keep the mint garnish from wilting?
Add the mint garnish just before serving, not when you first assemble the salad to chill. The cold air and moisture in the fridge can make the mint leaves wilt or turn dark. Keep your mint sprigs in a small glass of water on the counter while the salad chills. Then, right before you bring the bowl out, place the fresh, perky leaves on top.
Can I make this recipe for a large crowd?
Absolutely! This recipe scales up wonderfully. Simply multiply the ingredients by the number of guests. Use a very large, clear punch bowl or multiple trifle dishes. Layering in a big bowl creates a stunning centerpiece for a buffet table. Remember to keep your safe food handling practices in mind when preparing large quantities, especially keeping cut fruits properly chilled.
What other fresh herbs work besides mint?
Basil is a fantastic alternative, especially if you use tropical fruits. Its sweet, slightly peppery flavor pairs wonderfully. Lemon thyme or even a bit of finely chopped rosemary can add an interesting and sophisticated twist. Start with a small amount, as herbs can be strong. For a fun, refreshing kick, try adding some microgreens like shiso or cilantro on top.
This layered Ultimate Summer Fruit salad is truly a no-fuss, stunning dish. It’s the kind of recipe that proves simple ingredients, prepared with a little care, can be spectacular. For more ideas on easy, no-cook dishes that impress, explore our collection of no-bake recipes that are perfect for hot days.
Your Summer Celebration Bowl
So, is this the ultimate summer fruit salad? In my family’s opinion, yes! It captures the season’s brightness in every layer. It’s healthy, it’s fun to make, and it never fails to bring smiles. Whether you’re enjoying it on a quiet morning or sharing it at a big celebration, this salad is a taste of summer sunshine. Grab your favorite fruits, a pretty bowl, and start stacking. Your ultimate summer treat is waiting.
Equipment
- Grand bol
- Fouet
- Spatule
- Plaque à pâtisserie
- Papier sulfurisé
Ingredients
- 1 tasse fraises, équeutées et tranchées
- 1 tasse myrtilles
- 1 tasse framboises
- 2 kiwis, pelés et tranchés
- 1 tasse mangue, pelée et coupée en dés
- 1 tasse ananas, pelé et coupé en dés
- 1 tasse pastèque, coupée en dés
- 1 tasse cerises, dénoyautées et coupées en deux
- q.s. feuilles de menthe pour garniture
Instructions
- Lavez, peliez et hachez tous les fruits selon la liste des ingrédients.
- Choisissez un grand bol en verre transparent ou un plat à trifle pour les couches.
- Commencez à superposer les fruits : fraises, myrtilles, framboises, kiwi, mangue, ananas, pastèque et cerises.
- Répétez le motif de superposition jusqu'à ce que tous les fruits soient utilisés, en veillant à ce que la structure reste légère et aérée.
- Ajoutez des feuilles de menthe fraîches pour la garniture.
- Réfrigérez pendant au moins une heure avant de servir.
Notes
Nutrition

Hi, I’m Olivia Parker, the founder of BakingSecret.com and a lifelong lover of all things sweet and homemade. I grew up in a small town in Oregon, where the smell of fresh cookies in my family’s kitchen sparked my passion for baking. Over the years, I turned that passion into a mission: to help home bakers feel confident, inspired, and creative.
After studying food science and working in several artisan bakeries across the U.S., I decided to create a space where everyone from beginners to seasoned bakers can find reliable recipes, expert tips, and a warm, welcoming community. BakingSecret.com is my way of sharing the magic of baking with the world. When I’m not testing new recipes, you’ll find me exploring farmers’ markets, collecting vintage cookbooks, or perfecting my sourdough technique.