
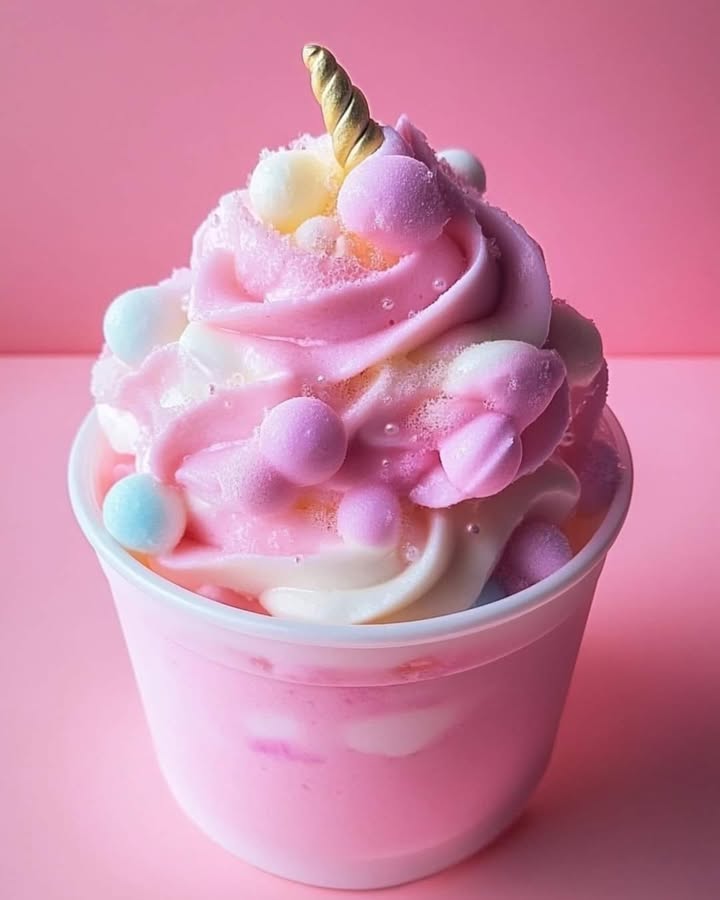
The Magic of Unicorn Cotton Candy Mousse: A Dream Dessert!
Have you ever stared at a fluffy cloud of cotton candy and wished you could turn it into a dessert you could actually eat with a spoon? I know I have! That whimsical dream is exactly what inspired me to create this Unicorn Cotton Candy Mousse. It all started when my niece asked for a “rainbow cloud” cake for her birthday. I wanted something magical, light, and bursting with fun. After a few playful (and delicious) experiments in my kitchen, this fantastical mousse was born. It’s not just a dessert; it’s a little jar of pure joy that makes everyone smile.
A Sweet Spell: The Story Behind Unicorn Desserts
Unicorn-themed treats exploded onto the food scene a few years ago, bringing with them a wave of pastel colors and edible glitter. They tap into our love for fantasy and pure, unadulterated fun. This mousse is my modern, no-bake twist on that trend. While traditional mousses might focus on chocolate or fruit, this one captures the nostalgic flavor of a county fair in a sophisticated, creamy form. It’s a perfect example of how playful baking can be—mixing a classic dessert technique with a totally whimsical flavor.
Why You Will Adore This Magical Mousse Recipe
You will love this recipe because it’s surprisingly simple, yet the result looks like you spent hours in a fairy-tale kitchen. The texture is incredibly light and airy, melting on your tongue like sweet magic. The best part? The hidden fruit jelly center, which adds a delightful, tangy surprise that cuts through the sweetness. It’s a dessert that appeals to both kids and adults instantly. Plus, there’s no baking involved, so it’s perfect for hot days or when you just don’t want to turn on the oven!
When to Whip Up This Whimsical Treat
This Unicorn Cotton Candy Mousse is your secret weapon for any event that needs a dash of enchantment. It’s a showstopper at birthday parties, especially unicorn or rainbow-themed ones. Imagine serving these in clear glasses at a baby shower or bridal shower for a touch of feminine charm. They also make fantastic, fun desserts for a family movie night or a sleepover. Honestly, any day that needs brightening is a perfect day for this colorful creation.
What You’ll Need for Your Unicorn Cotton Candy Mousse
- 1 cup heavy cream, cold
- ½ cup cotton candy syrup
- ½ cup instant vanilla pudding mix (dry powder)
- Pastel rainbow food coloring (pink, purple, blue, yellow)
- Edible gold stars
- Cotton candy for garnish
- Fruit jelly cups (like peach or strawberry), chopped, for the surprise center
Easy Swaps for Your Pantry
No cotton candy syrup? No problem! You can use ¼ cup of marshmallow fluff mixed with ¼ cup of simple syrup. For a dairy-free version, use full-fat coconut cream chilled overnight. The instant pudding mix is key for stability, but you could try using 2 tablespoons of powdered sugar and ½ teaspoon of cream of tartar if you’re in a pinch. For the jelly center, any small, soft candy or even fresh raspberries would be a lovely fruity burst.
Crafting Your Cloud: Step-by-Step Instructions
Step 1: Whip the Cream to Stiff Peaks
Pour your cold heavy cream into a large, clean mixing bowl. Using a hand mixer or stand mixer, start whipping on medium speed. Watch as the cream transforms from liquid to frothy, then to soft peaks that barely hold their shape. Keep going until you see stiff peaks that stand straight up when you lift the beaters. This firm foundation is what will hold all our magical fluff together. Pro tip: Chill your bowl and beaters in the freezer for 10 minutes beforehand for even faster, better results.
Step 2: Gently Fold in the Flavor
Now, add the cotton candy syrup and the dry vanilla pudding mix to the whipped cream. Using a large rubber spatula, gently fold these in. “Folding” means you cut down through the center of the bowl, scoop along the bottom, and bring it up and over the top. Repeat just until the mixtures are fully combined. You want to keep as much of that wonderful air in the cream as possible. Over-mixing will deflate your cloud, so be gentle and patient.
Step 3: Create Your Rainbow Colors
Divide the pale, fluffy mousse into four or five smaller bowls. This is where the magic really starts! Add a drop or two of a different pastel food coloring to each bowl. Use a spoon to gently swirl the color in. I love using soft pink, lavender, sky blue, and a touch of buttery yellow. Seeing those separate, beautiful clouds of color is so satisfying. Let the kids help with this part—they are the best at choosing the rainbow!
Step 4: Layer the Mousse for a Vibrant Effect
Grab your clear glasses or jars. Using a spoon or a piping bag without a tip, start layering the colored mousse. Drop a spoonful of pink into the bottom, then gently top it with purple, then blue. Don’t press down; let the colors rest softly on top of each other. The goal is distinct, whimsical stripes that look like a layered rainbow. Using clear vessels shows off this beautiful effect perfectly.
Step 5: Add the Fruity Surprise Center
Here comes the fun secret! Take a small spoonful of your chopped fruit jelly. Make a little well in the center of your mousse layers with the back of a spoon. Carefully nestle the jelly right in the middle. Then, cover it up with a final dollop of mousse. When someone takes a spoonful, they’ll get the creamy mousse and then a burst of bright, fruity flavor. It’s a little surprise that makes this dessert truly special.
Step 6: Top with Magical Garnishes
No unicorn dessert is complete without a bit of sparkle! Right before serving, crown each mousse with a small, fluffy puff of cotton candy. Immediately sprinkle a few edible gold stars over the top. The contrast of the soft pastel mousse, the fluffy pink cloud on top, and the shiny stars is absolutely magical. This step makes it feel like a real celebration.
Step 7: Serve and Savor the Magic
Your masterpiece is ready! Serve these immediately so the cotton candy garnish stays fluffy. Hand them out to your eager guests and watch their faces light up. The first spoonful is always met with “oohs” and “ahhs.” The mousse is light as air, sweet like childhood memories, and the fruity jelly center adds the perfect tangy contrast. It’s a dessert experience, not just a dish.
Chef’s Tip
For the most magical presentation, use cotton candy in different pastel colors that match your mousse layers. A mix of pink, blue, and purple cotton candy on top looks absolutely enchanting and ties the whole rainbow theme together.
Time to Make the Magic
Prep Time: 25 minutes
Chill Time: 1 hour (optional, for a firmer set)
Total Time: 25 minutes (plus chilling)
Servings: 4-6
The Secret to Perfect Peaks
The real secret is in the cream. Always, always use heavy cream that is very cold. The fat content is what allows it to whip up thick and hold its shape. If your kitchen is warm, place your mixing bowl over a larger bowl filled with ice water while you whip. This little trick guarantees you’ll get those perfect, stiff peaks every single time, giving your mousse the structure it needs.
A Fun Fact About Cotton Candy
Did you know cotton candy was actually invented by a dentist? Well, a dentist named William Morrison teamed up with a confectioner in 1897. They created a machine that melted sugar and spun it into fine strands. They first called it “Fairy Floss.” It reminds us that sometimes the sweetest things in life come from the most unexpected places!
Tools You’ll Need
- Large mixing bowl
- Hand mixer or stand mixer
- Rubber spatula
- Several small bowls for coloring
- Clear glasses or small jars for serving
- Spoons for layering
How to Store Your Leftover Magic
If you have any leftovers (a rare event!), you can store them covered in the refrigerator for up to 2 days. The mousse will stay perfectly delicious, though the cotton candy garnish will dissolve into the top, creating a lovely swirled effect.
The fruit jelly center might release a little moisture over time, but this won’t affect the taste. Simply give it a gentle stir if needed before eating the next day.
I do not recommend freezing this mousse, as the whipped cream can become grainy and separate when thawed. It’s truly best enjoyed fresh, the day it’s made.
My Top Tips for Success
- Color Gradually: Start with one drop of food coloring per bowl. You can always add more to brighten the shade, but you can’t take it away!
- Chill Your Glasses: For an extra-fancy touch, chill your serving glasses in the freezer for 15 minutes before assembling. This helps the mousse stay cool longer.
- Prep the Jelly: Chop your fruit jelly into small, bite-sized pieces so it’s easy to spoon into the center and eat.
- Make it Ahead: You can make the mousse (without garnishes) up to 4 hours ahead. Keep it covered in the fridge, then add the cotton candy and stars just before serving.
Presentation Ideas to Impress
- Serve on a platter decorated with edible flowers and rainbow sprinkles.
- Use vintage soda fountain glasses for a nostalgic fairground feel.
- For a party, line them up on a table with a sign that says “Unicorn Clouds.”
- Add a “unicorn horn” by placing a pirouette cookie or a waffle cone piece on the side.
Healthier & Fun Variations to Try
Want to mix it up? Here are six delightful twists on this Unicorn Cotton Candy Mousse:
- Berry Swirl: Instead of jelly in the center, fold a few tablespoons of pureed and strained raspberries or strawberries into half of the plain mousse for a swirled pink layer.
- Citrus Zing: Add a teaspoon of lemon or orange zest to the mousse base for a bright, fresh flavor that pairs wonderfully with the sweet cotton candy.
- Chocolate Drizzle: Drizzle the inside of your glass with melted white chocolate before adding the mousse. It adds a subtle chocolate note and looks beautiful.
- Coconut Dream: Use coconut cream instead of heavy cream and add a drop of coconut extract. Garnish with toasted coconut flakes for a tropical unicorn treat.
- Matcha Green Layer: Make one of your colored layers with matcha powder instead of food coloring for an earthy, elegant twist. It pairs surprisingly well with the sweetness.
- Mermaid Theme: Use shades of sea green, blue, and purple food coloring. Garnish with blue sanding sugar and a seashell candy for an under-the-sea version.
If you love no-fuss, impressive desserts like this, you’ll find so much inspiration in our complete collection of effortless no-bake recipes.
Common Mistakes to Avoid
Mistake 1: Over-whipping the Cream
It’s easy to get distracted and whip the cream for too long. This turns your beautiful, smooth whipped cream into grainy, over-whipped cream that’s starting to look like butter. Once it gets to that point, you can’t really fix it for this mousse. To avoid this, stop your mixer as soon as the cream forms stiff peaks that stand straight up. If you see the texture looking clumpy or hear a sloshing sound, you’ve gone too far. When in doubt, stop a little early—you can always whip a bit more.
Mistake 2: Stirring Instead of Folding
When you add the syrup and pudding mix, the instinct is to just stir it in. But vigorous stirring will knock all the air out of your whipped cream, leaving you with a dense, runny mixture instead of a light, fluffy mousse. Always use a folding technique with a spatula. Be gentle and patient, and mix just until no white streaks remain. This keeps the air bubbles intact for that perfect cloud-like texture.
Mistake 3: Adding Garnishes Too Early
Putting the cotton candy and gold stars on top right after you assemble the mousse is a recipe for disappointment. The cotton candy will quickly melt and dissolve from the moisture of the mousse, leaving you with a soggy, colored top. Always add these final, magical garnishes literally seconds before you serve the dessert. This way, the cotton candy is fluffy, the stars are shiny, and the presentation is absolutely perfect.
Mistake 4: Using Warm Ingredients
If your heavy cream isn’t cold from the fridge, or if your mixing bowl is warm, your cream simply won’t whip up properly. It might stay liquidy or take forever to form peaks. Always start with cold cream straight from the refrigerator. For an extra boost, pop your bowl and beaters in the freezer for 10-15 minutes before you start. A cold environment is the whipped cream’s best friend.
Frequently Asked Questions
Can I make this Unicorn Cotton Candy Mousse ahead of time?
Yes, you can definitely prepare parts of it ahead! The mousse itself can be made, colored, and layered into the glasses up to 4-6 hours before serving. Cover the glasses tightly with plastic wrap and store them in the refrigerator. The only thing you should NOT do ahead is add the cotton candy and gold star garnishes. Add those literally right before you hand the desserts to your guests. This keeps the cotton candy fluffy and magical, not melted.
I can’t find cotton candy syrup. What’s a good substitute?
Don’t worry, this happens! A great substitute is to use ¼ cup of marshmallow fluff (the stuff in the jar) mixed well with ¼ cup of simple syrup or even light corn syrup. This combination gives you that signature sweet, vanilla-cotton candy flavor. You could also use a clear vanilla syrup or even a raspberry syrup for a different fruity twist. The key is to keep the liquid amount similar so your mousse doesn’t get too thin.
Why do I need to add instant pudding mix? Can I skip it?
The instant pudding mix is a clever thickener and stabilizer. It helps the mousse set firmly so it holds its beautiful layers in the glass. If you skip it, you’ll have a delicious but much softer whipped cream that might weep or collapse after a short time. If you really need to avoid the pudding mix, you could try using a tablespoon of powdered gelatin bloomed in a little water, but the pudding mix is the easiest and most reliable method for this particular recipe’s texture.
What kind of food coloring is best for the pastel rainbow effect?
Gel food coloring is my top choice because it’s highly concentrated, so you only need a tiny drop to get vibrant color without adding extra liquid. Liquid food coloring works too, but you might need a few more drops. For the perfect “unicorn” or pastel look, use the very tip of a toothpick to pick up just a speck of gel color. You can always add more, but you can’t take it away! Start with pinks, purples, blues, and a tiny touch of yellow for a classic rainbow.
Can I make a dairy-free or vegan version of this mousse?
Absolutely! For a dairy-free version, use a full-fat canned coconut cream that has been chilled overnight. Scoop out only the solid cream that rises to the top and whip it just like heavy cream. The cotton candy syrup and pudding mix are usually vegan, but always check the labels. For the pudding mix, find a vegan instant variety or use a stabilizer like agar-agar. The result will be a slightly coconut-flavored, wonderfully fluffy vegan cloud!
My mousse turned out a bit runny. What did I do wrong?
A runny mousse usually points to one of two issues: the cream wasn’t whipped to stiff enough peaks, or the heavy cream itself didn’t have a high enough fat content (look for “heavy whipping cream” with around 36% fat). Another possibility is that it got too warm while you were folding. Make sure all your ingredients are cool, and whip that cream until it’s really firm. If it’s already runny, you can try folding in a little more dry pudding mix to help it thicken up as it chills.
Is there a way to make this less sweet?
The cotton candy flavor is inherently very sweet. To balance it, you can reduce the cotton candy syrup by a tablespoon or two. More importantly, lean into the tangy fruit jelly center. Use a tart jelly flavor like raspberry, blackberry, or lemon curd. The sharp contrast will make the sweet mousse taste more balanced overall. You could also use unsweetened whipped cream and rely solely on the syrup for sweetness.
Can I use homemade whipped cream instead of store-bought?
This recipe *is* homemade whipped cream! You are making the whipped cream from scratch using heavy cream. That’s the base of the entire mousse. The “store-bought” element people sometimes think of is the Cool Whip type product. I strongly recommend using real heavy cream you whip yourself—it tastes far superior and gives you much more control over the final texture and sweetness.
What’s the best way to layer the colors without them mixing?
The secret is a light touch. Use a spoon or a piping bag to gently dollop each color into the center of the glass. Let the weight of the mousse spread it out naturally. Don’t press down or try to smooth it flat with a spoon, as this will cause the colors to blend at the edges. It’s okay if they touch a little—a soft gradient is pretty! For very defined lines, you can chill the glass for 10 minutes between adding each color.
Are the edible gold stars necessary? Where do I find them?
They’re not necessary for taste, but they add a huge “wow” factor for the magical unicorn theme! You can find edible gold stars, glitter, or dust in the baking aisle of most large craft stores (like Michaels or Hobby Lobby) or online. If you don’t have them, you can garnish with rainbow sprinkles, mini marshmallows, or even a fresh berry. The goal is just that little extra bit of special decoration. Remember to always use decorations labeled “edible” for safety, and be mindful of practices to avoid cross contamination when handling food decorations.
Ready for a Sprinkle of Magic?
So there you have it—your guide to creating a dessert that’s pure, joyful magic. This Unicorn Cotton Candy Mousse is more than just a recipe; it’s a chance to play, to create something beautiful, and to share a moment of wonder with the people you love. It proves that the best baking (or no-baking!) comes from a place of fun. So grab your mixer, pick your favorite pastel colors, and whip up a little bit of edible happiness today. I promise the smiles it creates will be the sweetest part of all.
Equipment
- Grand bol
- Fouet
- Spatule
- Verres transparents
- Cuillère
Ingredients
- 1 tasse crème épaisse, froide
- ½ tasse sirop de sucre à barbe à papa
- ½ tasse mélange de pouding à la vanille instantanée (poudre sèche)
- colorants alimentaires pastel arc-en-ciel (rose, violet, bleu, jaune)
- étoiles dorées comestibles
- q.s. barbe à papa pour la garniture
- à votre goût coupe de gelée de fruits (comme pêche ou fraise), hachée, pour le centre surprise
Instructions
- Portez la crème épaisse froide dans un grand bol et fouettez jusqu'à obtenir des pics fermes.
- Incorporez délicatement le sirop de sucre à barbe à papa et le mélange de pouding à la vanille sèche.
- Divisez la mousse dans de petits bols et incorporez différents colorants alimentaires pastel en effectuant des mouvements de tourbillon.
- Disposez la mousse colorée en couches dans des verres transparents sans tasser.
- Ajoutez les morceaux de gelée de fruits au centre des couches de mousse.
- Terminez par une boule de barbe à papa et parsemez d'étoiles dorées comestibles.
- Servez immédiatement pour profiter de la garniture de barbe à papa aérienne.
Notes
Nutrition

Hi, I’m Olivia Parker, the founder of BakingSecret.com and a lifelong lover of all things sweet and homemade. I grew up in a small town in Oregon, where the smell of fresh cookies in my family’s kitchen sparked my passion for baking. Over the years, I turned that passion into a mission: to help home bakers feel confident, inspired, and creative.
After studying food science and working in several artisan bakeries across the U.S., I decided to create a space where everyone from beginners to seasoned bakers can find reliable recipes, expert tips, and a warm, welcoming community. BakingSecret.com is my way of sharing the magic of baking with the world. When I’m not testing new recipes, you’ll find me exploring farmers’ markets, collecting vintage cookbooks, or perfecting my sourdough technique.