
Why This Red Velvet Cheesecake Steals the Show
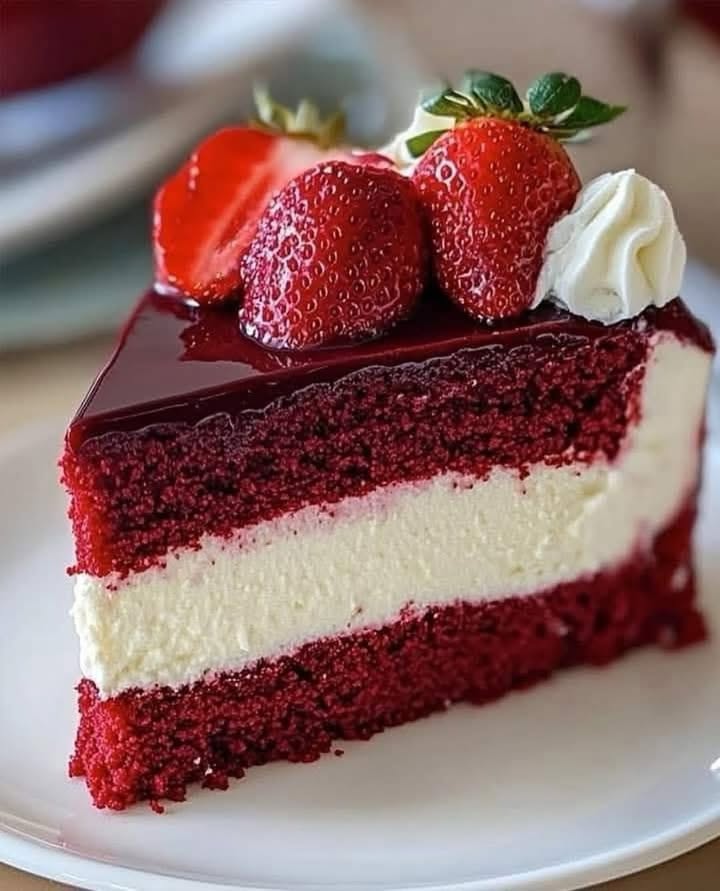
Let me tell you about the time I first made this **Velvet Strawberry Cheesecake** for my best friend’s birthday. It was one of those moments where everyone at the table stopped mid-conversation, forks in hand, just to marvel at the dessert. The rich red velvet layers mingled with creamy cheesecake, topped with juicy strawberries—it felt like a celebration on a plate. What makes this dish so special is how it combines textures and flavors: soft, sweet, tangy, and indulgent all at once. Trust me, it’s not just a dessert; it’s an experience.
A Little History Behind the Magic
Red velvet cake has been around since the early 1900s, gaining fame in the United States as a Southern classic. Its deep red color comes from cocoa reacting with buttermilk or vinegar, though these days we often rely on food coloring for that vibrant hue. Cheesecake, on the other hand, dates back to ancient Greece, where it was served at athletic events. Fast forward to today, and combining these two iconic desserts feels like culinary destiny. When I added fresh strawberries into the mix, it became my signature twist—a nod to modern tastes while honoring tradition.
Why You’ll Love This Recipe
This recipe checks all the boxes: it’s decadent yet simple enough for home bakers, even if you’re new to layered cakes. The cream cheese filling is velvety smooth, while the red velvet adds a hint of chocolatey richness. Fresh strawberries bring brightness and balance to every bite. Plus, assembling this beauty doesn’t require fancy tools—just your mixing bowls and a little patience. Whether you’re baking for yourself or impressing guests, this Velvet Strawberry Cheesecake will earn rave reviews.
Perfect Occasions to Whip Up This Dessert
From Valentine’s Day to summer picnics, this cheesecake fits right in. Imagine slicing into it during holiday gatherings, bridal showers, or even casual family dinners. It’s also perfect for birthdays because who wouldn’t want a slice of something so visually stunning? I’ve served it at book club meetings too, and let’s just say no one wanted to leave without asking for seconds—or the recipe!
Ingredients You’ll Need
- 1 cup fresh strawberries, halved
- 2 cups softened cream cheese
- 1 cup granulated sugar
- 1 teaspoon vanilla extract
- 1 cup red velvet cake mix (store-bought works fine)
- ½ cup melted butter
- 2 large eggs
- ¼ cup milk
- 1 pre-made graham cracker crust
- Whipped cream for decoration
Substitution Options
If you need swaps, here are some ideas:
- Use almond extract instead of vanilla for a nutty twist.
- Swap out strawberries for raspberries or blueberries if they’re in season.
- For dairy-free options, try vegan cream cheese and coconut milk.
- If you don’t have a graham cracker crust, make your own using crushed cookies and melted butter.
Step 1: Preheat Your Oven
Start by preheating your oven to 163°C (325°F). This ensures everything bakes evenly later on. While waiting, take a moment to admire your ingredients—there’s something magical about seeing fresh strawberries glisten under the light. Pro tip: Line your counter with parchment paper to keep things tidy as you work.
Step 2: Prepare the Cream Cheese Mixture
In a large bowl, beat the cream cheese and sugar until it’s soft and creamy. Think of it as giving the mixture a spa treatment—it should feel luxurious! Add the eggs one at a time, beating well after each addition. Stir in the vanilla and milk, blending until smooth. The aroma of vanilla wafting through your kitchen is pure bliss.
Step 3: Make the Red Velvet Layer
Combine the red velvet cake mix with melted butter. Mix until you get a dough-like consistency. Don’t be afraid to use your hands here—it’s fun and therapeutic! The red batter looks festive and promises a pop of color in every slice. Chef’s tip: If the mix seems dry, add a splash more melted butter.
Step 4: Assemble the Cake
Pour half of the red velvet mixture into the graham cracker crust, spreading it evenly. Next, pour the cream cheese mixture on top, smoothing it out gently. Finally, sprinkle the remaining red velvet over the cream cheese layer. Use a knife to swirl the layers together for a marbled effect. Picture art class meets dessert-making—it’s creative and satisfying.
Step 5: Bake to Perfection
Pop the assembled cheesecake into the oven and bake for 45–50 minutes. You’ll know it’s done when the center is set but still slightly jiggly. Let it cool completely before refrigerating for at least 3 hours. Patience pays off here—the chilling process firms up the cheesecake beautifully.
Step 6: Decorate and Serve
Before serving, arrange the strawberry halves on top and pipe whipped cream around the edges. Voilà! A masterpiece ready to dazzle. Take a moment to snap a photo—it’s almost too pretty to eat…almost.
Timing Breakdown
- Preparation Time: 20 minutes
- Cooking Time: 50 minutes
- Chilling Time: 3 hours
- Total Time: About 4 hours
Chef’s Secret
For extra flavor, brush the red velvet layer with a bit of strawberry jam before adding the cream cheese mixture. It enhances the fruity notes and keeps the cake moist.
An Interesting Tidbit
Did you know red velvet cake gained popularity during World War II? Bakers used beet juice to maintain its signature color due to rationing shortages. Today, we can enjoy its vivid charm without worrying about wartime constraints!
Necessary Equipment
You’ll need:
- Mixing bowls
- Electric mixer or whisk
- Spatula
- Measuring cups and spoons
- Knife for swirling
- Parchment paper (optional)
Storage Tips
Once cooled, store the cheesecake in the refrigerator covered with plastic wrap or in an airtight container. It stays fresh for up to 4 days. For longer storage, freeze individual slices wrapped tightly in foil—they’ll last up to a month.
If freezing, thaw overnight in the fridge before serving. Keep leftovers away from strong-smelling foods to prevent odors from seeping in. And remember, always serve chilled for the best texture.
Tips and Advice
– Always soften your cream cheese beforehand—it blends much smoother.
– Chill your utensils before whipping cream for sturdier peaks.
– Taste-test your strawberries for sweetness; adjust sugar accordingly.
Presentation Ideas
- Garnish with mint leaves for a pop of green.
- Dust powdered sugar lightly over the top for elegance.
- Serve on a pedestal plate for dramatic flair.
Healthier Alternatives
1. Low-Sugar Version: Replace granulated sugar with a sugar substitute like stevia.
2. Vegan Option: Use plant-based cream cheese and almond milk.
3. Gluten-Free: Opt for gluten-free red velvet mix and graham crackers.
4. Fruit Swap: Try mango or peach slices instead of strawberries.
5. Lightened-Up: Cut the cream cheese amount in half and fold in Greek yogurt.
6. No-Bake Style: Skip baking entirely by using a no-bake cheesecake base.
Common Mistakes to Avoid
Mistake 1: Overmixing the Batter
Overmixing can lead to dense layers. Mix just until combined to keep the texture light. Pro tip: Stop mixing as soon as there are no streaks left.
Mistake 2: Skipping the Chill Time
Skipping the chilling step results in a runny cheesecake. Give it time to firm up properly—it’s worth the wait!
Mistake 3: Using Cold Ingredients
Cold cream cheese won’t blend smoothly. Always let it sit at room temperature for 30 minutes prior.
FAQs
Can I use homemade red velvet cake?
Absolutely! Just crumble it finely and mix with melted butter for similar results.
How do I prevent cracks in my cheesecake?
Avoid overbaking and ensure slow cooling. Turning off the oven and leaving the door slightly ajar helps.
What if I don’t have a graham cracker crust?
Make your own by crushing cookies and binding them with melted butter. Press firmly into the pan.
Can I freeze this cheesecake?
Yes, wrap individual slices tightly and freeze for up to a month. Thaw in the fridge before serving.
Is this recipe kid-friendly?
Definitely! Kids love the combination of colors and flavors. They might even help decorate!
Do I need an electric mixer?
Not necessarily. A good old-fashioned whisk works fine, though it takes a bit more effort.
Can I double the recipe?
Sure thing! Adjust quantities accordingly and use a larger pan or two smaller ones.
What’s the best way to cut clean slices?
Dip your knife in hot water, wipe it dry, then slice. Repeat between cuts for neat edges.
Can I omit the strawberries?
Of course! Try raspberries, blueberries, or even caramel drizzle for variety.
How far ahead can I prepare this?
You can assemble and chill it a day in advance. Just add toppings right before serving.
Final Thoughts
This **Velvet Strawberry Cheesecake** isn’t just a dessert—it’s a showstopper. From its vibrant layers to its irresistible flavors, it’s bound to become a favorite in your recipe collection. So grab your apron, gather your ingredients, and let’s create something truly unforgettable. Happy baking!
Equipment
- Mixing bowls
- Electric mixer or whisk
- Spatula
- Measuring cups and spoons
- Knife for swirling
Notes
Chill your utensils before whipping cream for sturdier peaks.
Taste-test your strawberries for sweetness; adjust sugar accordingly.
For extra flavor, brush the red velvet layer with a bit of strawberry jam before adding the cream cheese mixture.
Store leftovers in the refrigerator for up to 4 days, or freeze individual slices tightly wrapped for up to a month.