
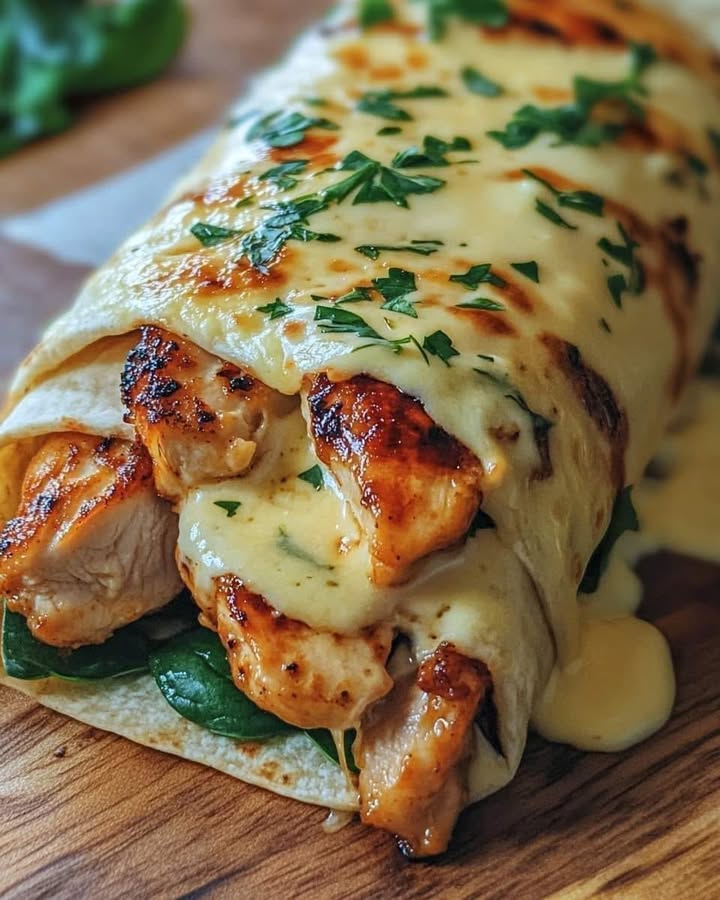
Cheesy Garlic Chicken Wraps: Your New Go-To Weeknight Win!
Ever have that “what’s for dinner” panic at 5 PM? I do, often! That’s why these Cheesy Garlic Chicken Wraps are my kitchen superhero. They combine juicy chicken, melted cheese, and that irresistible garlic aroma into one warm, handheld package. It’s the recipe I whip up when my family’s hungry, my friends pop over unexpectedly, or I just need a seriously satisfying snack. Let’s make them!
From Simple Start to Family Favorite
I can’t claim a grand history for these wraps. They started as a happy accident. I had leftover shredded chicken and a serious craving for garlic bread. I tossed them together in a skillet with some butter and cheese, scooped it into a tortilla, and boom—instant love. It’s a modern mash-up of classic flavors: the comfort of cheesy garlic bread meets the convenience of a wrap. It’s become our unofficial “Friday Fun Food” tradition.
Why You’ll Absolutely Love These Cheesy Garlic Wraps
This recipe is a crowd-pleaser for so many reasons. The flavor is bold and comforting—garlic and cheese is a duo that never fails. It’s incredibly quick, using simple ingredients you likely already have. It’s also wonderfully flexible. You can customize the fillings, make them ahead, or cook the chicken in different ways. They’re a perfect blend of easy, tasty, and forgiving, which is exactly what busy cooks need.
Perfect Occasions for These Flavor-Packed Wraps
- Busy Weeknight Dinners: A 20-minute meal that feels like a treat.
- Game-Day Snacking: Easy to make in batches for a hungry crowd.
- Kid-Friendly Lunch: Pack them whole or sliced for lunchboxes.
- Last-Minute Picnics: They travel well and don’t need utensils.
- Post-Workout Refuel: Packed with protein and delicious energy.
Ingredients for Your Cheesy Garlic Chicken Wraps
Here’s your simple shopping list. Quality matters here, especially with the garlic and cheese!
- 2 boneless, skinless chicken breasts, cooked and shredded
- Salt and pepper, to taste
- 1 tbsp olive oil
- 2 tbsp unsalted butter
- 3 cloves garlic, minced
- 1 tsp Italian seasoning
- 1/2 cup shredded mozzarella cheese
- 1/2 cup shredded cheddar cheese
- 4 large flour tortillas
- Fresh parsley, chopped for garnish (optional)
Smart Substitution Options
Don’t stress if you’re missing something! Cooking is about creativity.
- Chicken: Use pre-cooked rotisserie chicken or leftover turkey for ultimate speed.
- Cheese: Monterey Jack, pepper jack, or a pre-shredded “Italian blend” work beautifully.
- Tortillas: Swap flour tortillas for whole wheat, spinach, or even gluten-free versions.
- Garlic Butter: If you’re out of fresh garlic, 1 teaspoon of garlic powder can step in.
- Seasoning: Instead of Italian seasoning, try a mix of dried oregano and basil.
How to Make Your Ultimate Cheesy Garlic Wraps
Step 1: Cook and Shred the Chicken
Start by seasoning your chicken breasts generously with salt and pepper. Heat the olive oil in a large skillet over medium heat. The sizzle when the chicken hits the pan is the sound of dinner starting! Cook for 5-7 minutes per side until the outside is golden and the inside is fully cooked. Let it rest for a few minutes on a plate. Then, use two forks to shred it into tender, juicy pieces. Pro tip: Letting the chicken cool slightly makes shredding easier and keeps your fingers safe from the heat.
Step 2: Create the Magic Garlic Butter Sauce
In the same skillet, melt the butter over medium heat. The residual chicken flavors will enrich the sauce. Add your minced garlic and Italian seasoning. The fragrance will fill your kitchen in under a minute—it’s truly the soul of this recipe! Sauté for just 1-2 minutes until the garlic is soft and fragrant but not browned. Browning garlic can make it bitter, so keep the heat steady and watch it closely.
Step 3: Combine Chicken, Sauce, and Cheese
Return all that lovely shredded chicken to the skillet with the garlic butter. Toss everything together until every piece glistens with that flavorful coating. Now, add your shredded mozzarella and cheddar. Stir gently as the cheeses melt, creating a creamy, sticky, delicious binder that holds everything together. The mixture will go from separate ingredients to a unified, cheesy garlic chicken masterpiece in moments.
Step 4: Assemble the Wraps
Warm your tortillas briefly. You can do this in a microwave for 30 seconds or in a clean, dry skillet for a few seconds per side. This simple step prevents cracking and makes rolling so much easier. Spoon the cheesy chicken mixture into the center of each tortilla. Fold the sides inward, then roll tightly from the bottom up to form a neat, secure wrap. Imagine you’re rolling a cozy, flavorful burrito for your best friend.
Step 5: Toast the Wraps (Optional but Recommended)
For an extra dimension of texture, give your wraps a quick toast. Heat a clean skillet over medium heat. Place each wrap seam-side down first. Cook for 2-3 minutes per side until the tortilla is golden brown and slightly crispy. This step transforms the wrap, adding a warm, toasted crunch that contrasts beautifully with the soft, cheesy filling inside.
Step 6: Serve and Enjoy!
Slice each wrap in half diagonally—it just looks more inviting! Garnish with a sprinkle of fresh parsley if you like a pop of color and freshness. Serve them immediately while they’re warm, melty, and absolutely irresistible. The first bite, with that mix of savory garlic, melted cheese, and tender chicken, is pure comfort food joy.
Timing Breakdown: Quick and Efficient
This recipe is designed for efficiency. Here’s how your time will be spent:
- Prep Time: 10 minutes (seasoning chicken, mincing garlic, shredding cheese)
- Cook Time: 15-20 minutes (cooking chicken, making sauce, assembling)
- Optional Toast Time: 5 minutes
- Total Time: Around 25-30 minutes for a complete meal.
Chef’s Secret: The Garlic Rule
My one non-negotiable rule? Use fresh garlic. The pre-minced jarred garlic lacks the vibrant, pungent punch that makes these wraps special. Freshly minced garlic releases its oils into the butter, creating a flavor base that’s alive and aromatic. It’s the small step that makes a huge difference.
A Little Extra Info: The Power of the Wrap
The tortilla wrap is more than just a container. It’s a tool for perfect ingredient preparation and portion control, keeping all the delicious components together in one neat package. According to principles of food preparation, combining elements like this not only makes eating easier but can also enhance the overall sensory experience by blending textures and flavors in each bite.
Necessary Equipment
You don’t need fancy tools! Just gather:
- A large skillet (non-stick or cast iron is perfect)
- A sharp knife for mincing garlic
- Two forks for shredding chicken
- A mixing spoon or spatula
- A cutting board
How to Store Your Cheesy Garlic Wraps
If you have leftovers, wrap them tightly in aluminum foil or place them in an airtight container. They will keep in the refrigerator for up to 2 days. The tortilla may soften a bit from the moisture of the filling, but the flavors will remain delicious.
To reheat, I recommend the oven or toaster oven. Unwrap them, place on a baking sheet, and heat at 350°F for about 10-15 minutes until warm throughout. This method helps restore a bit of crispness to the tortilla. Microwaving is quicker but can make the wrap soggy.
For longer storage, you can freeze the assembled but un-toasted wraps. Wrap each individually in plastic wrap and then in foil. Freeze for up to 1 month. Thaw in the refrigerator overnight and then toast in a skillet to refresh the texture before serving.
Tips and Advice for the Best Results
- Don’t overcook the chicken when shredding it. It should be juicy, not dry.
- Feel free to adjust the garlic amount. Love garlic? Add 4 or 5 cloves!
- If your cheese isn’t melting smoothly, add a splash of milk to the skillet to create a creamier sauce.
- For a lighter version, use low-fat cheese and lean chicken breast.
Presentation Tips to Impress
Even simple food can look fabulous!
- Serve the sliced wraps on a platter with a bowl of salsa, sour cream, or a simple ranch dip for dunking.
- Add a colorful side like a simple salad of mixed greens or some roasted vegetables.
- For a party, create a “wrap station” with the filling, tortillas, and extra toppings like diced tomatoes or avocado for guests to assemble themselves.
Healthier & Fun Alternative Recipes
This basic formula is a playground for creativity. Try these six twists:
- Spicy Southwest Wraps: Add a can of drained black beans, a diced jalapeño, and use pepper jack cheese. Top with cilantro and a lime crema.
- Greek Style Wraps: Substitute the Italian seasoning with oregano, use feta cheese instead of cheddar, and add chopped cucumbers and tomatoes to the filling.
- Buffalo Chicken Wraps: Mix the shredded chicken with 1/4 cup of buffalo sauce before adding cheese. Use blue cheese crumbles as a garnish.
- Vegetarian “Chicken” Wraps: Replace chicken with 2 cups of cooked quinoa or roasted cauliflower florets for a hearty plant-based version.
- Pizza Wrap: Add a tablespoon of pizza sauce to the garlic butter mixture and include diced pepperoni in the filling. Mozzarella is perfect here.
- Breakfast Wrap: Use the garlic butter base with scrambled eggs instead of chicken. Add the cheese and perhaps some cooked breakfast sausage. Perfect for morning!
If you love quick, no-cook assembly ideas too, you’ll find plenty of inspiration in our collection of no-bake recipes for other easy treats.
Common Mistakes to Avoid
Mistake 1: Using Cold, Stiff Tortillas
This is the number one reason wraps crack and fall apart. Tortillas straight from the package are often stiff and dry. Skipping the warming step makes them brittle when you try to roll them. Always warm your tortillas briefly in a microwave (wrapped in a damp paper towel) or in a dry skillet. This makes them pliable and soft, ensuring a perfect, intact wrap every time.
Mistake 2: Overloading the Tortilla
It’s tempting to pack in as much cheesy chicken as possible. But too much filling makes the wrap impossible to close neatly. It can burst open when you toast it or eat it. Aim for a generous but manageable amount—about 3/4 cup of filling per large tortilla. Fold the sides in snugly before you roll from the bottom to create a secure packet.
Mistake 3: Burning the Garlic
Garlic burns quickly and turns bitter, ruining the delicate flavor of the sauce. This happens when the skillet is too hot or you sauté for too long. Keep the heat at a steady medium after melting the butter. Add the garlic and stir constantly for only 1-2 minutes until it’s just fragrant and softened. If it starts browning, immediately lower the heat.
Mistake 4: Using Pre-Shredded Cheese Without Adjusting
Pre-shredded cheese is convenient, but it often contains anti-caking agents that can make it melt less smoothly. It might require a bit more help to become creamy. If using pre-shredded, consider adding a tiny splash (like a tablespoon) of milk or cream to the skillet when you mix it in. This helps create a saucier, more cohesive filling.
Frequently Asked Questions
Can I make Cheesy Garlic Chicken Wraps ahead of time?
Absolutely! You can prepare the cheesy garlic chicken filling up to two days ahead and store it in the refrigerator in an airtight container. When ready to serve, reheat the filling gently in a skillet or microwave until warm and melty again. Then, assemble your wraps with fresh, warmed tortillas. You can also assemble the entire wraps ahead and refrigerate them for a day. Reheat them in the oven or toaster oven to best restore the texture.
What’s the best way to shred chicken?
The easiest method is to use two forks. Hold the cooked chicken breast steady with one fork. Use the other fork to pull and scrape against the meat, breaking it into shreds. For larger batches, you can let the chicken cool slightly and then use your clean hands to pull it apart. For ultra-fast shredding, you can pop cooked chicken into a stand mixer and use the paddle attachment on low speed for a few seconds—it works wonders!
Can I use different types of cheese?
Yes, cheese swapping is highly encouraged! The mozzarella provides great melt, and the cheddar adds sharp flavor. You can use any good melting cheese. Monterey Jack is mild and creamy. Pepper Jack adds a spicy kick. A pre-blended “Mexican” or “Italian” style shredded cheese also works perfectly. For a stronger taste, try adding some grated Parmesan to the mix.
Are these wraps freezer-friendly?
They are! For freezing, assemble the wraps but skip the optional toasting step. Wrap each one tightly in plastic wrap, then in aluminum foil, or place in a heavy-duty freezer bag. Freeze for up to one month. To enjoy, thaw overnight in the refrigerator. Then, toast them in a skillet or bake in the oven at 350°F until heated through and the tortilla is crisped to your liking.
What can I serve with Cheesy Garlic Wraps?
These wraps are quite satisfying on their own! For a fuller meal, pair them with a light side salad with vinaigrette, some roasted vegetables like broccoli or bell peppers, or a simple soup. For dipping, salsa, ranch dressing, sour cream, or a creamy avocado dip are all fantastic companions that add a cool contrast to the warm, cheesy wraps.
How can I make this recipe lower in calories?
Several easy swaps can lighten it up. Use low-fat or part-skim mozzarella and cheddar cheeses. Choose lean chicken breast and measure your cheese portions. You can also use a lighter wrap, like a whole wheat or a “light” flour tortilla. Reduce the butter by 1 tablespoon and increase the olive oil slightly. The garlic and herb flavors will still shine through beautifully.
My cheese isn’t melting into a sauce—it’s clumping. What did I do wrong?
This usually happens if the skillet is too cool or the cheese is added too quickly. Ensure your chicken and garlic butter mixture is hot when you add the shredded cheese. Add the cheese gradually, stirring constantly. If it remains clumpy, add a very small splash (1-2 tablespoons) of milk, broth, or even water to the skillet to introduce moisture and help the cheese melt smoothly into a cohesive sauce.
Can I use chicken thighs instead of breasts?
Definitely. Chicken thighs are more flavorful and forgiving. They stay juicy even if cooked a bit longer. Shredded chicken thigh meat will result in a richer, more tender filling. Just ensure you cook them thoroughly until no pink remains, following the same method. The cooking time might be slightly similar, but always check for internal temperature (165°F) to be safe.
What if I don’t have Italian seasoning?
No problem! Italian seasoning is just a convenient blend. You can make your own mix using dried basil, oregano, thyme, and rosemary. A simple pinch of each will work. Or, focus on the garlic and add a different herb you love, like a teaspoon of smoked paprika for a twist or some dried dill for a fresher note. The recipe is very adaptable.
Is there a way to make these wraps for a large crowd?
This recipe scales up perfectly for parties. Simply multiply the ingredients based on how many wraps you need. Cook the chicken in batches or use a large roasting pan to cook several breasts at once. You can even use a slow-cooked shredded chicken recipe for maximum ease. Prepare the filling in a large pot or slow cooker to keep it warm. Set up a station with warm tortillas, the filling, and toppings so guests can build their own. It’s a fun and interactive meal solution!
A Wrap That Wraps Up Everything Good
In the end, these Cheesy Garlic Chicken Wraps are more than just a recipe. They’re a solution. They solve the “what’s for dinner?” question with speed and flavor. They bring a smile to my kid’s face and satisfy my hungry friends. They’re customizable, forgiving, and deeply tasty. From the first sizzle of garlic in butter to the final crispy toast of the tortilla, each step is simple joy. I hope this recipe becomes a trusted friend in your kitchen, just like it is in mine. Give it a try, and don’t forget to check out our other comforting favorites like a decadent Hershey’s Chocolate Cake, a zesty Cranberry Orange Loaf, or even delightful Cherry Cupcakes for when you need a sweet finish. Happy cooking, and even happier eating!
Equipment
- Grande poêle
- Couteau aiguisé
- Cuillère ou spatule
- Planche à découper
- Papier sulfurisé
Ingredients
- 2 pièces poitrines de poulet désossées et sans peau, cuites et effilochées
- q.s. sel et poivre
- 1 c. à soupe huile d'olive
- 2 c. à soupe beurre non salé
- 3 clous gousses d'ail, émincées
- 1 c. à café assaisonnement italien
- 1/2 tasse fromage mozzarella râpé
- 1/2 tasse fromage cheddar râpé
- 4 grands tortillas de farine
- q.s. persil frais, haché pour garnir (facultatif)
Instructions
- Saisonner les poitrines de poulet avec du sel et du poivre. Faire chauffer l'huile d'olive dans une grande poêle à feu moyen. Cuire pendant 5-7 minutes de chaque côté jusqu'à ce qu'elles soient dorées et bien cuites. Effilocher le poulet avec deux fourchettes après repos.
- Dans la même poêle, faire fondre le beurre à feu moyen. Ajouter l'ail émincé et l'assaisonnement italien, faire sauter pendant 1-2 minutes jusqu'à ce qu'ils soient parfumés.
- Ramener le poulet effiloché dans la poêle avec le beurre à l'ail, et tout mélanger. Incorporer la mozzarella et le cheddar jusqu'à ce qu'ils soient fondus.
- Chauffer les tortillas au micro-ondes ou dans une poêle pour éviter qu'elles ne craquent. Répartir le mélange de poulet dans chaque tortilla, plier les côtés vers l'intérieur et rouler fermement.
- (Facultatif) Griller les wraps dans une poêle propre à feu moyen pendant 2-3 minutes de chaque côté jusqu'à ce qu'ils soient dorés.
- Couper chaque wrap en deux et garnir de persil frais si désiré. Servir chaud.
Notes
Nutrition

Hi, I’m Olivia Parker, the founder of BakingSecret.com and a lifelong lover of all things sweet and homemade. I grew up in a small town in Oregon, where the smell of fresh cookies in my family’s kitchen sparked my passion for baking. Over the years, I turned that passion into a mission: to help home bakers feel confident, inspired, and creative.
After studying food science and working in several artisan bakeries across the U.S., I decided to create a space where everyone from beginners to seasoned bakers can find reliable recipes, expert tips, and a warm, welcoming community. BakingSecret.com is my way of sharing the magic of baking with the world. When I’m not testing new recipes, you’ll find me exploring farmers’ markets, collecting vintage cookbooks, or perfecting my sourdough technique.