
Hey there, welcome to my kitchen! There’s a chill in the air outside, and my oven is ready to warm things up. I just found a bag of white chocolate chips tucked in the pantry. It got me thinking about brownies. Classic ones are amazing, but I wanted something a little different, a little sweeter. That’s when I remembered my favorite twist: white chocolate brownies. They’re creamy, they’re soft, and they feel like a little luxury on a regular day. I’ve been making them for years, sharing them with friends, and always getting asked, “What’s in these? They’re so good!” Today, I’m excited to share that love with you. We’ll talk about why these brownies stand out, and I’ll give you my go-to recipe to build from.
Why White Chocolate Brownies Are So Special
Let’s talk about why I love these so much. First, their flavor is unique. White chocolate brownies don’t taste like the dark, cocoa-rich ones we all know. They offer a gentle, creamy sweetness. It’s more of a vanilla-like flavor, but richer and more dessert-like. This makes them perfect for people who might find regular chocolate too intense. They’re a wonderful alternative.
Their texture is also a big win. When done right, they can be wonderfully chewy and dense, or slightly cakey and soft. It depends on your method. But that chewy texture is something many people aim for. I’ll share my tips for it later. This softer flavor profile also means they pair with other ingredients incredibly well. Think raspberries, nuts, or even a swirl of cream cheese. They’re like a blank canvas for your favorite flavors.
I also find them to be very forgiving for new bakers. The process is straightforward. You aren’t dealing with melting dark chocolate which can sometimes seize up. White chocolate melts smoothly. This makes the whole baking experience more relaxed and fun. Lastly, they just look beautiful. A tray of golden, baked white chocolate brownies with bits of chocolate peeking through is a lovely sight. It always feels a bit fancier, even though it’s easy to make.
How to Make Classic White Chocolate Brownies
This is my basic, no-fuss recipe for classic white chocolate brownies. It’s the foundation I’ve used forever. From here, you can add nuts, fruit, or anything you like. It’s a simple and easy-to-follow recipe. Let’s get started.
Ingredients You’ll Need
Gathering your ingredients is the first step. I always recommend using good quality white chocolate. It really matters here, since it’s the main flavor. Here’s what you’ll need:
- White chocolate: 200 grams of good quality bars or chips. I avoid baking chips that have lots of additives for melting, as they can change the texture.
- Butter: 115 grams (unsalted).
- Eggs: 2 large, at room temperature.
- Granulated sugar: 150 grams.
- All-purpose flour: 130 grams. Some bakers like using bread flour for a chewier texture, like in those Sally’s Baking Addiction white chocolate brownies discussions. All-purpose works perfectly for me.
- Salt: A pinch, about 1/4 teaspoon. This balances the sweetness.
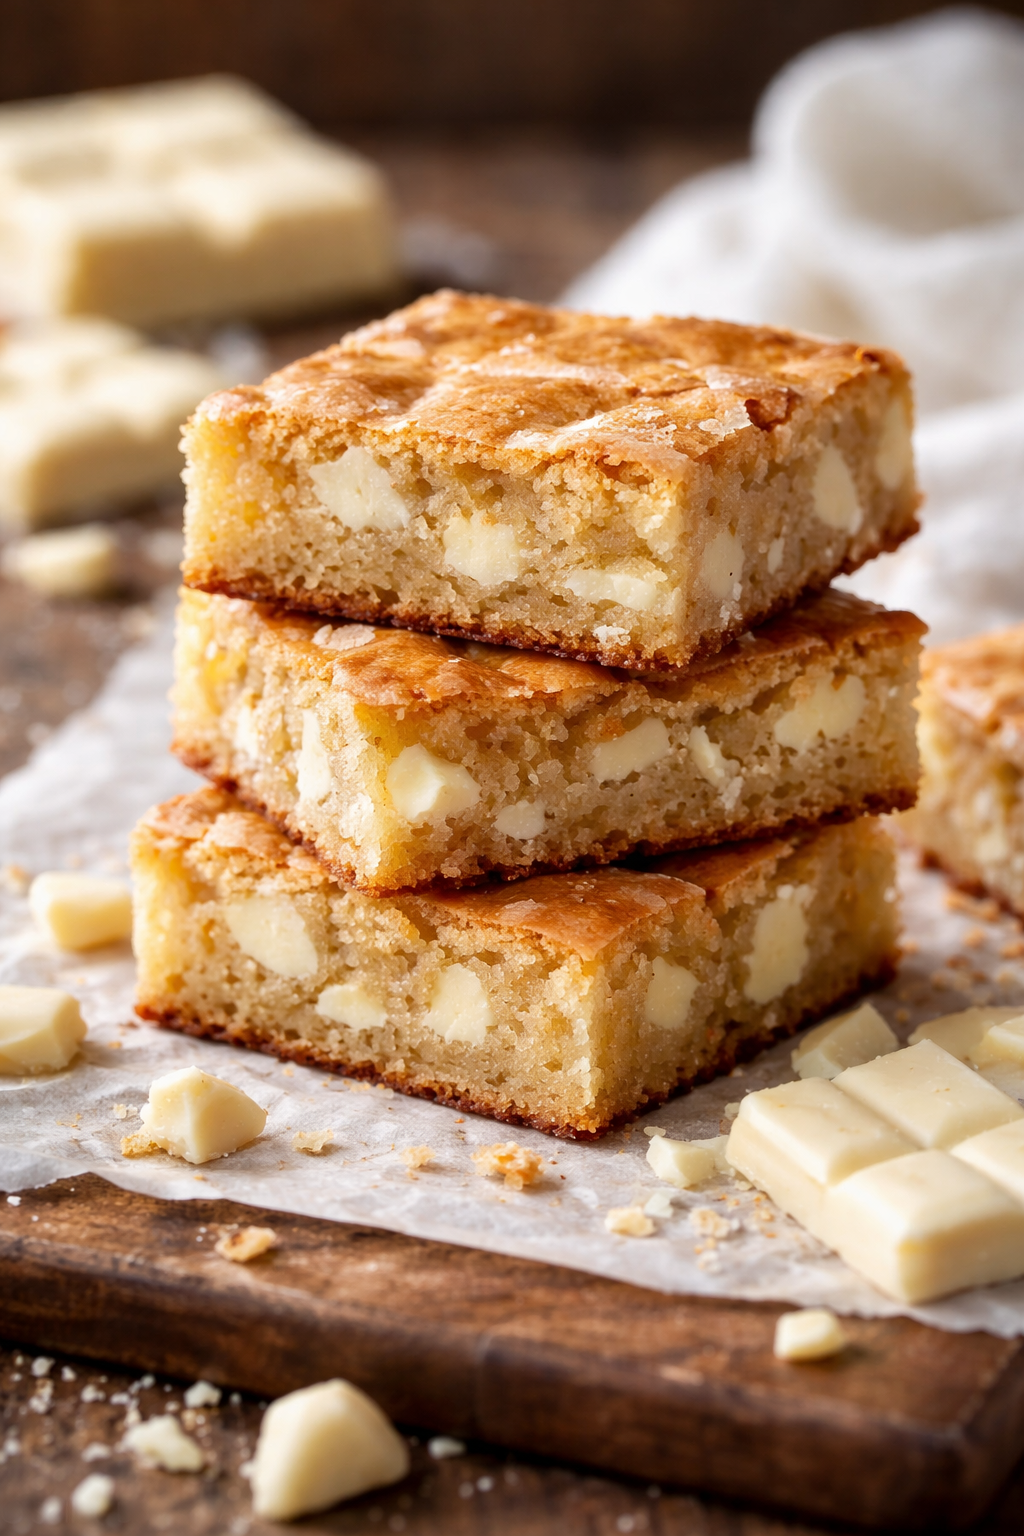
- Optional: 100 grams of extra white chocolate chunks or chips for folding in. This gives you those lovely white chocolate chunk brownies with pockets of meltiness.
That’s it! You don’t need any special ingredients. This list makes a perfect batch. For an eggless version, you can use substitutes like yogurt or buttermilk, but we’ll stick to this classic one today.
Step-by-Step Instructions
Ready to bake? Here’s my process, step by step.
Step 1: Melt the Chocolate and Butter. First, chop your main 200g of white chocolate into small pieces. In a heatproof bowl, combine it with the butter. You can melt this gently over a pot of simmering water (a double boiler) or in the microwave very carefully. White chocolate burns easily. Stir until it’s completely smooth and melted. Let this mixture cool for about 10 minutes. It shouldn’t be hot when we add the eggs.
Step 2: Whisk the Eggs and Sugar. In a separate large bowl, take your two room-temperature eggs and the granulated sugar. Whisk them together vigorously for about 1-2 minutes. You don’t need a fluffy foam, but you want them well combined and a bit paler. This step helps give the brownies structure.
Step 3: Combine Wet Ingredients. Now, pour your slightly cooled white chocolate and butter mixture into the egg and sugar bowl. Stir it gently with a spatula until everything is blended. It will look smooth and glossy.
Step 4: Add the Dry Ingredients. Sift your flour and salt directly into the wet mixture. This prevents lumps. Fold everything together gently. Stop as soon as the flour is fully incorporated. Overmixing can make the brownies tough. If you’re using those extra 100g of white chocolate chunks or chips, fold them in now.
Step 5: Bake. Pour the batter into an 8×8 inch (20×20 cm) baking pan lined with parchment paper. Spread it evenly. Bake in a preheated oven at 170°C (325°F) for about 25-30 minutes. The secret to chewy white brownies? Not over-baking. The top should be set and golden, but a skewer inserted into the center might still have a few moist crumbs clinging to it. That’s perfect. Let them cool completely in the pan before cutting. This is key for clean slices.
And that’s it! You now have a pan of beautiful, classic white chocolate brownies. They are sweet, rich, and utterly satisfying. From this base, you can explore so many ideas. Maybe you want to add a handful of walnuts for white chocolate brownies with walnuts. Or perhaps you’d like to swirl in some cream cheese for white chocolate brownies with cream cheese. You could even press fresh raspberries into the top before baking for white chocolate brownies with raspberries. The options are endless.
I often get asked, “Can I add white chocolate chips to brownie mix?” Absolutely! If you’re using a store-bought blondie or vanilla brownie mix, tossing in a cup of white chocolate chips is a great upgrade. It boosts the flavor and texture. Another common question is about taste: “Does white chocolate taste good in brownies?” I think it does! It gives a milder, butterier sweetness that many people, especially kids, really enjoy. It’s a different experience from a dark chocolate brownie, and that’s the fun part.
As for dietary questions, like “Can a diabetic eat a brownie?” I always say to consult a doctor or dietitian for personal advice. These brownies are a sweet treat, like any dessert. You can reduce the sugar a little, but it will change the texture. For everyday baking, this recipe is just about enjoying a homemade moment. Now you have the basic recipe. It’s time to make your own batch and see why these white chocolate brownies have become a favorite in my home.

Alright, so you’ve got the classic recipe down, but honestly, that’s just the beginning. The true magic of white chocolate brownies is how beautifully they play with other flavors. They’re like the friendly, welcoming base at a party—they make everything else shine. Here’s the thing: once you master the basic batter, you open up a whole world of delicious possibilities. Let’s dive into some of my favorite ways to mix things up.
Exciting Variations of White Chocolate Brownies
I love a classic, but I’m also a huge fan of playing around in the kitchen. Sometimes it’s because I have a bag of fresh raspberries, other times it’s because someone mentioned cream cheese, and my brain just goes, “Yes, absolutely.” These variations aren’t just minor tweaks; they transform the experience. They add new textures, balance sweetness, and turn your bake into something truly special.
White Chocolate Brownies with Raspberries
This is my go-to when I want something that looks and tastes elegant but is still effortless. The tartness of raspberries cuts through the creamy sweetness of the white chocolate in a way that’s just perfect. Funny enough, I first tried this after seeing a similar idea for lemons in a bar and thought, “Why not berries?”
Here’s how I do it: I make the classic batter as outlined before. Just before pouring it into the pan, I scatter a handful of fresh raspberries over the top—about 100 grams is plenty. I gently press them in so they’re nestled in the batter, but not drowned. As they bake, they burst a little, releasing their juices and creating little pockets of tangy flavor. It’s a stunning contrast. If you’re using frozen berries, don’t thaw them first; just toss them in frozen to prevent too much moisture seepage.
By the way, this combination is a crowd-pleaser. It answers the question, “Does white chocolate taste good in brownies?” with a resounding “Yes, especially with fruit!” For an even more intense berry flavor, you could fold in a few tablespoons of raspberry jam into the batter, but I prefer the fresh burst.
White Chocolate Brownies with Cream Cheese
Now, if you’re after something richer, more decadent, this is your variation. The cream cheese adds a lovely tang and a fantastic, almost velvety texture contrast. It’s not quite a cheesecake brownie, but it’s somewhere in that delicious neighborhood.
My method is simple: I reserve about 150 grams of the prepared batter. In a separate bowl, I mix 200 grams of softened cream cheese with 50 grams of sugar and a splash of vanilla until smooth. I pour the plain white chocolate brownie batter into the pan first, then I dollop the cream cheese mixture over the top. Using a knife, I swirl it through the batter gently. You don’t want to fully mix it—you want those beautiful marbled streaks.
The result? Some bites are all sweet, creamy brownie, and others have that tangy, rich cream cheese punch. It’s a fantastic way to elevate the treat. It reminds me of the principle behind a good banana bread brownie, where two great things come together to create one even better thing.
White Chocolate Brownies with Walnuts
For those who crave texture and a bit of earthy flavor, walnuts are the answer. They bring a nice crunch and a nuttiness that complements the sweet white chocolate beautifully. I’m a big fan of adding nuts to brownies generally—it just feels wholesome and satisfying.
I chop about 100 grams of walnuts into medium-sized pieces. After folding in the flour into the main batter, I add these walnuts and stir just to combine. The nuts get distributed throughout, so every bite has a little crunch. It’s a straightforward add-in, but it makes the brownies feel more substantial and, in my opinion, a bit more sophisticated. If you’re a fan of that chewy texture, the nuts don’t interfere at all; they just add another layer.
Making White Chocolate Brownies for Special Diets
One of the wonderful things about baking is making it work for everyone. Over the years, friends have asked for adjustments—maybe they’re avoiding eggs, or they want a different texture. So I’ve tinkered and found some reliable paths that still deliver a delicious result.
Eggless White Chocolate Brownies
This is a common request, and it’s totally doable. The eggs in the classic recipe provide structure and lift. To replace them, I use a combination of yogurt and a bit of extra binding. For each egg, I substitute 60 grams of plain, thick yogurt (like Greek yogurt) mixed with a teaspoon of cornstarch. The yogurt adds moisture and a slight tang, while the cornstarch helps hold things together.
The process is the same: melt the chocolate and butter, mix it with the sugar and your yogurt mixture, then fold in the flour. The batter will be a bit thicker, but it bakes up beautifully. They might be slightly more dense than the egg version, but they’re still soft, sweet, and utterly satisfying. It’s a great way to make eggless white chocolate brownies that everyone can enjoy.
White Chocolate Brownies Using Bread Flour
Now, this is a fun one for texture enthusiasts. I read somewhere about using bread flour in cookies for chew, and I thought, “Why not brownies?” All-purpose flour works perfectly, but if you’re chasing that specific, resilient chewiness, bread flour can be your secret.
Bread flour has a higher protein content, which develops more gluten when mixed. You need to be a bit more gentle—fold, don’t stir vigorously—to avoid toughness. Simply replace the all-purpose flour in the classic recipe with the same weight of bread flour. You might find the batter a tad more elastic. The bake time is the same. The result? A brownie with a distinctly chewy, almost pull-apart texture that’s really delightful. It’s a experiment worth trying if you’re asking, “What is the secret to chewy white brownies?”
Speaking of other chewy, interesting treats, playing with flour types reminds me of the structure in something like Dr. Pepper brownies, where the unique liquid adds a different kind of tenderness.
Whatever path you choose—adding berries, swirling cream cheese, tossing in walnuts, or adjusting for dietary needs—the goal is the same: to make a batch of brownies that brings a smile. These variations prove that the classic white chocolate brownies recipe isn’t a rigid formula; it’s a starting point for your own kitchen adventures. So grab your ingredients, pick a variation, and see where your taste takes you. Happy baking!
Expert Tips for Perfect White Chocolate Brownies
Okay, let’s get down to the nitty-gritty. You’ve got the recipe and the fun variations—awesome. But you know me, I’m always thinking about those little tweaks that take a good bake to a “can-I-have-the-whole-pan?” masterpiece. Over the years, and through more than a few batches that were a bit too cakey or a touch too sweet, I’ve picked up some solid, no-fail tricks. They’re the kind of tips you whisper to a friend while you’re waiting for the oven timer to go off. So grab a cup of coffee, and let’s talk shop.
The Secret to Chewy White Brownies
This is the question I get asked more than any other: What is the secret to chewy white brownies? Honestly, it’s not one thing; it’s a small collection of choices that all point in the same direction. It’s about building that dense, fudgy texture that sticks to the roof of your mouth in the best way.
First, the flour. I mentioned bread flour earlier as a variation, and it’s a fantastic cheat code for chew. But even with all-purpose, how you handle it matters. Don’t overmix the batter once the flour is in. Stirring too much develops the gluten, which can lead to a tougher, more bread-like texture. You want to fold just until you don’t see any white streaks. That’s it.
Second, fat-to-flour ratio. This is a big one. My recipe uses a good amount of butter and white chocolate, which are both fats. They keep things moist. If you find a recipe online that looks dry or cakey, it’s often because it’s shy on fat. Trust the butter!
Finally, and this is my golden rule: under-bake them. Seriously. I pull my pan out when the edges are just starting to pull away from the sides and the top is set and golden. I do the skewer test, and if it comes out with a few moist, gooey crumbs clinging to it, I celebrate. That’s the sweet spot. They’ll finish setting up as they cool, locking in that dense, chewy heart. Letting them cool completely in the pan is non-negotiable for clean cuts and perfect texture.
Adding White Chocolate Chips to Brownie Mix
Here’s a real-life scenario: It’s 4 PM, you have unexpected guests coming over, and you need a treat, stat. The boxed brownie mix in your pantry is about to become your best friend. But can you make it better? Absolutely. The question, “Can I add white chocolate chips to brownie mix?” gets a huge yes from me.
You’ll want to pick a mix with a flavor profile that can handle it. A classic chocolate fudge mix might create a fun marbled effect, but the flavors compete. For the best results, go for a blondie mix or a vanilla brownie mix. These have that buttery, caramel-like base that white chocolate just sings with. Prepare the mix according to the package directions, then simply fold in a generous cup of white chocolate chips before pouring it into the pan.
It’s a five-minute upgrade that makes the whole thing feel homemade. The chips melt into pockets of creamy sweetness that are just delightful. I do this all the time when I’m in a pinch, and no one has ever guessed it started from a box! It’s a brilliant shortcut, especially if you’re new to baking and want to build confidence.
Speaking of confidence, a few other quickfire tips from my kitchen to yours:
- Quality of Chocolate: I can’t stress this enough. Since white chocolate is the star, splurging a little on a bar with real cocoa butter makes a world of difference compared to chips that are mostly sugar and oil. The flavor is cleaner and richer.
- Room Temp is Key: Having your eggs and any dairy (like cream cheese for a swirl) at room temperature isn’t just fussy baking advice. It helps everything emulsify smoothly, preventing a greasy or curdled-looking batter. I just take my eggs out when I start preheating the oven.
- Cutting Cleanly: For those picture-perfect squares, use a plastic knife. It sounds weird, but it works wonders on sticky, chewy bars without dragging. Or, use a large, sharp chef’s knife and wipe it clean with a damp cloth between each cut.
- Storing for Freshness: These brownies keep beautifully. Once completely cool, layer them in an airtight container with parchment paper between layers. They’ll stay soft and delicious at room temp for 3-4 days. For longer storage, I freeze them. They thaw in about an hour and taste just-baked. If you’re curious about best practices for storing any baked goods, checking out guidelines for safe leftovers is always a smart move to ensure quality and safety.
You know, I was once so obsessed with getting the perfect crinkly top on a batch that I nearly missed my friend’s birthday party. The funny thing is, when I finally got there with my slightly-less-than-perfect brownies, they were devoured in minutes and everyone raved. The moral? Don’t get so caught up in perfection that you forget the joy of sharing something homemade. The love is the real secret ingredient.
If this journey into the world of sweet, creamy bars has you hooked, there’s a whole universe of delicious treats to explore. For more inspiration, from classic blondies to inventive fruit bars, you can always dive into our collection of favorite dessert bar and brownie recipes.
And that’s a wrap on my white chocolate brownie wisdom! I truly hope these tips give you the confidence to bake a batch that’s exactly how you like it—chewy, sweet, and utterly satisfying. Remember, every baker has a flop now and then (I sure do!), but that’s how we learn. So preheat that oven, and make something delicious today.
Your White Chocolate Brownies Questions, Answered
Here are answers to some of the most common questions I get about these lovely treats. Hopefully, this clears things up for your next baking adventure!
- Does white chocolate taste good in brownies? Yes, but it’s a different experience. It’s not the deep, bitter-chocolate hit of a classic brownie. White chocolate brownies offer a creamy, vanilla-buttery, and rich sweetness. They’re milder, which makes them perfect for pairing with tart fruits or nuts. If you enjoy sweet, decadent desserts, you’ll likely love them.
- Can I make white chocolate brownies without any chocolate? This is a tricky one! True white chocolate contains cocoa butter. If a recipe calls for “white brownies without chocolate,” it’s likely using just butter, vanilla, and brown sugar to create a blondie. For the signature flavor, you really do need the white chocolate. For a cocoa-free bar, a classic blondie recipe is your best bet.
- Is there a famous recipe, like from Nigella Lawson? While I haven’t seen a specific white chocolate brownies recipe Nigella Lawson has published, her style is all about indulgent, simple pleasures. My recipe shares that spirit—easy, ingredient-focused, and luxurious. She often uses white chocolate in other bakes, so the flavor profile would fit right into her repertoire.
- Can a diabetic eat a brownie? I’m not a doctor, so this is important: anyone with diabetes should consult their healthcare team for personalized advice. Generally, traditional brownies are high in sugar and carbs. You can find recipes specifically designed with sugar substitutes and lower-carb flours, but the texture will differ. They should always be considered an occasional treat, not a regular part of the diet.
- How do I make eggless white chocolate brownies? As mentioned in the variations, you can substitute each egg with 60g of thick yogurt (like Greek yogurt) mixed with 1 tsp of cornstarch. The result is a slightly denser but still wonderfully moist and sweet brownie. It’s a great, reliable method for eggless white chocolate brownies.
- Why did my white chocolate seize when melting? White chocolate is very sensitive to moisture. A single drop of water or steam can cause it to become grainy and clumpy. Always ensure your bowl and utensils are completely dry. Melt it very gently over low heat or in short microwave bursts, stirring frequently.
- Can I use white chocolate chips instead of a bar? You can, but read the ingredients. High-quality baking chips will work. Avoid “white confectionery” or “white baking morsels” that don’t contain cocoa butter, as they won’t melt or taste the same. Chopping a bar is often more reliable for a smooth, rich batter.
- What’s the difference between these and blondies? It’s a fine line! Blondies are typically made with brown sugar, butter, and vanilla as the base flavor, giving them a butterscotch taste. White chocolate brownies use melted white chocolate in the batter, which gives a distinct, creamy cocoa-butter flavor. They’re cousins, but not identical twins.
- My brownies are too sweet. How can I fix that? White chocolate is very sweet. To balance it, always add that pinch of salt to the batter. You can also reduce the added granulated sugar by up to ¼ cup. Adding a tart element like raspberries or a cream cheese swirl is the best natural way to cut the sweetness in the final product.
- Can I double this recipe? Absolutely! Double all the ingredients and bake it in a 9×13 inch pan. You’ll need to increase the baking time slightly—start checking around the 35-minute mark. Just make sure your oven is properly preheated and you rotate the pan halfway through for even baking.
Equipment
- Heatproof bowl
- Whisk
- Spatula
- 8x8 inch baking pan
- Parchment paper
Ingredients
- 200 g white chocolate good quality bars or chips
- 115 g unsalted butter
- 2 large eggs at room temperature
- 150 g granulated sugar
- 130 g all-purpose flour
- 1/4 tsp salt a pinch
- 100 g extra white chocolate chunks optional, for folding in
Instructions
- Chop 200g of white chocolate into small pieces and combine it with the butter in a heatproof bowl.
- Melt the chocolate and butter over a double boiler or in the microwave until smooth, then let it cool for about 10 minutes.
- In a separate bowl, whisk together the eggs and sugar vigorously for 1-2 minutes until well combined and slightly paler.
- Pour the cooled white chocolate and butter mixture into the egg and sugar bowl and stir gently until blended.
- Sift the flour and salt into the wet mixture and fold gently until fully incorporated. Optional: fold in the extra white chocolate chunks now.
- Pour the batter into an 8x8 inch baking pan lined with parchment paper, spreading it evenly.
- Bake in a preheated oven at 170°C (325°F) for about 25-30 minutes, until set with a few moist crumbs on a skewer.
- Allow to cool completely in the pan before cutting into squares.
Notes
Nutrition

Hello! I’m Sarah Mitchell, and I’m passionate about bringing creativity and innovation to baking. My love for baking started in high school when I first tried my hand at decorating cupcakes for a class project. What began as a fun hobby quickly became a full-time passion. I’ve spent the past decade working in bakeries and dessert shops, honing my skills in everything from simple cookies to intricate wedding cakes.
After working in some of the top bakeries across the country, I realized that baking was about more than just following recipes — it was about infusing your personality into each creation. At BakingSecret.com, I love creating recipes that push boundaries while staying true to the heart of classic baking. I specialize in creating delicious and visually stunning pastries that will wow your guests.
When I’m not baking, I enjoy teaching baking classes, trying out new cake decoration techniques, and traveling to find inspiration in global dessert traditions. I’m so excited to share my tips and tricks with you to help elevate your baking game!