
The Impossible Coconut Custard Pie: Magic in Your Oven!
Have you ever wished for a little kitchen magic? I remember the first time I made this Impossible Coconut Custard Pie. I was sure I’d forgotten the crust! But then, like a delicious promise, it baked itself into layers of creamy custard and a tender, cakey bottom. This pie is pure wizardry, and absolutely foolproof. It’s the dessert that makes you look like a baking rockstar with almost no effort. Let’s make some magic together!
A Slice of History: Where Did This Magic Pie Come From?
The “impossible” pie concept became famous in the 1970s and 80s, thanks to the folks at Bisquick. The idea was genius: a one-bowl batter that bakes into its own distinct layers. No rolling, no chilling, no stress. My grandma used to make a version of this, and the smell of toasting coconut would fill her whole house. It’s a classic American comfort dessert that feels both nostalgic and wonderfully simple.
Why You’ll Fall in Love With This Coconut Custard Pie
You’ll love this recipe because it’s a triple threat: easy, impressive, and incredibly delicious. The texture is a dream—silky custard meets sweet, chewy coconut flakes, all sitting on a soft, barely-there crust. It’s the perfect dessert for when you want something special but don’t want to fuss. Plus, watching it create its own layers feels like a little victory every single time!
Perfect Occasions for Your Magical Pie
This pie is your secret weapon for so many events! It’s a hit at casual family dinners, perfect for summer barbecues, and a lovely, light finish to a holiday feast. I love bringing it to potlucks because it travels well and always sparks conversation. “You made the crust too?” is my favorite question to answer with a wink.
Gathering Your Ingredients for Coconut Custard Magic
Here’s everything you need for this enchanting dessert. The beauty is in its simplicity!
- 1/2 cup Bisquick baking mix
- 3/4 cup granulated sugar
- 4 large eggs
- 2 cups milk (whole or 2% works best)
- 1 cup sweetened flaked coconut
- 1 teaspoon pure vanilla extract
- 1 tablespoon softened butter
Simple Swaps: Ingredient Substitutions
Don’t have something? No problem! Here are some easy swaps:
- Bisquick: Use any similar “complete” pancake and baking mix.
- Milk: Any milk you have works, even canned coconut milk for extra flavor!
- Coconut: Unsweetened shredded coconut can be used for a less sweet pie.
- Sugar: You can slightly reduce the sugar if you prefer, but it helps with the custard set.
Crafting Your Magical Coconut Custard Pie: Step-by-Step
Step 1: Preheat and Prep Your Pan
First, turn your oven on to 400°F (200°C). Let it heat up fully for even baking. While it warms, take your 9-inch pie plate and butter it generously. I use my fingers to smear soft butter all over the bottom and sides. This little step is crucial. It helps the magical crust form and makes serving slices a breeze. You’ll hear a lovely sizzle when you pour in the batter! Pro tip: Use the wrapper from your stick of butter to grease the pan—no mess!
Step 2: The One-Bowl Wonder Mix
Now for the easy part! Grab a large mixing bowl. Add the Bisquick, sugar, eggs, milk, coconut, vanilla, and that softened butter. The combined scent of vanilla and coconut is heavenly. Use a whisk or an electric mixer on medium-low to blend everything for about 2 minutes. You want a perfectly smooth, slightly frothy batter with no lumps of Bisquick hiding. The coconut flakes will dance and swirl in the pale yellow liquid. It’s a beautiful, simple batter that holds so much promise.
Step 3: The Baking Transformation
Carefully pour your smooth batter into the waiting pie plate. It will be quite liquid—that’s exactly right! Slide it onto the center rack of your hot oven. Now, the magic begins. As it bakes for 25-30 minutes, the ingredients will work their alchemy. The pie is done when the top is a glorious deep golden brown, and the center is set with just the slightest jiggle. A knife inserted near the center should come out clean. The aroma of toasted coconut will have you hovering by the oven!
Step 4: Cooling and the Big Reveal
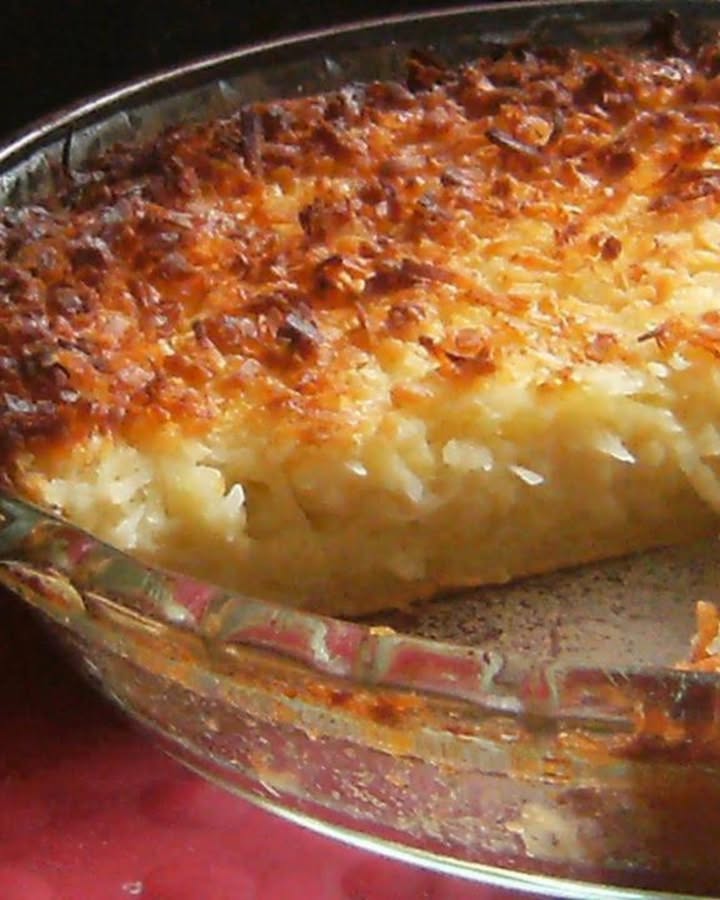
This is the hardest part—waiting! Take the pie out and let it cool completely on a wire rack. As it cools, the magic finishes. The layers fully separate and set. You’ll see the coconut-topped custard and the soft, cakey crust beneath. Chef’s tip: For the cleanest slices, chill the cooled pie in the fridge for an hour before cutting. It makes serving absolutely perfect wedges so simple.
Your Pie Timeline: From Prep to Plate
| Prep Time: | 10 minutes |
| Cook Time: | 30 minutes |
| Cooling Time: | 2 hours |
| Total Time: | 2 hours 40 minutes |
The Chef’s Secret for the Best Custard
My secret? Use room temperature eggs and milk. Taking these ingredients out of the fridge 30 minutes before you start makes a huge difference. It helps the batter blend more smoothly and promotes an even, silky custard texture as it bakes. It’s a small step with a big payoff!
A Sweet Bit of Coconut Lore
Did you know the coconut is sometimes called the “tree of life”? Every part of the tree can be used! In baking, its sweet, nutty flavor is unmistakable. In our pie, the flaked coconut not only adds taste and texture but also rises to the top during baking, creating that beautiful, toasted golden crown.
Tools You’ll Need for This Kitchen Trick
- 9-inch pie plate (glass or ceramic is best)
- Large mixing bowl
- Whisk or electric hand mixer
- Measuring cups and spoons
- Wire cooling rack
Storing Your Impossible Coconut Custard Pie
Once your pie has cooled completely, you can cover it loosely with plastic wrap or aluminum foil. It keeps beautifully in the refrigerator for up to 3-4 days. The chill actually makes the custard set even more, giving it a lovely, firm texture.
If you’d like to keep it longer, you can freeze this pie! Wrap the whole pie or individual slices tightly in plastic wrap, then in foil. It will keep in the freezer for up to 2 months. Thaw it overnight in the fridge when you’re ready for a treat.
I don’t recommend leaving this pie out at room temperature for more than a few hours. Since it contains dairy and eggs, it’s safest and tastiest when kept chilled.
Tips and Advice for Pie Perfection
- For an extra-toasty coconut flavor, spread your coconut flakes on a baking sheet and toast them in the oven for 5-7 minutes at 350°F before adding them to the batter. Let them cool first!
- If the top is browning too quickly but the center isn’t set, tent the pie loosely with a piece of foil.
- Make sure your oven is fully preheated. A hot start is key to the “impossible” layer formation.
Presentation Ideas to Make It Shine
- Dust with a whisper of powdered sugar just before serving.
- Add a dollop of freshly whipped cream and a sprinkle of toasted coconut on top.
- Serve with a side of fresh berries like raspberries or mango slices for a colorful, tropical twist.
- Drizzle each slice with a little warm caramel sauce for a decadent touch.
6 Delicious Variations to Try
Once you’ve mastered the magic, try these fun twists!
- Chocolate Chip Impossible Pie: Fold in 1/2 cup of semi-sweet chocolate chips with the coconut. The melted pockets of chocolate are amazing.
- Lemon Coconut Pie: Add the zest of one lemon and use 1 tablespoon of lemon juice in place of the vanilla for a bright, sunny flavor.
- Nutty Delight Pie: Swap the coconut for 3/4 cup of chopped pecans or walnuts for a rich, nutty version.
- Pina Colada Pie: Use 1 cup of canned coconut milk and 1 cup of regular milk. Add 1/2 cup of crushed, drained pineapple. Tropical heaven!
- Maple Pumpkin Pie: Omit the coconut and vanilla. Add 1 cup of pumpkin puree, 1 tsp pumpkin pie spice, and use 1/2 cup of maple syrup instead of half the sugar.
- Berry Bliss Pie: Scatter 1 cup of fresh or frozen blueberries or raspberries in the bottom of the buttered pan before pouring the plain batter (omit coconut) over the top.
If you love the self-forming crust concept, you must try our classic Impossible French Apple Pie recipe for a fall favorite. For another easy, crowd-pleasing dessert, this Hoosier Sugar Cream Pie is wonderfully simple. Craving more coconut? Our Toasted Coconut Fudge is a no-bake dream. And for a fruity twist on magic, the Impossible Pumpkin Pie is a holiday must-make.
Common Mistakes to Avoid for a Perfect Pie
Mistake 1: Using Cold Dairy and Eggs
Pouring cold milk and using eggs right from the fridge is a common shortcut. It makes the batter harder to blend smoothly. More importantly, it can disrupt the cooking time and texture of the delicate custard. The cold ingredients cool down the batter, leading to uneven baking. Always let your eggs and milk sit on the counter for 20-30 minutes first. Your pie will bake more evenly and have a silkier texture.
Mistake 2: Overmixing or Undermixing the Batter
It’s easy to just give the batter a few stirs and think it’s done. Undermixing leaves lumps of Bisquick that bake into unpleasant pockets. On the other hand, going wild with the mixer for 10 minutes isn’t necessary either. You just want a perfectly smooth, homogenous mixture. Mix on medium speed for a solid 1-2 minutes until it’s completely smooth and slightly airy. This ensures every component is evenly distributed for the magic to happen.
Mistake 3: Not Letting the Pie Cool Completely
I know it’s tempting to dig in right away! But cutting into a warm impossible pie is a recipe for a soupy mess. The custard needs time to set fully as it comes to room temperature and chills. The layers are still forming even out of the oven. If you cut it warm, it won’t hold its shape. Be patient. Let it cool on the rack, then chill it in the fridge for at least an hour. You’ll be rewarded with neat, beautiful slices.
Mistake 4: Using the Wrong Size or Type of Pan
Using a deep 10-inch pan or a metal tart pan can throw off the recipe. A 9-inch standard pie plate is ideal. The depth and material (glass or ceramic) affect how the heat transfers and how the layers form. A pan that’s too big will make a thin, over-baked custard. A dark metal pan might cook the bottom too fast. Stick with a standard 9-inch glass pie dish for the best, most consistent magical results.
For those watching their sugar intake, you can make a delicious version with less sugar. Be mindful that sugar plays a role in texture and browning. For great information on balancing sweetness in your diet, the CDC has helpful guidelines on low added sugar eating.
This incredible pie is just one of many wonderful, easy desserts in our collection of favorite pies and tarts. You’ll find everything from classic fruit pies to other magical “impossible” creations there!
Your Coconut Custard Pie Questions, Answered
Can I make this Impossible Coconut Custard Pie without Bisquick?
Yes, you can! To make a Bisquick substitute for this specific recipe, mix together 1/2 cup of all-purpose flour, 3/4 teaspoon of baking powder, 1/4 teaspoon of salt, and 1/2 tablespoon of softened butter or oil. Use this mixture in place of the 1/2 cup of Bisquick. The result will be slightly different but still delicious. The pie might be a bit more dense, but the magical layering effect should still occur. It’s a great option if you don’t have the mix on hand.
Why is my pie soggy in the middle?
A soggy middle usually means the pie needed more baking time. Oven temperatures can vary. The pie is done when the top is a deep golden brown and the center *just* barely jiggles when you gently shake the pan. A knife inserted near the center should come out clean, not wet with batter. If the top was browning too fast, you might have taken it out early. Next time, tent the pie with foil if the top darkens quickly, and let it bake a few more minutes until fully set.
Can I use canned coconut milk instead of regular milk?
Absolutely! Using canned coconut milk will give you an incredibly rich and pronounced coconut flavor. For best results, use “full-fat” canned coconut milk for the creamiest custard. You can replace all 2 cups of regular milk with it. Just make sure to shake the can well or stir it before measuring, as the cream and liquid separate. Your pie will be a deeper, more tropical treat. It’s one of my favorite variations!
How do I know when the magic coconut pie is fully cooked?
Look for three key signs. First, the entire top should be a uniform, beautiful golden brown, with the coconut flakes looking nicely toasted. Second, the edges will be firm and slightly puffed. Third, and most important, the center should be set with only the slightest movement—a gentle jiggle, not a wobbly wave. The classic knife test works perfectly here. Insert a knife about an inch from the center; it should come out clean.
Can I make this recipe ahead of time?
This pie is an excellent make-ahead dessert! In fact, I think it’s even better the next day. Bake and cool the pie completely. Then cover it tightly and store it in the refrigerator. It will keep beautifully for up to 3 days. The flavors meld, and the custard sets up firmly, making it easier to slice. You can bake it a full day before you need to serve it. Just add any whipped cream or garnish right before serving.
Is it possible to freeze Impossible Coconut Custard Pie?
You can freeze this pie successfully. Let it cool completely after baking. Wrap the entire pie (or individual slices) tightly in plastic wrap, then in a layer of aluminum foil. Freeze for up to 2 months. To serve, thaw it overnight in the refrigerator. The texture will be slightly different from fresh—the custard may be a bit more dense—but it will still taste wonderful. It’s a great way to have a homemade dessert ready for unexpected guests.
My pie didn’t form distinct layers. What went wrong?
If your pie didn’t layer, the most common culprit is an oven that wasn’t hot enough at the start. A full preheat to 400°F is crucial for the initial “shock” that helps the ingredients separate. Also, double-check your measurements, especially the Bisquick and milk. Too much liquid can prevent proper setting. Finally, avoid over-greasing the pan. A thin coat of butter is enough; a pool of melted butter at the bottom can interfere with the crust formation.
Can I add other flavors to the basic coconut custard pie?
You can get so creative with flavors! Try adding 1/2 teaspoon of almond extract with the vanilla for a marzipan-like taste. A pinch of nutmeg or cinnamon in the batter adds warmth. For a citrus twist, add the zest of a lime or orange. You could also fold in a handful of mini chocolate chips, chopped macadamia nuts, or even diced mango. Just keep any add-ins to about 1/2 to 3/4 cup so you don’t weigh down the delicate batter.
What’s the best way to get clean slices of custard pie?
A clean, sharp knife is your best friend. Run the knife under very hot water, wipe it dry, and make your cut. The heat helps slice cleanly through the custard. Repeat for each slice. For the absolute cleanest cuts, chill the fully cooled pie for at least 3-4 hours, or overnight. A well-chilled pie holds its shape perfectly. You can also use a pie server or thin spatula to gently lift each piece from the bottom crust.
Can I make this coconut pie with less sugar?
You can reduce the sugar, but do so carefully. Sugar contributes to the custard’s structure and browning. I wouldn’t recommend going below 1/2 cup for this recipe, or the texture may become eggy and the top won’t caramelize as nicely. You could also experiment with a natural sugar substitute that measures 1:1 like sugar in baking. Be aware the flavor and color will change slightly. It’s still a treat, so enjoy it in moderation!
Ready to Make Some Magic?
There you have it, friends—the secret to the magical, self-crusting Impossible Coconut Custard Pie. It’s a recipe that never fails to bring a smile, both to the baker and everyone who gets a slice. So preheat that oven, grab your bowl, and get ready for a little kitchen wizardry. Don’t forget to share your beautiful creations online! Tag your photos with #MagicalBaking. I can’t wait to see your pies.
Equipment
- Grand bol
- Fouet
- Spatule
- Plaque à pâtisserie
- Papier sulfurisé
Ingredients
- 1/2 tasse mélange à pâtisserie Bisquick
- 3/4 tasse sucre
- 4 œufs
- 2 tasse lait entier ou 2%
- 1 tasse noix de coco râpée sucrée
- 1 cuillère à café extrait de vanille
- 1 cuillère à soupe beurre ramolli
Instructions
- Préchauffez le four à 200°C (400°F) et beurrez un plat à tarte de 9 pouces.
- Dans un grand bol, mélangez le Bisquick, le sucre, les œufs, le lait, la noix de coco, la vanille et le beurre ramolli.
- Battez le mélange avec un fouet ou un batteur électrique à vitesse moyenne-basse pendant environ 2 minutes, jusqu'à ce qu'il soit lisse et légèrement mousseux.
- Versez la pâte dans le plat à tarte beurré et faites cuire au four pendant 25 à 30 minutes jusqu'à ce qu'elle soit dorée et juste prise au centre.
- Retirez du four et laissez refroidir complètement sur une grille, puis réfrigérez pendant au moins une heure avant de trancher.
Notes
Nutrition

Hi, I’m Olivia Parker, the founder of BakingSecret.com and a lifelong lover of all things sweet and homemade. I grew up in a small town in Oregon, where the smell of fresh cookies in my family’s kitchen sparked my passion for baking. Over the years, I turned that passion into a mission: to help home bakers feel confident, inspired, and creative.
After studying food science and working in several artisan bakeries across the U.S., I decided to create a space where everyone from beginners to seasoned bakers can find reliable recipes, expert tips, and a warm, welcoming community. BakingSecret.com is my way of sharing the magic of baking with the world. When I’m not testing new recipes, you’ll find me exploring farmers’ markets, collecting vintage cookbooks, or perfecting my sourdough technique.