
Homemade Jelly Donuts: Your New Favorite Sweet Ritual
Is there anything more joyful than biting into a warm, sugar-coated donut and finding a river of sweet jam inside? I don’t think so. Every time I make these jelly donuts, my kitchen fills with the most amazing smell. It reminds me of weekend mornings with my family. This recipe is my go-to for creating those happy, sticky-fingered memories. Let’s make some magic!
The Sweet History of the Jelly Donut
The jelly-filled donut has a fun story. In many places, it’s a festive treat. For example, in Israel, they eat ‘sufganiyot’ during Hanukkah. Polish ‘paczki’ are a rich, traditional favorite too. My version is a bit simpler for home bakers. It captures that same spirit of celebration in every fluffy, jammy bite. It’s a little piece of sweet history you can make right on your stove.
Why You’ll Love This Jelly Donut Recipe
You will adore this recipe! First, the dough is wonderfully soft and tender. Second, frying at home means they are fresher than any store-bought version. Finally, you get to pick your favorite jam. Raspberry? Strawberry? Go wild! The process is also super satisfying. Watching the dough puffs up in the oil is pure kitchen magic. It’s easier than you think to make bakery-style donuts.
Perfect Occasions for Jelly-Filled Donuts
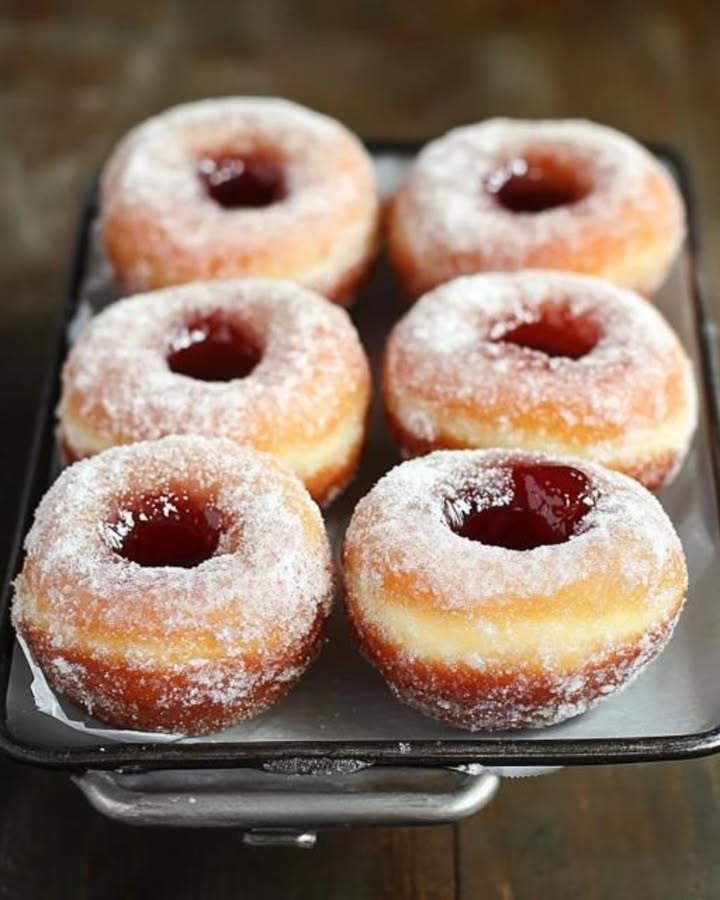
These donuts turn any day into a party. They are perfect for weekend brunches with coffee. They make a fantastic treat for kids’ sleepovers or birthday breakfasts. I love making a big batch for holiday mornings. The powdered sugar looks like a dusting of snow! They’re also a hit at bake sales. Trust me, a box of these never lasts long.
Ingredients for Your Perfect Jelly Donuts
Gather these simple ingredients for donut success:
- 2 1/4 cups all-purpose flour
- 1/4 cup granulated sugar
- 1 package active dry yeast (2 1/4 tsp)
- 1/2 cup milk
- 1/4 cup unsalted butter
- 2 large eggs
- 1/4 tsp salt
- 1 cup fruit jelly or jam (like strawberry or raspberry)
- 1 cup granulated sugar for coating
- Vegetable or canola oil for frying
Handy Substitution Options
No worries if you’re missing something! Here are easy swaps:
- Milk: Any milk works—whole, 2%, or even a non-dairy milk like almond.
- Butter: You can use salted butter. Just omit the extra salt in the recipe.
- Jelly: Use any flavor you love! Lemon curd or chocolate hazelnut spread are delicious too.
- Coating: Swap granulated sugar for powdered sugar or cinnamon sugar.
How to Make Homemade Jelly Donuts: A Step-by-Step Guide
Follow these simple steps for the best homemade donuts you’ve ever tasted.
Step 1: Mix Your Dry Ingredients
Start by grabbing a large mixing bowl. Measure out your flour, sugar, and yeast. The yeast will look like tiny granules. Whisk them all together until they are one uniform, pale mixture. This ensures the yeast is evenly distributed. Your kitchen will start to smell like a bakery already. Set this bowl aside for a moment. We are building the foundation for our fluffy donut dough.
Step 2: Warm the Milk and Butter
Now, pour your milk into a small saucepan. Cut the butter into a few pieces and add it in. Heat this gently over medium-low. We don’t want it boiling! Just warm it until the butter melts and the mixture feels like a warm bath to your finger. You should see little bubbles around the edge of the pan. This warmth wakes up the yeast. It’s the secret to a dough that rises beautifully.
Step 3: Combine and Knead the Dough
Pour the warm, buttery milk into your flour mixture. Crack in the two eggs and sprinkle the salt. Use a wooden spoon to stir everything into a shaggy dough. It will be sticky! Turn it out onto a lightly floured counter. Now, knead it for about 5-7 minutes. Push, fold, and turn. You’ll feel it transform from sticky to smooth and elastic under your hands. Pro tip: If the dough sticks, add a tiny bit more flour. Just a tablespoon at a time.
Step 4: Let the Dough Rise
Place your beautiful smooth dough ball back in the bowl. Cover it with a clean kitchen towel or plastic wrap. Find a warm, draft-free spot for it. I like the oven with just the light on. Let it rest here for about 1 hour. The yeast will do its magic. The dough will puff up and nearly double in size. It’s ready when you gently poke it and the indentation slowly fills back in.
Step 5: Shape the Donuts
Punch down the risen dough gently. It will deflate with a soft sigh. Turn it out onto your floured surface. Roll it out to about 1/2-inch thickness. Now for the fun part! Use a round cookie cutter or even the rim of a glass to cut out circles. Aim for about 3 inches wide. Gather the scraps, roll them out again, and cut more circles. Lay them on a parchment-lined tray. They need a short 15-minute rest before frying.
Step 6: Fry to Golden Perfection
Pour oil into a heavy-bottomed pot or deep skillet. You want it about 2 inches deep. Heat it over medium to 350-375°F. Use a thermometer if you have one. Carefully slide a few donuts into the hot oil. Don’t crowd the pot! Fry for about 1-2 minutes per side. Watch them turn a gorgeous, deep golden brown. They’ll puff up like little pillows. Use a slotted spoon to lift them out. Let them drain on a wire rack over paper towels.
Step 7: Fill with Sweet Jelly
Let the donuts cool just enough to handle. Spoon your jelly into a piping bag fitted with a small, round tip. If you don’t have one, a plastic bag with the corner snipped off works. Poke a small hole in the side of each warm donut. Gently squeeze the piping bag. Fill each donut until you feel a slight resistance and see a little jam peek out. This is the sweet surprise in every bite!
Step 8: The Sugar Coating Finale
Place your granulated sugar in a wide, shallow bowl. While the donuts are still warm (but not piping hot), roll each one in the sugar. Coat it generously on all sides. The warmth helps the sugar stick in a beautiful, sparkly layer. Set them on a serving plate. The contrast of the crunchy sugar against the soft, jam-filled interior is pure heaven. Serve them fresh and enjoy the smiles.
Chef’s Tip for Amazing Jelly Donuts
My secret trick? Add a teaspoon of vanilla extract or a bit of lemon zest to the dough. It gives a wonderful background flavor. It makes the fruit filling taste even brighter. A tiny splash of vanilla in the warm milk works wonders. It’s a simple way to make your homemade version taste extra special.
Your Jelly Donut Timeline
Planning is key for stress-free baking! Here’s your timeline:
- Prep Time: 30 minutes (measuring, mixing, shaping)
- Rising Time: 1 hour 15 minutes (first rise + short rest)
- Frying & Filling Time: 20 minutes
- Total Time: About 2 hours 5 minutes
- Kcal: Approximately 300 per delicious donut
One More Secret for Success
For the absolute fluffiest texture, let your eggs and milk come to room temperature before starting. Cold ingredients can slow down the yeast. This simple step makes the dough come together faster. It also helps it rise more evenly. Just take them out of the fridge 30 minutes before you begin.
A Fun Donut Fact
Did you know the first donuts probably didn’t have holes? Early versions were often just balls of fried dough. The hole in the center became popular later. It helped the donut cook more evenly all the way through. Our jelly donuts skip the hole. We save that space for a delicious pocket of fruity jam instead!
Necessary Equipment for Jelly Donuts
You don’t need fancy tools! Here’s what helps:
- Large mixing bowl
- Wooden spoon or spatula
- Rolling pin
- 3-inch round cutter (or a glass)
- Heavy pot or deep skillet for frying
- Candy/oil thermometer (very helpful!)
- Slotted spoon or spider skimmer
- Wire cooling rack
- Piping bag or plastic bag for filling
Storing Your Homemade Donuts
Best Served Fresh: Jelly donuts are truly at their prime the day they are made. The sugar coating is crisp. The outside is slightly crunchy from the fry. The inside is cloud-soft. Enjoy them within a few hours of cooking for the ultimate experience.
Short-Term Storage: If you have leftovers, store them in a single layer in an airtight container. Keep them at room temperature for up to 1 day. The sugar will soften and the exterior will lose its crunch. But they will still taste wonderfully sweet and delicious.
A Note on Refrigeration: I don’t recommend refrigerating them. The cold makes the starchy dough become firm and less pleasant. The sugar will also melt and get sticky. For longer storage, freezing is a better option. Freeze unfilled donuts on a tray, then bag them. Thaw and warm before filling.
Pro Tips & Helpful Advice
- Oil Temperature is King: Use a thermometer! If the oil is too cool, the donuts soak up grease and get heavy. If it’s too hot, they brown outside but stay raw inside. 350-375°F is perfect.
- Test Fry: Fry a small piece of dough first. If it sizzles nicely and turns golden in about 60 seconds, your oil is ready.
- Don’t Overfill: When injecting the jelly, stop when you feel resistance. Overfilling can cause the donut to burst, making a sugary mess.
- Even Sugar: Roll in sugar while still warm. For extra coverage, you can roll them a second time after they’ve cooled slightly.
Presentation Ideas for Your Donut Spread
Make your donuts look as good as they taste!
- Stack them on a rustic cake stand for a bakery display.
- Serve on a platter with different jams in the center for a DIY filling bar.
- Dust half with powdered sugar and half with granulated for a pretty two-tone effect.
- Skewer mini donut holes (made from scrap dough) on sticks for a fun, popsicle-style treat.
Healthier & Creative Jelly Donut Variations
Love this recipe? Try these fun twists next time!
- Baked Jelly Donuts: For a less guilty treat, try baking the dough. Brush shaped donuts with melted butter, bake at 375°F until golden, then fill and sugar-coat as usual. They’re lighter but still satisfying.
- Whole Grain Donuts: Substitute half the all-purpose flour with whole wheat flour. It adds fiber and a nutty flavor. The texture will be slightly denser but still delicious. For more on incorporating whole grain foods into your diet, check out this helpful resource.
- Vegan Jelly Donuts: Use plant-based milk, vegan butter, and a flax egg (1 tbsp ground flax + 3 tbsp water per egg). The dough may be a bit more delicate, but it works!
- Gluten-Free Jelly Donuts: Use a good 1-to-1 gluten-free flour blend. Make sure your yeast is gluten-free. The frying process is the same.
- Savory-Filled “Donuts”: Skip the sugar. Fill warm donuts with cheese sauce, spinach and feta, or even a creamy chicken mixture. Roll in grated Parmesan or everything bagel seasoning.
- Mini Donut Holes: Instead of cutting circles, roll the dough into small balls. Fry them until golden all over. Toss in cinnamon sugar and serve with jam for dipping.
If you enjoyed mastering this recipe, you might also love exploring other international pastries from around the world. The techniques you learn here open the door to so many delicious baked goods!
Common Mistakes to Avoid with Jelly Donuts
Learn from my kitchen mishaps! Avoid these common pitfalls.
Mistake 1: Killing the Yeast with Hot Liquid
This is the number one reason dough doesn’t rise. If your milk and butter mixture is too hot, it will kill the yeast. The dough will stay flat and dense. Always aim for “warm,” around 110°F. It should feel comfortably warm on your wrist, not hot. A quick test is the finger dip—if you can hold your finger in it for 10 seconds, it’s perfect.
Mistake 2: Frying in Oil That’s Too Cold
Oil that isn’t hot enough is a disaster for donuts. The dough soaks up the oil instead of cooking quickly. You end up with greasy, heavy donuts. Always use a thermometer. Wait for it to hit 350-375°F before adding your first donut. If you don’t have a thermometer, do the dough test: a tiny piece of dough should sizzle and brown in about 60 seconds.
Mistake 3: Overcrowding the Frying Pot
It’s tempting to fry a lot at once. But adding too many donuts drops the oil temperature fast. This leads to uneven cooking and greasy results. Fry in small batches. Give each donut plenty of room to float and puff up. This keeps the oil temperature stable. Your donuts will cook evenly and have that perfect golden crust.
Mistake 4: Filling Donuts When They’re Too Hot
If you try to inject jelly into a piping hot donut, the jam will become super runny. It can leak out or even burn you. Let the donuts cool for about 5-10 minutes after frying. They should be warm to the touch, not scalding. This allows the interior to set a bit. The jelly will stay put right where you want it.
Frequently Asked Questions About Jelly Donuts
Can I make the dough ahead of time?
Yes, you can! After the first rise, you can punch down the dough. Then, cover it tightly and put it in the refrigerator overnight. This is called a cold ferment. It actually develops more flavor. The next day, take it out. Let it sit at room temperature for 30 minutes. Then, roll, cut, and fry as directed. This is a great way to break up the work for a special breakfast.
What’s the best jam or jelly to use for filling?
You want a thick jam or jelly, not a runny preserves. A thick seedless raspberry or strawberry jam is classic and works perfectly. Apricot and blackberry are also fantastic. Avoid jelly with huge fruit chunks. They can clog your piping tip. If your jam is too runny, you can thicken it. Simmer it in a pan for a few minutes to reduce it, then let it cool before filling.
How do I know when the oil is ready without a thermometer?
No thermometer? No problem. Use the wooden spoon or dough test. Dip the handle of a wooden spoon into the oil. If steady bubbles form around it immediately, the oil is likely hot enough. For the dough test, drop a tiny piece of your scrap dough into the oil. If it sizzles vigorously, rises to the top, and turns golden brown in about 60 seconds, you’re ready to fry.
Why are my donuts raw in the middle?
This usually means the oil was too hot. The outside cooked and browned too quickly. The heat didn’t have time to travel to the center. Next time, lower your oil temperature slightly. Aim for 350°F. Also, make sure you aren’t rolling the dough too thick. A consistent 1/2-inch thickness is ideal for even cooking from edge to center.
Can I bake jelly donuts instead of frying them?
You can! The texture will be more like a sweet roll than a classic fried donut. But it’s still delicious. Place your shaped dough on a parchment-lined baking sheet. Let them rise until puffy. Brush lightly with melted butter. Bake at 375°F for 12-15 minutes until golden. Let them cool slightly, then fill and coat with sugar as usual.
My dough didn’t rise. What went wrong?
There are a few common culprits. First, check your yeast expiration date. Old yeast loses its power. Second, the liquid was likely too hot and killed the yeast. Or, it could have been too cold and didn’t activate it. Third, your rising spot might have been too cold. Yeast loves warmth. Try placing the bowl in an oven with just the light on for a cozy, draft-free spot.
What oil is best for frying donuts?
Use an oil with a high smoke point and a neutral flavor. Vegetable oil, canola oil, and peanut oil are all excellent choices. They can handle the high heat without burning. They also won’t impart any weird tastes to your delicate donuts. Avoid olive oil for frying donuts. It has a lower smoke point and a strong flavor that doesn’t pair well with sweet jelly.
How do I clean up used frying oil?
Let the oil cool completely in the pot. Once cool, strain it through a fine-mesh sieve lined with cheesecloth or a coffee filter. This removes any tiny dough bits. Store the clean oil in a sealed container in a cool, dark place. You can reuse it for another batch of donuts or for savory frying. When you’re done, pour cooled oil into a non-recyclable container and dispose of it in the trash.
Can I freeze homemade jelly donuts?
You can freeze unfilled, un-sugared donuts for best results. Let them cool completely after frying. Place them in a single layer on a baking sheet and flash-freeze for 1 hour. Then, transfer them to a freezer bag. They’ll keep for 1-2 months. To serve, thaw at room temperature. Warm them gently in the oven. Then, fill with jam and roll in sugar.
What’s the difference between a jelly donut and a bismarck?
This is a fun regional naming quirk! In many parts of the U.S., a jelly-filled donut is called a Bismark or Bismarck. They are essentially the same thing: a round, fried, yeasted doughnut filled with jelly. Some might say a Bismark is always filled with jelly, while a donut could have other fillings. But in most home kitchens, the names are used interchangeably for this delicious treat.
Ready for more baking adventures? The skills you learn here are perfect for trying a classic Italian Zeppole or the French beignet-style Pets de Nonne. For another filled pastry, check out these amazing Polish Paczki. And if you want a completely different dessert, this rich Chocolate Souffle is a showstopper.
Final Sweet Thoughts
Making jelly donuts at home is a rewarding project. Yes, it takes a little time. But the result is so worth it. The smell, the taste, the pride—it’s all magical. I hope this recipe becomes a special tradition in your home. Just like it is in mine. Gather your ingredients, heat that oil, and get ready for the happiest, jammiest breakfast (or dessert) ever. Happy baking!
Equipment
- Grand bol
- Spatule
- Rouleau à pâtisserie
- Plaque à pâtisserie
- Huile pour friture
Ingredients
- 2 1/4 tasses farine tout usage
- 1/4 tasse sucre granulé
- 1 paquet levure sèche active (2 1/4 cuil. à café)
- 1/2 tasse lait
- 1/4 tasse beurre non salé
- 2 grands œufs
- 1/4 cuil. à café sel
- 1 tasse confiture ou gelée de fruits (comme fraise ou framboise)
- 1 tasse sucre granulé pour enrobage
- q.s. huile pour friture
Instructions
- Mélangez la farine, le sucre et la levure dans un grand bol et fouettez jusqu'à homogène.
- Chauffez le lait et le beurre dans une casserole à feu moyen-doux jusqu'à ce qu'ils soient fondus et bouillonnants, sans ébullition.
- Versez le mélange de lait chaud dans le mélange de farine, ajoutez les œufs et le sel, et remuez jusqu'à obtenir une pâte hachée.
- Pétrissez la pâte sur une surface farinée pendant 5 à 7 minutes jusqu'à obtenir une texture lisse et élastique.
- Laissez la pâte lever dans un bol couvert dans un endroit chaud pendant environ 1 heure jusqu'à ce qu'elle double de taille.
- Étalez la pâte jusqu'à obtenir une épaisseur de 1/2 pouce et découpez des cercles de 3 pouces.
- Faites reposer les cercles de donuts pendant 15 minutes sur un plateau recouvert de papier sulfurisé.
- Chauffez l'huile dans un pot profond à 350-375°F, puis faites frire les donuts pendant 1-2 minutes de chaque côté jusqu'à ce qu'ils soient dorés.
- Laissez les donuts refroidir légèrement avant de les garnir de gelée dans chaque donuts.
- Roulez les donuts encore chauds dans le sucre granulé et servez.
Notes
Nutrition

Hi, I’m Olivia Parker, the founder of BakingSecret.com and a lifelong lover of all things sweet and homemade. I grew up in a small town in Oregon, where the smell of fresh cookies in my family’s kitchen sparked my passion for baking. Over the years, I turned that passion into a mission: to help home bakers feel confident, inspired, and creative.
After studying food science and working in several artisan bakeries across the U.S., I decided to create a space where everyone from beginners to seasoned bakers can find reliable recipes, expert tips, and a warm, welcoming community. BakingSecret.com is my way of sharing the magic of baking with the world. When I’m not testing new recipes, you’ll find me exploring farmers’ markets, collecting vintage cookbooks, or perfecting my sourdough technique.