
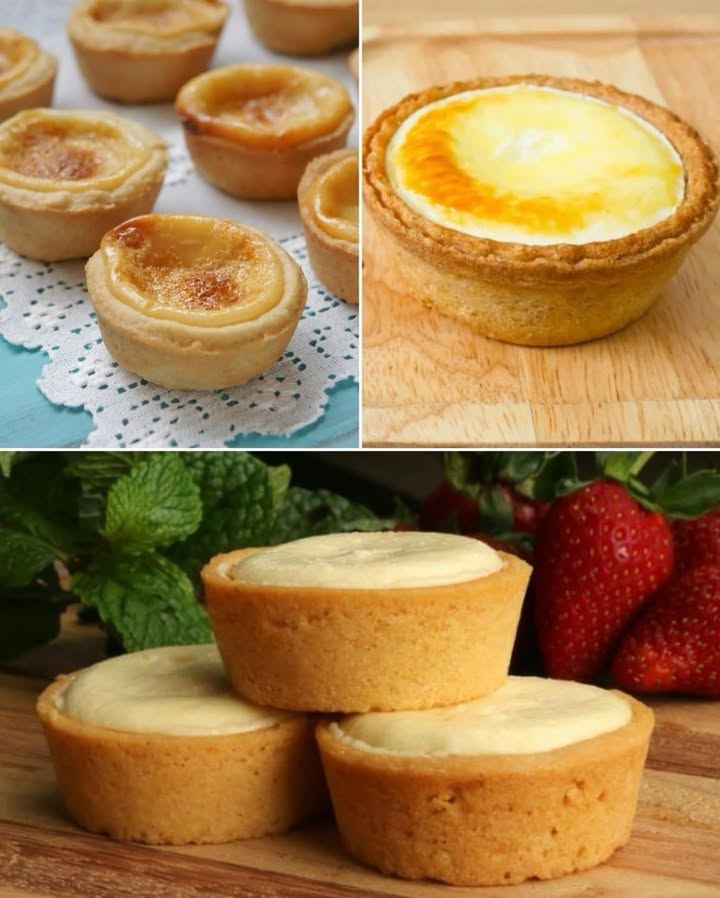
Pastry Cream Cups: A Little Cup of Sunshine
You know that feeling when you bite into something so perfectly sweet and creamy that you just have to close your eyes for a second? That’s what these Pastry Cream Cups are all about. I first made them for my daughter’s school bake sale, and let me tell you, they were gone faster than you can say “seconds, please!” They’re like a happy little hug in a cup—a buttery, flaky shell cradling the smoothest, dreamiest vanilla custard. They look fancy but are secretly simple. Let’s make some magic together!
A Bite-Sized History of Sweetness
While the exact origin is a bit of a delicious mystery, these cups are a wonderful twist on classic pastry traditions. Think of them as the charming, portable cousin of a fruit tart or a cream puff. The concept of a baked pastry shell filled with custard is a staple in bakeries from Paris to your local patisserie. My version is a home cook’s dream, blending a simple shortbread-like dough with a foolproof pastry cream. It’s a modern take that brings a touch of bakery elegance right to your kitchen table, perfect for when you want to impress without the stress.
Why You’ll Fall in Love With This Recipe
This recipe is a total winner for so many reasons! First, the flavor is pure comfort: rich butter, sweet vanilla, and creamy custard. Second, it’s incredibly versatile. You can top them with fresh berries, a dusting of powdered sugar, or a drizzle of chocolate. Third, they are the perfect make-ahead treat. You can bake the cups and make the cream a day early, then assemble just before serving. They’re foolproof, fun, and guaranteed to make you the star of any potluck or family dinner.
Perfect Occasions for Pastry Cream Cups
These delightful cups are perfect for almost any gathering! They shine at afternoon tea parties, bridal or baby showers, and as a elegant finish to a dinner party. I love packing them in a pretty box for a thoughtful homemade gift. They’re also a fantastic project for baking with kids on a rainy weekend—my little ones love pressing the dough into the molds. Honestly, a quiet Tuesday afternoon with a cup of coffee and one of these is a pretty perfect occasion, too!
Gathering Your Ingredients
Let’s check the pantry! You likely have most of this already. Here’s what you need for these amazing Pastry Cream Cups:
For the Dough:
- 2 cups all-purpose flour
- 1/2 cup granulated sugar
- 1/2 cup unsalted butter, at room temperature
- 1 large egg
- 1 teaspoon baking powder
For the Pastry Cream:
- 2 cups whole milk
- 1/2 cup granulated sugar, divided
- 3 large egg yolks
- 1/4 cup cornstarch
- 1 teaspoon pure vanilla extract
Easy Ingredient Swaps
Don’t have something? No worries! Here are some easy swaps:
- Butter: You can use salted butter. Just omit any added salt in the recipe.
- Milk: 2% milk works fine, though whole milk gives the richest cream.
- Cornstarch: An equal amount of all-purpose flour can be used, though the cream might be slightly less glossy.
- Vanilla: Try using the seeds from a vanilla bean for an extra special touch, or a dash of almond extract.
Let’s Make These Dreamy Pastry Cream Cups!
Ready? Put on your favorite apron, and let’s get baking. I’ll walk you through each step.
Step 1: Making the Dough
In a large, cozy bowl, whisk together your flour, baking powder, and sugar. The airy, snowy-white flour mixing with the sweet sugar is the start of something wonderful. Add the soft butter and the egg. Now, get your hands in there! Knead it gently until it comes together into a soft, pale yellow ball. It should feel like Play-Doh but smell like a bakery. Pro tip: If the dough feels too sticky, add a tablespoon of flour. Once it’s smooth, wrap it in plastic and let it rest on the counter for 30 minutes. This relaxes the gluten and makes rolling a breeze.
Step 2: Shaping the Cups
After its little nap, your dough is ready. Lightly flour your surface and rolling pin. Roll the dough out to about half a centimeter thick—the thickness of a couple of stacked quarters. Using a round cookie cutter or even the rim of a glass, cut out circles slightly larger than your muffin tin cups. Gently press each circle into a greased muffin cup, forming a neat little nest. Use your fingers to press it up the sides evenly. Seeing those neat little cups lined up is so satisfying!
Step 3: Starting the Pastry Cream
Now for the star: the pastry cream! Pour the milk and half the sugar into a medium saucepan. Place it over medium heat. We just want to warm it up until you see little bubbles form around the edge—don’t let it boil yet. Meanwhile, in a separate bowl, whisk the egg yolks with the remaining sugar and cornstarch. Whisk vigorously for a full minute until it’s thick, pale, and completely smooth. This step is key to a lump-free cream!
Step 4: Cooking the Cream to Perfection
When the milk is steaming hot, it’s time to temper the eggs. This is the chef’s secret to avoiding scrambled eggs in your cream! Slowly pour about half of the hot milk into the egg yolk mixture, whisking constantly. Now, pour this combined mixture back into the saucepan with the remaining milk. Return it to medium heat. Cook, stirring non-stop with a wooden spoon, until the mixture thickens into a glorious, pudding-like consistency. It should coat the back of the spoon. Remove from heat and stir in the vanilla. That aroma is heaven!
Step 5: Assembling and Baking
Preheat your oven to 350°F (180°C). Carefully spoon or pipe the warm pastry cream into your waiting dough cups, filling them almost to the top. Slide the tray into the oven and bake for 20-25 minutes. You’ll know they’re done when the pastry edges are a beautiful golden brown and the cream is set. The smell filling your kitchen is your reward. Let them cool completely in the pan before trying to remove them. Patience is a virtue here—a warm cream cup is a fragile thing!
Your Baking Timeline
Here’s a quick breakdown of the time you’ll need:
- Prep Time: 30 minutes
- Dough Resting Time: 30 minutes
- Cooking Time (Cream): 10 minutes
- Baking Time: 25 minutes
- Cooling Time: 1 hour
- Total Time: About 2 hours 35 minutes (mostly hands-off)
Chef’s Secret for the Smoothest Cream
My absolute can’t-fail trick? Strain your finished pastry cream through a fine-mesh sieve into a clean bowl before filling the cups. This catches any tiny, accidental bits of cooked egg, guaranteeing a velvety-smooth texture every single time. It’s a one-minute step that makes all the difference between good and great.
A Fun Fact About Custard
Did you know that pastry cream is known as “crème pâtissière” in French? It’s one of the five mother sauces of pastry! This versatile cream is the base for so many desserts, from éclairs to fruit tarts. By mastering this one recipe, you’re unlocking the door to a whole world of international pastries.
Tools You’ll Need
- Muffin tin (standard 12-cup)
- Medium and large mixing bowls
- Whisk and wooden spoon
- Rolling pin
- Round cookie cutter (about 3.5-inch diameter)
- Medium saucepan
- Fine-mesh sieve (highly recommended!)
- Plastic wrap
Storing Your Pastry Cream Cups
Once completely cooled, these cups store beautifully. Place them in a single layer in an airtight container. They will keep in the refrigerator for up to 3 days. The pastry may soften slightly from the cream’s moisture, but they will still taste delicious.
For longer storage, you can freeze the baked and filled cups. First, freeze them uncovered on a baking sheet until solid. Then, transfer them to a freezer-safe bag or container. They can be frozen for up to 1 month. Thaw overnight in the refrigerator before serving.
I do not recommend storing them at room temperature for more than a few hours due to the dairy in the cream. Always keep them chilled for food safety and the best texture.
My Best Tips and Advice
- Ensure your butter is truly at room temperature for an easy-to-work-with dough.
- When cooking the cream, constant stirring is non-negotiable. Put on some music and stir away!
- Let the cups cool fully in the pan. They firm up as they cool and will unmold perfectly.
- For a shiny finish, you can brush the baked pastry with a little apricot jam glaze.
Pretty Presentation Ideas
- Top each cup with a single perfect raspberry or blueberry.
- Dust lightly with powdered sugar just before serving.
- Add a tiny mint leaf for a pop of color.
- Serve on a tiered cake stand for a tea party vibe.
- For a decadent twist, drizzle with melted dark chocolate.
6 Delicious Variations to Try
Once you master the basic Pastry Cream Cup, the fun really begins! Here are six tasty twists:
- Chocolate Pastry Cream Cups: Add 3 ounces of melted and cooled semi-sweet chocolate to the finished pastry cream. It’s pure bliss for chocolate lovers.
- Lemon Zest Cups: Add the zest of two lemons to the dough and replace the vanilla in the cream with lemon juice. Bright, sunny, and refreshing!
- Berry Compote Cups: Make a quick compote by simmering berries with a little sugar. Spoon a layer into the bottom of the baked cup before adding the vanilla cream.
- Coconut Cream Cups: Use coconut milk instead of regular milk and add a handful of toasted coconut to the dough. Tropical paradise!
- Espresso Cream Cups: Dissolve 1-2 teaspoons of instant espresso powder into the warm milk before making the cream. A perfect pick-me-up dessert.
- Mini Fruit Tart Cups: After baking and cooling, fill with vanilla cream and artfully arrange slices of kiwi, strawberry, and mandarin orange on top.
Looking for more inspiration? You might love the flavors in our Classic French Macarons, or the creamy filling in these Perfect Boston Cream Pie cupcakes. For another great custard-based dessert, check out our Crème Brûlée for Beginners. And if you adore fruity pastries, our Rustic Mixed Berry Galette is a must-try.
Common Mistakes to Avoid
Avoiding these simple pitfalls will guarantee perfect Pastry Cream Cups every time.
Mistake 1: Not Tempering the Eggs
Pouring hot milk directly into the egg yolk mixture will scramble the eggs. You’ll end up with sweet, vanilla-flavored scrambled eggs instead of smooth cream. Always slowly whisk the hot milk into the yolks first to gently raise their temperature. Then you can safely combine everything back in the pot.
Mistake 2: Overworking the Dough
Kneading the dough too much develops the gluten in the flour. This makes the pastry tough and chewy, not tender and flaky. Mix just until the ingredients come together into a ball. A few dry crumbs are okay—they’ll incorporate as you gently knead it a few times on the counter.
Mistake 3: Under-thickening the Pastry Cream
If you take the cream off the heat too soon, it will be runny and won’t set properly in the oven. Cook it until it’s thick like pudding and holds a line when you run your finger across the back of the coated spoon. It should bubble a little in the center. This ensures a firm, sliceable filling.
Mistake 4: Trying to Unmold While Warm
This is the number one reason cups break! The pastry and cream are both soft and fragile when hot. You must let them cool completely in the muffin tin. As they cool, the structure firms up. Then, a gentle twist with a butter knife will pop them out perfectly intact.
Your Pastry Cream Cup Questions, Answered!
Can I make the components ahead of time?
Absolutely! This is a great make-ahead strategy. You can bake the empty pastry cups a day in advance. Let them cool, then store them in an airtight container at room temperature. The pastry cream can also be made a day ahead. Press plastic wrap directly onto its surface to prevent a skin from forming and refrigerate. Assemble and fill the cups a few hours before you plan to serve them. This keeps the pastry from getting soggy.
Why did my pastry cream turn out lumpy?
Lumps usually happen for two reasons. First, the egg yolk mixture wasn’t whisked smoothly enough before adding the hot milk. Second, the cream wasn’t stirred constantly during cooking, allowing it to cook unevenly and form small curds. The good news is you can fix it! Simply push the finished cream through a fine-mesh sieve. This will remove any lumps and give you a perfectly smooth texture. Next time, whisk thoroughly and keep stirring.
Can I use a different type of flour?
For the best texture, stick with all-purpose flour. It has the right protein content to create a tender yet sturdy cup that holds its shape. Using cake flour might make the dough too delicate and crumbly. Using bread flour would make it too tough. If you need a gluten-free option, a 1-to-1 gluten-free all-purpose flour blend should work, though the texture may be slightly more sandy.
My dough is too sticky to roll. What should I do?
Don’t panic! This happens if the butter was too soft or the kitchen is very warm. Just add a little more flour, one tablespoon at a time, and gently knead it in until the dough is no longer sticky. Also, make sure to chill the dough for the full 30 minutes. This firms up the butter and makes the dough much easier to handle when rolling.
Can I freeze the unfilled baked cups?
Yes, you can! This is a fantastic time-saver. Once the baked cups are completely cooled, place them in a single layer on a baking sheet and flash-freeze for an hour. Then, transfer them to a freezer-safe bag or container. They can be frozen for up to 2 months. Thaw at room temperature before filling. This method is perfect for having a ready-to-go dessert base anytime.
What’s the best way to fill the cups neatly?
For the cleanest look, use a piping bag fitted with a large round tip. It gives you so much control and prevents drips on the beautiful pastry edges. If you don’t have a piping bag, a sturdy plastic zip-top bag with a corner snipped off works just as well. You can also use a small cookie scoop or just a spoon—just be careful to fill evenly.
Is there a way to make the pastry cream less sweet?
Of course! Dessert should suit your taste. You can safely reduce the sugar in the pastry cream by up to 2 tablespoons without affecting the texture. The flavor will be more focused on the rich egg yolks and vanilla. You can also use the USDA’s food composition data to compare the sugar content of different ingredients if you’re looking to make more informed swaps.
Can I use this pastry cream for other desserts?
You absolutely can! This is a master recipe for classic pastry cream. Once chilled, it’s perfect for filling éclairs, cream puffs, layer cakes, or even as a dip for fresh fruit. It’s wonderfully versatile. Just remember that if you’re using it as a cake filling, you might want to lighten it by folding in some whipped cream for stability.
Why did my cups puff up in the center while baking?
This is usually because the dough wasn’t pressed firmly enough into the corners and up the sides of the muffin tin. When the heat hits, air pockets can form, causing the dough to lift. To prevent this, use your fingers or a small tool like a shot glass to really press the dough into every nook and cranny of the cup. Dock the bottom lightly with a fork before filling to let steam escape.
Can I make mini versions of these?
Mini cups are adorable and perfect for parties! Simply use a mini muffin tin and a smaller round cutter. Roll the dough a tiny bit thinner. The baking time will be much shorter—start checking at around 10-12 minutes. The filling amount will also be less, so you can get many more treats from one batch. They’re bite-sized perfection.
And there you have it! From the first mix of flour and butter to that final, satisfying bite, making Pastry Cream Cups is a joyful baking adventure. They prove that the most impressive desserts often come from simple, honest ingredients and a little bit of love. I hope this recipe becomes a cherished favorite in your home, just like it is in mine. Now, go preheat that oven and get ready for some compliments! Happy baking!
Equipment
- Grand bol
- Fouet
- Spatule
- Plaque à pâtisserie
- Papier sulfurisé
Ingredients
- 2 tasses farine tout usage
- 1/2 tasse sucre cristallisé
- 1/2 tasse beurre non salé, à température ambiante
- 1 grand œuf
- 1 cuillère à café poudre à lever
- 2 tasses lait entier
- 1/2 tasse sucre cristallisé, divisé
- 3 grands jaunes d'œufs
- 1/4 tasse maïs d'amidon
- 1 cuillère à café extrait de vanille pur
Instructions
- Dans un grand bol, fouettez ensemble la farine, la poudre à lever et le sucre.
- Ajoutez le beurre et l'œuf, puis pétrissez doucement jusqu'à ce que la pâte se forme.
- Enveloppez la pâte dans du film plastique et laissez reposer pendant 30 minutes.
- Étalez la pâte à environ un demi-centimètre d'épaisseur et découpez des cercles.
- Pressez les cercles dans des moules à muffins beurrés pour former des coupelles.
- Dans une casserole, chauffez le lait et la moitié du sucre jusqu'à ce qu'il soit fumant mais sans bouillir.
- Dans un autre bol, fouettez les jaunes d'œufs avec le sucre restant et le maïs d'amidon jusqu'à consistance lisse.
- Incorporez lentement la moitié du lait chaud dans le mélange d'œufs, puis remettez le tout dans la casserole.
- Faites cuire, en remuant constamment, jusqu'à ce que le mélange épaississe à une consistance de pudding.
- Retirez du feu et ajoutez l'extrait de vanille.
- Préchauffez le four à 180 °C (350 °F).
- Remplissez les coupelles de crème pâtissière chaude et faites cuire pendant 20-25 minutes.
- Laissez refroidir complètement avant de retirer du moule.
Notes
Nutrition

Hi, I’m Olivia Parker, the founder of BakingSecret.com and a lifelong lover of all things sweet and homemade. I grew up in a small town in Oregon, where the smell of fresh cookies in my family’s kitchen sparked my passion for baking. Over the years, I turned that passion into a mission: to help home bakers feel confident, inspired, and creative.
After studying food science and working in several artisan bakeries across the U.S., I decided to create a space where everyone from beginners to seasoned bakers can find reliable recipes, expert tips, and a warm, welcoming community. BakingSecret.com is my way of sharing the magic of baking with the world. When I’m not testing new recipes, you’ll find me exploring farmers’ markets, collecting vintage cookbooks, or perfecting my sourdough technique.