
Ever had a cake that feels like a hug from your grandmother? That warm, buttery aroma filling your kitchen is exactly what happens with this Kentucky Butter Cake. It’s not some fancy, high-stress recipe. It’s a simple, honest cake that always, always gets a smile. My family practically cheers when I pull this golden bundt from the oven. It’s our go-to for birthdays, Sunday dinners, or just because someone needs a little sweetness.
The Story of This Buttery Bundt Cake
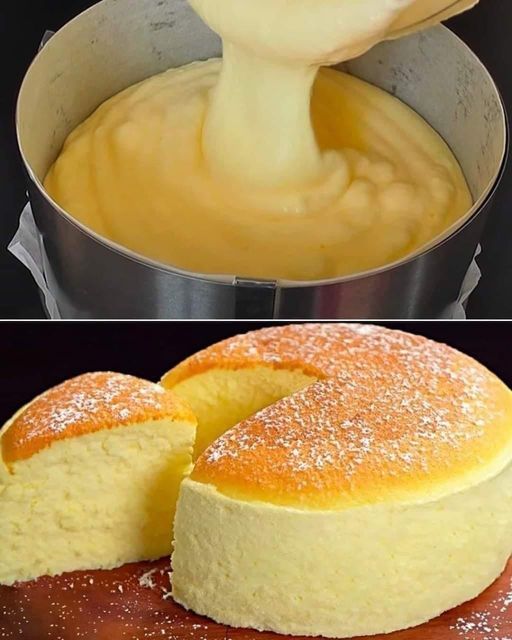
The Kentucky Butter Cake recipe has been a treasure in community cookbooks and family kitchens for decades. While its exact origins are a bit fuzzy, it’s a classic Southern American dessert. It embodies that wonderful tradition of rich, comforting “snack cakes” meant to be shared. The magic is in that simple butter sauce poured over the hot cake. It soaks in, creating an unbelievably moist texture and a flavor that’s pure, sweet butter. Modern versions stick to this perfect formula, relying on ingredients you likely already have in your pantry.
Why You’ll Absolutely Love This Recipe
You’ll love this Kentucky Butter Cake for its incredible simplicity and crowd-pleasing results. First, the flavor is out-of-this-world buttery and rich without being heavy. Second, it’s a one-bowl wonder – mixing is straightforward and quick. Third, that soaking sauce guarantees a moist cake that stays delicious for days. It’s forgiving, reliable, and looks gorgeous on a cake stand. Honestly, it’s the kind of recipe that makes you feel like a baking pro.
The Perfect Occasion for Kentucky Butter Cake
This cake is your secret weapon for so many events! It’s perfect for a casual potluck or a family reunion where you need a no-fuss dessert. Serve it at a birthday party instead of a layered cake – it’s equally festive. A slice with coffee makes a cozy afternoon treat. It’s also a wonderful bake sale item or a thoughtful gift for a neighbor. Any time you want to share a classic, homemade joy, this cake is the answer.
Ingredients for Your Easy Kentucky Butter Cake
Gather these simple ingredients for your cake and sauce.
- 3 cups All-Purpose Flour
- 2 cups Granulated Sugar
- 1 teaspoon Salt
- 1 teaspoon Baking Powder
- ½ teaspoon Baking Soda
- 1 cup Buttermilk
- 1 cup Unsalted Butter, softened
- 2 teaspoons Vanilla Extract
- 4 Large Eggs
For the Butter Sauce:
- ⅓ cup Granulated Sugar
- ⅓ cup Unsalted Butter
- 3 tablespoons Water
- 2 teaspoons Vanilla Extract
Handy Substitution Options
If you’re missing something, try these swaps.
- Buttermilk: Make a quick substitute by adding 1 tablespoon of lemon juice or white vinegar to 1 cup of regular milk. Let it sit for 5 minutes before using.
- Unsalted Butter: Salted butter works fine. Just omit the added salt in the cake batter to keep the flavor balanced.
- Standard Bundt Pan: If you don’t have a 10-inch bundt pan, you can use a 9×13 inch rectangular baking pan. The baking time may need adjustment.
Step-by-Step Preparation
Step 1: Prep Your Pan and Oven
Start by making sure your bundt pan is ready. Give it a good coating with butter or shortening, then dust it lightly with flour. This prevents sticking and helps your cake release beautifully. Turn on your oven and set it to 325°F (165°C). A proper preheat is key for even baking. The smell of butter and vanilla will soon start wafting through your kitchen!
Step 2: Combine the Dry Ingredients
In a large mixing bowl, measure out your flour, sugar, salt, baking powder, and baking soda. Whisk them together thoroughly. You’ll see the white flour mix with the sparkling sugar. This ensures the leaveners are evenly distributed. Your cake will rise perfectly without any dense spots. Pro tip: Sifting the flour isn’t needed, but a good whisk does the job.
Step 3: Blend in the Wet Ingredients
Now, add the softened butter, buttermilk, vanilla extract, and eggs to the dry mix. Use your mixer or a sturdy spoon to blend everything. First, it will look a bit lumpy. Then it will become a smooth, pale yellow batter. Once combined, beat the batter on medium speed for a full 3 minutes. This incorporates air and builds the structure for a light, tender cake.
Step 4: Bake Your Cake
Pour the thick, velvety batter into your prepared bundt pan. Smooth the top gently. Place it in the center of your preheated oven. Bake for about 60 minutes. You can check around 55 minutes by inserting a toothpick into the center. If it comes out clean or with just a few moist crumbs, it’s done. The top will be a gorgeous golden brown.
Chef’s tip: Don’t open the oven door too early! This can cause the cake to fall. Wait until at least the 50-minute mark for your first peek.
Step 5: Make and Apply the Butter Sauce
While the cake is baking, make the sauce. In a small saucepan, combine the sugar, butter, water, and vanilla. Cook over medium heat, stirring often, until the butter melts and the sugar dissolves. Do not let it boil. You want a smooth, glossy syrup. As soon the cake comes out of the oven, poke many holes all over the top with a skewer or fork. Slowly pour the warm sauce over the hot cake, letting it seep into every hole.
Timing Breakdown
- Preparation Time: 15 minutes
- Cooking/Baking Time: 60 minutes
- Sauce & Soaking Time: 10 minutes
- Cooling Time (recommended): 1 hour
- Total Time (until serving): About 1 hour 45 minutes
My Chef’s Secret for Perfection
The real secret is in the sauce timing. Make the butter sauce while the cake is baking. Have it ready and still warm when the cake comes out of the oven. The heat from the cake helps it absorb the syrup deeply. This creates that legendary moist texture throughout, not just on the surface.
A Little Extra Sweet Info
This cake is sometimes called a “poke cake” because of the holes you make for the sauce. That technique is used in many classic desserts to add moisture and flavor. It’s a brilliant, simple trick that turns a good cake into a spectacular one.
Necessary Equipment
- 10-inch Bundt pan
- Large mixing bowl
- Electric hand mixer or stand mixer
- Measuring cups and spoons
- Whisk
- Small saucepan
- Skewer or long fork for poking holes
- Cooling rack
How to Store Your Kentucky Butter Cake
Once your cake has cooled completely, you can store it. First, if you plan to eat it within two days, simply cover it well with plastic wrap or place it under a cake dome. Keep it at room temperature. The sauce keeps it moist.
For longer storage, you can refrigerate it. Wrap it tightly in plastic wrap or place it in an airtight container. It will keep beautifully for up to 5 days in the fridge. The cool temperature helps preserve its texture.
You can also freeze this cake for up to 3 months. Wrap the whole cake or individual slices tightly in plastic wrap, then in aluminum foil or a freezer bag. Thaw it overnight in the refrigerator before serving.
Tips and Advice for the Best Cake
- Ensure your butter is properly softened to room temperature. This helps it blend smoothly without over-mixing.
- Use real vanilla extract for the best flavor. Imitation vanilla won’t give you that rich, warm taste.
- Let the cake cool in the pan for about 20 minutes after adding the sauce. Then invert it onto a rack. This helps it set and release cleanly.
- If your cake seems to be browning too quickly on top, you can loosely tent it with aluminum foil during the last 15 minutes of baking.
Presentation Tips to Make it Special
- Place the cake on a pretty cake stand and dust it with a light snowfall of powdered sugar.
- Serve with a dollop of freshly whipped cream or a scoop of vanilla ice cream.
- Garnish with a few fresh berries or a sprinkle of edible flowers for a springtime look.
- For a holiday touch, drizzle a little extra glaze made from powdered sugar and milk over the top.
Healthier & Fun Alternative Recipes
You can tweak this classic to suit different tastes!
- Kentucky Butter Cupcakes: Bake the batter in cupcake tins for individual portions. Reduce baking time to 18-22 minutes and poke each cupcake with a fork before adding a smaller amount of sauce.
- Gluten-Free Kentucky Butter Cake: Substitute the all-purpose flour with a high-quality gluten-free flour blend designed for baking.
- Lower-Sugar Version: Reduce the granulated sugar in the cake by ½ cup and use a sugar substitute in the sauce. The texture may be slightly different.
- Citrus-Kissed Cake: Add the zest of one lemon or orange to the batter for a bright, fresh twist on the buttery flavor.
- Nutty Delight Cake: Fold ½ cup of finely chopped pecans or walnuts into the batter before baking for added texture and flavor.
- Spiced Butter Cake: Add 1 teaspoon of cinnamon or a pinch of nutmeg to the dry ingredients for a warm, autumnal variation.
If you love this easy bundt cake, you might also enjoy my Classic Pound Cake recipe for another simple treat. For a chocolate version, my Devil’s Food Cake is always a hit. When you need a quick single-serving dessert, these Microwave Mug Cakes save the day. And for a truly show-stopping layer cake, try this perfect Red Velvet Cake.
Common Mistakes to Avoid
Mistake 1: Not Properly Preparing the Bundt Pan
This is a big one! A bundt pan has lots of grooves. If you just spray it lightly, the cake will likely stick and tear when you try to remove it. To avoid this, use a generous amount of butter or shortening. Follow that with a dusting of flour, tapping it around all the nooks. This creates a non-stick barrier. A well-prepared pan ensures your beautiful cake comes out intact.
Mistake 2: Under or Over-Mixing the Batter
The mixing times matter. Under-mixing can leave pockets of dry flour. Over-mixing after adding the eggs can make the cake tough. First, blend until the ingredients are just combined. Then, follow the instruction to beat for 3 minutes on medium speed. This specific time helps develop the right structure. Use a timer so you don’t guess.
Mistake 3: Boiling the Butter Sauce
The sauce should be melted and smooth, not boiled. If you bring it to a boil, it can change consistency and may not soak in as well. It could also start to caramelize. Keep it on medium heat and stir constantly. Remove it from the heat as soon as the butter melts and the sugar is dissolved. It should look like a thin, shiny syrup.
Mistake 4: Not Poking Enough Holes for the Sauce
If you only poke a few holes, the sauce will just glaze the top. The inside won’t get that amazing moisture. Use a skewer, fork, or even a thin knife. Poke many holes, all over the surface, and go deep. This lets the buttery syrup travel down into the cake, making every bite heavenly.
Practical tip: Poke the holes immediately after taking the cake from the oven. The cake is warm and soft, making it easier.
Mistake 5: Cutting the Cake Too Soon
Patience is key! After adding the sauce, the cake needs time to absorb it and cool down. If you cut it while it’s too hot, it can crumble and fall apart. Let it cool in the pan for at least 20 minutes. Then let it cool completely on a rack for another hour. This sets the structure and makes slicing clean and easy.
When thinking about nutrition, it’s helpful to remember that treats like this Kentucky Butter Cake are part of a balanced diet. For understanding nutritional needs, information on daily value guidelines from trusted sources can be useful.
This Easy Kentucky Butter Cake is truly a gem in the world of simple cakes and cupcakes. It proves that the most beloved desserts are often the easiest to make.
Frequently Asked Questions
Can I make this cake without a bundt pan?
Yes, you can! A 9×13 inch rectangular baking pan is a good alternative. The baking time may be slightly less, so start checking for doneness around 45 minutes. The cake will be more of a sheet cake style, but it will taste just as wonderful. You can also use two 9-inch round cake pans. Just remember to poke holes and add the sauce to each layer.
Why is buttermilk used in this recipe?
Buttermilk plays a few important roles. Its acidity reacts with the baking soda, helping the cake rise and become light. It also adds a very slight tang that balances the sweetness of the cake. Finally, it contributes to a tender, moist texture. If you don’t have it, the milk-and-vinegar substitute works well because it creates that needed acidity.
How can I tell if my cake is done baking?
The best test is the toothpick test. Insert a clean toothpick or a small skewer into the center of the cake. If it comes out clean or with just a few dry crumbs attached, the cake is done. Also, look at the edges; they should be pulling away slightly from the sides of the pan. The top will be a uniform golden brown color. Avoid opening the oven too early to prevent the cake from sinking.
My sauce seems too thick. What did I do wrong?
If your sauce is thick or grainy, you likely cooked it too long or at too high heat. The goal is to melt the ingredients together, not simmer or boil them. If it gets too thick, you can add another tablespoon of warm water and stir gently to thin it out. Always make the sauce on medium heat with constant stirring until just melted.
Can I add flavors like almond or lemon to this cake?
Absolutely! This cake is a great base for subtle flavor variations. You could replace one teaspoon of the vanilla with almond extract for a nutty flavor. Adding the zest of one lemon to the batter gives a lovely citrus note. Be careful with strong flavors like peppermint, as they might overpower the delicate butter taste. Start with small additions.
How long will this cake stay fresh?
This cake stays remarkably fresh because of the butter sauce. At room temperature, covered well, it will be delicious for 2-3 days. In the refrigerator, tightly wrapped, it can last up to 5 days. The chilled texture is still very moist. You can also freeze it for longer storage without losing quality.
Is it necessary to use unsalted butter?
Using unsalted butter lets you control the exact amount of salt in the recipe. This is important for balancing flavors. If you only have salted butter, you can use it. Just omit the extra teaspoon of salt listed in the dry ingredients. The cake will still taste great, but the flavor balance might be slightly different.
What’s the best way to get the cake out of the bundt pan?
Let the cake cool in the pan for about 20 minutes after you’ve poured the sauce over it. This allows the structure to set a bit. Then, place a cooling rack or plate over the top of the pan. Carefully flip the pan and rack over together. The cake should release gently. If it resists, tap the pan lightly or run a thin knife around the central tube.
Can I make this recipe with a hand mixer instead of a stand mixer?
A hand mixer works perfectly for this recipe. The batter is not overly thick, so a hand mixer can handle it well. Just be sure to beat for the full 3 minutes as directed to get enough air into the batter. If you’re mixing by hand with a spoon, you’ll need to whisk vigorously to achieve the same result, which takes more effort.
Why is the oven temperature set at 325°F instead of the usual 350°F?
A slightly lower temperature like 325°F is used for richer, denser cakes like this one. It allows the cake to bake slowly and evenly throughout without over-browning the top or edges too quickly. This gentle heat helps achieve that perfect, moist interior. Don’t increase the temperature, as it might cause the cake to dry out or crack.
So there you have it, my friends! This Easy Kentucky Butter Cake is more than just a recipe. It’s a piece of baking tradition that brings people together. Its magic lies in its simplicity and the unforgettable, buttery result. One bite of that moist, tender cake will tell you why it’s been a family favorite for generations. I hope you bake it, share it, and enjoy every sweet moment. Happy baking!
Equipment
- Grand bol
- Fouet
- Spatule
- Moule à bundt
- Papier sulfurisé
Ingredients
- 3 tasse farine tout usage
- 2 tasse sucre cristallisé
- 1 cuil. sel
- 1 cuil. poudre à lever
- 0.5 cuil. bicarbonate de soude
- 1 tasse lait fermenté
- 1 tasse beurre non salé, ramolli
- 2 cuil. extrait de vanille
- 4 grand œufs
Instructions
- Préchauffez votre four à 165°C et préparez un moule à bundt en le graissant avec du beurre et en le saupoudrant de farine.
- Dans un grand bol, fouettez ensemble la farine, le sucre, le sel, la poudre à lever et le bicarbonate de soude.
- Ajoutez le beurre ramolli, le lait fermenté, l'extrait de vanille et les œufs aux ingrédients secs et mélangez jusqu'à obtenir une pâte lisse.
- Battez la pâte pendant 3 minutes à vitesse moyenne pour incorporer de l'air.
- Versez la pâte dans le moule préparé et lissez le dessus.
- Faites cuire pendant environ 60 minutes, en vérifiant la cuisson avec un cure-dent vers 55 minutes.
- Pendant que le gâteau cuit, préparez la sauce au beurre en combinant le sucre, le beurre, l'eau et la vanille dans une petite casserole et en chauffant jusqu'à ce que tout soit fondu.
- Une fois le gâteau cuit, piquez des trous avec une brochette ou une fourchette et versez la sauce au beurre chaude sur le gâteau.
Notes
Nutrition

Hi, I’m Olivia Parker, the founder of BakingSecret.com and a lifelong lover of all things sweet and homemade. I grew up in a small town in Oregon, where the smell of fresh cookies in my family’s kitchen sparked my passion for baking. Over the years, I turned that passion into a mission: to help home bakers feel confident, inspired, and creative.
After studying food science and working in several artisan bakeries across the U.S., I decided to create a space where everyone from beginners to seasoned bakers can find reliable recipes, expert tips, and a warm, welcoming community. BakingSecret.com is my way of sharing the magic of baking with the world. When I’m not testing new recipes, you’ll find me exploring farmers’ markets, collecting vintage cookbooks, or perfecting my sourdough technique.