
Hold on a second. Is that a huge brownie on my plate? Or is it a slice of luscious, chocolatey pie? You know that moment when you can’t decide which dessert to bake? I get it all the time. The rich, fudgy goodness of a perfect brownie always calls my name. So does the promise of a flaky, buttery crust. I used to think choosing was my only option. Then I found the answer. Make a chocolate brownie pie. It combines the best parts of both worlds into one incredible dessert. Your kitchen will smell amazing. Your family will ask for seconds. Let me show you how simple it can be.
What is a Chocolate Brownie Pie?
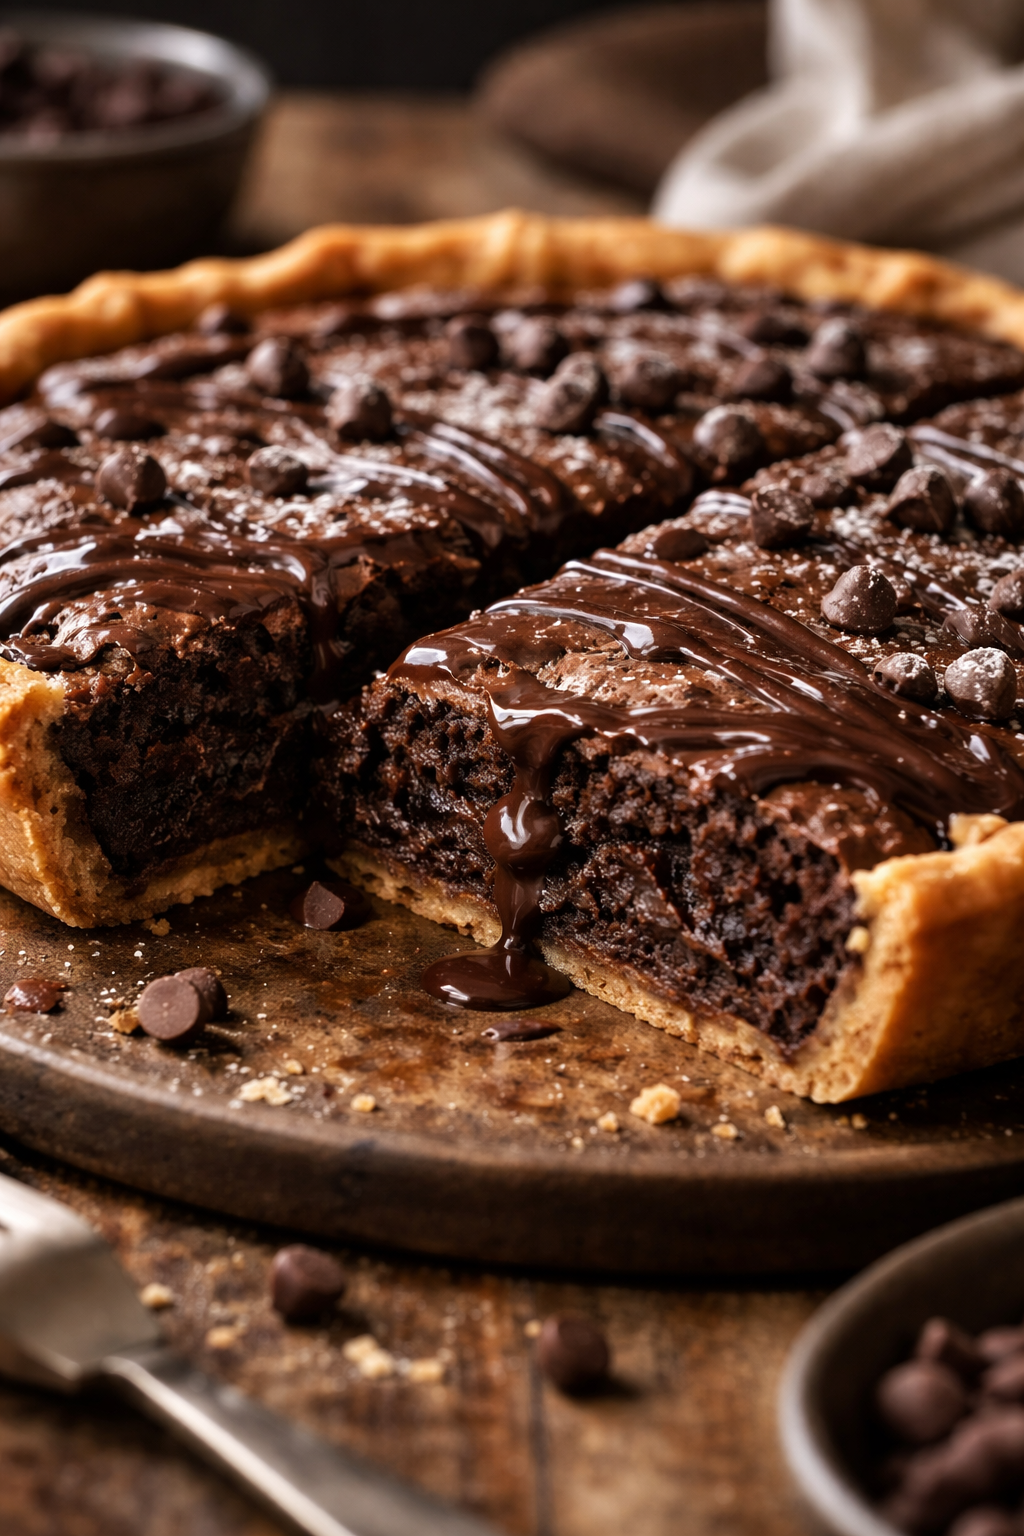
A chocolate brownie pie is exactly what it sounds like. Imagine a classic, flaky pie crust. Now, picture your favorite rich and fudgy brownie batter poured right into that crust. It bakes up into a magical hybrid. You get the sturdy, satisfying crunch of the pie shell with every bite. And you get the deep, moist, chocolate-packed center of a perfect brownie. It’s two beloved desserts in one neat, sliceable package.
Think of it as the ultimate upgrade. A regular brownie is great on its own. But the brownie pie crust adds a whole new layer of texture and flavor. It’s a game-changer for potlucks and holiday dinners. People see a pie and expect fruit or custard. Then they taste that intense chocolate brownie filling. Their surprise is the best part. It’s a crowd-pleaser every single time.
Why You Should Try This Recipe
First, the taste is unbeatable. It’s pure chocolate happiness. But there are so many more reasons to love this recipe. Let’s break it down.
It’s incredibly versatile. Serve it warm with a scoop of cold vanilla ice cream. The ice cream melts into the fudgy brownie center. You can also add a mountain of whipped cream. A drizzle of chocolate or caramel sauce makes it feel extra special. For a simpler treat, a dusting of powdered sugar is perfect. It’s delicious straight from the pan at room temperature, too. This dessert adapts to any occasion.
It’s perfect for bakers of all levels. Are you new to baking? No problem. Using a high-quality brownie mix as your base is a fantastic shortcut. It makes the process foolproof. You just mix a few extra ingredients and pour it into the crust. It’s that easy. This is the heart of an easy brownie pie with mix. Many popular recipes, like those from Paula Deen brownie pie or on shows like chocolate brownie pie the kitchen, use this approach. It guarantees a delicious result every time.
If you love baking from scratch, you can do that too. Use your favorite brownie recipe for the filling. You control the quality of every ingredient. You can make it extra fudgy or a bit cakier, just how you like it. Brands like chocolate brownie pie Aunt Bessies offer ready-made shells if you want to save even more time. Or you can make your own pie crust. The choice is yours.
It’s a guaranteed showstopper. Bringing a beautiful pie to a party feels special. This brownie pie from mix looks impressive but requires minimal effort. You get all the credit for a fancy dessert. I’ve made this for birthdays, summer barbecues, and even a fancy dinner. It always disappears first. The combination is simply a winner.
Here’s a quick list of the key benefits:
- Easy to make: Using a mix simplifies the process dramatically.
- Delicious textures: Enjoy both a flaky crust and a fudgy filling.
- Endless serving options: Great with ice cream, whipped cream, or solo.
- Always a hit: It’s a universally loved dessert for good reason.
A Simple Way to Get Started: Using a Brownie Mix
Let’s talk about the easiest path to your first brownie pie with brownie mix. I do this when I’m short on time but want something homemade. It’s my not-so-secret secret for success. You only need a few things.
First, pick up a family-sized brownie mix. The kind meant for a 9×13 pan works best. You’ll also need the ingredients listed on the box, usually eggs, water, and oil. Grab a 9-inch deep-dish pie shell, either frozen or refrigerated. You can find these in any grocery store. That’s really the base. From there, you can get creative.
Here’s my favorite tip for extra richness. Replace the water called for on the box with an equal amount of strong coffee or hot water. Coffee deepens the chocolate flavor without making it taste like coffee. It just makes the chocolate taste more chocolatey. It’s a trick many bakers use.
Another great addition is a handful of chocolate chips. Stir in a cup of semi-sweet or dark chocolate chips into your batter. This creates pockets of melted chocolate throughout your chocolate chip brownie pie. It’s like a bonus surprise in every bite.
What about people who love brownies but don’t want the crust? You can make a crustless brownie pie. Just grease your pie plate very well and pour the batter right in. It bakes into a dense, thick brownie that you can slice into wedges. It’s a great gluten-friendly option if you use a gluten-free brownie mix.
The method is straightforward:
- Preheat your oven to the temperature on the brownie mix box.
- Let your pie shell thaw for about 10 minutes if it’s frozen.
- Prepare the brownie batter according to the package directions, using any of your added tweaks.
- Pour the thick batter into the pie shell. Smooth the top with a spatula.
- Bake it. You’ll need to bake it a bit longer than the box says for brownies. Start checking around the 40-minute mark. The pie is done when a toothpick inserted in the center comes out with a few moist crumbs.
- Let it cool completely before slicing. This is the hardest part, but it helps the filling set.
See? It doesn’t have to be complicated. In less than an hour of active time, you can have a stunning dessert ready to go.
| Ingredient | Standard Boxed Mix Version | From-Scratch Boost |
|---|---|---|
| Base | Family-size brownie mix | Your favorite homemade brownie recipe |
| Crust | Store-bought deep-dish pie shell | Homemade pie crust or a chocolate cookie crust |
| Flavor Boost | Replace water with coffee; add chocolate chips | Use high-quality cocoa and chocolate; add espresso powder |
| Best Served With | Vanilla ice cream, whipped cream, fresh berries, or caramel sauce | |

So, you’re sold on the idea and ready to get your hands dirty in the kitchen. Fantastic! Let’s walk through the actual process, from gathering your tools to pouring that glorious batter. I promise, it’s a fun afternoon project with a seriously sweet reward at the end.
Ingredients and Tools You’ll Need
Alright, time to raid the pantry. Funny enough, sometimes the hardest part of baking is just getting everything assembled on the counter. Once you do, everything flows. Here’s what you need for a classic, easy-to-love version of this chocolate brownie pie.
The Simple Ingredient List
I like to keep things straightforward, especially for a first try. This list is your ticket to a guaranteed win.
The Foundation:
- 1 pre-made pie crust – This is the ultimate shortcut. I use the frozen deep-dish ones, thawed for about 15 minutes. You could absolutely make your own, of course. But for a brownie pie from mix, this keeps it super simple.
- 1 box of your favorite brownie mix – Grab the “family size” or the one meant for a 9×13 pan. It gives you the right amount of filling for a deep pie plate without being skimpy.
- 1/2 cup of chocolate chips – Semi-sweet are my go-to. They melt into little pockets of extra joy, turning it into a chocolate chip brownie pie. By the way, if you have leftovers from making something like Dr. Pepper Brownies, those work perfectly here.
The Wet Team:
- 2 large eggs – Room temperature is best, but I’ve used cold ones straight from the fridge in a hurry. It still works.
- 1/4 cup of vegetable oil – This gives that moist, fudgy texture. I sometimes use melted butter instead for a richer flavor, but oil is foolproof.
- 1/4 cup of water – Here’s a little trick I learned from watching chocolate brownie pie the kitchen: swap this with strong, hot coffee. It makes the chocolate flavor… deeper, somehow. Not like coffee, just more intense chocolate. It’s magic.
- 1 teaspoon of vanilla extract – The classic flavor enhancer. Don’t skip it.
The Tools to Gather
You don’t need any fancy equipment. It’s all pretty basic stuff, which is part of why this dessert is so approachable.
First, the vessel: a 9-inch pie dish. If you’re using a frozen shell, it often comes in its own foil pan, which is fine. But I like transferring it to my ceramic pie dish for a prettier presentation. It just feels more homemade.
For mixing, a large bowl and a whisk or a spatula will do. If you have an electric mixer, you can use it, but honestly, this batter is so easy to mix by hand. I usually just grab my trusty wooden spoon—it feels more rustic, you know?
Measuring cups and spoons are essential. And a rubber spatula is perfect for scraping every last bit of that thick batter out of the bowl and into the crust. No waste!
And lastly, oven mitts. Because that pie dish gets hot, and you’ll need to pull it out to check on it. I have a funny story about oven mitts, actually. I once used a thin towel instead and nearly dropped a whole peach cobbler. Lesson learned: proper mitts are a must.
That’s everything. See? Nothing out of the ordinary. If you’ve baked anything before, you probably have all this already. Now, let’s get that crust ready.
Preparing the Pie Crust
This step is quick, but it’s where you lay the groundwork for your whole dessert. A good brownie pie crust makes a difference.
Start by preheating your oven to 350°F (175°C). I always do this first because my oven takes forever to heat up, and it gives the pie shell time to thaw a bit if it’s frozen.
Now, the crust itself. If you’re using a store-bought one, like many of the chocolate brownie pie Aunt Bessies style shells, you just need to place it in your pie dish. Sometimes they’re a bit misshapen from the packaging. Gently press it into the corners of the dish and fix any cracks. If the edges are looking a little thin or uneven, you can crimp them with your fingers. Just pinch around the rim to create a simple, wavy edge. It looks nice and helps contain the filling.
Making your own crust? That’s awesome. Use your favorite recipe—maybe a buttery shortbread crust or a classic flaky pastry. Roll it out, fit it into the dish, and crimp the edges beautifully. It adds a lovely personal touch. Honestly, though, for a quick easy brownie pie with mix, the pre-made route is golden. It’s what makes recipes like a Paula Deen brownie pie so popular—they’re all about simplicity and great taste.
One tip: if you’re feeling adventurous, you could even make a chocolate cookie crust. Think crushed Oreos mixed with butter. It would be insane with the brownie filling. But that’s a project for another day. Today, we’re keeping it easy.
By the way, if you’re someone who loves bars and might be thinking, “Could I just make this in a square pan?” you totally could. It would be more like a thick, sliceable brownie. A crustless brownie pie is also an option—just grease the pie plate well and pour the batter right in. It’s great for a gluten-free version if you use a gluten-free mix. But for the classic experience, that crust is key. It’s the textural contrast that makes it special.
Mixing the Brownie Batter
This is the fun part. It’s where the magic happens, and it smells amazing already.
In your mixing bowl, combine the brownie mix, eggs, oil, water (or coffee!), and vanilla extract. Now, when I’m following a brownie recipe from scratch, I’m more careful about order. But with a mix, it’s pretty forgiving. I just dump everything in together and stir until it’s smooth and well combined. The batter will be thick and glossy, which is exactly what you want. A thick batter helps it bake up dense and fudgy instead of spreading out too thin.
Here’s the thing: don’t overmix. Once it’s smooth and you see no dry streaks of mix, stop. Overmixing can sometimes make things a bit tougher, though with a box mix it’s less of a worry than with a from-scratch cake.
Now, for the bonus round: stir in your chocolate chips. Fold them in gently with your spatula. They’ll get distributed throughout, promising those little molten chocolate pockets in the finished pie. It’s a small step that feels like a big luxury.
Pouring the batter into the crust is a moment of pure anticipation. It’s thick, so it might not flow perfectly. Use your spatula to spread it evenly across the crust, making sure it gets into all the edges. You want a nice, flat top so it bakes uniformly. Sometimes I give the dish a gentle shake or tap on the counter to settle the batter.
And that’s it. Your brownie pie with brownie mix is ready for the oven. It looks pretty incredible already, all dark and promising in that pale crust. The next step is baking, which is where patience becomes your best friend. But before we move on, let me just say—this method is so adaptable. You could add chopped nuts, a swirl of peanut butter, or even a layer of caramel in the middle if you’re feeling fancy. It’s like a blank canvas for chocolate lovers. I once added a handful of leftover dried cherries from making Cherry Bars for a Crowd, and it was a fantastic chocolate-fruit combo. Or, imagine a layer of that salty-sweet peanut caramel from Peanut Caramel Crunch Bars nestled in the middle? Heavenly.
Really, once you master this basic build, you can play around. It’s the same principle as a chocolate brownie cake, but in a pie form—portable, sliceable, and always a conversation starter at any table.
Baking and Serving Your Masterpiece
The oven is preheated. Your pie dish is filled with that luscious, thick batter. It’s go time. This part is the easiest, honestly—but it does require a bit of patience, which I’ve never had much of when it comes to chocolate. Here’s the thing: how you bake and cool this pie determines whether you get a fudgy, decadent slice or a crumbly mess. Let’s get it right.
You want to place your pie on the center rack of that 350°F oven. Middle rack is key for even heating. Now, set your timer for 35 minutes, but don’t wander off. Every oven has its own personality, you know? Mine runs a little hot, so I start peeking around the 30-minute mark. The goal is a top that’s set and looks crackly, like a perfect brownie should. The real test is the toothpick. Stick it right into the center. You’re not looking for it to come out clean. If it does, you’ve overbaked it. You want a few sticky, moist crumbs clinging to the pick. That’s the sweet spot for a fudgy brownie pie. It might take 40, even 45 minutes. Totally fine. Don’t rush it.
When it’s perfect, pull it out with those trusty oven mitts. The smell is going to be incredible. Now, here’s the hard part. You have to let it cool. I know, I know. But if you slice into it while it’s piping hot, the filling will ooze everywhere. It needs time to set. I put mine on a wire rack for at least 15 minutes, but honestly, an hour is better if you can swing it. That initial cool lets the structure firm up just enough to get a clean slice. For the neatest slices ever, I sometimes chill the whole pie in the fridge for a couple hours. It cuts like a dream.
Serving it is where you get to shine. A warm slice with a scoop of melting vanilla ice cream is classic for a reason—it’s perfection. But let me tell you about my favorite way. I take a cold slice from the fridge, microwave it for just 15 seconds to take the chill off, and then add a dollop of freshly whipped cream. The contrast of the cool, dense brownie and the barely-warm center? Unreal. A sprinkle of flaky sea salt on top right before serving is a game-changer. It cuts the sweetness and makes every chocolate note pop. Funny enough, this kind of attention to finishing touches is what professional chefs focus on, and it’s a big part of thoughtful food preparation—it’s not just about the cooking, but how you present and balance the final dish.
If you’re bringing this to a party, I have a little hack. Bake and cool it completely the day before. Wrap it tightly and leave it at room temperature. Then, right before you leave, add your toppings. It travels like a champ and tastes even better as the flavors meld.
Getting Creative: Variations and Pro-Tips
So you’ve mastered the basic brownie pie from mix. Awesome. But the kitchen is your playground, and this recipe is a fantastic trampoline. Here are some twists I’ve tried and loved, plus a few hard-earned tips.
Mix It Up: Delicious Variations
- The Crustless Wonder: For a super fudgy, gooey brownie pie that’s also naturally gluten-free, just skip the crust. Grease your pie dish really, really well—I use butter and a dusting of cocoa powder—and pour the batter right in. Bake as usual. It’s like the ultimate, extra-thick brownie wedges. My friend who avoids gluten requests this version every time she comes over.
- Salty-Sweet Magic: Right when the pie comes out of the oven, sprinkle the top with a big pinch of flaky sea salt. The heat helps it stick. This one simple move transforms it. It’s the same principle as those fancy chocolate bars, and it makes the chocolate flavor so much deeper.
- Graham Cracker Game-Changer: Tired of a standard brownie pie crust? Try a graham cracker crust. You can buy a pre-made one or make your own by mixing crushed graham crackers with melted butter and a little sugar. It adds a honeyed, toasted flavor that pairs amazingly with the dark chocolate. It gives me serious s’mores vibes.
By the way, if you love playing with flavors, this brownie recipe base is so forgiving. I’ve stirred in a half-cup of chopped toasted pecans for crunch. I’ve swirled in a big spoonful of creamy peanut butter before baking. One time, I even layered a thin sheet of store-bought caramel on the bottom of the crust before adding the batter. It sank a bit but created these incredible sticky caramel pockets. Experimenting is half the fun. If you love this kind of bar-style dessert, you’ll find tons of inspiration in our main collection of dessert bars and brownie recipes for your next baking adventure.
My Top Tips for Brownie Pie Perfection
- Don’t Overbake. I’ve said it before, but it’s worth repeating. Those moist crumbs on the toothpick are your friend. The pie will continue to set as it cools.
- Room Temp is Your Friend. If you’re using eggs from the fridge, let them sit in a bowl of warm water for 5 minutes. Room temperature ingredients blend more smoothly and can lead to a better rise.
- Slice with a Hot Knife. For the cleanest, most beautiful slices, run your knife under very hot water, wipe it dry, and then cut. The heat glides right through the fudgy filling without dragging. Re-wipe and reheat between slices.
- Storage Smarts. Keep leftover pie covered at room temperature for up to 3 days. After that, the crust can get soggy. You can also freeze individual slices wrapped in plastic for a month-long chocolate emergency stash. Thaw at room temperature or zap in the microwave.
Remember, even if your pie cracks on top or looks a little rustic, it’s going to taste incredible. Baking is about the joy of making something, not just picture-perfect results.
Your Chocolate Brownie Pie Questions, Answered
I get a lot of questions about this dessert—here are the ones that pop up most often.
- Can I really use any brownie mix? Absolutely. Any family-sized mix works. I tend to go for the “fudgy” or “dark chocolate” varieties, but even a basic one will be great. The key is using the right size (for a 9×13 pan) so your pie isn’t thin.
- How do I make a true crustless version? It’s the easiest variation. Just generously grease a 9-inch pie plate with butter or non-stick spray. Pour your prepared batter in and bake. You might need to reduce the bake time by 5-10 minutes, so keep an eye on it. It’s a fantastic, low-fuss option.
- What are some other fun add-ins besides chocolate chips? Oh, so many. Chopped toasted walnuts or pecans are a classic. Try rolling in a swirl of raspberry jam for a chocolate-berry twist. Or, chop up some of your favorite chocolate candy bars and fold them in. I’m partial to chopped peanut butter cups myself.
- Is the Paula Deen recipe the same as this? Many popular recipes, like the famous Paula Deen brownie pie, follow this same brilliant shortcut of using a mix in a pie shell. Hers often includes extra butter and pecans, making it incredibly rich. Our version is a great, simple starting point you can then customize to your taste.
- My center is still super gooey after cooling. Did I underbake it? Possibly, but that might just be your preference! A very fudgy, dense center is what many people love. If you want it firmer, bake a few minutes longer next time. If you LOVE that gooey center, just know it’s a feature, not a bug. Serve it with a spoon!
- Can I make a chocolate chip brownie pie with a cookie crust? You bet. A chocolate cookie crust (like Oreos) with a chocolate chip brownie pie filling is a chocolate overload in the best way. Just be aware a cookie crust can brown faster, so you might tent the edges with foil halfway through baking.
- How do I prevent a soggy bottom crust? A quick “blind bake” can help. Just bake the empty pie crust for about 8 minutes before adding the batter. This sets it and creates a barrier. Also, make sure your batter is nice and thick, not runny.
- What’s the deal with adding coffee? It’s a baker’s secret. The coffee (just a quarter cup, hot) doesn’t make it taste like coffee. Instead, it enhances and deepens the chocolate flavor, making it taste richer and more complex. You won’t taste it, you’ll just taste better chocolate.
- Can I use a metal pan vs. ceramic? Yes, but they conduct heat differently. A dark metal or foil pan may bake faster and lead to a darker crust. A light-colored ceramic or glass dish bakes more evenly and slowly. Just adjust your bake time and keep a close watch.
- Any tips for serving a crowd? Bake two pies! No, really. One always disappears faster than you think. For a beautiful buffet, slice it ahead of time and arrange on a platter. Provide little bowls of toppings like whipped cream, berries, and sauces so guests can customize their slice.
There you have it. From the moment you crack the eggs to the last delicious crumb, making a chocolate brownie pie is one of the most satisfying kitchen projects. It’s forgiving, impressive, and, most importantly, deeply delicious. The real secret? It’s not about perfection. It’s about the simple joy of creating something sweet to share. So go ahead, put your own spin on it, and enjoy every messy, chocolatey moment.
Equipment
- Large mixing bowl
- Whisk or spatula
- Rubber spatula
- 9-inch pie dish
- Oven mitts
Ingredients
- 1 pre-made deep-dish pie crust thawed if frozen
- 1 box family-size brownie mix for a 9x13 pan
- 2 large eggs
- 1/4 cup vegetable oil or melted butter
- 1/4 cup water or strong hot coffee
- 1 teaspoon vanilla extract
- 1/2 cup semi-sweet or dark chocolate chips
Instructions
- Preheat your oven to 350°F (175°C).
- Thaw the pie shell for about 10 minutes if it's frozen.
- In a large mixing bowl, combine the brownie mix, eggs, oil, water (or coffee), and vanilla extract.
- Stir until smooth and combined, avoiding overmixing.
- Fold in the chocolate chips gently.
- Pour the batter into the prepared pie crust, smoothing the top with a spatula.
- Bake in the preheated oven, starting to check for doneness around 40 minutes.
- The pie is done when a toothpick inserted in the center comes out with a few moist crumbs.
- Let it cool completely before slicing for the best results.
Notes
Nutrition

Hello! I’m Sarah Mitchell, and I’m passionate about bringing creativity and innovation to baking. My love for baking started in high school when I first tried my hand at decorating cupcakes for a class project. What began as a fun hobby quickly became a full-time passion. I’ve spent the past decade working in bakeries and dessert shops, honing my skills in everything from simple cookies to intricate wedding cakes.
After working in some of the top bakeries across the country, I realized that baking was about more than just following recipes — it was about infusing your personality into each creation. At BakingSecret.com, I love creating recipes that push boundaries while staying true to the heart of classic baking. I specialize in creating delicious and visually stunning pastries that will wow your guests.
When I’m not baking, I enjoy teaching baking classes, trying out new cake decoration techniques, and traveling to find inspiration in global dessert traditions. I’m so excited to share my tips and tricks with you to help elevate your baking game!