
Forget the Oven: My Go-To No-Bake Strawberry Tart that Wows Every Time!
You know that feeling when it’s too hot to cook? You have friends coming over for a last-minute BBQ and you want a dessert that looks like you spent hours, but you have… maybe 15 minutes? This is that dessert. My No-Bake Strawberry and Speculoos Tart was born on one of those hectic summer afternoons, and it’s been a lifesaver ever since. It’s the perfect mix of creamy, crunchy, fresh, and sweet—all without turning on the stove.
A Modern Twist on a Classic No-Bake Sensation
While the classic strawberry tart or ‘tarte aux fraises’ is a French pastry shop staple, my version is for real life. It skips the fussy pastry cream and complicated crust. Instead, I use speculoos cookies, those spiced-biscuit wonders you often get with coffee. They’re perfect for a crunchy base. This recipe is all about convenience meeting incredible flavor. It feels a bit fancy, but it’s as easy as assembling a delicious, edible puzzle. I made it for my book club last month, and they all thought I picked it up from a patisserie!
Why This No-Bake Strawberry Tart Will Be Your Summer Hero
You’ll fall in love with this recipe. First, it’s lightning fast. The hands-on time is truly just 15 minutes. Second, it’s incredibly fresh and light—the perfect end to a heavy meal. The contrast between the buttery, spiced crust, the smooth cream, and the juicy berries is just magic. Plus, it’s a no-brainer for hot days. No heating up the kitchen! It’s also wonderfully forgiving. If your crust isn’t perfect, just press it in. No rolling pins or baking blind required.
When to Whip Up Your No-Bake Masterpiece
This tart is unbelievably versatile. I love making it for:
- Summer Potlucks & BBQs: It travels like a dream and always disappears fast.
- Weeknight Treats: When you need something sweet, fast.
- Last-Minute Guests: Impress them without the stress.
- Mother’s Day or a Birthday: It looks so elegant and celebratory.
- Just Because! Sometimes a Tuesday deserves a special dessert.
Everything You Need for Your No-Bake Strawberry Tart
Here’s your simple shopping list. You probably have half of this already!
For the Crust:
- 200 g (about 7 oz or 2 cups crushed) speculoos cookies (like Biscoff)
- 80 g (about 1/3 cup + 1 tbsp) unsalted butter, melted
For the Cream Filling:
- 250 g (about 1 cup) mascarpone cheese, room temperature
- 250 ml (about 1 cup) heavy whipping cream, cold
- 80 g (about 1/3 cup) powdered sugar
- 1 teaspoon pure vanilla extract
For the Topping:
- 500 g (about 1 lb) fresh strawberries, hulled and halved
- Optional: 2 tablespoons apricot jam, warmed, for a shiny glaze
No Stress Substitutions: Make It Your Own!
Don’t have a specific ingredient? No problem! Here are my favorite swaps:
- Speculoos: Use graham crackers, digestive biscuits, or even ginger snaps.
- Mascarpone: Full-fat cream cheese works wonders. Just beat it until super smooth.
- Heavy Cream: For a lighter version, use Greek yogurt, but note the filling will be softer.
- Strawberries: Any berry works! Raspberries, blueberries, or a mix are gorgeous.
Building Your No-Bake Strawberry Tart: Step-by-Step
Ready for the fun part? Let’s assemble this beauty together.
Step 1: Create the Crunchy Speculoos Base
First, grab your speculoos cookies. Place them in a sturdy zip-top bag and crush them with a rolling pin. You want a fine, sandy crumb with a few small bits for texture. Pour the crumbs into a bowl. Next, drizzle in the warm, melted butter. The smell is amazing—like cinnamon and caramel. Mix it all with a fork until every crumb is coated and the mixture holds together when pinched. It should look like wet sand. Tip this into your tart pan (I use a 9-inch one with a removable bottom). Press it firmly into an even layer on the bottom and up the sides. I use the bottom of a glass to make it nice and compact. A solid crust is key!
Pro tip: For an even easier clean-up, you can pulse the cookies and butter together in a food processor.
Step 2: Whip Up the Dreamy Vanilla Cream
Now, for the luxurious cream filling. In a large, cool bowl, pour your cold heavy cream. Using a hand mixer or a whisk, whip the cream until it just starts to thicken. Then, add the powdered sugar and vanilla extract. Continue whipping until you get soft, billowy peaks that hold their shape. In another bowl, gently stir the mascarpone with a spatula to loosen it. It should be smooth and creamy. Now, fold the whipped cream into the mascarpone. Do this gently, using a folding motion, until no white streaks remain. The mixture will be light, fluffy, and heavenly.
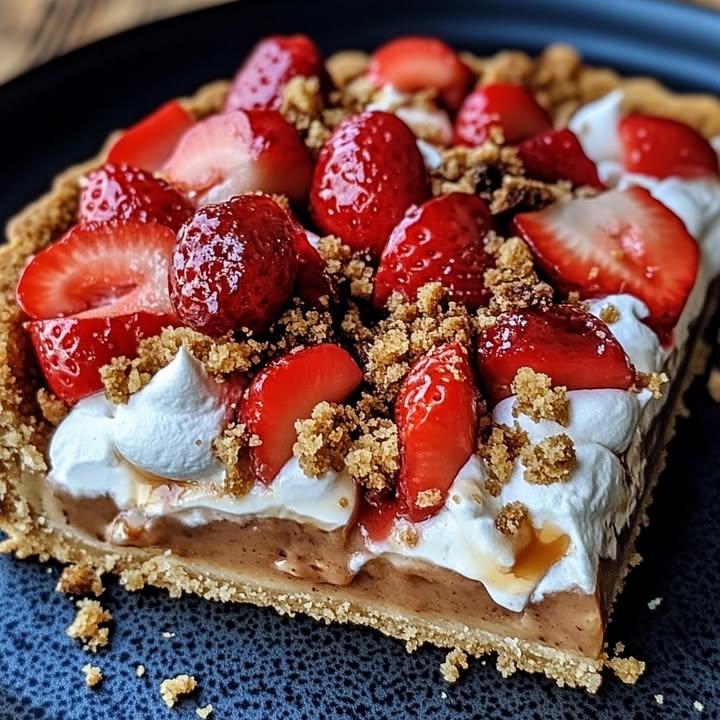
Step 3: Assemble and Adorn with Strawberries
Time to bring it all together! Scoop your fluffy cream filling into the prepared crust. Use a spatula or the back of a spoon to spread it into a smooth, even layer. Clean your strawberries and pat them dry. Then, let your creativity shine. You can arrange the halved berries in neat concentric circles from the outside in, or just pile them on artfully for a rustic, “just-picked” look. If you want that professional bakery shine, gently brush the berries with a little warmed apricot jam. This not only looks beautiful but adds a hint of extra sweetness.
Chef’s tip: For the cleanest slices, pop the finished tart in the fridge for at least 2 hours to set. This makes cutting through those beautiful layers a breeze!
Your Quick Time Guide
- Prep Time: 15 minutes
- Chill Time (Recommended): 2 hours
- Total Time: 2 hours 15 minutes (mostly hands-off chilling!)
- Servings: 8 lovely slices
My Secret for the Ultimate Texture
Here’s my little secret: a pinch of salt in the crust. Just a tiny pinch mixed with the cookie crumbs and butter. It sounds simple, but it makes a world of difference. It enhances the warm spices in the speculoos and balances the sweetness of the cream and berries, making every bite more complex and delicious.
A Fun Fact About Speculoos
Did you know speculoos cookies were traditionally baked for St. Nicholas’ Day in Belgium and the Netherlands? The spices like cinnamon, nutmeg, and cloves were considered a luxury. Now, we get to enjoy them all year round in this fantastic, modern dessert.
Equipment You’ll Need
- 9-inch tart pan with removable bottom (or a pie dish)
- Mixing bowls
- Hand mixer or whisk
- Rolling pin or food processor
- Spatula
- Measuring cups and spoons
Keeping Your Tart Fresh and Tasty
This No-Bake Strawberry Tart is best enjoyed the day it’s made when the crust is at its peak crispiness. However, I often make it a few hours ahead for an event. Just cover it loosely with plastic wrap and keep it in the refrigerator. The moisture from the cream and berries will slowly soften the crust over time. By the next day, the base will be more like a delicious, chewy cookie layer—still wonderful, but different.
If you have leftovers, they’ll keep in the fridge for up to 2 days. I don’t recommend freezing this tart. The cream filling can separate and become grainy when thawed, and the fresh strawberries will turn very mushy.
To prep ahead, you can make the crust and store it, tightly covered, at room temperature for a day. You can also whip the cream filling and store it separately in the fridge for a few hours. Assemble with fresh strawberries just before serving for the best texture and presentation.
Tips for No-Bake Strawberry Tart Perfection
- Use cold cream and a cold bowl for the best, fastest whipping results.
- Let your mascarpone sit out for 15-20 minutes to soften. This prevents lumps in your filling.
- Pat your strawberries completely dry before adding them. Any water will make the cream soggy.
- If your crust cracks while pressing it, don’t worry! Just patch it with a bit more crumb mixture and press firmly.
Presentation Ideas to Impress Your Guests
- Serve each slice with a dollop of extra whipped cream and a mint leaf.
- Drizzle individual plates with a little melted chocolate or caramel sauce before placing the slice.
- Grate a little dark chocolate or sprinkle crushed pistachios over the top for color contrast.
- For a mini-dessert option, make individual tarts in a muffin tin lined with parchment cups.
6 Delicious Variations to Try
Once you master the basic recipe, the world is your oyster! Here are six fun twists:
- Chocolate Speculoos Tart: Mix 2 tablespoons of cocoa powder into the cookie crust. Add a layer of melted dark chocolate on the crust before adding the cream.
- Lemon Berry Bliss: Add the zest of one lemon to the cream filling for a bright, zingy flavor that cuts through the richness.
- Tropical Dream: Use a coconut-flavored cookie for the crust and top the cream with mango, kiwi, and passion fruit.
- Peaches and Cream: Swap the strawberries for thinly sliced, ripe peaches and a sprinkle of cinnamon in the cream.
- Mocha Madness: Dissolve a teaspoon of instant espresso powder into the cream filling and top with chocolate shavings.
- Mixed Berry Medley: Use a vibrant combination of raspberries, blackberries, and blueberries for a gorgeous, colorful top.
I love how flexible this recipe is. If you’re exploring more no-bake ideas, you can find fantastic inspiration in our complete collection of easy no-bake desserts.
Common Mistakes to Avoid
Mistake 1: A Soggy, Weak Crust
This happens when you don’t press the crumb mixture firmly enough into the pan, or if you use too little butter. A loose crust will fall apart when you try to slice the tart. To avoid this, really press down hard with the back of a measuring cup or glass. Make sure the mixture is uniform and holds together when pinched. It should feel compact, not crumbly.
Mistake 2: Over-whipping the Cream Filling
Whipping the cream past soft peaks into stiff peaks can make your filling grainy and cause it to “break” or look curdled when mixed with the mascarpone. This creates a heavy, dense layer instead of a light, fluffy one. Stop your mixer as soon as the cream forms soft mounds that droop slightly at the peak. Remember, you’ll be folding it further, so it’s better to be slightly under-whipped.
Mistake 3: Using Wet Strawberries
Placing wet strawberries on top of the creamy filling is a recipe for a watery mess. The juice will seep down and make the cream runny and the crust soggy. Always, always wash and hull your berries ahead of time, then lay them out on a paper towel to dry completely. Pat them gently with another towel to be sure they are totally dry before arranging them.
Mistake 4: Not Letting It Set
Trying to slice and serve the tart immediately after assembly is a common error. The layers haven’t had time to firm up, so you’ll get a messy, collapsed slice. Patience is key! Give your tart a minimum of 1-2 hours in the fridge. This allows the cream to set and the flavors to meld, resulting in clean, beautiful portions that hold their shape on the plate.
Frequently Asked Questions
Can I make this tart a day ahead?
Yes, you can assemble it a day ahead, but be aware that the crust will soften significantly. It transforms from crispy to a soft, cake-like texture, which is still delicious but different. For the best texture, I recommend making the crust and filling separately the day before, storing them covered in the fridge, and then assembling with fresh strawberries a few hours before serving. This is a great tip for stress-free entertaining!
No speculoos? No problem! Graham crackers are the most common and delicious substitute, giving you a lovely honey-kissed crust. Digestive biscuits (like McVitie’s) work wonderfully for a slightly wholesome, nutty flavor. Ginger snaps will add a spicy kick that pairs beautifully with the strawberries. Even vanilla wafers or shortbread cookies can create a fantastic base. The general rule is to use about 2 cups of any fine cookie crumbs mixed with the same amount of melted butter.
Can I use frozen strawberries?
I don’t recommend using frozen strawberries for the topping. When they thaw, they release a lot of liquid and become very mushy, which will ruin the texture of your cream and make the tart soggy. Frozen berries are perfect for cooking into a sauce or compote, but for the fresh, elegant look of this tart, fresh is definitely best. If strawberries are out of season, try other fresh fruits like kiwi, mandarin segments, or firm raspberries.
My cream filling is runny. What went wrong?
A runny filling usually means the cream wasn’t cold enough when whipped, the bowl was warm, or it was under-whipped. Always start with cream straight from the fridge and use a chilled metal bowl if possible. Whip until you get distinct, soft peaks. Also, ensure your mascarpone is at a cool room temperature, not too warm and liquidy. If it’s already runny, you can try to fix it by whipping it more, but be careful not to overdo it and make butter!
How do I get a shiny glaze on the strawberries?
For that beautiful patisserie shine, use a simple fruit glaze. Warm 2-3 tablespoons of apricot jam or red currant jelly with a teaspoon of water in the microwave for 20 seconds until it’s liquid. Stir it well, then use a pastry brush to gently coat each strawberry. This not only adds shine but also a subtle layer of flavor and helps preserve the berries’ color. Let it set for a few minutes before serving.
Is there a way to make this gluten-free?
Absolutely! This recipe is very easy to adapt for gluten-free diets. Simply use your favorite certified gluten-free cookies to make the crust. Many brands make excellent gluten-free graham-style crackers or ginger snaps. Check that your powdered sugar is also gluten-free (most are, but some might have anti-caking agents derived from wheat). The filling and toppings are naturally gluten-free, making this a fantastic dessert for mixed-diet gatherings.
Can I use a different cheese besides mascarpone?
Yes, full-fat cream cheese is the most common and successful substitute. Make sure to let it soften completely at room temperature and beat it with the powdered sugar until it is perfectly smooth and lump-free before folding in the whipped cream. For a tangier, lighter option, you could use a mix of Greek yogurt and whipped cream, though the filling will be less stable and more mousse-like.
How long can I store leftovers?
Leftover tart can be stored, covered tightly with plastic wrap, in the refrigerator for up to 2 days. The crust will continue to soften, and the strawberries may weep a little juice, but it will still taste wonderful. It’s really at its prime within the first 24 hours. I do not recommend freezing this dessert, as the texture of the cream and fresh fruit does not hold up well after thawing.
My crust stuck to the pan. How do I prevent that?
Using a tart pan with a removable bottom is the key trick! Once the tart is fully chilled and set, place the pan on top of a large can or sturdy cup. Gently let the outer ring fall down, then slide the tart off the metal base onto your serving plate using a large spatula. If you only have a solid pie dish, simply serve the tart directly from the dish for a more rustic, home-style presentation.
Can I add other flavors to the cream?
Of course! The vanilla cream is a perfect blank canvas. For a citrus twist, add the zest of a lemon or orange. For a hint of almond, mix in 1/4 teaspoon of almond extract (go easy, it’s potent!). You could also fold in a couple tablespoons of lemon curd for a tangy surprise. A tablespoon of liqueur like Grand Marnier or Chambord can add a lovely grown-up note. Just add any extra flavorings when you’re mixing the mascarpone to ensure they are evenly distributed.
Remember, understanding the components of your food is part of smart cooking. For reliable information on food quality and ingredients, you might find resources from trusted institutions like the National Institutes of Health helpful for general nutrition education.
Ready, Set, No-Bake!
And there you have it! My all-time favorite, stress-free summer dessert. This No-Bake Strawberry and Speculoos Tart proves that you don’t need fancy skills or hours in the kitchen to create something truly special. It’s creamy, crunchy, fresh, and utterly satisfying. I promise it will become a regular in your recipe rotation, just like it has in mine. Now, go grab those ingredients and get ready for the compliments to roll in. Happy no-baking!
Equipment
- Moule à tarte de 23 cm
- Bols de mélange
- Fouet
- Rouleau à pâtisserie ou robot culinaire
- Spatule
Ingredients
- 200 g biscuits speculoos écrasés
- 80 g beurre non salé fondu
- 250 g fromage mascarpone à température ambiante
- 250 ml crème épaisse froide
- 80 g sucre glace
- 1 cuil. extrait de vanille pur
- 500 g fraises fraîches décortiquées et coupées en deux
- 2 cuil. confiture d'abricot facultatif, réchauffée, pour un glaçage brillant
Instructions
- Écrasez les biscuits speculoos dans un sac en plastique avec un rouleau à pâtisserie jusqu'à obtenir une poudre fine, puis mélangez avec le beurre fondu.
- Appuyez fermement sur le mélange dans un moule à tarte de 23 cm pour former la croûte.
- Dans un grand bol, fouettez la crème épaisse jusqu'à ce que des pics mous se forment, puis ajoutez le sucre glace et l'extrait de vanille, et fouettez jusqu'à ce que le mélange soit homogène.
- Dans un autre bol, mélangez le mascarpone jusqu'à ce qu'il soit lisse, puis incorporez délicatement la crème fouettée.
- Versez la garniture à la crème sur la croûte préparée, en lissant le dessus avec une spatule.
- Disposez les fraises coupées sur le dessus, soit en cercles concentriques, soit en les empilant artistiquement.
- Si désiré, badigeonnez les fraises avec de la confiture d'abricot réchauffée pour un fini brillant.
- Réfrigérez pendant au moins 2 heures avant de servir.
Notes
Nutrition

Hi, I’m Olivia Parker, the founder of BakingSecret.com and a lifelong lover of all things sweet and homemade. I grew up in a small town in Oregon, where the smell of fresh cookies in my family’s kitchen sparked my passion for baking. Over the years, I turned that passion into a mission: to help home bakers feel confident, inspired, and creative.
After studying food science and working in several artisan bakeries across the U.S., I decided to create a space where everyone from beginners to seasoned bakers can find reliable recipes, expert tips, and a warm, welcoming community. BakingSecret.com is my way of sharing the magic of baking with the world. When I’m not testing new recipes, you’ll find me exploring farmers’ markets, collecting vintage cookbooks, or perfecting my sourdough technique.