
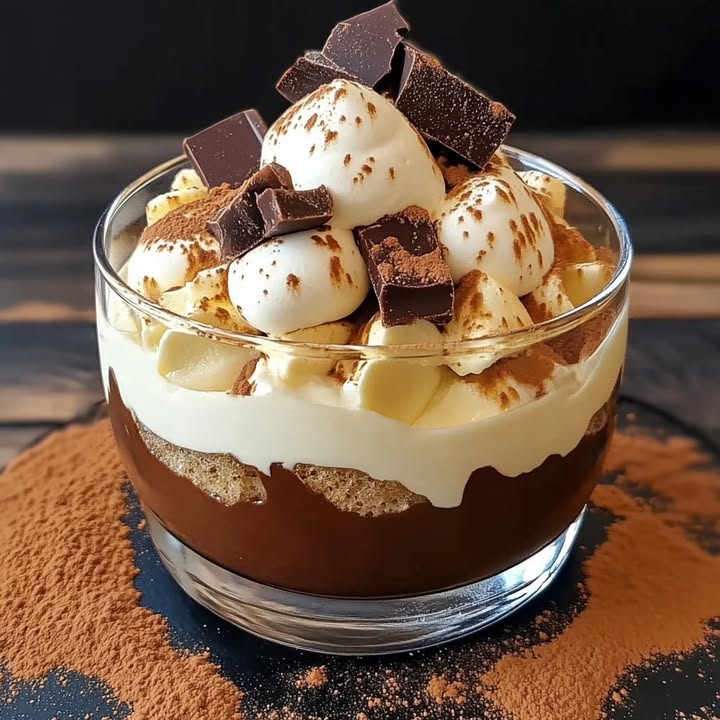
Have you ever stared at your oven and felt… nothing? Not an ounce of baking ambition? Me too, especially on a warm day. That’s why this No-Bake Chocolate Tiramisu Delight with Crunchy Chantilly became my summer weekend savior. It feels incredibly fancy, tastes like a dream, and you can make it while watching your favorite show. No heat, no fuss, just creamy, chocolatey layers that will make everyone think you’re a pastry chef in disguise.
The Story Behind This Chocolate Tiramisu Delight
The classic tiramisu, which means “pick me up” in Italian, is a beautiful layering of coffee-soaked ladyfingers and mascarpone cream. My version is a playful, chocolate-forward twist I created for a friend’s birthday who loves chocolate more than coffee. I wanted to keep that elegant, make-ahead spirit but add a surprising crunch. The “chantilly croquante” – basically whipped cream with crushed praline or brittle folded in – was my “aha!” moment. It adds a wonderful textural contrast to the silky layers. It’s a modern take on an old favorite, perfect for when you want something impressive without the traditional espresso flavor.
Why You’ll Absolutely Love This Recipe
This dessert is a crowd-pleaser for so many reasons. First, it’s **no-bake**, which is a lifesaver in hot weather or when your oven is occupied. Second, it gets *better* overnight, making it the ultimate do-ahead party trick. The combination of rich, dark chocolate mascarpone, soft ladyfingers, and that airy, crunchy whipped cream topping is simply addictive. It’s also surprisingly simple. If you can whip cream and melt chocolate, you’ve got this. The “wow” factor is huge compared to the effort required.
Perfect Occasions for Your Chocolate Tiramisu
This dessert shines at any gathering where you want to impress without stress. It’s perfect for:
- Dinner Parties: Prepare it in the morning and forget about it until dessert time.
- Potlucks: It travels well in its dish and serves many.
- Holidays: A fantastic non-pie option for Thanksgiving or Christmas.
- Birthdays: Elegant enough for an adult celebration.
- Weekend Treats: Because sometimes Tuesday deserves a chocolate tiramisu delight.
Ingredients for Your Chocolate Tiramisu Delight
- 250g (about 1 cup) Mascarpone Cheese: Let it sit at room temperature for 20 minutes to soften.
- 3 large Eggs: We’ll be separating the yolks and whites.
- 80g (about ⅓ cup + 1 tbsp) Granulated Sugar: Divided for the yolks and the egg whites.
- 200g (7 oz) Dark Baking Chocolate, min. 60% cocoa: The higher the quality, the better the flavor.
- 200ml (about ¾ cup) Heavy Whipping Cream, cold: For the crunchy chantilly layer.
- 24-30 Ladyfinger Cookies (Savoiardi): You may not use all of them.
- 250ml (1 cup) Strong Brewed Coffee or Espresso, cooled: Can be decaf.
- 2-3 tbsp Coffee Liqueur (optional): Like Kahlúa, for extra depth.
- 50g (about ½ cup) Hazelnut Praline Paste or Crushed Almond Brittle: For the “croquant” in the chantilly.
- Cocoa Powder & Chocolate Shavings: For the beautiful final dusting.
Easy Substitutions If You’re in a Pinch
No worries if you’re missing something! Here are some swaps:
- No Mascarpone? Mix 8 oz full-fat cream cheese with ¼ cup sour cream and 2 tbsp heavy cream.
- Egg Concerns? Use pasteurized eggs for safety, or skip the raw eggs by using ¾ cup of a thick vanilla pudding mix folded into the mascarpone.
- No Dark Chocolate? Semi-sweet chocolate chips work in a pinch.
- Non-Alcoholic: Just leave out the liqueur and use all coffee.
- Nut-Free: Skip the praline and use crushed hard toffee or even crumbled-up butter cookies for the crunch.
Let’s Make This Chocolate Tiramisu Delight!
Step 1: Prep the Chocolate and Coffee Base
First, brew your coffee and let it cool completely in a shallow bowl. Stir in the coffee liqueur if you’re using it. This is your dipping liquid. Next, finely chop the dark chocolate and melt it gently. You can do this in a heatproof bowl over a pot of simmering water (double boiler) or in the microwave in 20-second bursts, stirring well each time. Once smooth, set it aside to cool slightly. You want it warm but not hot enough to cook the eggs. The rich, glossy chocolate is the star here, so take a moment to appreciate its deep aroma.
Step 2: Create the Luxurious Chocolate Mascarpone Cream
Separate your eggs. In a large bowl, whisk the egg yolks with half of the sugar until the mixture becomes pale, thick, and creamy. This is called “blanching” the yolks. Add the softened mascarpone to the yolk mixture and whisk gently just until combined and smooth. Now, pour in the melted, cooled chocolate and fold it in with a spatula. You’ll see the cream turn into a beautiful milk-chocolate color. In a clean, dry bowl, whisk the egg whites with a pinch of salt until soft peaks form. Gradually add the remaining sugar and whisk until you get stiff, glossy peaks. Gently fold a third of the egg whites into the chocolate mascarpone to lighten it, then fold in the rest until no white streaks remain. Pro tip: Be gentle when folding to keep the air in the egg whites – that’s what gives our cream its cloud-like texture.
Step 3: Build the Dreamy Layers
Grab your serving dish – a pretty glass trifle bowl or a 9×9 square dish works great. Quickly dip each ladyfinger into the cooled coffee mixture. You want them just moistened, not soggy and falling apart. Lay them in a single layer at the bottom of your dish. Spread half of the chocolate mascarpone cream over the ladyfingers evenly. Repeat with another layer of coffee-dipped ladyfingers and the remaining cream. Smooth the top nicely. Gently cover the surface with plastic wrap and chill for at least 4 hours, but overnight is best. This resting time allows the flavors to marry and the ladyfingers to soften perfectly.
Step 4: Whip Up the Crunchy Chantilly Topping
Right before serving, make your crowning glory. Pour the very cold heavy cream into a chilled bowl. Whisk it until it holds soft peaks. If you like, add a tiny splash of vanilla. Take your hazelnut praline paste or crushed brittle and fold most of it into the whipped cream, reserving a little for garnish. You’ll hear the delightful crunch as you fold. This Chantilly Croquante is a fun textural surprise. Spoon or pipe this crunchy whipped cream over the chilled tiramisu.
Step 5: The Grand Finale
This is the most satisfying part. Using a fine-mesh sieve, generously dust the entire top with unsweetened cocoa powder. Sprinkle over the remaining crushed praline and some elegant chocolate shavings. Chef’s tip: For clean slices, dip your knife in hot water and wipe it dry between each cut. Serve immediately and watch the delighted faces. The contrast of the soft, creamy layers with the crunchy topping is pure magic.
Your Tiramisu Timeline
Here’s what to expect time-wise for your Chocolate Tiramisu Delight:
- Prep Time: 30 minutes
- Chilling Time: 4 hours minimum (overnight is ideal)
- Assembly Time (topping): 10 minutes before serving
- Total Time: 4 hours 40 minutes (mostly hands-off chilling)
Chef’s Secret
My secret weapon for the deepest flavor? I add a tiny pinch of flaky sea salt to the chocolate mascarpone cream. It doesn’t make it taste salty; it just makes the chocolate flavor pop brighter and more complex. Trust me on this one.
A Little Extra Tidbit
Did you know the ladyfinger cookie (Savoiardi) was actually created in the late 15th century for the Duke of Savoy? Their dry, absorbent texture makes them perfect for tiramisu. They’re like little flavor sponges, soaking up all that coffee and chocolate goodness without turning to mush.
What You’ll Need to Make It
You don’t need fancy equipment! Just gather:
- Two mixing bowls (one for whipping cream, one for egg whites)
- Electric hand mixer or stand mixer (a whisk and strong arms work too!)
- Spatula
- 9×9 dish or large serving bowl
- Fine-mesh sieve for dusting cocoa
- Small pot for melting chocolate (or microwave-safe bowl)
How to Store Your Masterpiece
This tiramisu is a dream for making ahead. Once assembled (without the crunchy chantilly topping), cover it tightly with plastic wrap, pressing the wrap directly onto the surface of the cream to prevent a skin from forming. This will keep air out and stop it from absorbing any fridge odors.
Store it in the refrigerator for up to 3 days. The flavor actually improves after 24 hours. Wait to add the crunchy whipped cream topping until just before you plan to serve it. This keeps the crunchy bits from getting soggy.
I do not recommend freezing this tiramisu. The creamy layers can separate and become grainy upon thawing, and the ladyfingers can turn unpleasantly wet. It’s best enjoyed fresh from the fridge.
Handy Tips for the Best Results
- Use room-temperature mascarpone. Cold mascarpone can be lumpy when mixed.
- Dip ladyfingers quickly – a literal “in-and-out” motion. They continue to absorb liquid after you pull them out.
- If your kitchen is hot, chill your mixing bowl and whisk attachment before whipping the cream for the topping.
- For a cleaner presentation, line your square dish with ladyfingers standing up around the edges before adding the dipped ones to the bottom.
Presentation Ideas to Impress Your Guests
- Serve in individual glass jars or martini glasses for a personalized touch.
- Use a cookie cutter to create single-serving portions on a plate, drizzle with chocolate sauce.
- Garnish with fresh berries like raspberries for a tart contrast.
- For holidays, use themed sprinkles or colored sugar on top of the chantilly.
- Add a sprig of fresh mint for a pop of color.
6 Delicious Variations to Try
The beauty of a base recipe like this is how easily you can change it up. Here are six twists on the classic Chocolate Tiramisu Delight:
- Orange Chocolate Dream: Add the zest of one orange to the mascarpone cream and use Grand Marnier in the coffee dip.
- Peppermint Patty Tiramisu: Use mint chocolate and add a drop of peppermint extract to the cream. Top with crushed candy canes.
- Mocha Madness: Dissolve 1 tbsp of instant espresso powder into the melted chocolate for an intense coffee-chocolate kick.
- Berry Fusion: Layer fresh raspberries or sliced strawberries between the ladyfinger and cream layers.
- White Chocolate & Raspberry: Swap the dark chocolate for white chocolate and add a layer of raspberry coulis.
- Dairy-Free Delight: Use a plant-based mascarpone alternative, dairy-free whipped cream, and ensure your ladyfingers are vegan.
Common Mistakes to Avoid
Mistake 1: Soggy Ladyfinger Disaster
This is the number one tiramisu faux pas. Dipping the ladyfingers for too long turns them into a mushy, wet layer that can make the whole dessert collapse. They should be moist but still hold their structure. The trick is to do a very quick dip—just one second per side. Remember, they will continue to soften as they chill with the creamy layers. Think “quick coffee bath,” not “long soak.”
Mistake 2: Lumpy Mascarpone Mixture
Using mascarpone straight from the fridge is a common mistake. Cold mascarpone is firm and doesn’t blend smoothly, leaving unpleasant lumps in your otherwise silky cream. Always take your mascarpone out of the fridge about 20-30 minutes before you start. Let it soften on the counter. When you mix it with the yolks and sugar, it should blend into a beautifully smooth, velvety base for your chocolate.
Mistake 3: Overwhipping or Underwhipping the Cream and Egg Whites
The texture of your cream layers depends on this. If you under-whip the heavy cream or egg whites, they won’t hold their structure, and your dessert will be runny. If you over-whip them, especially the heavy cream, they can turn grainy and start to separate into butter. For perfect results, whip until you have firm peaks that hold their shape when you lift the whisk. Stop as soon as you get there!
Mistake 4: Adding the Topping Too Early
That crunchy chantilly is the star of the show, but its charm is in the contrast between the creamy base and the crunchy bits. If you assemble the entire dessert hours in advance, the moisture from the tiramisu will seep into the whipped cream and soften your praline or brittle, turning it chewy instead of crunchy. Always make the crunchy chantilly and add it just before serving. It only takes a few minutes and makes all the difference.
Frequently Asked Questions
Can I make this tiramisu without raw eggs?
Absolutely, and it’s a very common concern. You have a couple of great options. First, you can use pasteurized eggs, which are heated to kill any bacteria while still remaining raw. Second, you can modify the recipe by skipping the egg whites and using stabilized whipped cream. For the yolks, you can gently cook them with a little of the sugar and some milk over a double boiler until slightly thickened (a sabayon), then let it cool before mixing with the mascarpone. This adds a step but gives peace of mind. Alternatively, a simple swap is to use a prepared vanilla pudding mix as part of the filling for a cooked, egg-free version.
How far in advance can I prepare this dessert?
This tiramisu is actually at its best made a day in advance. The long chilling time allows the ladyfingers to soften perfectly and all the flavors to meld together beautifully. You can safely assemble the base (the chocolate mascarpone and ladyfinger layers) up to 3 days ahead. Keep it tightly covered in the fridge. The only component you should make fresh is the crunchy chantilly topping. Whip that up and add it right before you serve to keep that wonderful contrasting texture.
What can I use instead of coffee liqueur?
No problem at all! The liqueur is optional and just adds an extra layer of flavor. You can simply omit it and use only brewed coffee for dipping. For a different flavor profile, you could use a splash of amaretto (almond liqueur), dark rum, or even a tablespoon of vanilla extract mixed into the coffee. If you want a completely non-alcoholic version, just use straight cooled coffee or even a strongly breved chicory root “coffee” for a similar depth without the caffeine or alcohol.
My whipped cream for the topping is runny. What did I do wrong?
A few things can cause runny whipped cream. First, make sure your heavy cream is very cold—I even chill my mixing bowl and whisk attachment. Second, check that your cream has a high enough fat content (look for “heavy whipping cream,” not just “whipping cream”). Third, don’t rush it; whip at a medium-high speed until you see clear trails and then soft peaks form. If your kitchen is very warm, this can also be a challenge. A pro tip is to add a teaspoon of cornstarch or a stabilizer like powdered sugar (which contains cornstarch) at the beginning to help it hold its shape better.
Can I freeze tiramisu for later?
I generally do not recommend freezing this particular tiramisu. The creamy, egg-based filling can separate and become grainy when thawed. The ladyfingers, already moist, can turn into an unappealing, icy mush. The texture is a huge part of the appeal, and freezing really compromises it. It’s a dessert best enjoyed fresh from the fridge within a few days of making it. If you need a make-ahead freezer dessert, a classic baked cheesecake or cookie dough might be a better choice.
What’s the best type of chocolate to use?
For the richest flavor, use a good quality dark baking chocolate or couverture chocolate with a cocoa content of at least 60%. I love the deep, complex notes of a 70% dark chocolate. Avoid using chocolate chips meant for cookies if you can, as they often contain stabilizers that can make melting trickier. A pure chocolate bar broken into pieces will melt more smoothly and give you that luxurious, professional-grade taste. The quality of the chocolate is the backbone of your Chocolate Tiramisu Delight, so don’t skimp here!
Is there a way to make this recipe nut-free?
Yes, easily! The nuts only come from the praline or brittle in the crunchy chantilly topping. Simply omit that ingredient. You can still make a lovely plain chantilly (whipped cream) for the top, sweetened with a little powdered sugar. For crunch, consider folding in some crushed-up toffee pieces (check labels for nut warnings) or even crumbled-up crispy cookie bits like amaretti cookies (which are almond-based, so check for allergies) or speculoos cookies. You could also just top with chocolate shavings and cocoa powder for a classic look.
How do I prevent the cocoa powder on top from getting soggy?
The key is timing. Only dust the top with cocoa powder right before serving. If you dust it and then cover it with plastic wrap or let it sit, the moisture from the dessert will moisten the powder, causing it to blotch and lose its pretty, dry finish. If you need to store it after adding cocoa, do not let the plastic wrap touch the surface. Instead, use toothpicks to tent the plastic over the dessert so there’s an air gap. But for best results, add your final dusting as the last step, just as you’re bringing it to the table.
Can I use a different dish than a square pan?
Of course! The beauty of a no-bake layered dessert is its flexibility. A clear glass trifle bowl is stunning because it shows off all the beautiful layers. You can also use a round springform pan for a cake-like presentation. Individual serving glasses, jars, or even wine glasses make for elegant, no-mess portions. Just adjust your layering process accordingly—you might need to break the ladyfingers to fit the shape of your dish.
My mascarpone cream seems too thin. How can I fix it?
If your cream seems runny before chilling, don’t panic. First, ensure you properly whipped your egg whites to stiff peaks—this provides structure. Second, make sure your melted chocolate was cooled enough before adding it; hot chocolate can deflate the egg whites. If it’s still thin, pop the whole mixture into the fridge for 20-30 minutes to firm up a bit before attempting to layer it. Often, the chilling time is what sets everything perfectly. The dessert is meant to be creamy, not solid, so after its long chill, it should be sliceable but still beautifully soft.
Creating wonderful desserts at home is a joy, and understanding the quality of your ingredients is part of the fun. For general guidance on making balanced choices, resources like the CDC’s page on healthy food habits can offer great foundational advice for your everyday cooking.
If you fell in love with the process of making this no-bake wonder, you’ll find a whole world of inspiration in our collection of international pastry recipes waiting for you to explore.
So, there you have it – your ticket to a stunning, no-bake dessert that feels incredibly special. This Chocolate Tiramisu Delight with its surprise crunchy topping is more than just a recipe; it’s a little act of kitchen magic that proves the most impressive treats don’t always need an oven. It’s about layering flavors and textures with love (and a good whisk). I hope this recipe brings as much joy to your table as it has to mine. Now, go raid your pantry, and let’s get layering
Equipment
- Grand bol
- Fouet
- Spatule
- Plat de service
- Passoire à mailles fines
Ingredients
- 3 œufs séparés
- 80 g sucre divisé
- 200 g chocolat noir minimum 60% de cacao
- 250 g mascarpone à température ambiante
- 200 ml crème fouettée froide
- 24-30 biscuits à la cuillère Savoiardi
- 250 ml café fort ou espresso, refroidi
- 2-3 cuil. à soupe liqueur de café facultatif
- 50 g pâte pralinée aux noisettes ou caramel mou
- q.s. cacao en poudre pour saupoudrer
- q.s. copeaux de chocolat pour décorer
Instructions
- Préparez le café et laissez-le refroidir dans un plat peu profond ; ajoutez la liqueur de café si vous l'utilisez.
- Hachez finement et faites fondre doucement le chocolat noir ; laissez refroidir légèrement.
- Dans un bol, fouettez les jaunes d'œufs avec la moitié du sucre jusqu'à ce que le mélange soit pâle et épais.
- Ajoutez le mascarpone ramolli au mélange de jaunes d'œufs et fouettez jusqu'à obtenir une texture lisse.
- Incorporez le chocolat fondu jusqu'à ce qu'il soit bien mélangé.
- Dans un bol propre, battez les blancs d'œufs avec une pincée de sel jusqu'à obtention de pics moelleux.
- Ajoutez progressivement le reste du sucre et battez jusqu'à obtenir des pics durs.
- Incorporez délicatement un tiers des blancs d'œufs au mélange de chocolat mascarpone, puis incorporez le reste.
- Immergez rapidement les biscuits à la cuillère dans le mélange de café et disposez-les dans un plat de service.
- Étalez la moitié de la crème chocolat mascarpone uniformément sur les biscuits.
- Répétez avec une autre couche de biscuits trempés dans le café et le reste de la crème.
- Couvrez de film plastique et réfrigérez pendant au moins 4 heures ou une nuit.
- Avant de servir, fouettez la crème épaisse jusqu'à obtenir des pics souples.
- Incorporez la pâte pralinée aux noisettes, en réservant un peu pour la décoration.
- Déposez ou décorez la chantilly croustillante sur le tiramisu réfrigéré.
- Saupoudrez de cacao en poudre et parsemez de pralin et de copeaux de chocolat avant de servir.
Notes
Nutrition

Hi, I’m Olivia Parker, the founder of BakingSecret.com and a lifelong lover of all things sweet and homemade. I grew up in a small town in Oregon, where the smell of fresh cookies in my family’s kitchen sparked my passion for baking. Over the years, I turned that passion into a mission: to help home bakers feel confident, inspired, and creative.
After studying food science and working in several artisan bakeries across the U.S., I decided to create a space where everyone from beginners to seasoned bakers can find reliable recipes, expert tips, and a warm, welcoming community. BakingSecret.com is my way of sharing the magic of baking with the world. When I’m not testing new recipes, you’ll find me exploring farmers’ markets, collecting vintage cookbooks, or perfecting my sourdough technique.