
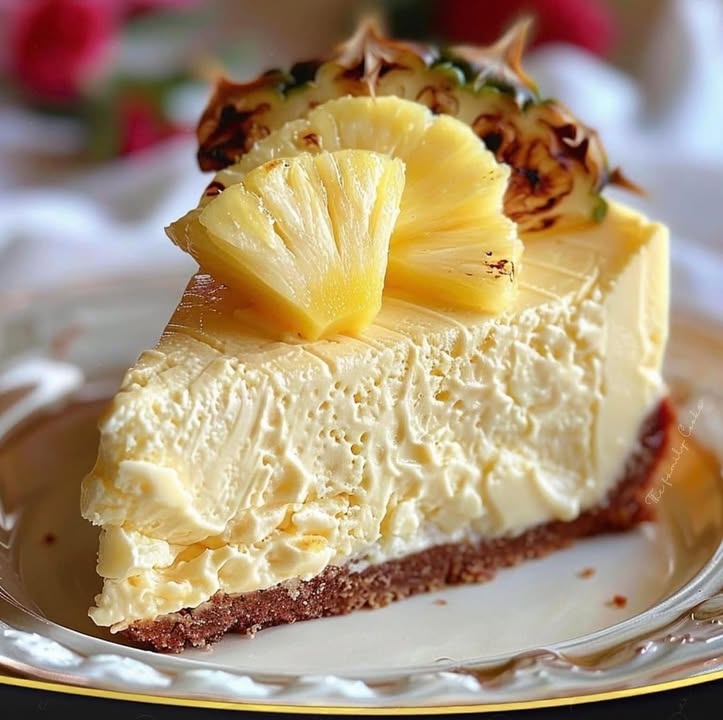
Discover the Sweet and Tangy Delight of Pineapple Mousse Cheesecake
Imagine a smooth, creamy cheesecake with a fresh, zesty twist—this Pineapple Mousse Cheesecake is a delightful treat for any occasion. I first tried this recipe at a friend’s summer party, and it was love at first bite. The combination of tangy pineapple and rich cream cheese is simply irresistible. Since then, I’ve made it for family gatherings, and it’s always a hit!
A Brief History: From Classic to Tropical Twist
Traditional cheesecakes are a beloved dessert around the world, but adding a tropical twist makes them even more special. This Pineapple Mousse Cheesecake is a modern take on the classic, blending the familiar comfort of a graham cracker crust with the refreshing flavors of pineapple. It’s a perfect example of how a simple ingredient can elevate a well-loved dish.
Why You’ll Fall in Love with This Recipe
This recipe is a crowd-pleaser for several reasons. First, the blend of flavors is just right—sweet, tangy, and creamy all in one. Second, it’s incredibly easy to make, even for beginners. And third, it’s versatile enough to fit any occasion, from casual family dinners to elegant parties. Plus, the no-bake method means you won’t heat up your kitchen, making it perfect for warm weather.
Perfect Occasions to Prepare This Recipe
Whether you’re hosting a summer barbecue, celebrating a birthday, or just looking for a sweet treat, this Pineapple Mousse Cheesecake is the perfect choice. Its light and airy texture makes it ideal for hot days, while its delicious flavor will make any event feel special.
Ingredients for Your Pineapple Mousse Cheesecake
- 1 1/2 cups graham cracker crumbs
- 1/4 cup melted butter
- 2 cups cream cheese, softened
- 1/2 cup granulated sugar
- 1 cup pineapple puree
- 1/2 cup heavy cream
- 1 tablespoon gelatin, dissolved in 1/4 cup warm water
- 1 whole pineapple, for garnish
Substitution Options
If you don’t have all the ingredients, don’t worry! You can substitute the graham cracker crumbs with cookie crumbs, and use coconut oil instead of butter. For a vegan version, use a plant-based cream cheese and a non-dairy whipped topping. And if you can’t find pineapple puree, you can blend fresh pineapple chunks until smooth.
Preparation Section
Step 1: Create the Crust
Mix the graham cracker crumbs with the melted butter in a bowl until the mixture resembles wet sand. Press this into the bottom of a springform pan, making sure it’s even and compact. Place the pan in the refrigerator to cool for about 20 minutes. This will help the crust set and prevent it from crumbling later.
Step 2: Mix the Cream Cheese Filling
Beat the cream cheese and sugar together in a large mixing bowl until the mixture is smooth and creamy. Add the pineapple puree and mix well to combine. The smell of the pineapple will fill the air, making your kitchen feel like a tropical paradise. Make sure there are no lumps in the mixture for a silky smooth texture.
Step 3: Whip the Heavy Cream
In a separate bowl, beat the heavy cream until it forms stiff peaks. This might take a few minutes, so be patient. Once ready, gently fold the whipped cream into the pineapple cheese mixture. The result should be a light and fluffy mousse-like consistency. The color will be a beautiful pastel yellow, and the texture will be irresistibly smooth.
Step 4: Add the Gelatin
Stir the dissolved gelatin until it’s completely free of lumps. Gently mix it into the pineapple mousse. The gelatin will help the cheesecake set, giving it a firm yet creamy texture. Be sure to stir thoroughly to avoid any clumps.
Step 5: Assemble and Chill
Pour the mousse over the chilled crust, smoothing the top with a spatula. Make sure the surface is even and smooth. Cover the pan with plastic wrap and refrigerate for at least 4 hours, or until the cheesecake is set. Patience is key here, as the chilling time is crucial for the perfect texture.
Timing: A Quick Breakdown
Here’s a quick overview of the time you’ll need:
- Prep Time: 30 minutes
- Cooling Time: 20 minutes
- Chilling Time: 4 hours
- Total Time: 4 hours and 50 minutes
Chef’s Secret: A Pro Tip for Perfect Texture
To ensure the perfect texture, make sure the cream cheese is at room temperature before mixing. Cold cream cheese can lead to a lumpy mixture, which isn’t what we want. Letting it sit out for about 30 minutes beforehand makes a big difference.
Extra Info: A Fun Fact About Pineapples
Did you know that pineapples were named by European explorers who thought they looked like pinecones? The word “pineapple” actually comes from the Spanish word “piña,” meaning “pinecone.” It’s a fun fact to share while enjoying your Pineapple Mousse Cheesecake!
Necessary Equipment
To make this recipe, you’ll need a few essential tools:
- Springform pan
- Mixing bowls
- Electric mixer or whisk
- Spatula
- Measuring cups and spoons
Storage: Keeping Your Cheesecake Fresh
Proper storage is key to maintaining the freshness and texture of your Pineapple Mousse Cheesecake. After it has set, keep it in the refrigerator, covered with plastic wrap. It will stay fresh for up to 5 days. If you want to freeze it, wrap individual slices in plastic and place them in an airtight container. This way, it will last up to 2 months. Just remember to thaw it in the refrigerator before serving.
Tips and Advice: Enhancing Your Recipe
To make your Pineapple Mousse Cheesecake even more impressive, try using a ring mold to create individual servings. This not only looks elegant but also makes it easier to serve. Another tip is to add a little lime zest to the mousse for an extra burst of citrus flavor.
Presentation Tips: Making It Look Fabulous
For a stunning presentation, garnish each slice with a fresh pineapple slice and a sprig of mint. You can also drizzle a bit of pineapple syrup around the plate for a professional touch. Another idea is to sprinkle some toasted coconut on top for added texture and flavor.
Healthier Alternative Recipes: Something for Everyone
If you’re looking for a healthier twist on this recipe, here are six variations you can try:
- Low-Fat Version: Use a reduced-fat cream cheese and Greek yogurt for a lighter option. This keeps the creamy texture while cutting down on calories.
- Vegan Version: Substitute the cream cheese with a plant-based alternative and use coconut cream instead of heavy cream. Add a bit of agar-agar for the gelatin effect.
- No-Sugar Option: Replace the granulated sugar with stevia or another natural sweetener. This is great for those watching their sugar intake.
- Gluten-Free Crust: Use gluten-free graham cracker crumbs or almond flour for the crust. This makes it a perfect dessert for those with gluten sensitivities.
- Fruit Topping: Add a layer of fresh mixed berries or a berry compote on top for a burst of natural sweetness and color.
- Spiced Pineapple Mousse Cheesecake: Add a pinch of cinnamon and nutmeg to the mousse for a warm, spiced flavor. This is especially lovely during the fall and winter seasons.
If you’re a fan of no-bake desserts, you might also enjoy our No-Bake Mango Cheesecake. It’s just as creamy and delicious, with a wonderful tropical twist. For a different citrus flavor, check out our Lime Mousse Cheesecake.
Common Mistakes to Avoid
Mistake 1: Overmixing the Mousse
Overmixing the mousse can cause it to become too dense and lose its light, airy texture. To avoid this, mix the ingredients just until they are combined. Stop mixing once everything is blended, and avoid overworking the mixture.
Mistake 2: Not Chilling the Crust
Skipping the step of chilling the crust can lead to a soggy base. The crust needs to be firm to support the mousse. Make sure to chill it for at least 20 minutes before adding the mousse. This will help it hold its shape and prevent it from becoming mushy.
Mistake 3: Using Cold Cream Cheese
Using cold cream cheese can result in a lumpy filling. Always let the cream cheese come to room temperature before mixing. This ensures a smooth and creamy texture. If you’re in a hurry, you can microwave the cream cheese for a few seconds to soften it, but be careful not to overheat it.
Mistake 4: Adding Too Much Liquid
Adding too much liquid, such as extra pineapple puree, can make the mousse runny. Stick to the recipe measurements and be careful not to overdo it. If you want a stronger pineapple flavor, consider using a concentrated pineapple puree or adding a bit of pineapple extract.
FAQ: Frequently Asked Questions
Can I use canned pineapple for this recipe?
Yes, you can use canned pineapple, but it’s best to drain it well and blend it to a smooth puree. Fresh pineapple, however, provides a more vibrant and natural flavor, so it’s recommended if possible.
Is this recipe suitable for vegetarians?
Yes, this recipe is suitable for vegetarians. However, if you follow a strict vegetarian diet, make sure to use a vegetarian-friendly gelatin or a plant-based alternative like agar-agar.
How long does the cheesecake need to chill?
The cheesecake needs to chill for at least 4 hours, or until it is set. This allows the gelatin to set properly and the mousse to firm up. For the best results, chill it overnight.
Can I freeze the Pineapple Mousse Cheesecake?
Yes, you can freeze it. Wrap individual slices in plastic wrap and place them in an airtight container. The cheesecake will last up to 2 months in the freezer. Thaw it in the refrigerator before serving.
What can I use if I don’t have a springform pan?
If you don’t have a springform pan, you can use a regular cake pan. Just line the bottom with parchment paper to make it easier to remove the cheesecake. Alternatively, you can use a pie dish, but the final presentation might be a bit messier.
Can I make this recipe without gelatin?
Gelatin is essential for setting the mousse, but if you prefer not to use it, you can try using a plant-based alternative like agar-agar. Follow the package instructions for the correct amount to use.
How do I make the pineapple puree?
To make pineapple puree, simply blend fresh pineapple chunks in a blender or food processor until smooth. You can strain it through a fine-mesh sieve to remove any pulp and achieve a smoother texture.
Can I add other fruits to the mousse?
Absolutely! You can experiment with other fruits like mango, strawberry, or even kiwi. Just make sure to puree the fruit well and adjust the amount of sugar to taste, as some fruits may be sweeter than others.
Is this recipe suitable for a lactose-free diet?
To make this recipe lactose-free, use a lactose-free cream cheese and replace the heavy cream with a non-dairy alternative like coconut cream. This will maintain the creamy texture without the lactose.
Yes, you can use different types of cookies for the crust. Graham crackers are traditional, but you can also use vanilla wafers, shortbread, or even chocolate cookies. Just make sure to use a similar weight and texture to the graham cracker crumbs.
For more delectable dessert recipes, check out our Dessert Recipes section. You’ll find a variety of sweet treats to satisfy any craving.
Happy baking, and enjoy your delicious Pineapple Mousse Cheesecake! Whether you’re a seasoned baker or new to the kitchen, this recipe is sure to impress. Don’t forget to share your creations with us on social media—tag us in your photos and let us know how it turned out!
Equipment
- Springform pan
- Mixing bowls
- Electric mixer or whisk
- Spatula
- Measuring cups and spoons
Ingredients
- 1 1/2 cups graham cracker crumbs
- 1/4 cup melted butter
- 2 cups cream cheese, softened
- 1/2 cup granulated sugar
- 1 cup pineapple puree
- 1/2 cup heavy cream
- 1 tablespoon gelatin, dissolved in 1/4 cup warm water
- 1 whole pineapple, for garnish
Instructions
- Mix the graham cracker crumbs with melted butter until it resembles wet sand, then press into the bottom of a springform pan and refrigerate for 20 minutes.
- In a large mixing bowl, beat the cream cheese and sugar until smooth, then add pineapple puree and mix well.
- In a separate bowl, whip the heavy cream until stiff peaks form, then gently fold it into the cheese mixture until combined.
- Stir the dissolved gelatin into the mousse mixture until no lumps remain.
- Pour the mousse over the chilled crust, smooth the top, cover with plastic wrap, and refrigerate for at least 4 hours until set.
Notes
Nutrition

Hi, I’m Olivia Parker, the founder of BakingSecret.com and a lifelong lover of all things sweet and homemade. I grew up in a small town in Oregon, where the smell of fresh cookies in my family’s kitchen sparked my passion for baking. Over the years, I turned that passion into a mission: to help home bakers feel confident, inspired, and creative.
After studying food science and working in several artisan bakeries across the U.S., I decided to create a space where everyone from beginners to seasoned bakers can find reliable recipes, expert tips, and a warm, welcoming community. BakingSecret.com is my way of sharing the magic of baking with the world. When I’m not testing new recipes, you’ll find me exploring farmers’ markets, collecting vintage cookbooks, or perfecting my sourdough technique.