
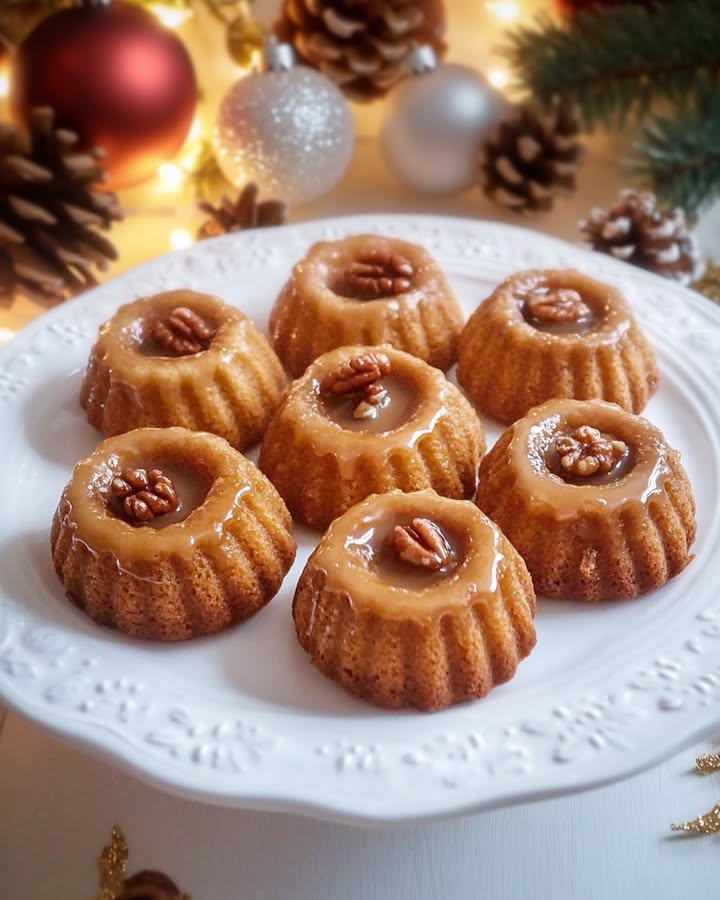
Christmas Nut Caramel Cookies: A Sweet and Nutty Delight
I love the holidays, not just for the festive decorations and cheerful music, but for the joy of baking. One of my favorite recipes to make is Christmas Nut Caramel Cookies. These cookies are a delightful blend of rich, buttery dough, crunchy nuts, and a sweet, gooey caramel center. They’re perfect for filling the house with the aroma of holiday cheer and sharing with loved ones.
A Little History Behind Christmas Nut Caramel Cookies
Christmas Nut Caramel Cookies have a special place in my heart. Growing up, my grandmother used to make these delightful treats every year. She would spend hours in the kitchen, carefully crafting each cookie with love. The recipe has been passed down through generations, and it’s a tradition I cherish. These cookies are like a warm hug from the past, bringing back memories of snowy days and family gatherings around the fireplace.
Why You’ll Love This Recipe
There’s something truly magical about these Christmas Nut Caramel Cookies. The combination of textures—crumbly, nutty, and chewy—makes them a crowd-pleaser. Plus, they are incredibly easy to make, even for beginners. The best part? The rich, buttery flavor and the sweet, gooey caramel center make each bite a little piece of heaven.
Perfect Occasions to Prepare This Recipe
These cookies are perfect for any holiday gathering. Whether you’re hosting a Christmas party, making a treat for your neighbors, or simply looking for a cozy afternoon project, these cookies are sure to impress. They also make a wonderful gift, beautifully packaged in a festive box or tin.
Ingredients
- 200g of flour
- 100g of chopped walnuts
- 100g of sugar
- 100g of softened butter
- 1 egg
- 1 teaspoon of vanilla extract
- 50g of cannelé caramel
- A pinch of salt
Substitution Options
If you don’t have walnuts, you can use pecans or almonds. For the caramel, you can substitute it with homemade or store-bought caramel sauce.
Preparation Section
Step 1: Cream the Butter and Sugar
In a large bowl, beat the softened butter with the sugar until you get a creamy mixture. The key is to mix until it’s light and fluffy, which takes about 2-3 minutes. This step is crucial as it helps to incorporate air into the dough, making your cookies light and tender.
Step 2: Add the Egg and Vanilla
Next, add the egg and vanilla extract to the butter-sugar mixture. Mix well to combine. You’ll notice the mixture becoming smooth and slightly pale in color. The vanilla adds a lovely, aromatic touch that complements the other flavors perfectly.
Step 3: Combine the Dry Ingredients
In another bowl, combine the flour, chopped walnuts, and a pinch of salt. Gently fold this mixture into the wet ingredients. Be careful not to overmix; you want the dough to be just combined. The texture should be crumbly yet cohesive, perfect for shaping into cookies.
Step 4: Chill the Dough
Form the dough into a ball and wrap it in plastic wrap. Refrigerate for 30 minutes. This chilling step is essential as it makes the dough easier to handle and helps the cookies hold their shape while baking.
Step 5: Preheat the Oven
Preheat your oven to 180°C (thermostat setting 6). This step ensures that your oven is at the right temperature by the time you’re ready to bake, leading to perfectly golden cookies.
Step 6: Roll and Cut the Dough
On a lightly floured surface, roll out the chilled dough to a thickness of about 5 mm. Use cookie cutters to cut out shapes. The shapes can be as creative as you like—stars, trees, or simple circles all work beautifully.
Step 7: Add the Caramel
Place the cut cookies on a baking sheet lined with parchment paper. Add a small spoonful of cannelé caramel to the center of each cookie. The caramel will melt and create a delicious, gooey center as the cookies bake.
Step 8: Bake the Cookies
Bake the cookies for 12-15 minutes, or until they are golden brown. The edges should be lightly golden, and the centers will be soft and chewy. Remove them from the oven and let them cool on the baking sheet for a few minutes before transferring them to a wire rack to cool completely.
Step 9: Cool and Enjoy
Let the cookies cool on a wire rack. This allows them to firm up and makes them easier to handle. Once cooled, they are ready to be enjoyed. Serve them with a cup of hot cocoa or coffee for a perfect holiday treat.
Chef’s Tip: Add a Sprinkle of Sea Salt
For an extra touch of flavor, sprinkle a little sea salt on top of the caramel before baking. The salt enhances the sweetness and adds a delightful contrast to the rich, buttery cookies.
Timing
- Prep Time: 30 minutes
- Cooking Time: 15 minutes
- Chilling Time: 30 minutes
- Total Time: 1 hour 25 minutes
Chef’s Secret
The secret to these cookies is in the chilling. Chilling the dough not only makes it easier to handle but also helps the cookies keep their shape and texture. Don’t skip this step!
Extra Info
A fun fact about these cookies is that the cannelé caramel adds a unique, deep, and rich flavor. It’s a French confectionery and gives the cookies a distinctly gourmet touch.
Necessary Equipment
To make these cookies, you’ll need a mixing bowl, an electric mixer, a rolling pin, cookie cutters, a baking sheet, and parchment paper.
Storage
These cookies can be stored in an airtight container at room temperature for up to one week. If you want to keep them longer, you can freeze the baked cookies for up to three months. Simply thaw them at room temperature before serving. The caramel center stays soft and gooey, making them perfect for snacking on throughout the holiday season.
Tips and Advice
Make sure your butter is at the right consistency—soft but not melted. This will help in achieving the perfect texture. Also, don’t overbake the cookies; they should be lightly golden to ensure they stay soft and chewy.
Presentation Tips
For a festive touch, you can dust the cookies with powdered sugar or drizzle them with a bit of melted chocolate. You can also arrange them on a platter with a variety of other holiday cookies for a visually appealing and delicious display.
Healthier Alternative Recipes
If you’re looking for a healthier option, here are some variations you might enjoy:
– Oatmeal Raisin Version: Replace the nuts with oats and raisins for a more wholesome treat. Check out our Christmas Cookie Bliss recipe for inspiration.
– Coconut Almond Delight: Swap the walnuts for shredded coconut and sliced almonds. This version is perfect for a tropical twist. Our Lemon Coconut Cookies offer a similar flavor profile.
– Dark Chocolate Chip: Add dark chocolate chips instead of caramel for a rich, antioxidant-packed treat. You can find more ideas in our Cherry Chocolate Cookies recipe.
– Zesty Lemon Flavor: Add a tablespoon of lemon zest to the dough for a fresh, zesty flavor. Our Lemon Zest Cookies are a great reference.
– Whole Wheat Option: Substitute half of the regular flour with whole wheat flour for a fiber-rich, nuttier taste.
– Honey Sweetened: Replace the sugar with honey for a natural, less processed sweetener. This adds a unique, mellow sweetness to the cookies.
Common Mistakes to Avoid
Mistake 1: Overbeating the Butter and Sugar
Overbeating the butter and sugar can lead to a tough, dense cookie. Beat the mixture just until it’s light and fluffy, which usually takes about 2-3 minutes.
Mistake 2: Not Chilling the Dough
Skipping the chilling step can result in cookies that spread too much and lose their shape. Make sure to chill the dough for at least 30 minutes before rolling and cutting.
Mistake 3: Overbaking
Overbaking can turn your cookies from soft and chewy to hard and dry. Keep an eye on them and remove them from the oven when they are lightly golden.
Mistake 4: Adding Too Much Caramel
Too much caramel can make the cookies ooze and become messy. Use a small spoon to add just enough caramel for a nice, gooey center without overwhelming the cookie.
Mistake 5: Not Using Parchment Paper
Using parchment paper on your baking sheet prevents the cookies from sticking and makes cleanup a breeze. Always line your baking sheet with parchment paper for the best results.
FAQ
Can I use different types of nuts?
Yes, you can use other nuts like pecans or almonds. Just make sure they are finely chopped for the best texture.
What if I don’t have cannelé caramel?
You can use regular caramel sauce or make your own by melting sugar and adding a little water and cream. The flavor will still be delicious.
These cookies can be stored in an airtight container at room temperature for up to one week. For longer storage, you can freeze them for up to three months.
Can I make the dough ahead of time?
Absolutely! You can prepare the dough, chill it, and store it in the fridge for up to 24 hours before baking. This is a great way to save time during busy holiday seasons.
What if I don’t have an electric mixer?
You can use a whisk or a wooden spoon to mix the butter and sugar. It will take a bit more effort, but it’s still possible to achieve a creamy mixture.
Can I use a hand mixer instead of an electric mixer?
Yes, a hand mixer works just as well. Just make sure to cream the butter and sugar thoroughly for a light and fluffy mixture.
The cookies are done when they are lightly golden brown around the edges and the centers are set but still soft. You can also use a toothpick to check for doneness; insert it into the center, and if it comes out clean, the cookies are ready.
Definitely! You can add a teaspoon of cinnamon, a dash of nutmeg, or even a hint of ginger for a spicier, more complex flavor. Experiment with your favorite spices and flavors to make them your own.
Can I use whole wheat flour?
Yes, you can substitute half of the all-purpose flour with whole wheat flour for a healthier option. This will give the cookies a nuttier, heartier flavor.
What if I don’t have an oven?
If you don’t have an oven, you could try using a toaster oven or even a stovetop method. Place the cookies in a pan and cook them on low heat, flipping them halfway through, until they are golden brown and cooked through.
Before you start baking, make sure to check out our main category for more delicious and easy-to-follow recipes. Happy baking!
Equipment
- Electric mixer
- Mixing bowl
- Rolling pin
- Cookie cutters
- Baking sheet
- Parchment paper
Ingredients
- 200 g flour
- 100 g chopped walnuts
- 100 g sugar
- 100 g softened butter
- 1 unit egg
- 1 tsp vanilla extract
- 50 g cannelé caramel
- a pinch salt
Instructions
- In a large bowl, beat the softened butter with the sugar until creamy and light.
- Add the egg and vanilla extract to the butter-sugar mixture, and mix well.
- In another bowl, combine the flour, chopped walnuts, and a pinch of salt, then gently fold this mixture into the wet ingredients.
- Form the dough into a ball, wrap it in plastic wrap, and refrigerate for 30 minutes.
- Preheat your oven to 180°C (thermostat setting 6).
- On a lightly floured surface, roll out the chilled dough to a thickness of about 5mm and cut out shapes with cookie cutters.
- Place the cut cookies on a baking sheet lined with parchment paper and add a small spoonful of cannelé caramel to the center of each cookie.
- Bake the cookies for 12-15 minutes or until golden brown around the edges.
- Let the cookies cool on a wire rack before serving.
Notes
Nutrition

Hi, I’m Olivia Parker, the founder of BakingSecret.com and a lifelong lover of all things sweet and homemade. I grew up in a small town in Oregon, where the smell of fresh cookies in my family’s kitchen sparked my passion for baking. Over the years, I turned that passion into a mission: to help home bakers feel confident, inspired, and creative.
After studying food science and working in several artisan bakeries across the U.S., I decided to create a space where everyone from beginners to seasoned bakers can find reliable recipes, expert tips, and a warm, welcoming community. BakingSecret.com is my way of sharing the magic of baking with the world. When I’m not testing new recipes, you’ll find me exploring farmers’ markets, collecting vintage cookbooks, or perfecting my sourdough technique.