
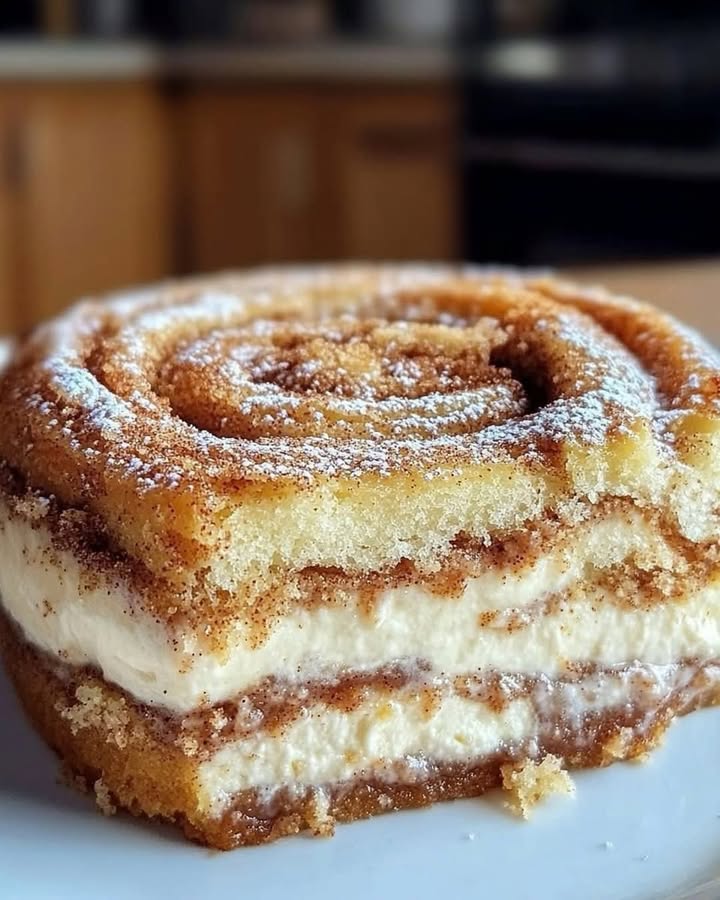
A Delightful Journey with Cinnamon Roll Cheesecake
Imagine a dessert that combines the creamy, smooth texture of cheesecake with the warm, comforting flavors of a cinnamon roll. This Cinnamon Roll Cheesecake is a match made in heaven, and it’s one of my favorite treats to share with family and friends.
The Story Behind Cinnamon Roll Cheesecake
When I first tried this recipe, I was blown away by how well the two flavors blended. The traditional cheesecake base pairs perfectly with the swirls of cinnamon, creating a dessert that feels both familiar and exciting. It’s a modern twist on classic flavors, inspired by the love for both cheesecake and cinnamon rolls.
Why You’ll Fall in Love with This Recipe
This Cinnamon Roll Cheesecake is not just any dessert; it’s an experience. The combination of rich cream cheese, sweet cinnamon, and a buttery graham cracker crust is simply irresistible. Plus, it’s surprisingly easy to make, making it a go-to for any special occasion or just a lazy Sunday afternoon.
Ideal Occasions to Prepare This Dessert
Whether you’re hosting a holiday gathering, a birthday party, or a simple weekend get-together, this Cinnamon Roll Cheesecake is sure to impress. It’s also a great way to end a cozy dinner for two. The versatility of this dessert makes it a perfect addition to any event.
Ingredients
- 1 cup of granulated sugar
- 1 cup of cream cheese, softened
- 1 teaspoon vanilla extract
- 2 cups of graham cracker crumbs
- 1/2 cup of melted butter
- 3 large eggs
- 1 teaspoon ground cinnamon
- 1 1/2 cups of sour cream
- 1/2 cup of brown sugar
Substitution Options
- Use honey graham crackers for a slightly sweeter crust.
- Swap out the granulated sugar for coconut sugar for a healthier option.
- Replace the sour cream with Greek yogurt for a tangier flavor.
Preparation Steps
Step 1: Preheat the Oven and Prepare the Crust
Start by preheating your oven to 325 F (160 C). In a mixing bowl, combine the melted butter with the graham cracker crumbs. Stir until the mixture is well combined and has a sandy texture. Press this mixture firmly into the bottom of a removable mold to form the crust. This will be the sturdy base for your creamy cheesecake.
Step 2: Prepare the Cheese Filling
In a large bowl, beat the cream cheese and granulated sugar together until you achieve a smooth and creamy consistency. Add the eggs one at a time, beating well after each addition. Mix in the vanilla extract, sour cream, and ground cinnamon. The mixture should be well combined, with no lumps remaining. The aroma of the cinnamon and vanilla will already have your kitchen smelling divine!
Step 3: Assemble and Bake
Pour the cheese mixture over the prepared crust. In a small bowl, mix the brown sugar with a little additional cinnamon and sprinkle this mixture over the top of the cheesecake. Place the cheesecake in the preheated oven and bake for 50-60 minutes, or until the center is firm but slightly jiggly. The cinnamon and brown sugar will caramelize slightly, adding a wonderful depth of flavor.
Step 4: Cool and Refrigerate
Remove the cheesecake from the oven and let it cool completely at room temperature. Once it’s cooled, refrigerate it for at least 4 hours, or overnight if possible. This chilling time allows the flavors to meld and the cheesecake to set properly, resulting in the perfect texture.
Step 5: Serve and Enjoy
Unmold the cheesecake and cut it into portions. Serve each slice with a dollop of whipped cream or a scoop of ice cream for a delightful contrast. The combination of the creamy cheesecake, the spiced topping, and the cool, creamy accompaniment is pure bliss.
Chef’s Tip
To enhance the flavor even more, try adding a pinch of nutmeg to the filling. It complements the cinnamon and adds a subtle, warm note to the overall taste.
Timing
Prep Time: 20 minutes
Cooking Time: 50-60 minutes
Resting Time: 4 hours or overnight
Total Time: 1 hour 20 minutes
Extra Info
Did you know that cinnamon not only adds a wonderful flavor but also has health benefits? It can help with digestion and is packed with antioxidants. So, not only are you indulging in a delicious dessert, but you’re also getting a bit of a health boost!
Necessary Equipment
- Removable cake pan
- Mixing bowls
- Electric mixer or whisk
- Spatula
Storage
Store the Cinnamon Roll Cheesecake in the refrigerator, covered with plastic wrap or in an airtight container. It will keep well for up to 5 days. For longer storage, you can freeze the cheesecake. Wrap it tightly in plastic wrap and then place it in a freezer bag. It will last for up to 3 months. When ready to serve, thaw it in the refrigerator overnight.
Pro tip: To prevent the cheesecake from sticking to the pan, line the bottom with parchment paper before pressing in the crust. This will make it much easier to remove the cheesecake once it’s chilled.
Tips and Advice
- Make sure all ingredients are at room temperature for the best results.
- Don’t overbeat the cream cheese mixture, as this can lead to air bubbles and a less smooth texture.
- For a more impressive presentation, drizzle some caramel sauce over the top just before serving.
Presentation Tips
- Garnish with a sprinkle of extra cinnamon and a few graham cracker crumbs for added texture.
- Add a fresh raspberry or strawberry on top for a pop of color.
- Serve with a dusting of powdered sugar for a touch of elegance.
Variations
- Apple Cinnamon Swirl Cheesecake: Swirl in some apple pie filling for a fall-inspired treat. Check out our Caramel Apple Cheesecake for inspiration.
- Peanut Butter Cinnamon Cheesecake: Add a layer of peanut butter to the filling for a nutty twist. Our Peanut Butter Delight recipe can give you some ideas.
- Cherry Cinnamon Cheesecake: Top with a cherry compote for a fruity and festive flair. Try our Air Fryer Cherry Rolls for a similar flavor profile.
- Orange Cinnamon Cheesecake: Add a hint of orange zest to the filling for a refreshing twist. Our Tangerine Cheesecake Muffins might inspire you.
- Chocolate Cinnamon Cheesecake: Swirl in some chocolate syrup for a decadent treat.
- Lemon Cinnamon Cheesecake: Add a touch of lemon zest for a zesty, citrusy flavor.
Common Mistakes to Avoid
Mistake 1: Overmixing the Filling
Overmixing the cream cheese mixture can introduce air bubbles, leading to a less smooth and potentially cracked cheesecake. To avoid this, mix the ingredients until just combined and stop when the mixture is smooth.
Mistake 2: Overbaking the Cheesecake
Overbaking can cause the cheesecake to become dry and cracked. Remove the cheesecake from the oven when the edges are set but the center is still slightly jiggly. This ensures a creamy and smooth texture.
Mistake 3: Not Chilling Long Enough
Not allowing the cheesecake to chill long enough can result in a runny and unset filling. Make sure to chill the cheesecake for at least 4 hours, or preferably overnight, to achieve the best texture.
Mistake 4: Using Cold Ingredients
Using cold ingredients, especially cream cheese, can result in a lumpy and uneven filling. Ensure all ingredients are at room temperature before starting to mix. This will help them blend smoothly and evenly.
Mistake 5: Not Lining the Pan
Not lining the pan with parchment paper can make it difficult to remove the cheesecake. Line the bottom of the pan with parchment paper for easy removal and a clean, professional look.
FAQ
Can I use different types of graham crackers?
Yes, you can use different types of graham crackers, such as honey-flavored or cinnamon-flavored, to add a unique twist to the crust. Just make sure to process them into fine crumbs.
What if I don’t have a removable cake pan?
If you don’t have a removable cake pan, you can use a regular cake pan and line the bottom with parchment paper. This will make it easier to remove the cheesecake once it’s chilled.
Can I use a different type of sugar?
Yes, you can use different types of sugar, such as brown sugar, coconut sugar, or even a sugar substitute like stevia. Just keep in mind that the flavor and texture may vary slightly.
How do I know when the cheesecake is done?
The cheesecake is done when the edges are set but the center is still slightly jiggly. This usually takes about 50-60 minutes in the oven. A toothpick inserted in the center should come out mostly clean.
Can I freeze the Cinnamon Roll Cheesecake?
Yes, you can freeze the Cinnamon Roll Cheesecake. Wrap it tightly in plastic wrap and then place it in a freezer bag. It will last for up to 3 months. Thaw it in the refrigerator overnight before serving.
Can I make this recipe ahead of time?
Yes, you can make this recipe ahead of time. In fact, it’s recommended to chill the cheesecake for at least 4 hours, or overnight, to achieve the best texture. This makes it a great make-ahead dessert.
What can I do if the cheesecake cracks?
If the cheesecake cracks, you can still salvage it. Simply cover the cracks with a layer of sour cream or whipped cream and sprinkle with cinnamon and brown sugar. This will mask any imperfections and add a delicious finishing touch.
Can I use a different type of spice?
While cinnamon is the star of this recipe, you can experiment with other spices like nutmeg, cardamom, or allspice to create a unique flavor profile. Just start with a small amount and adjust to taste.
Can I make this recipe gluten-free?
Yes, you can make this recipe gluten-free by using gluten-free graham crackers for the crust. Make sure to check the labels of all other ingredients to ensure they are also gluten-free.
What are some good toppings for Cinnamon Roll Cheesecake?
Some great toppings for Cinnamon Roll Cheesecake include a drizzle of caramel sauce, a dollop of whipped cream, a sprinkle of extra cinnamon and brown sugar, and a few graham cracker crumbs for added texture. Fresh berries or a fruit compote can also add a nice touch.
Let’s Get Baking!
Now that you have all the tips and tricks, it’s time to get started on your Cinnamon Roll Cheesecake. Whether you’re baking for a special occasion or just treating yourself, this dessert is sure to be a hit. Enjoy the process and the delicious results! And for more delightful recipes, check out our recipes category.
Remember, a balanced diet is key to enjoying these delicious treats. For more information on nutrition basics, visit the National Institutes of Health. Happy baking!
Equipment
- Removable cake pan
- Mixing bowls
- Electric mixer or whisk
- Spatula
- Whipped cream or ice cream for serving
Ingredients
- 1 cup granulated sugar
- 1 cup cream cheese, softened
- 1 tsp vanilla extract
- 2 cups graham cracker crumbs
- 1/2 cup melted butter
- 3 large eggs
- 1 tsp ground cinnamon
- 1 1/2 cups sour cream
- 1/2 cup brown sugar
Instructions
- Preheat the oven to 325°F (160°C).
- In a mixing bowl, combine melted butter with graham cracker crumbs and stir until sandy texture forms.
- Press the mixture firmly into the bottom of a removable mold to form the crust.
- In a large bowl, beat cream cheese and granulated sugar until smooth.
- Add eggs one at a time, beating well after each addition.
- Mix in vanilla extract, sour cream, and ground cinnamon until well combined with no lumps.
- Pour the cheese mixture over the prepared crust.
- In a small bowl, mix brown sugar with additional cinnamon and sprinkle over the cheesecake.
- Bake for 50-60 minutes, until the center is firm but slightly jiggly.
- Allow the cheesecake to cool completely at room temperature and refrigerate for at least 4 hours or overnight.
- Unmold and cut into portions; serve with whipped cream or ice cream.
Notes
Nutrition

Hi, I’m Olivia Parker, the founder of BakingSecret.com and a lifelong lover of all things sweet and homemade. I grew up in a small town in Oregon, where the smell of fresh cookies in my family’s kitchen sparked my passion for baking. Over the years, I turned that passion into a mission: to help home bakers feel confident, inspired, and creative.
After studying food science and working in several artisan bakeries across the U.S., I decided to create a space where everyone from beginners to seasoned bakers can find reliable recipes, expert tips, and a warm, welcoming community. BakingSecret.com is my way of sharing the magic of baking with the world. When I’m not testing new recipes, you’ll find me exploring farmers’ markets, collecting vintage cookbooks, or perfecting my sourdough technique.