
The Ultimate Indulgence: Strawberry Cheesecake Red Velvet Cupcakes
Picture this: a rich, red velvet cupcake. Now, imagine a surprise pocket of creamy strawberry cheesecake hiding inside. That’s the magic of these Strawberry Velvet Cupcakes! I first made these for my book club, and let’s just say the chapter discussion was quickly forgotten. Everyone just kept asking for the recipe. These aren’t just cupcakes; they’re little handheld celebrations.
From Classic to Creative: The Story of Red Velvet
Red velvet cake has a fun history. It started as a simple “velvet” cake, made with cocoa for a soft texture. The red color came from a chemical reaction between the cocoa and buttermilk. Later, bakers added food coloring for that famous deep red look. My version takes the classic and stuffs it with joy—a strawberry cheesecake filling! It’s a modern twist on a beloved dessert. It feels fancy but is so fun to make at home.
Why You’ll Fall in Love With This Cupcake Recipe
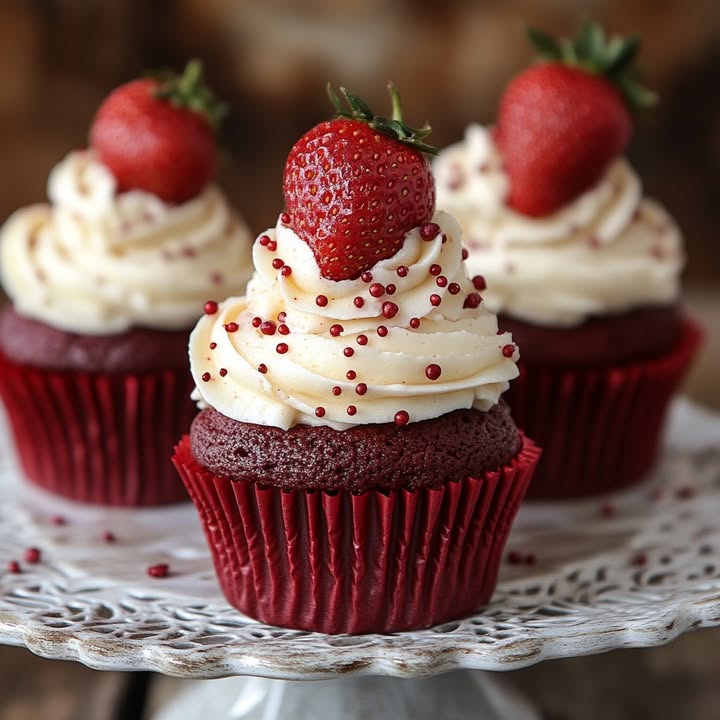
You will adore this recipe. First, the flavors are incredible. The tangy buttermilk cake, sweet cheesecake filling, and creamy frosting all work together perfectly. Second, they are stunning. The deep red cake against the white frosting and a fresh strawberry is just beautiful. Finally, they’re a total crowd-pleaser. I make them for everything, from birthdays to “just because” Tuesdays. That moment when someone bites into the hidden filling? Pure happiness.
When to Whip Up a Batch of Strawberry Velvet Cupcakes
These decadent desserts are perfect for so many occasions. They are a must for Valentine’s Day or any romantic date night at home. They steal the show at birthday parties and baby showers. I always bring a tray to potlucks because they disappear fast. They also make a wonderful “thank you” gift for a neighbor or teacher. Honestly, any day feels special with a Strawberry Cheesecake Red Velvet Cupcake on your plate.
Gathering Your Ingredients for Success
Here is everything you need to create these homemade treats. Having it all ready before you start makes the baking process so smooth.
For the Red Velvet Cupcakes:
- 1 ½ cups all-purpose flour
- 1 cup granulated sugar
- 1 tablespoon cocoa powder
- 1 teaspoon baking soda
- ½ teaspoon salt
- 1 cup buttermilk
- ½ cup vegetable oil
- 1 large egg
- 1 teaspoon vanilla extract
- 1 teaspoon white vinegar
- 1 tablespoon red food coloring (gel works best)
For the Strawberry Cheesecake Filling:
- 4 ounces cream cheese, softened
- ⅓ cup granulated sugar
- 1 egg yolk
- ½ teaspoon vanilla extract
- ⅓ cup diced fresh strawberries
For the Cream Cheese Frosting:
- 8 ounces cream cheese, softened
- ½ cup unsalted butter, softened
- 2 cups powdered sugar
- 1 teaspoon vanilla extract
Easy Ingredient Swaps (No Stress!)
Don’t have something on the list? No problem! Here are some simple swaps.
- Buttermilk: Make your own! Pour 1 tablespoon of white vinegar or lemon juice into a measuring cup. Fill it with milk to the 1-cup line. Stir and let it sit for 5 minutes.
- Fresh Strawberries: You can use frozen diced strawberries. Just thaw them completely and pat them very dry with a paper towel before folding them into the filling.
- Food Coloring: If you prefer a natural color, you can use beet powder. The color will be more muted, but the flavor is great.
- Cocoa Powder: Any unsweetened cocoa powder works. Dutch-processed will give a slightly deeper flavor.
Crafting Your Strawberry Velvet Cupcakes: A Step-by-Step Guide
Follow these simple steps to baking from scratch success. Let’s get our bowls ready!
Step 1: Preheat and Prepare
First, turn your oven on to 350°F (175°C). This gives it time to get perfectly hot. While it heats, line your muffin tin with pretty cupcake liners. I like the red or gold foil ones for these – they make the cupcakes look extra special. Getting this done first makes the whole process feel organized and easy.
Step 2: Mix the Dry Ingredients
Grab a medium-sized bowl. Whisk together the flour, sugar, cocoa powder, baking soda, and salt. You’ll see the cocoa powder create little swirls in the white flour. Whisking this well is key. It makes sure the leavening agents are evenly spread throughout the batter. This guarantees every cupcake rises perfectly in the oven.
Step 3: Combine the Wet Ingredients
In a larger bowl, pour in the buttermilk and vegetable oil. Crack in the egg and add the vanilla and vinegar. Now, for the fun part: add the red food coloring! I use gel because the color is so vibrant. Whisk it all until the mixture is completely smooth and a stunning, deep red color. It will smell tangy and rich.
Step 4: Bring the Batter Together
Slowly pour the beautiful red wet ingredients into the bowl of dry ingredients. Gently stir them together with a spatula. Stop as soon as you no longer see streaks of flour. Pro tip: A few small lumps are okay! Over-mixing is the enemy of a tender cupcake. Your batter will be a gorgeous, velvety red and quite thick.
Step 5: Make the Surprise Filling
In a clean bowl, beat the softened cream cheese and sugar until it’s creamy and smooth. Add the egg yolk and vanilla, and beat again. Now, fold in your diced fresh strawberries. Gently is the word here. You want juicy little berry bits throughout the creamy filling. This sweet, pink mixture is the hidden treasure.
Step 6: Fill and Layer for the Big Reveal
Use a spoon or cookie scoop to fill each cupcake liner about halfway with the red velvet batter. Now, add a generous spoonful of the strawberry cheesecake filling right in the center. Try to keep it away from the edges. Finally, cover the filling with more red velvet batter until the liner is about ¾ full.
Step 7: Bake to Perfection
Carefully place the muffin tin in your preheated oven. Bake for 18 to 20 minutes. You’ll know they’re done when a toothpick poked into the cake part (not the filling center) comes out clean. The tops will spring back when lightly touched. Let them cool in the tin for 5 minutes, then move them to a wire rack to cool completely. This patience is crucial for the frosting!
Step 8: Whip Up the Dreamy Frosting
While the cupcakes cool, make the frosting. Beat the softened cream cheese and butter together in a bowl until it’s completely smooth and fluffy. This takes about 2 minutes. Gradually add the powdered sugar and vanilla. Keep beating on medium-high speed for another 2-3 minutes. You will see it transform into a light, cloud-like, spreadable frosting.
Step 9: Frost and Garnish Your Creations
Once the cupcakes are totally cool, it’s time to decorate! You can spread the frosting on with a knife for a rustic look. I love using a piping bag with a star tip for a bakery-style swirl. Top each gorgeous cupcake with a fresh strawberry slice or a small whole berry. Chef’s Tip: For an extra touch, sprinkle a tiny bit of red velvet cake crumbs on top of the frosting.
Your Baking Timeline
Here’s a quick look at how your time will be spent making these sweet indulgences:
- Prep Time: 25 minutes
- Cook Time: 20 minutes
- Cooling Time: 1 hour
- Total Time: 1 hour 45 minutes
The cooling time is very important. Frosting a warm cupcake is a recipe for a melty, slippery mess!
A Little Secret for the Best Texture
My secret trick is the white vinegar. It might seem odd in a cake recipe. But when combined with the baking soda and buttermilk, it creates a chemical reaction. This reaction makes the cupcakes incredibly tender and gives them that signature slight “tang.” Don’t skip it! It’s the old-fashioned secret to perfect red velvet texture.
A Fun Fact About Your Ingredients
Did you know that cream cheese frosting, which pairs so perfectly with red velvet, is a relatively modern creation? While cream cheese itself has been around since the 1800s, it wasn’t commonly used for frosting until the mid-20th century. Before that, red velvet cakes were often paired with a cooked “ermine” frosting made from flour and milk. I think we can all agree the cream cheese version was a delicious improvement!
Tools You’ll Need in Your Kitchen
You don’t need fancy equipment. Here’s what I use:
- Standard 12-cup muffin tin
- Cupcake liners
- Mixing bowls (2-3 medium)
- Whisk and spatula
- Hand mixer or stand mixer (makes frosting easy!)
- Measuring cups and spoons
- Cooling rack
- Piping bag and tip (optional, but fun)
How to Keep Your Cupcakes Fresh and Tasty
Because of the cream cheese frosting and fresh fruit filling, these cupcakes need refrigeration. Place them in a single layer in an airtight container. You can also cover a plate or tray tightly with plastic wrap.
They will stay fresh and delicious in the fridge for up to 3 days. The flavors actually meld and get even better after the first day! Just let them sit at room temperature for about 20 minutes before serving. This takes the chill off and lets the frosting soften up perfectly.
You can also freeze unfrosted cupcakes for up to 2 months. Wrap them individually in plastic wrap and place them in a freezer bag. Thaw overnight in the fridge, then frost them the day you plan to serve.
My Best Tips for Cupcake Success
- Room Temperature is Key: Make sure your cream cheese, butter, and eggs are at room temperature before you start. This ensures everything blends smoothly without lumps.
- Don’t Overfill: Filling the liners ¾ full is the perfect amount. This leaves room for the cupcake to rise beautifully without spilling over.
- Test for Doneness: Ovens can vary. Start checking at 18 minutes. The toothpick test is your best friend.
- Cool Completely: I know it’s hard to wait! But frosting a warm cupcake will cause the frosting to melt and slide right off.
Pretty Ways to Present Your Masterpiece
Let’s make them look as good as they taste! Here are a few ideas:
- Place each cupcake in a gold or patterned liner on a lovely cake stand.
- Top with a fresh strawberry and a tiny mint leaf for a pop of green.
- For Valentine’s Day, use heart-shaped sprinkles or a dusting of pink sanding sugar.
- Drizzle a little melted white chocolate or a reduced strawberry sauce over the frosting.
- Serve them on a tiered dessert tray for a party – it always looks so impressive!
Love This Recipe? Try These 6 Fun Twists!
Once you master the base recipe, the world is your cupcake! Here are six delicious variations to try.
- Chocolate Chip Cheesecake Velvet: Swap the diced strawberries for mini chocolate chips in the filling. It’s a chocolate lover’s dream.
- Lemon Blueberry Velvet: Omit the cocoa powder for a “pink velvet” base. Use lemon zest in the batter. For the filling, use blueberries instead of strawberries and add a teaspoon of lemon juice.
- Gluten-Free Strawberry Velvet Cupcakes: Use a 1-to-1 gluten-free all-purpose flour blend. Make sure your baking soda and cocoa powder are certified gluten-free. The result is just as moist and delicious!
- Mini Cheesecake Cupcakes: Use a mini muffin tin! Reduce the baking time to about 10-12 minutes. These bite-sized treats are perfect for large gatherings.
- Orange Creamsicle Velvet: Add 1 tablespoon of orange zest to the red velvet batter. For the filling, use orange zest instead of strawberries. Frost with the classic cream cheese frosting. It’s a bright, citrusy surprise.
- Mocha Cheesecake Velvet: Add 1 tablespoon of instant espresso powder to the dry ingredients. For the filling, fold in mini chocolate chips. This creates a rich, coffee-infused dessert perfect for adults.
Connecting the Dots in the Kitchen
The beauty of mastering these Strawberry Velvet Cupcakes is how it builds your confidence. Once you understand the layering technique, you can apply it to so many other delicious cupcake recipes. For instance, the same method works great for creating surprise-filled lemon cupcakes or even a decadent chocolate caramel version. Baking is all about learning one great recipe and then making it your own!
Common Mistakes to Avoid for Perfect Cupcakes
Even experienced bakers can run into these hiccups. Here’s how to steer clear.
Mistake 1: Using Cold Ingredients
This is the most common issue. When cream cheese, butter, or eggs are cold, they don’t blend well. You end up with lumpy frosting and dense batter. The fix is simple. Take these ingredients out of the fridge at least an hour before you start baking. They should feel soft and cool to the touch, not cold. This ensures a silky smooth texture in both your filling and frosting.
Mistake 2: Over-Mixing the Batter
We all want a smooth batter. But mixing too much develops the gluten in the flour. This leads to tough, rubbery cupcakes instead of tender, velvety ones. Once you add the wet ingredients to the dry, mix just until the last streaks of flour disappear. A few small lumps are perfectly fine. They will bake out. Gentle folding is your friend here.
Mistake 3: Overfilling the Cupcake Liners
It’s tempting to use all that beautiful batter. But if you fill the liners to the top, the cupcakes will rise and spill over in the oven. You’ll get a messy “muffin top” that sticks to the pan. The perfect fill level is ¾ full. This leaves just enough room for the cake to rise into a perfect, rounded dome. Using a cookie scoop or a ¼ cup measure helps keep it consistent.
Mistake 4: Frosting Warm Cupcakes
Impatience can ruin the look of your desserts. The cream cheese frosting is rich and soft. If you spread it on a warm cupcake, the heat will melt the butter and cream cheese. Your beautiful swirl will turn into a runny, gloppy mess. Always let the cupcakes cool in the pan for 5 minutes, then transfer them to a wire rack. Wait until they are completely at room temperature before you even think about frosting.
Mistake 5: Not Dicing the Strawberries Small Enough
Big chunks of strawberry in the filling can cause problems. They release a lot of water as they bake. This can make the cheesecake layer too wet or prevent it from setting properly. It can also make the cupcake soggy around the filling. Always dice your fresh strawberries into very small, pea-sized pieces. If you’re using frozen, thaw and pat them extremely dry before dicing and adding them.
Frequently Asked Questions (FAQs)
Can I make these Strawberry Velvet Cupcakes the day before?
Yes, you absolutely can! These are a great make-ahead dessert. I often bake the cupcakes and make the frosting the day before a party. Store the completely cooled, unfrosted cupcakes in an airtight container at room temperature. Keep the frosting in a separate sealed container in the fridge. The next day, let the frosting sit out to soften for 30 minutes, give it a quick re-whip with your mixer, then frost your cupcakes. This actually helps the flavors develop and makes your party day much less stressful.
Why do I need vinegar in a cake recipe?
It sounds strange, but it’s a key part of classic red velvet chemistry. The vinegar reacts with the baking soda. This reaction creates tiny bubbles of carbon dioxide. These bubbles help the cake rise and become incredibly light and tender. Combined with the tang from the buttermilk, it also gives red velvet its unique, slight tangy flavor that balances the sweetness. Don’t worry, you won’t taste the vinegar at all in the final product.
Can I use frozen strawberries for the filling?
You can, but you need to handle them carefully. Frozen berries have a lot of extra moisture. Thaw them completely in a strainer over a bowl. Then, press them gently between layers of paper towels to remove as much liquid as possible. Only after they are very dry should you dice them and fold them into the cheesecake filling. If you skip the drying step, the extra water can make your filling runny and affect the cupcake’s texture.
My food coloring isn’t very red. What can I do?
The type of food coloring matters a lot. Liquid food coloring (the kind in little dropper bottles) is mostly water. You need a lot of it to get a deep color, and that can change your batter. I highly recommend using gel food coloring. It’s much more concentrated, so you need less. This gives you a vibrant, true red color without adding extra liquid to your recipe. You can find it in the baking aisle of most craft or grocery stores.
How do I get my cream cheese frosting to be stiff enough for piping?
A soft frosting can be frustrating. First, ensure your butter and cream cheese are just softened, not melted or oily. Second, make sure you beat them together for a full 2-3 minutes until very fluffy before adding sugar. Gradually add the powdered sugar while mixing on low speed. Once it’s all in, beat on medium-high for another 2-3 minutes. This incorporates air and makes it light and pipeable. If it’s still too soft, you can add a little more powdered sugar, a quarter cup at a time.
Can I make these without the cheesecake filling?
Of course! You’ll have delicious classic red velvet cupcakes. Just skip the step for making the filling. Fill your cupcake liners ⅔ full with the red velvet batter and bake as directed. You’ll get a slightly shorter baking time, so start checking at 16 minutes. Top them with the same wonderful cream cheese frosting and a strawberry. They will still be a huge hit with anyone who loves decadent cakes and cupcakes.
What’s the best way to store leftover cupcakes?
Because of the dairy in the frosting and filling, these cupcakes must be stored in the refrigerator. Place them in a single layer in a large, airtight container. If you need to stack them, put a layer of parchment paper between the layers. They will stay fresh for up to 3 days. Bring them to room temperature for about 20 minutes before serving for the best taste and texture. The cold fridge can make the cake a bit firm, so letting it warm up a little is key.
Can I use a different fruit in the filling?
Absolutely! The cheesecake filling is a wonderful blank canvas. Raspberries, blueberries, or finely chopped peaches would all be fantastic. Just make sure to dice any larger fruit into small pieces. If you’re using a very juicy fruit like raspberries, you might want to mash them slightly and drain a little juice, or even use a tablespoon of fruit preserves instead. Experimenting with different fruits is a fun way to make the recipe your own.
Is there a way to make this recipe healthier?
You can make a few swaps for a lighter version. Use half whole-wheat flour and half all-purpose. You can reduce the sugar in the cake by a quarter cup. For the frosting, use reduced-fat cream cheese. Remember, dessert is about balance and enjoyment. For those interested in broader healthy eating ideas, learning about the benefits of a plant-based diet can offer great inspiration for other meals, letting you fully savor special treats like these without worry.
My cupcakes sank in the middle. What happened?
A sunken center usually means the cupcakes weren’t baked quite long enough, or the oven door was opened too early. The structure sets in the last few minutes of baking. If you take them out too soon, the center collapses. Make sure your oven is fully preheated. Don’t open the door to check until at least the 18-minute mark. Also, ensure your baking soda is fresh—old leavening agents lose their power. Test with a toothpick; it should come out clean from the cake part.
Ready, Set, Bake!
And there you have it! Everything you need to create these stunning and delicious Strawberry Cheesecake Red Velvet Cupcakes. They might look like they came from a fancy bakery, but they are totally doable in your own kitchen. The process is fun, the result is incredible, and the smiles they bring are the best reward. So put on your apron, preheat that oven, and get ready to make some magic. Don’t forget to share your beautiful creations—and maybe save one or two just for yourself. Happy baking!
Equipment
- Grand bol
- Fouet
- Spatule
- Plaque à pâtisserie
- Papier sulfurisé
Ingredients
- 1.5 tasses farine tout usage
- 1 tasse sucre
- 1 cuillère à soupe cacao en poudre
- 1 cuillère à café bicarbonate de soude
- 0.5 cuillère à café sel
- 1 tasse buttermilk
- 0.5 tasse huile de soja
- 1 grand œuf
- 1 cuillère à café extrait de vanille
- 1 cuillère à café vinaigre blanc
- 1 cuillère à soupe colorant rouge gel de préférence
- 4 onces fromage à la crème ramolli
- 0.33 tasse sucre
- 0.5 cuillère à café extrait de vanille
- 0.33 tasse fraises fraîches, coupées en dés
- 8 onces fromage à la crème ramolli
- 0.5 tasse beurre sans sel, ramolli
- 2 tasses sucre glace
- 1 cuillère à café extrait de vanille
Instructions
- Préchauffez votre four à 175°C et tapissez un moule à muffins de caissettes à cupcakes.
- Dans un bol moyen, fouettez ensemble la farine, le sucre, le cacao, le bicarbonate et le sel.
- Dans un grand bol, combinez le buttermilk, l'huile, l'œuf, l'extrait de vanille, le vinaigre et le colorant rouge, en fouettant jusqu'à ce que le mélange soit lisse.
- Incorporez délicatement les ingrédients humides aux ingrédients secs jusqu'à ce qu'ils soient juste combinés.
- Dans un bol propre, battez le fromage à la crème et le sucre jusqu'à consistance crémeuse. Ajoutez le jaune d'œuf et la vanille, puis incorporez les fraises coupées.
- Remplissez chaque caissette à cupcakes à moitié avec la pâte de velours rouge, ajoutez une cuillerée de garniture au cheesecake, puis couvrez de plus de pâte jusqu'à ce qu'elles soient remplies à ¾.
- Faites cuire au four pendant 18-20 minutes, jusqu'à ce qu'un cure-dent inséré dans la pâte sorte propre. Laissez refroidir pendant 5 minutes, puis transférez sur une grille pour refroidir complètement.
- Pour préparer le glaçage, battez le fromage à la crème et le beurre jusqu'à ce qu'ils soient lisses, puis incorporez graduellement le sucre glace et la vanille jusqu'à obtenir une texture légère et moelleuse.
- Glacez les cupcakes refroidis et garnissez-les de fraises fraîches.
Notes
Nutrition

Hi, I’m Olivia Parker, the founder of BakingSecret.com and a lifelong lover of all things sweet and homemade. I grew up in a small town in Oregon, where the smell of fresh cookies in my family’s kitchen sparked my passion for baking. Over the years, I turned that passion into a mission: to help home bakers feel confident, inspired, and creative.
After studying food science and working in several artisan bakeries across the U.S., I decided to create a space where everyone from beginners to seasoned bakers can find reliable recipes, expert tips, and a warm, welcoming community. BakingSecret.com is my way of sharing the magic of baking with the world. When I’m not testing new recipes, you’ll find me exploring farmers’ markets, collecting vintage cookbooks, or perfecting my sourdough technique.