
You know that feeling when you take a bite of something and you just go… “wow”? That was me the first time I tried a slice of a dreamy, creamy pistachio cheesecake. I was at a little bakery in Paris, completely unprepared for the magic of that sweet, nutty flavor paired with the perfect, velvety cheese filling. I knew right then I had to recreate that “rêve” (that’s “dream” for us non-French speakers!) at home. And guess what? After many happy (& delicious) experiments, I’ve got the perfect Pistachio Dream Cheesecake recipe to share with you. It’s easier than you think and an absolute showstopper!
The Story Behind the Dream: Pistachio Cheesecake Love
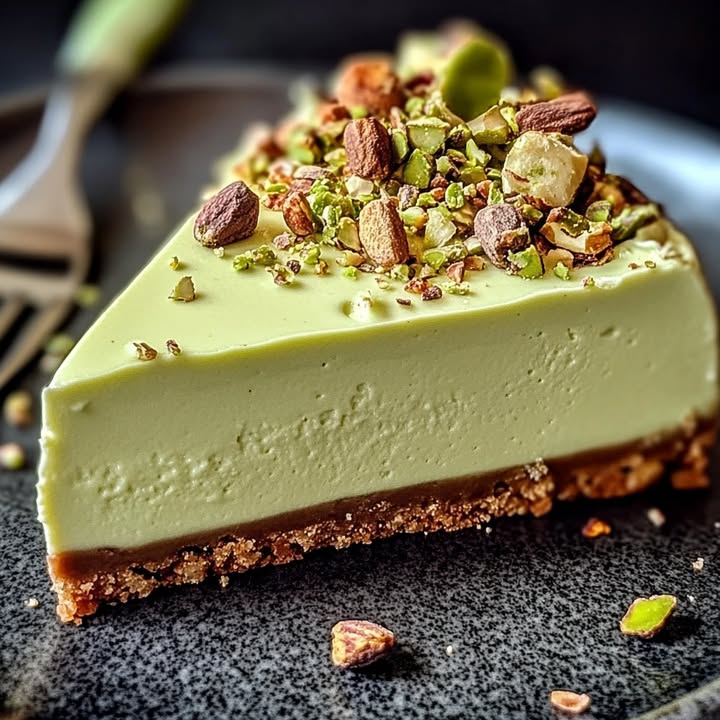
Cheesecake itself is ancient, going all the way back to ancient Greece! But the luscious, no-bake versions we adore today became super popular in the mid-20th century. The “rêveux” in the name means “dreamy,” and that’s exactly the texture we’re after. Adding pistachio? That’s a stroke of modern genius. It brings a beautiful green hue and a rich, toasty flavor that cuts through the sweetness perfectly. My version combines a crunchy speculoos base, that famous creamy filling, and a glossy white chocolate topping. It’s my twist on that unforgettable Parisian treat, made for sharing with my favorite people.
Why You’ll Fall in Love With This Pistachio Dream
This isn’t just another dessert. First, it’s a no-bake wonder, which is a lifesaver in summer. No water baths or oven worries! Second, the flavor is simply elegant. The earthy pistachio and tangy cream cheese are a match made in heaven. Plus, it looks like it came from a fancy patisserie, but the process is seriously straightforward. It’s the kind of dessert that makes everyone ask for the recipe, and you can smile and say, “Oh, it’s just a little something I whipped up!”
When to Serve Your Dreamy Creation
This cheesecake is versatile! It’s perfect for a special birthday (green for a nature lover’s party!), a classy dinner party dessert, or a festive holiday like Christmas or Easter. I love making it for my book club gatherings—it always sparks a great conversation. Honestly, any day you want to feel a bit fancy is a good day for this Pistachio Dream Cheesecake.
Gathering Your Dream Ingredients
For the Crust:
- 200 g (about 7 oz) speculoos cookies or digestive biscuits (like Biscoff)
- 80 g (about 2.8 oz) unsalted butter, melted
For the Pistachio Filling:
- 500 g (about 17.6 oz) full-fat cream cheese, softened to room temperature
- 150 g (about 5.3 oz) powdered sugar, sifted
- 250 ml (about 1 cup) heavy whipping cream, cold
- 100 g (about 3.5 oz) pistachio paste (this is the key to flavor & color!)
- 1 teaspoon vanilla extract
- 2 teaspoons gelatin powder + 3 tablespoons cold water (for setting)
For the White Chocolate Topping & Decoration:
- 150 g (about 5.3 oz) white chocolate, finely chopped
- 50 ml (about 3 tbsp + 1 tsp) heavy cream
- A handful of shelled pistachios, roughly chopped
- Edible gold flakes (optional, but oh-so-pretty!)
No Pistachio Paste? Try These Swaps!
Don’t panic if you can’t find pistachio paste. You have options!
- Homemade Pistachio Butter: Blend 150g of roasted, unsalted pistachios with 1-2 tablespoons of a neutral oil until super smooth. You might need to add a bit more sugar to the filling.
- Almond Paste: It will change the flavor, but almond and cream cheese are still a delicious duo. Add a drop or two of green food coloring if you want the color.
- Biscuit Base: No speculoos? Graham crackers or plain digestive biscuits work wonderfully.
Crafting Your Pistachio Dream Cheesecake: Step-by-Step
Step 1: Create the Buttery Crust
Start by crushing your cookies into fine crumbs. A food processor is fastest, but a zip-top bag and a rolling pin work just as well – and it’s a fun way to get out any frustration! You’ll hear a satisfying crunch as they break down. Pour the crumbs into a bowl and drizzle in the melted, golden butter. Mix it with a fork until every crumb is lightly coated and the mixture looks like wet sand. Press this firmly into the bottom of your springform pan. Use the bottom of a glass to get it even and tight. Pop this in the fridge to set while you make the magic happen upstairs.
Pro tip: For a taller crust edge, press some of the mixture up the sides of the pan about an inch.
Step 2: Bloom the Gelatin
This step is our secret for a perfect, sliceable texture that doesn’t melt on the plate. Sprinkle the gelatin powder over the cold water in a small, heat-proof bowl. Let it sit for 5-10 minutes. You’ll see it turn from powder to a firm, rubbery blob – this is called “blooming.” It’s getting ready to dissolve smoothly into our filling later.
Step 3: Whip Up the Dreamy Pistachio Filling
In a large bowl, beat the softened cream cheese with the sifted powdered sugar until it’s completely smooth, creamy, and lump-free. The color will be a pale, creamy white. Now, add the glorious pistachio paste and vanilla extract. Beat again until the beautiful pale green color is evenly spread throughout. In another bowl, whip the cold heavy cream to soft peaks – it should hold its shape but still be silky. Gently fold the whipped cream into the pistachio-cheese mixture. Be patient and use a big spatula, folding in a figure-eight motion to keep all that lovely air in the cream.
Step 4: Melt and Mix the Gelatin
Take your bloomed gelatin. You need to melt it without cooking it. The easiest way is to place the small bowl over a pot of barely simmering water (make sure the bowl isn’t touching the water) for about 30-60 seconds until it turns to clear liquid. Alternatively, microwave it for 5-second bursts. Quickly whisk a big spoonful of the pistachio filling into the liquid gelatin. This tempers it and prevents lumps. Then, pour this mixture back into the main filling bowl and fold thoroughly to combine.
Step 5: Assemble and Chill
Take your chilled crust out of the fridge. Pour the magnificent green filling over the crust. Smooth the top with your spatula or give the pan a few gentle taps on the counter to level it out. Now, the hard part: cover it and let it chill in the refrigerator for at least 6 hours, but overnight is truly best. This gives the gelatin time to work its firming magic.
Step 6: Make the White Chocolate Glaze
When the cheesecake is fully set, make the glossy topping. Place the chopped white chocolate in a bowl. Heat the 50ml of cream until it’s just about to boil, then pour it over the chocolate. Let it sit for 2 minutes, then stir slowly from the center out until you have a perfectly smooth, shiny ganache. Let it cool for a few minutes so it’s still pourable but not hot.
Step 7: The Grand Finale: Topping and Decorating
Pour the white chocolate ganache over the center of the chilled cheesecake. Use an offset spatula or the back of a spoon to guide it gently to the edges, letting it drip down slightly if you like. Immediately sprinkle the chopped pistachios and gold flakes (if using) over the top before the glaze sets. This is where your Pistachio Dream Cheesecake becomes a work of art!
Chef’s tip: For super clean slices, dip your knife in hot water and wipe it dry between each cut.
Your Cheesecake Timeline
- Prep Time: 30 minutes
- Setting/Chill Time: 6 hours (overnight ideal)
- Total Time: 6 hours 30 minutes (+ decorating)
- Servings: 10-12 happy people
The Chef’s Little Secret
For an extra punch of pistachio flavor, toast the chopped pistachios you use for decoration in a dry pan for 2-3 minutes before sprinkling them on. It deepens their nutty taste and adds a wonderful crunch against the smooth filling and glaze.
A Nutty Bit of Extra Info
Pistachios aren’t just tasty; they’re good for you! They’re packed with protein, fiber, and healthy fats. In fact, including nuts as part of a balanced heart healthy diet can be a delicious choice. So, you can feel just a tiny bit virtuous enjoying this dessert (we won’t tell about the cream cheese and chocolate!).
What You’ll Need in Your Kitchen
- 8-inch or 9-inch springform pan
- Food processor or zip-top bag & rolling pin
- Two large mixing bowls
- Electric hand mixer or stand mixer
- Rubber spatula
- Small heatproof bowl (for gelatin)
- Measuring cups and spoons
How to Keep Your Dream Fresh (Storage Tips)
This cheesecake stores beautifully in the refrigerator. Keep it covered with a cake dome or tightly wrapped with plastic film. It will stay perfect for up to 4-5 days. The flavors actually meld and get even better on day two!
You can also freeze this Pistachio Dream Cheesecake for longer storage. Freeze the whole cheesecake or individual slices on a parchment-lined tray until solid, then wrap tightly in plastic and foil. It keeps for up to 2 months. Thaw it overnight in the fridge before serving.
Remember to always use clean utensils when serving to prevent introducing moisture or bacteria that could make it soggy or spoil faster. If your kitchen is very warm, serve slices directly from the fridge to keep that dreamy texture intact.
My Best Tips for Cheesecake Success
- Room Temp is Key: Let your cream cheese sit out for a good 2 hours. Soft cheese blends smoothly and avoids lumps.
- Chill Your Bowl: For the whipped cream, chill your bowl and beaters in the freezer for 15 minutes before starting. Cold tools help the cream whip up faster and higher.
- Patience with Setting: Don’t rush the chilling time. The gelatin needs those full 6+ hours to set the filling firmly.
- Quality Matters: A good-quality pistachio paste makes all the difference in flavor and color. It’s worth seeking out!
Presentation Ideas to Wow Your Guests
- Serve each slice on a white plate with a drizzle of dark chocolate sauce and a mint leaf.
- Add a small scoop of vanilla or raspberry sorbet on the side for a contrast in temperature and flavor.
- For a party, make mini cheesecakes in a muffin tin with cupcake liners! Just reduce the baking time slightly.
- Dust the plate with a little powdered sugar or crushed freeze-dried raspberries for a pop of color.
Dreaming of Variations? Try These!
Love this recipe? The basic no-bake method is a fantastic canvas. Here are 6 ways to change the dream:
- Chocolate Hazelnut Dream: Swap the speculoos for chocolate cookies and the pistachio paste for Nutella. Top with chopped toasted hazelnuts.
- Berry Bliss Cheesecake: Use a graham cracker crust. Fold 1 cup of pureed fresh raspberries or strawberries into the filling (reduce cream slightly). Top with fresh berries.
- Lemon Sunshine Cheesecake: Use a ginger snap crust. Add the zest and juice of 2 lemons to the filling. Top with a lemon curd glaze and candied lemon peel.
- Salted Caramel Pretzel Crunch: Use a crust made from crushed pretzels. Swirl homemade salted caramel sauce into the plain filling. Top with more caramel and pretzel bits.
- Mango Coconut Tropical Dream: Use a crust with shredded coconut mixed in. Fold 1 cup of mango puree into the filling. Top with toasted coconut flakes and fresh mango.
- Cookies & Cream Classic: Use an Oreo cookie crust. Fold crushed Oreos into a plain vanilla filling. Top with whipped cream and more cookie crumbs.
You can find more amazing ideas and detailed guides in our dedicated collection of creamy cheesecake recipes for every season and craving.
Common Mistakes to Avoid
Mistake 1: Using Cold, Hard Cream Cheese
This is the number one reason for a lumpy, grainy filling. Cold cream cheese will never blend smoothly with the other ingredients. No matter how long you beat it, you’ll end up with little chunks. Always plan ahead and let your cream cheese soften on the counter for at least 2 hours. It should feel soft and spreadable when you press it.
Mistake 2: Over-whipping the Cream
We want soft, pillowy peaks, not stiff, buttery ones. If you whip the heavy cream too far, it becomes grainy and starts to turn into butter. This will make your filling heavy and less dreamy. Stop whipping when the cream holds its shape on the whisk but still looks soft and silky. It should slump over gently when dolloped.
Mistake 3: Adding Hot Gelatin Directly to the Filling
If you pour melted gelatin straight into the cold filling, it will immediately cool and form unpleasant rubbery strands or lumps. That’s why we “temper” it. By mixing a spoonful of the filling into the gelatin first, we gently bring its temperature up. Then it incorporates smoothly into the rest without any issues.
Mistake 4: Rushing the Chill Time
It’s so tempting to cut into that beautiful cheesecake after just a couple of hours! But gelatin needs time to fully set. Cutting too early means a runny, messy slice that won’t hold its shape. Respect the 6-hour minimum, but truly, letting it set overnight in the fridge gives you the cleanest slices and the very best texture.
Mistake 5: A Soggy Crust
A wet, crumbly base ruins the experience. Make sure your butter is just melted, not hot, when you mix it with the crumbs. Also, press the crust down very firmly and uniformly. A loose crust will absorb moisture from the filling and become soggy. Chilling it before adding the filling creates a protective barrier.
Your Pistachio Dream Cheesecake Questions, Answered!
Can I make this cheesecake without gelatin?
Yes, but the texture and stability will be different. Gelatin gives this no-bake cheesecake its firm, sliceable structure. Without it, the filling will be much softer, more like a mousse, and may not hold its shape when cut, especially in warm weather. If you want to avoid gelatin, you could try using a small amount of cornstarch mixed with a little milk, heated to a thick paste, and cooled before folding in. However, for the classic “rêveux” texture, gelatin is recommended.
What is pistachio paste, and where can I find it?
Pistachio paste is a smooth, thick spread made from ground pistachios, often with a bit of sugar and oil. It’s different from pistachio butter, which can be more oily and separated. You can find it in specialty baking stores, high-end grocery stores, or online. It provides an intense, authentic pistachio flavor and a vibrant green color that is hard to achieve with just chopped nuts. If you can’t find it, see the substitution section above for a good homemade alternative.
My white chocolate ganache split or became grainy. What happened?
This usually happens if the cream was too hot or if water got into the chocolate. White chocolate is very sensitive to heat. Ensure your cream is hot but not boiling vigorously when you pour it over the chocolate. Also, make sure your bowl and utensils are completely dry. If it does seize up, you can sometimes save it by adding a teaspoon of warm cream and whisking vigorously until it smooths out again.
How far in advance can I make this cheesecake?
This is a great make-ahead dessert! You can easily prepare it 2 days in advance. In fact, the flavors develop and improve with a little time. Add the white chocolate topping and final decorations the day you plan to serve it for the freshest look. The assembled and chilled cheesecake (without topping) can be kept in the fridge for up to 2 days before finishing.
Can I use a different type of pan?
A springform pan is highly recommended because the removable sides make it easy to get the cheesecake out without damaging it. If you only have a regular cake pan, you’ll need to line it very carefully with parchment paper that overhangs the sides to use as “handles” to lift the cheesecake out. This can be tricky with a creamy no-bake filling.
Is there a way to make this recipe nut-free?
Absolutely! To make a nut-free version, simply omit the pistachio elements. Use a plain biscuit base (like digestives). For the filling, make a classic vanilla cheesecake by increasing the vanilla extract to 1 tablespoon. You could also swirl in some fruit puree, like strawberry or passionfruit, for flavor and color. Top with a plain white or dark chocolate ganache.
Why did my crust stick to the pan?
To prevent sticking, always line the bottom of your springform pan with a round of parchment paper before adding the crust. You can also lightly grease the sides of the pan. When releasing the springform, run a thin, hot knife around the very edge between the cake and the pan before unclipping the ring.
Can I use frozen pistachios for the paste or decoration?
Frozen pistachios are fine for making paste or chopping for decoration, but they must be thawed completely and patted very dry. Any extra moisture can affect the texture of your paste and cause your chopped nuts to make the topping soggy. For the best flavor, use roasted, unsalted pistachios.
My filling isn’t very green. How can I deepen the color?
This depends on the brand of pistachio paste—some are more vibrant than others. If you want a more pronounced green color without altering the flavor, you can add a tiny drop of gel-based green food coloring. Liquid food coloring can alter the consistency, so gel or paste is better. Stir it in when you add the pistachio paste to the cream cheese mixture.
What can I do with leftover cheesecake?
Leftovers are a treat! Store them properly as described above. You can also crumble day-old cheesecake to make a trifle layer with fresh berries and whipped cream. Or, freeze individual slices for a quick and delicious dessert weeks later. Honestly, in my house, “leftover cheesecake” is a rare problem to have!
And there you have it! Your guide to creating a stunning, delicious Pistachio Dream Cheesecake that’s sure to impress. It’s a recipe that combines simple steps with a spectacular result. Whether it’s for a big celebration or just a sweet weekend treat, this cheesecake brings a little bit of patisserie magic right to your kitchen. Now go on, grab your springform pan, and get ready for the compliments to roll in. Happy baking (or rather, happy no-baking!)
Equipment
- Grand bol
- Fouet
- Spatule
- Moule à charnières
- Papier sulfurisé
Ingredients
- 200 g biscuits speculoos ou digestifs
- 80 g beurre non salé, fondu
- 500 g fromage à la crème entier, ramolli
- 150 g sucre glace, tamisé
- 250 ml crème épaisse, froide
- 100 g pâte de pistache
- 1 cuil. à soupe extrait de vanille
- 2 cuil. à café gelatine en poudre
- 150 g chocolat blanc, finement haché
- 50 ml crème épaisse
- une poignée pistaches décortiquées, grossièrement hachées
Instructions
- Écrasez les biscuits speculoos en miettes fines et mélangez-les avec le beurre fondu, puis pressez le mélange au fond d'un moule à charnières.
- Faites tremper la gélatine en la saupoudrant sur l'eau froide, laissez-la reposer pendant 5-10 minutes.
- Dans un grand bol, battez le fromage à la crème et le sucre glace jusqu'à obtenir un mélange lisse, puis ajoutez la pâte de pistache et l'extrait de vanille.
- Dans un autre bol, fouettez la crème épaisse froide jusqu'à obtenir des pics souples, puis incorporez-la délicatement au mélange de fromage à la crème.
- Faites fondre la gélatine trempée dans un bain-marie ou au micro-ondes, puis tempérez-la avec une cuillère du mélange avant de l'incorporer dans le grand bol.
- Versez le mélange sur la croûte dans le moule à charnières et réfrigérez pendant au moins 6 heures ou toute la nuit.
- Pour le glaçage au chocolat blanc, faites chauffer la crème et versez-la sur le chocolat haché, en remuant jusqu'à ce que le mélange soit lisse.
- Versez le ganache au chocolat blanc sur le cheesecake refroidi et décorez de pistaches hachées et de flocons d'or avant de trancher.
Notes
Nutrition

Hi, I’m Olivia Parker, the founder of BakingSecret.com and a lifelong lover of all things sweet and homemade. I grew up in a small town in Oregon, where the smell of fresh cookies in my family’s kitchen sparked my passion for baking. Over the years, I turned that passion into a mission: to help home bakers feel confident, inspired, and creative.
After studying food science and working in several artisan bakeries across the U.S., I decided to create a space where everyone from beginners to seasoned bakers can find reliable recipes, expert tips, and a warm, welcoming community. BakingSecret.com is my way of sharing the magic of baking with the world. When I’m not testing new recipes, you’ll find me exploring farmers’ markets, collecting vintage cookbooks, or perfecting my sourdough technique.