
Dreaming in Green: Why This Pistachio Cheesecake Steals Every Show
Have you ever made a dessert that was so good, people actually stopped talking to eat? That’s the power of this Pistachio Dream Cheesecake. I first made it for my book club, and the usual chatter turned into blissful, fork-scraping silence. The mix of that nutty, fragrant pistachio cream with the warm spice of a speculoos crust is pure magic. It’s not just a cheesecake—it’s an experience, a little slice of creamy, dreamy heaven that looks as stunning as it tastes.
A Slice of History: From New York to a Nutty Dream
The classic New York cheesecake is a legend for a reason. It’s rich, dense, and utterly dependable. But over the years, I’ve loved playing with flavors from my own pantry and memories. Pistachios always felt special – a treat from holidays, the “fancy” nut. This Pistachio Dream Cheesecake is my love letter to that feeling. It takes the sturdy, beloved framework of a baked cheesecake and fills it with the delicate, almost floral taste of pistachios. It’s a modern twist that feels both elegant and comforting.
Why You’ll Fall in Love With This Pistachio Cheesecake
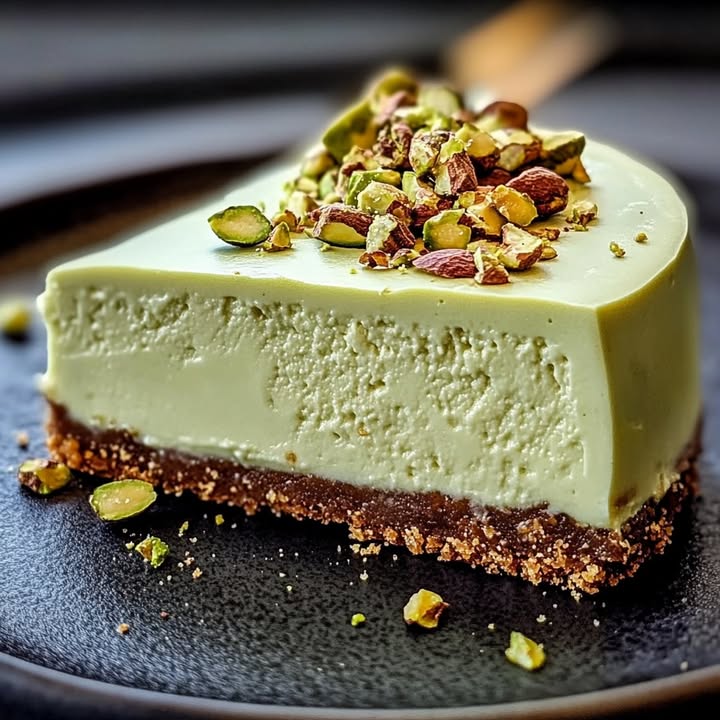
First, the flavor is unforgettable. It’s uniquely nutty and subtly sweet, not like any chocolate or fruit dessert. Second, while it looks like it came from a fancy patisserie, the steps are straightforward – no water bath needed! The texture is perfectly smooth and creamy, holding a sharp slice. And the color! That soft, natural green makes everyone smile. It’s a showstopper that’s secretly simple.
Perfect Occasions for Your Dreamy Dessert
This isn’t just a dessert; it’s a celebration centerpiece. It’s perfect for spring brunches, Mother’s Day, or any birthday where you want to impress. I love bringing it to potlucks because it travels like a champ and always stands out. It’s also my go-to for holiday dinners when I want something different from pumpkin or peppermint. Basically, any time you want to hear “Wow, you made this?!”
Gathering Your Dream Ingredients
Here’s what you’ll need to create this masterpiece. Using quality ingredients makes a real difference, especially with the pistachios and cheese.
- For the Crust:
- 200 g speculoos or shortbread biscuits (like Biscoff or Petit Beurre)
- 80 g unsalted butter, melted
- For the Pistachio Dream Filling:
- 500 g full-fat cream cheese (like Philadelphia), room temperature
- 150 g granulated sugar
- 3 large eggs, room temperature
- 200 g shelled, unsalted pistachios
- 200 ml heavy cream (or whipping cream)
- 1 teaspoon pure vanilla extract
- 1 tablespoon all-purpose flour
- A pinch of fine sea salt
- For the Topping (optional but glorious):
- 50 g chopped pistachios
- A drizzle of honey or melted white chocolate
No Stress Substitutions
Don’t have every item? No problem! Cooking is about joy, not stress.
- No Speculoos? Use graham crackers, digestive biscuits, or even plain shortbread.
- Pistachio Prep: If you can’t find shelled pistachios, buy them in-shell and make a fun family activity out of shelling them! Just ensure they are unsalted.
- Cream Cheese: Full-fat is key for texture. Any reputable brand of block cream cheese works.
- Heavy Cream: Full-fat sour cream can be used in a pinch for a slightly tangier result.
Let’s Bake the Dream: Step-by-Step
Step 1: Creating the Spiced Base
First, let’s make the crust. Place your biscuits in a sturdy freezer bag and crush them with a rolling pin until you have fine crumbs. You can also pulse them in a food processor. It’s oddly satisfying! Pour the crumbs into a bowl and mix with the melted butter until it resembles wet sand. Press this mixture firmly and evenly into the bottom of a 9-inch springform pan. Use a glass or measuring cup to really tamp it down. Pop it in the freezer for 15 minutes to set. This prevents a soggy bottom later.
Step 2: Waking Up the Pistachio Cream
Now for the star. In a clean food processor, blitz your shelled pistachios until they become a fine, fragrant meal. Don’t go too far or you’ll make paste. In a large bowl, beat the room-temperature cream cheese and sugar together until completely smooth and creamy. No lumps allowed! Add the eggs one at a time, beating well after each. Then, pour in the heavy cream, vanilla, flour, salt, and that beautiful pistachio meal. Mix on low until everything is just combined and a lovely pale green hue appears.
Step 3: The Grand Assembly and Bake
Take your chilled crust from the freezer. Pour the gorgeous green filling over the crust, spreading it gently to the edges. Tap the pan lightly on the counter to release any air bubbles. Place it in a preheated oven at 320°F (160°C). Pro tip: For extra creaminess, bake for about 50-60 minutes. The center should still have a slight, gentle wobble when you jiggle the pan. The edges will be set and just starting to color. This is the secret to a dreamy texture, not a dry one.
Step 4: The Patient Chill
This is the hardest part! Turn off the oven, crack the door open, and let the cheesecake cool inside for about an hour. This slow cooling prevents shocking cracks. Then, move it to a wire rack to cool completely. Once it’s room temperature, cover it loosely and refrigerate for at least 6 hours, but overnight is truly best. The flavors meld, the texture firms up perfectly, and it becomes sliceable heaven.
Chef’s Tip
For an ultra-smooth top and to enhance the nutty flavor, lightly toast your pistachios in a dry pan for 2-3 minutes before grinding. Let them cool completely first. It wakes up their oils and makes the entire kitchen smell amazing.
Your Cheesecake Timeline
Plan ahead for the best results. This dessert is a marathon, not a sprint, and the chilling time is non-negotiable.
- Prep Time: 30 minutes
- Cook Time: 55 minutes
- Cooling/Chilling Time: 7 hours (minimum)
- Total Time: About 8.5 hours (mostly hands-off chilling)
One More Secret to Success
Room temperature ingredients are not a suggestion; they are the law for creamy cheesecakes! Cold cream cheese will never blend smoothly, leading to a lumpy filling. Take your cream cheese and eggs out of the fridge at least 2 hours before you start.
A Nutty Bit of Extra Info
Did you know pistachios are technically a fruit seed? They’re related to cashews and mangoes! Their beautiful green color comes from chlorophyll. In many cultures, they’re a symbol of wellness and good fortune, which makes this Pistachio Dream Cheesecake even more perfect for celebrations.
Your Dream Kitchen Toolkit
You don’t need fancy gear. Just gather:
- A 9-inch springform pan (the hero of easy release)
- Food processor or blender
- Electric hand mixer or stand mixer
- Large mixing bowls
- Spatula (to scrape every last bit of that delicious filling!)
- Measuring cups and spoons
Keeping Your Dream Fresh: Storage Tips
Once sliced, this cheesecake keeps beautifully. Always store it in the refrigerator, covered tightly with plastic wrap or in an airtight container. It will stay fresh and delicious for up to 5 days. The crust may soften slightly after day 3, but the flavor will only get better.
Yes, you can freeze it! Wrap the whole cheesecake or individual slices tightly in plastic wrap, then again in foil. Freeze for up to 2 months. To serve, thaw it overnight in the fridge. This is a fantastic trick for stress-free entertaining.
For serving, always use a clean, sharp knife. Dipping the knife in hot water and wiping it dry between cuts gives you those pristine, restaurant-quality slices that make everyone feel special.
Bonus Tips & Advice for Perfection
- Don’t overmix the batter after adding the eggs. This incorporates too much air and can cause cracking.
- If a small crack does appear, don’t panic! It will be covered by your chopped pistachio or whipped cream topping.
- For a more intense pistachio flavor and color, you can add a drop or two of natural pistachio extract (not imitation).
Making it Picture Perfect: Presentation Ideas
- Just before serving, crown the top with a generous sprinkle of chopped pistachios and a delicate drizzle of honey.
- Serve each slice with a dollop of barely sweetened whipped cream and a single, perfect whole pistachio on top.
- For a dinner party, place a few edible gold flakes on top for a truly glamorous touch.
- Pair it with a small cup of strong espresso or a dessert wine like Moscato d’Asti.
Dreaming of Variations: Healthier & Fun Twists
This Pistachio Dream Cheesecake recipe is wonderfully adaptable. Here are six ways to play with it:
- No-Bake Pistachio Dream: Use gelatin or agar to set the filling for a lighter, summer-friendly version. Perfect when you don’t want to turn on the oven.
- Gluten-Free Pistachio Cheesecake: Simply use certified gluten-free biscuits for the crust and ensure your flour is a gluten-free 1:1 blend.
- Lighter Yogurt Version: Substitute half the cream cheese with thick Greek yogurt and reduce the sugar slightly for a tangier, protein-packed treat.
- Chocolate-Pistachio Marble: Swirl melted dark chocolate into half the batter before baking for a stunning and decadent marbled effect.
- Mini Pistachio Dream Cheesecakes: Use a muffin tin with liners for adorable, portion-controlled individual desserts. Just reduce the baking time.
- Vegan Pistachio Dream: Use vegan cream cheese, silken tofu, or cashew cream as a base, with a flax egg substitute and a nut-based crust.
If you love exploring these kinds of creative twists, you’ll find a treasure trove of inspiration in our complete collection of cheesecake recipes for every diet and craving.
Common Mistakes to Avoid
Mistake 1: Using Cold Ingredients Straight From The Fridge
This is the number one reason for a lumpy, dense cheesecake. Cold cream cheese won’t blend smoothly with the sugar and eggs. It also traps more air, which escapes during baking and causes cracks. Always, always let your cream cheese, eggs, and sour cream if using, sit on the counter for 1-2 hours until truly room temperature. Your final texture will be silky smooth because of this simple step.
Mistake 2: Overbaking the Cheesecake
We bake a cheesecake until it’s *set*, not until it’s firm like a cake. If you wait for the center to be completely solid in the oven, it will be dry and overcooked once chilled. The key is to look for a slight, jiggly wobble in the center when you gently shake the pan, about the size of a quarter. The edges should be set. Remember, it continues to cook as it cools in the turned-off oven.
Mistake 3: Skipping the Long, Slow Chill
Impatience leads to soupy slices! The long refrigeration time is when the cheesecake’s texture fully sets and the flavors develop their dreamy harmony. Slicing into it after just 2 hours will be disappointing. Plan to make it the day before you need it. A full overnight chill is the best gift you can give to your Pistachio Dream Cheesecake and your guests.
Mistake 4: Not Grinding the Pistachios Fine Enough
Large, gritty pieces of pistachio can disrupt the creamy mouthfeel of the filling. Take the time to process them into a fine, sandy meal. Be careful not to over-process into a butter, but aim for a texture similar to coarse almond flour. This ensures the nutty flavor is evenly distributed and the texture remains luxurious.
Your Pistachio Dream Cheesecake Questions, Answered
Can I use salted pistachios for this recipe?
I strongly recommend using unsalted, shelled pistachios. Salted nuts can make your entire cheesecake taste too salty, and it’s very hard to balance out. Using unsalted lets you control the exact amount of salt in the recipe. It ensures the sweet, delicate pistachio flavor shines through without being overwhelmed. If salted are all you have, give them a quick rinse in water and pat them very dry before toasting or grinding.
My cheesecake cracked in the middle! What did I do wrong?
Don’t worry, it happens to the best of us and it’s still delicious! Cracks usually come from overmixing (adding too much air), overbaking, or cooling too quickly. The air bubbles expand and then collapse, causing a crack. Next time, mix on low speed just until ingredients are combined. Follow the slow cooling method (in the oven with the door cracked). And remember, perfection is overrated—cover any crack with chopped pistachios or whipped cream!
How do I know for sure when the cheesecake is done baking?
Use the “jiggle test.” About 10 minutes before the recipe time is up, gently shake the oven rack. The outer 2-3 inches of the cheesecake should look set, but the center (about the size of a quarter or small lemon) should have a slight, soft wobble. It will look underdone, but it firms up dramatically while chilling. The internal temperature should be about 150°F (65°C) if you use a thermometer.
Can I make this recipe gluten-free?
Absolutely! This Pistachio Dream Cheesecake is very easy to make gluten-free. Simply swap the speculoos or shortbread biscuits for your favorite certified gluten-free cookie. Gluten-free graham-style crackers or even gluten-free gingersnaps work wonderfully for the crust. Just follow the same crushing and butter-mixing process. The filling is naturally gluten-free as is.
What’s the best way to get a clean slice?
For picture-perfect slices, use a thin, sharp knife. Run it under very hot water, wipe it completely clean and dry with a towel, then make your cut. Repeat this hot-water wipe between every single slice. The heat helps the knife glide through the creamy filling without dragging or sticking, giving you those beautiful, clean edges you see in bakeries.
Can I freeze the whole cheesecake?
Yes, freezing is a great make-ahead strategy. Let the baked and fully chilled cheesecake freeze uncovered on a plate for 1-2 hours until solid. Then, wrap it tightly in several layers of plastic wrap, followed by a layer of heavy-duty aluminum foil. Label it and freeze for up to 2 months. Thaw it overnight in the refrigerator before serving.
Why is my crust soggy?
A soggy crust usually means the butter wasn’t pressed in firmly enough, or it wasn’t pre-chilled before adding the filling. Make sure you really press the crumb mixture down hard with the bottom of a glass. Chilling it in the freezer for 15 minutes firms up the butter, creating a waterproof barrier that helps keep the crust crisp.
What can I use instead of a springform pan?
A springform is ideal, but if you don’t have one, use a 9-inch deep-dish pie plate or a regular cake pan. To remove slices from a regular cake pan, line the bottom with parchment paper with overhanging edges to create a “sling” that you can use to lift the whole cheesecake out before slicing. Serving from a pie plate is perfectly charming too!
The top of my cheesecake browned too much. How do I prevent this?
Cheesecakes are sensitive to oven heat. If you notice browning too quickly, tent the top loosely with a piece of aluminum foil for the remainder of the baking time. Placing a shallow pan of water on the rack below the cheesecake can also create a more gentle, humid environment that reduces browning and cracking.
Is it necessary to add flour to the filling?
The tablespoon of flour is a little stabilizer that helps give the filling structure and can reduce cracking. It’s a traditional ingredient in many baked cheesecake recipes. If you need a gluten-free version, cornstarch or a gluten-free 1:1 flour blend works just as well. You can omit it, but your cheesecake may be slightly more delicate and prone to cracking.
Ready to Bake Your Dream?
So there you have it—everything you need to create this stunning, dreamy dessert. This Pistachio Dream Cheesecake is more than a recipe; it’s a moment of joy, a conversation starter, and a beautiful way to show love. It combines the comforting ritual of baking with the thrill of creating something uniquely delicious. Remember, great baking is about the journey as much as the destination. So put on some music, enjoy the process of watching simple ingredients transform, and get ready for the compliments. And while indulging in this treat is a joy, for everyday choices, I find great guidance on making balanced choices from trusted sources like the NIH’s resources on balanced nutrition. Now, go preheat that oven and make some magic. I can’t wait for you to taste it!
Equipment
- Grand bol
- Fouet
- Spatule
- Plaque à pâtisserie
- Papier sulfurisé
Ingredients
- 200 g biscuits speculoos
- 80 g beurre non salé, fondu
- 500 g fromage à la crème
- 150 g sucre granulé
- 3 œufs
- 200 g pistaches décortiquées
- 200 ml crème épaisse
- 1 cuil à café extrait de vanille
- 1 cuil à soupe farine tout usage
- 1 pincée sel fin
Instructions
- Écrasez les biscuits speculoos et mélangez-les avec le beurre fondu; pressez dans un moule à charnière de 9 pouces et congelez pendant 15 minutes.
- Mixez les pistaches décortiquées dans un robot culinaire jusqu'à obtenir une texture fine.
- Dans un grand bol, battez le fromage à la crème et le sucre jusqu'à obtenir un mélange lisse, ajoutez les œufs un à un, puis incorporez la crème épaisse, la vanille, la farine et la pâte de pistache jusqu'à ce que le tout soit juste combiné.
- Versez la garniture sur la croûte, étalez uniformément et faites cuire à 160°C pendant 50-60 minutes jusqu'à ce que les bords soient pris mais le centre tremble légèrement.
- Éteignez le four, entrouvrez la porte et laissez refroidir pendant environ une heure, puis réfrigérez pendant au moins 6 heures ou toute la nuit avant de servir.
Notes
Nutrition

Hi, I’m Olivia Parker, the founder of BakingSecret.com and a lifelong lover of all things sweet and homemade. I grew up in a small town in Oregon, where the smell of fresh cookies in my family’s kitchen sparked my passion for baking. Over the years, I turned that passion into a mission: to help home bakers feel confident, inspired, and creative.
After studying food science and working in several artisan bakeries across the U.S., I decided to create a space where everyone from beginners to seasoned bakers can find reliable recipes, expert tips, and a warm, welcoming community. BakingSecret.com is my way of sharing the magic of baking with the world. When I’m not testing new recipes, you’ll find me exploring farmers’ markets, collecting vintage cookbooks, or perfecting my sourdough technique.